
Caramel Apple Cheesecake Bars Irresistible and Easy
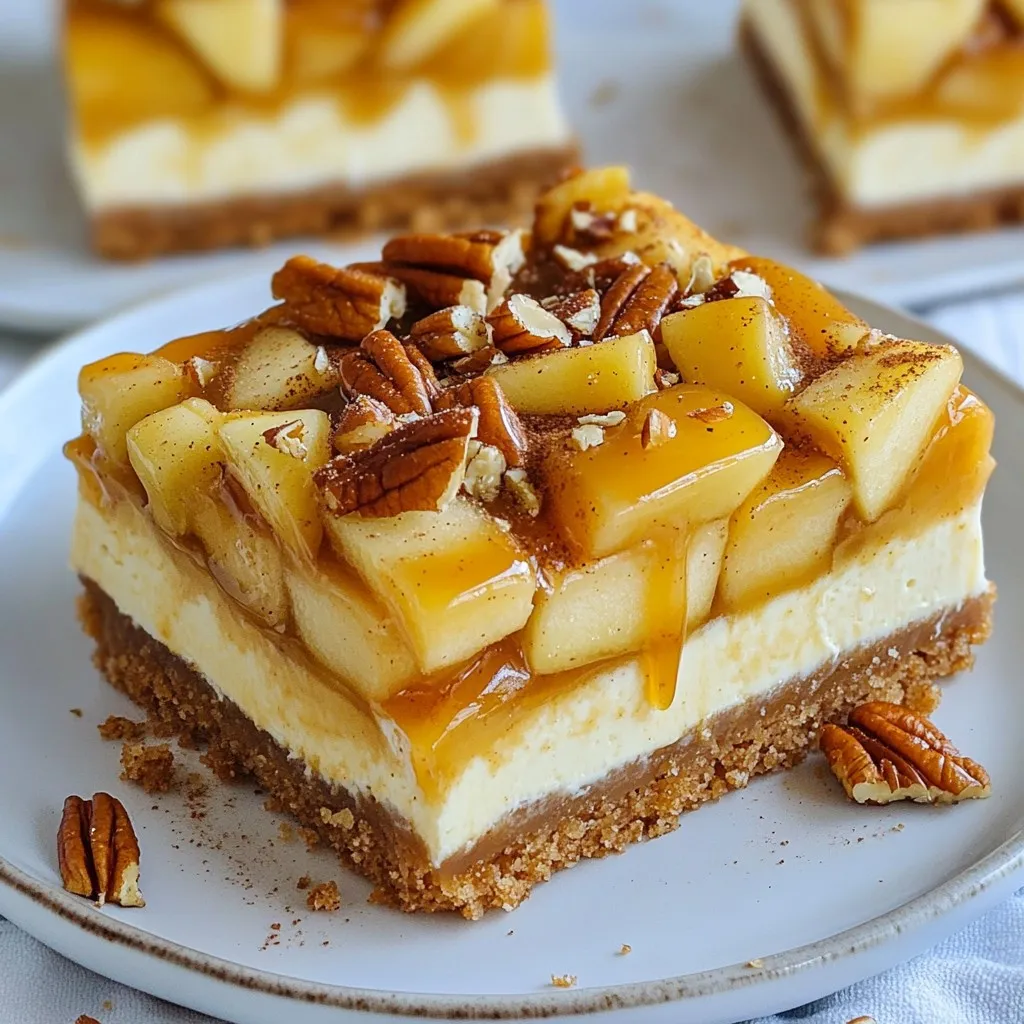

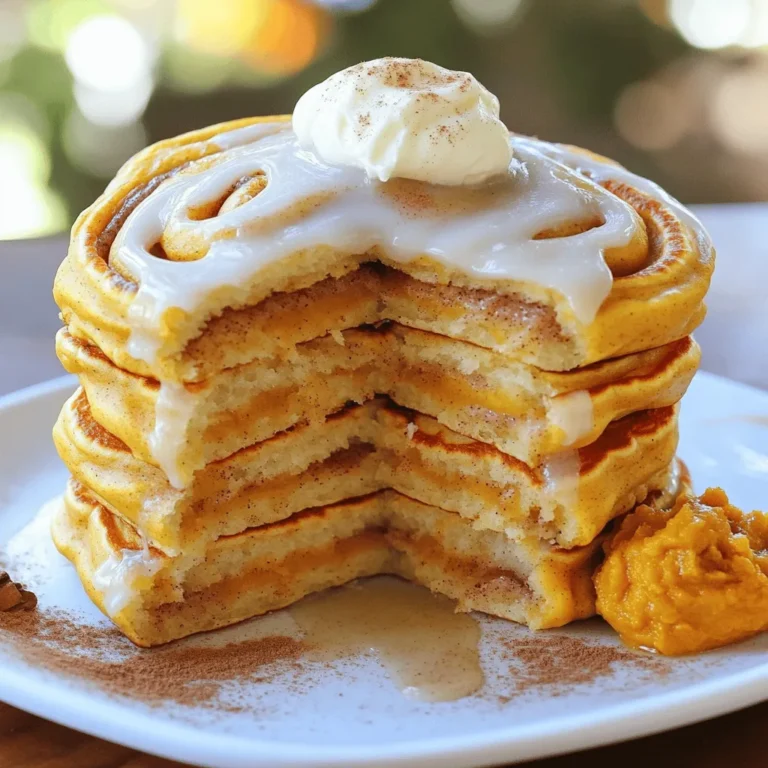
Caramel Apple Cheesecake Bars are the ultimate fall treat. They combine creamy cheesecake, sweet caramel, and crunchy apples in one delightful bite. Whether you’re baking for a family gathering or just treating yourself, this easy recipe is sure to impress. With only a few simple ingredients, you’ll be whipping up this delicious dessert in no time. Ready to dive into this sweet experience? Let’s get started!
Why I Love This Recipe
- Delicious Flavor Combination: The blend of creamy cheesecake, sweet caramel, and spiced apples creates a perfect harmony of flavors that’s irresistible.
- Easy to Make: This recipe simplifies the traditional cheesecake process, making it accessible for bakers of all skill levels.
- Perfect for Any Occasion: These bars are versatile enough to be served at parties, family gatherings, or as a delightful treat for yourself.
- Make Ahead Option: The bars can be prepared in advance and chilled, making them a convenient dessert choice for busy days.
Ingredients
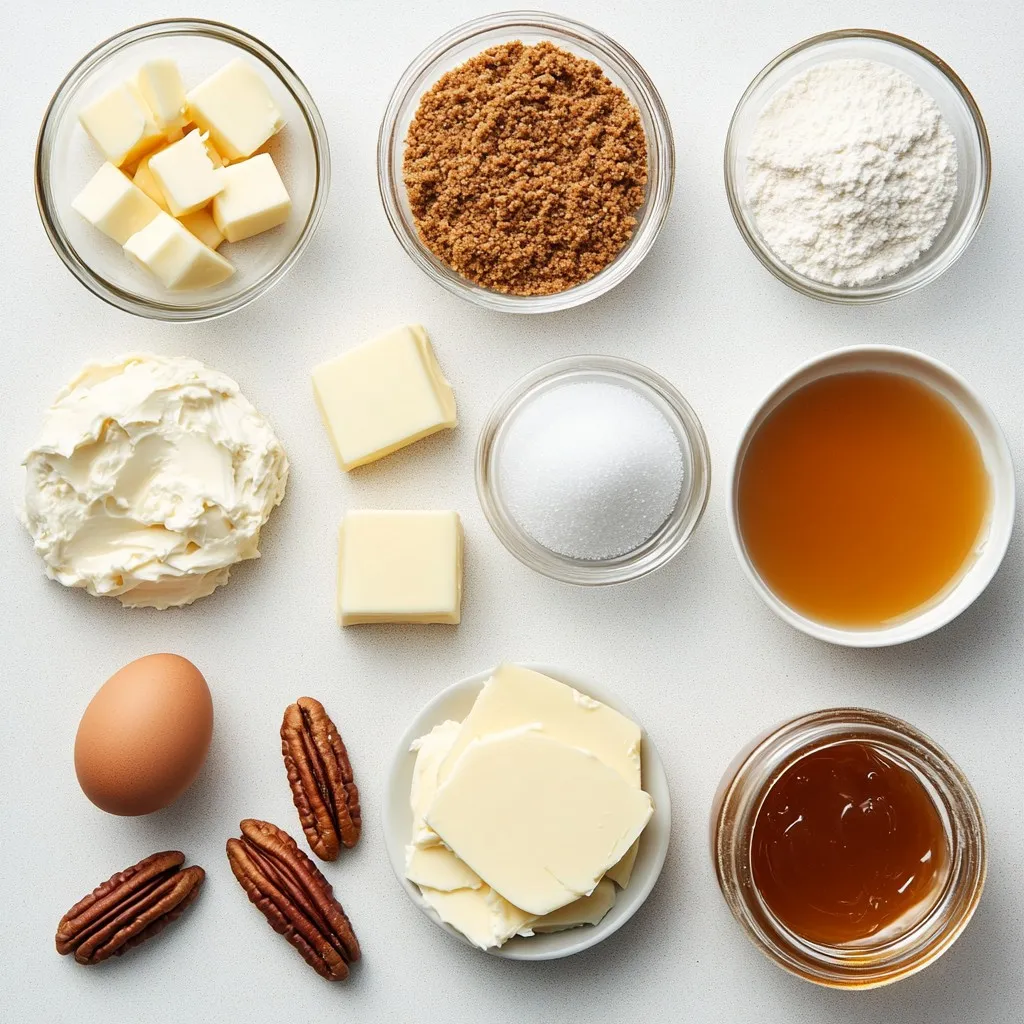
List of Ingredients
– 1 cup graham cracker crumbs
– 1/2 cup unsalted butter, melted
– 2 tablespoons granulated sugar
– 2 (8 oz) packages cream cheese, softened
– 1 cup granulated sugar
– 2 large eggs
– 1 teaspoon pure vanilla extract
– 2 cups apples, peeled and diced
– 1 teaspoon ground cinnamon
– 1 cup caramel sauce
– 1/2 cup chopped pecans (optional)
These ingredients create a perfect blend of flavors. The graham cracker crumbs serve as a sweet, crunchy crust. The cream cheese provides a rich and creamy filling. Apples add a fresh bite, while caramel sauce brings sweetness. You can choose to add pecans for a nice crunch. Each ingredient plays a role in enhancing the taste and texture of these bars.
Using fresh apples is key. I like to use tart varieties like Granny Smith. They balance the sweetness of the caramel and sugar. Make sure your cream cheese is at room temperature. This helps to create a smooth filling. Mixing in the ground cinnamon gives the bars a warm flavor.
This list makes it easy to prepare a delicious dessert. Gather everything, and you are ready to start cooking!
Step-by-Step Instructions
Preheating the Oven
Set your oven to 350°F (175°C). This warm-up is key for baking. While it heats, prepare a 9×9 inch baking pan. You can grease it with cooking spray or line it with parchment paper. This makes it easier to remove the bars later.
Creating the Crust
In a medium bowl, mix 1 cup of graham cracker crumbs with 1/2 cup of melted butter. Add 2 tablespoons of sugar to the mix. Stir until it looks crumbly. Press this mixture firmly into the bottom of your baking pan. This will form a nice, solid crust for your cheesecake.
Preparing the Cheesecake Filling
In a large bowl, beat 2 packages of softened cream cheese with 1 cup of sugar. Use an electric mixer for a smooth texture. Add 2 large eggs one by one, mixing well after each. Then stir in 1 teaspoon of pure vanilla extract.
Next, prepare your apples. Peel and dice 2 medium apples. Toss these apple pieces in 1 teaspoon of ground cinnamon in a small bowl. Fold the spiced apples into the cheesecake mixture gently. Be careful not to overmix.
Baking the Cheesecake
Pour the cheesecake filling over the crust in the baking pan. To eliminate air bubbles, tap the pan lightly on your countertop. Bake in the preheated oven for 30 to 35 minutes. The edges should be set, but the center can be a bit jiggly.
Cooling and Finishing Touches
After baking, let the cheesecake cool to room temperature. Once cool, drizzle 1 cup of caramel sauce over the top. If you like, sprinkle 1/2 cup of chopped pecans on top for extra crunch.
Chilling for Perfect Texture
Refrigerate the cheesecake bars for at least 4 hours, or overnight if you can wait. This helps them set well. When ready, lift the bars out of the pan using the parchment paper. Cut them into squares for serving. Enjoy your delicious, homemade caramel apple cheesecake bars!
Tips & Tricks
Ensuring Creamy Texture
To make your cheesecake smooth, use room temperature cream cheese. Cold cream cheese can create lumps. Let it sit out for about 30 minutes before mixing. This small step makes a big difference. When adding apples, be gentle. Overmixing can break them down too much. You want tasty apple pieces, not mush.
Customizing Flavor
Spice it up! You can add nutmeg or allspice for a warm touch. If you like, try flavored extracts like almond or maple. They add a nice twist. For a different sauce, swap caramel for chocolate or butterscotch. Each choice gives a unique taste to your dessert.
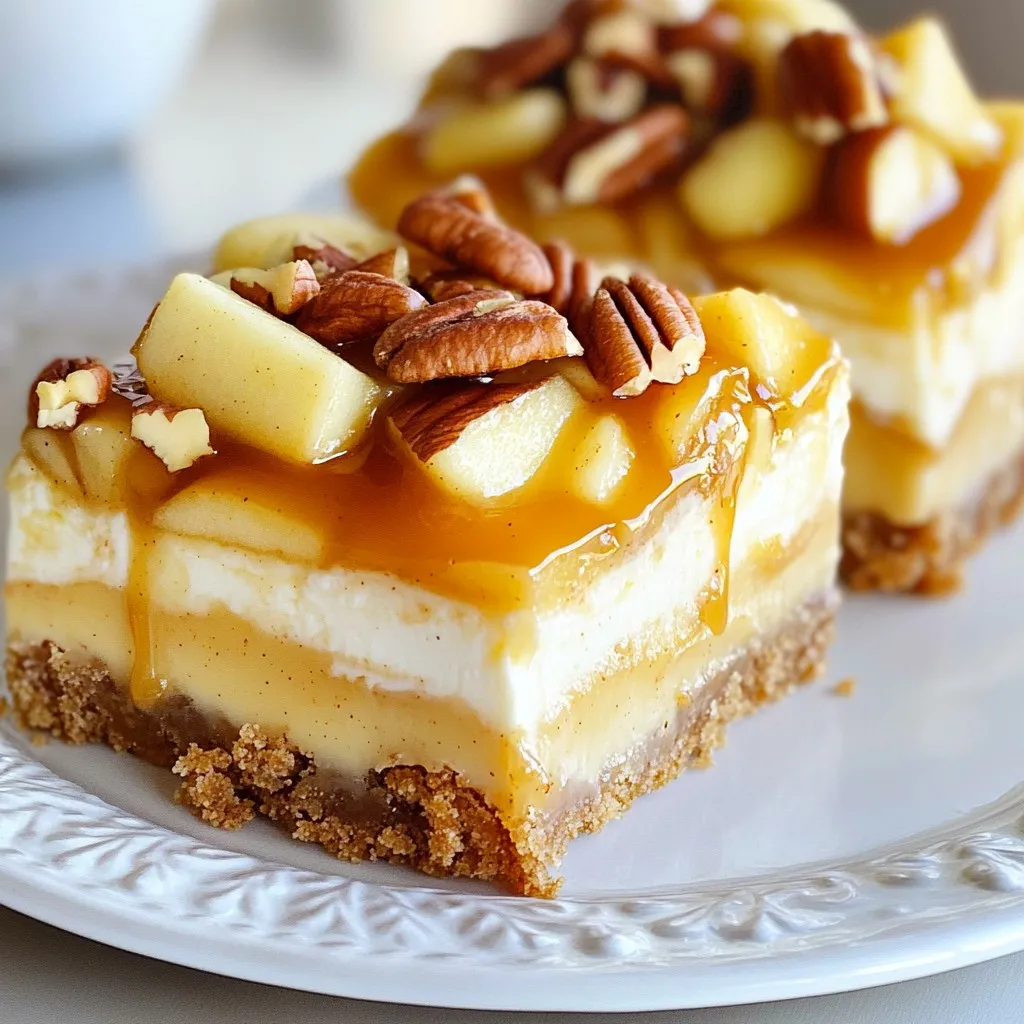
Serving Suggestions
For a pretty plate, serve these bars chilled. Drizzle extra caramel on top for sweetness. A sprinkle of cinnamon adds flair. To make it more decadent, add a dollop of whipped cream or a scoop of ice cream. These toppings turn a simple dessert into something special!
Pro Tips
- Use Room Temperature Cream Cheese: Let your cream cheese sit out for about 30 minutes before mixing. This ensures a smoother cheesecake filling without lumps.
- Choose the Right Apples: Opt for tart apples like Granny Smith for a great balance with the sweetness of the caramel and cheesecake.
- Don’t Overbake: Keep an eye on your cheesecake bars; they should be slightly jiggly in the center when you take them out. They will firm up as they cool.
- Chill Overnight: For the best flavor and texture, allow the bars to chill overnight. This will help the flavors meld beautifully.
Variations
Alternative Fruit Options
You can switch up the apples in your bars. Try using Granny Smith or Honeycrisp apples for a different taste. Seasonal fruits also work well. Pears or peaches can add a sweet twist. You can even mix in berries. Blueberries or raspberries can give a nice tart flavor.
Dietary Adjustments
If you need a gluten-free crust, use almond flour or gluten-free cookies. You can also make it dairy-free. Substitute cream cheese with cashew or coconut yogurt. Use a vegan butter for the crust instead of regular butter. These swaps keep the dessert tasty for everyone.
Seasonal Twists
For holidays, add festive spices like nutmeg or ginger. You can also top your bars with whipped cream and a sprinkle of cinnamon. During fall, drizzle with maple syrup for a cozy feel. In winter, add crushed peppermint for a fun twist. Each season brings a chance to get creative!
Storage Info
Best Practices for Storing
To keep your caramel apple cheesecake bars fresh, always refrigerate them. Place the bars in an airtight container. If you don’t have one, cover them tightly with plastic wrap. This prevents drying out and keeps them tasty for longer.
Freezing Instructions
If you want to store them for even longer, you can freeze these bars. First, cut them into squares. Wrap each square in plastic wrap, then place them in a freezer bag. When you want to eat one, take it out and let it thaw in the fridge overnight. This helps keep their creamy texture.
Shelf Life
In the fridge, these cheesecake bars stay fresh for about five days. Always check for spoilage before eating. Signs include a sour smell or a change in color. If you see these signs, it’s best to toss them out.
FAQs
Can I make these cheesecake bars ahead of time?
Yes, you can make these cheesecake bars ahead of time. I often prepare them a day before serving. This way, the flavors meld and the texture firms up nicely. After baking, let them cool completely. Then, refrigerate them for at least four hours or overnight. This waiting time makes cutting easier too. Just remember to drizzle the caramel on top right before serving for that fresh touch.
What kind of apples are best for this recipe?
For this recipe, I recommend using sweet and tart apples. Varieties like Granny Smith or Honeycrisp work well. They add a nice balance of flavor and texture. You want apples that hold their shape when baked. Avoid mushy apples, as they won’t give you that great bite.
How do I serve the cheesecake bars?
Serve these cheesecake bars chilled for the best flavor. I like to drizzle extra caramel sauce on top. A sprinkle of cinnamon can also enhance the look and taste. If you want to impress, add a dollop of whipped cream on the side. This adds a nice creaminess and looks fancy on the plate.
Can I use a different type of crust?
Yes, you can use different crusts if you prefer. For a gluten-free option, try almond flour or gluten-free cookie crumbs. A cookie crust made from Oreos also adds a rich flavor. Just remember to adjust the butter amount as needed to hold the crust together.
Is there a way to make this recipe healthier?
Absolutely! You can make some easy swaps. Use low-fat cream cheese instead of regular for less fat. You can also reduce the sugar by a third without losing taste. Consider using applesauce in place of some butter in the crust. These small changes can make a big difference while keeping the bars delicious.
This blog post walks you through making delicious cheesecake bars. We covered ingredients for a tasty crust and filling. I shared steps for baking and cooling, plus tips for creamy texture and flavor variations. You can even adjust it for different diets or seasons. Follow the storage tips for freshness. Enjoy creating this treat at home—your friends and family will love it. Simple steps lead to a delightful dessert experienc

Caramel Apple Cheesecake Bars
Ingredients
- 1 cup graham cracker crumbs
- 1/2 cup unsalted butter, melted
- 2 tablespoons granulated sugar
- 2 8 oz packages cream cheese, softened to room temperature
- 1 cup granulated sugar
- 2 large eggs
- 1 teaspoon pure vanilla extract
- 2 cups apples, peeled and diced
- 1 teaspoon ground cinnamon
- 1 cup caramel sauce
- 1/2 cup chopped pecans (optional)
Instructions
- Preheat your oven to 350°F (175°C) and grease a 9x9 inch baking pan.
- In a medium mixing bowl, combine graham cracker crumbs, melted butter, and 2 tablespoons of sugar. Press into the bottom of the baking pan.
- In a large bowl, beat softened cream cheese and 1 cup of sugar until smooth. Add eggs one at a time, mixing well after each addition, then stir in vanilla extract.
- Toss diced apples with ground cinnamon in a small bowl, then gently fold into the cheesecake mixture.
- Pour the cheesecake filling over the crust, tap the pan to remove air bubbles, and bake for 30-35 minutes until edges are set.
- Let the cheesecake cool to room temperature, then drizzle caramel sauce over the top and sprinkle with pecans if using.
- Refrigerate for at least 4 hours or overnight, then cut into squares for serving.

![To make healthy peanut butter oat bars, you need a few key items: - 2 cups rolled oats - 1/2 cup natural peanut butter - 1/4 cup honey or maple syrup - 1/4 cup unsweetened applesauce - 1/2 cup mixed nuts (almonds, walnuts, cashews), roughly chopped - 1/4 cup dark chocolate chips (optional) - 1/2 teaspoon ground cinnamon - 1/4 teaspoon sea salt These ingredients work together to create a tasty and nutritious snack. The oats provide fiber, while the peanut butter adds protein and healthy fats. Honey or maple syrup gives sweetness, and applesauce keeps the bars moist. You can easily change your bars by adding extra flavors or textures. Here are some fun options: - Dried fruits (like cranberries or raisins) - Seeds (like chia or flaxseed) - Protein powder for an extra boost - Coconut flakes for added flavor Feel free to mix and match these add-ins to suit your taste. These oat bars pack a nutritious punch. Here’s a quick look at what you’ll get: - Calories: About 150 per bar - Protein: Around 5g, thanks to the peanut butter and nuts - Fiber: Approximately 3g from the oats and nuts - Healthy Fats: Includes unsaturated fats from the peanut butter and nuts These bars not only taste great but also fuel your body. With their balanced nutrition, they make a perfect snack or breakfast option. For the complete recipe, check the Full Recipe link. Start by preheating your oven to 350°F (175°C). This step ensures even baking. Next, grab an 8x8-inch baking pan. Line it with parchment paper, letting some paper hang over the edges. This makes it easy to lift the bars out later. In a large mixing bowl, combine 2 cups of rolled oats, 1/2 teaspoon of ground cinnamon, and 1/4 teaspoon of sea salt. Stir well until the dry ingredients are mixed evenly. This mix creates a solid base for your bars. In a separate bowl, blend together 1/2 cup of natural peanut butter, 1/4 cup of honey or maple syrup, and 1/4 cup of unsweetened applesauce. Mix vigorously until the mixture is smooth. Pour this wet mixture into the bowl with the dry ingredients. Stir thoroughly, ensuring all the oats are coated. Now, it’s time for the fun part! Fold in 1/2 cup of roughly chopped mixed nuts and 1/4 cup of dark chocolate chips, if you want a sweet touch. Make sure to distribute these extras evenly throughout the batter. Spoon the mixture into your prepared baking pan. Use a spatula or your hands to press the mixture down firmly. This ensures the bars hold their shape while baking. Bake in the preheated oven for 20-25 minutes. Look for a lovely golden brown color on the edges. Once done, remove the pan from the oven. Let it cool for about 10 minutes. Use the parchment paper to lift the bars from the pan and place them on a wire rack. Allow them to cool completely before cutting into your desired size. You can store any leftovers in an airtight container to keep them fresh. Enjoy these tasty treats as a snack or a quick breakfast! For the complete recipe, see the Full Recipe section. To get the best texture for your peanut butter oat bars, use rolled oats. They stay chewy and hold together well. If you want a softer bar, add a bit more applesauce. For crunch, add more nuts. Press the mixture firmly into the pan. This helps the bars hold their shape when baked. Store your bars in an airtight container. This keeps them fresh and moist. You can also layer parchment paper between bars to prevent sticking. If you want to keep them longer, freeze them. They freeze well for up to three months. Just wrap them tightly in plastic wrap before placing them in a freezer bag. These bars make a great snack or breakfast. Cut them into small squares for easy grabbing. Pair them with yogurt or fruit for a balanced meal. You can also drizzle some honey on top for added sweetness. Feel free to explore the [Full Recipe] for more ideas on how to enjoy these delicious treats! {{image_4}} You can change up the nuts in your oat bars. Use almonds, walnuts, or cashews. If you like seeds, try adding pumpkin seeds or sunflower seeds. These options add crunch and healthy fats. Mix and match to find your favorite combination. If you want a different sweet taste, try maple syrup instead of honey. You can also use agave nectar for a milder flavor. For a low-calorie option, consider stevia or monk fruit sweetener. Each sweetener changes the taste just a little. Adding fruits and spices can make your bars pop with flavor. Try mashed bananas or dried fruits like cranberries or apricots. For spices, add a pinch of nutmeg or ginger for warmth. You can even fold in some cocoa powder for a chocolatey twist. These small changes can make your bars exciting and unique. To keep your healthy peanut butter oat bars fresh, store them in an airtight container. This helps to lock in moisture and flavor. You can keep them at room temperature for up to a week. If you want them to last longer, consider refrigerating them. The cool air helps maintain their taste and texture. Freezing is a great way to extend the life of your oat bars. Wrap each bar tightly in plastic wrap. Then place them in a freezer-safe bag or container. You can freeze the bars for up to three months. When you're ready to enjoy them, just take out a bar and let it thaw on the counter. If you prefer warm bars, you can reheat them. Simply place a bar in the microwave for about 15-20 seconds. This warms them up nicely and brings back their fresh-baked taste. If you stored them in the fridge, let them sit at room temperature for a few minutes before warming to avoid cold centers. For more details, check out the Full Recipe. Yes, you can swap peanut butter for almond, cashew, or sunbutter. Each nut butter brings its own flavor. Almond butter gives a creamy texture, while cashew butter is milder. Sunbutter is a great option for nut allergies. Just make sure to choose a natural nut butter without added sugars or oils. These oat bars last about one week at room temperature. Keep them in an airtight container. For longer storage, they can stay fresh in the fridge for about two weeks. If you want to enjoy them later, freeze the bars. They can last up to three months in the freezer. Just thaw them when you are ready to eat. Yes, this recipe is gluten-free if you use certified gluten-free oats. Most rolled oats are naturally gluten-free. However, some brands may process oats with gluten-containing grains. Always check the label before buying. This way, you can enjoy your oat bars without worry. Yes, you can skip added sugars. Use ripe bananas instead of honey or maple syrup. Applesauce also adds natural sweetness. You can add a bit more applesauce if you want a sweeter taste. This keeps the oat bars healthy and tasty without extra sugar. You now have a complete guide to making healthy peanut butter oat bars. We covered essential ingredients and fun add-ins to suit your taste. Step-by-step instructions ensure your bars come out perfectly every time. I shared tips for the best texture and storage methods to keep them fresh. You can also explore different variations for added flavor. These oat bars are easy to make, fun to customize, and nutritious. Enjoy your delicious, homemade snacks!](https://goldendishy.com/wp-content/uploads/2025/07/83a658d4-f414-4ba0-9f79-92aafa211a05-768x768.webp)