
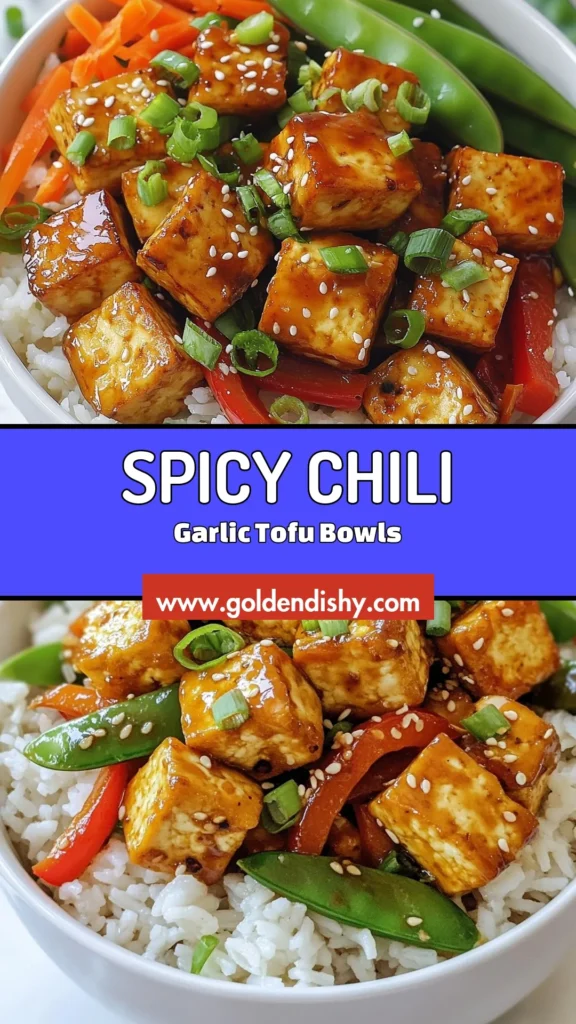
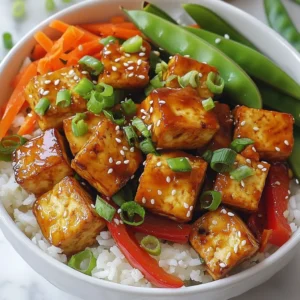
Chili Garlic Tofu Bowls Crisp and Flavorful Delight
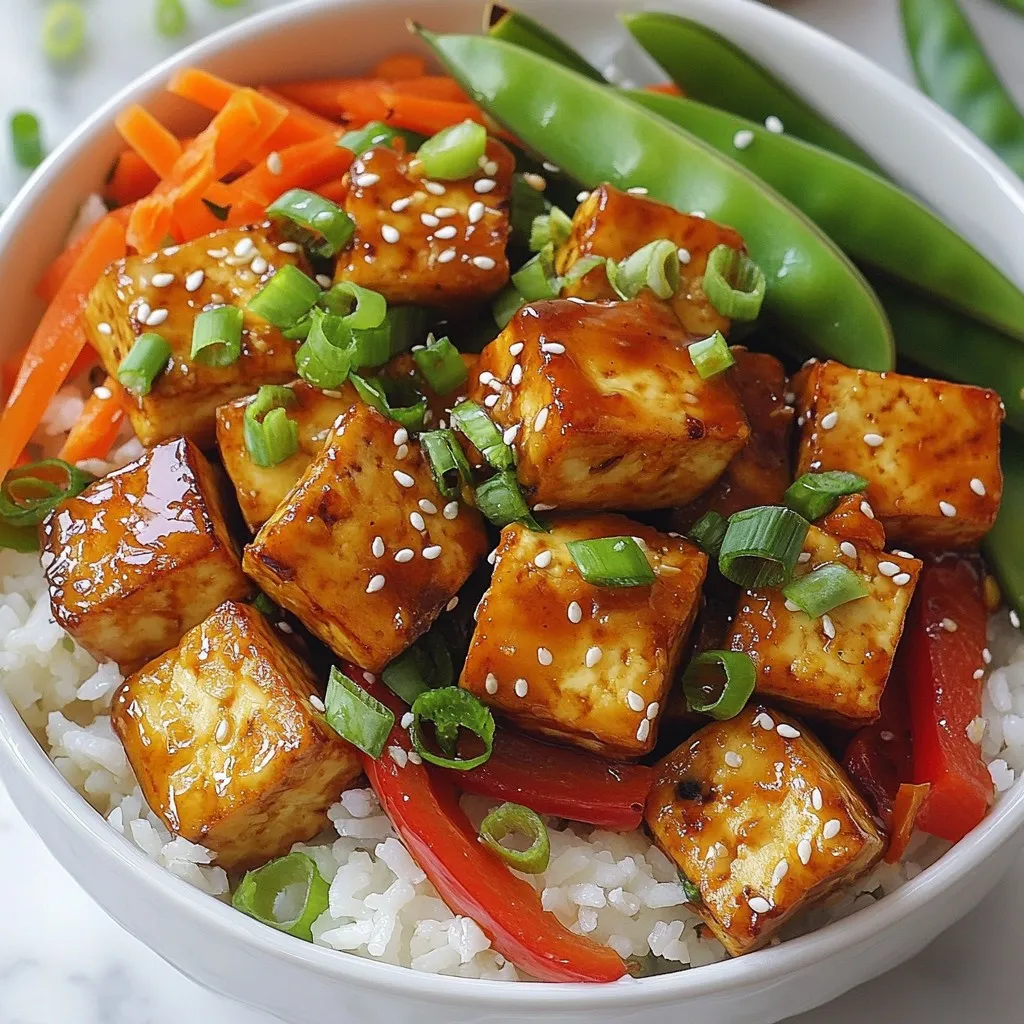
Craving a meal that’s both crisp and packed with flavor? Look no further! Chili Garlic Tofu Bowls offer a delightful mix of textures and tastes that will leave you satisfied and energized. In this article, I’ll guide you through creating this vibrant dish, from preparing the perfect tofu to choosing fresh vegetables and garnishes. Get ready to whip up a tasty bowl that is simple, healthy, and absolutely delicious!
Why I Love This Recipe
- Flavor Explosion: This dish combines the savory taste of tofu with a spicy garlic and ginger sauce, creating a delightful flavor profile.
- Healthy and Wholesome: Packed with fresh vegetables and protein-rich tofu, this recipe is both nutritious and satisfying.
- Quick and Easy: With a total prep and cook time of just 30 minutes, this recipe is perfect for busy weeknights.
- Customizable: You can easily adjust the spice levels and swap in your favorite veggies to make it your own!
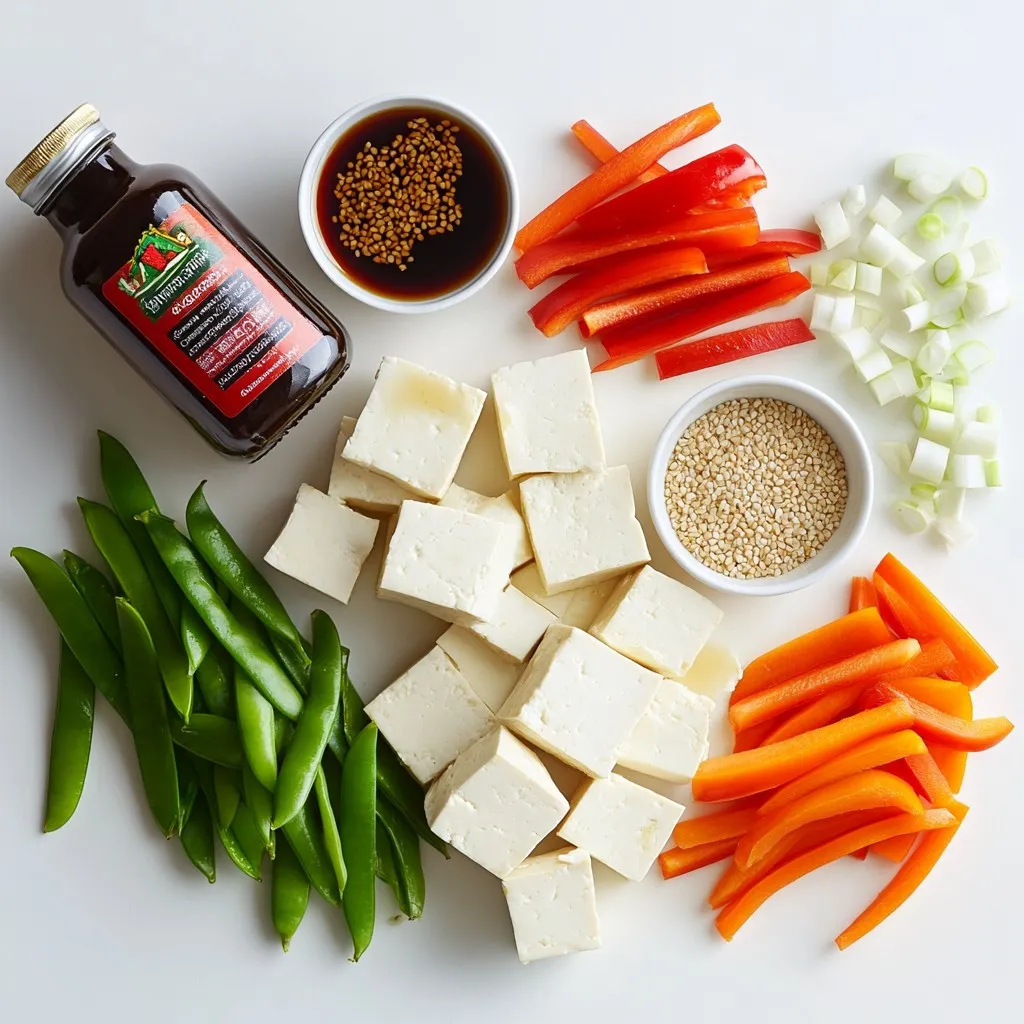
Ingredients
Main Ingredients
– Firm tofu and its preparation: For this dish, use 400g of firm tofu. Press it to remove excess moisture. This step helps the tofu get crispy. Cut the pressed tofu into 1-inch cubes.
– Vegetables for stir-fry: I love adding fresh colors and textures. Use 1 red bell pepper, thinly sliced. Add 1 cup of snap peas, trimmed, and 1 medium carrot, julienned. These veggies give a nice crunch.
– Flavoring agents: Garlic and ginger are key. Use 3 cloves of minced garlic and 2 tablespoons of minced ginger. Add 2 tablespoons of soy sauce for saltiness. One tablespoon of chili paste adds heat. Finally, mix in 1 tablespoon of maple syrup for sweetness.
Optional Garnishes
– Sesame seeds: These add a nutty crunch. Sprinkle them on top before serving.
– Chopped green onions: Use 3 finely chopped green onions. They add freshness and color.
Serving Suggestions
– Recommended grains: Serve your chili garlic tofu over cooked jasmine rice or quinoa. Both options soak up the sauce nicely.
– Additional toppings: Consider adding lime wedges. A squeeze of lime brings brightness to each bite.
Step-by-Step Instructions
Preparing the Tofu
How to press and cut tofu
Start by pressing the firm tofu. This step removes extra moisture, which improves texture. Wrap the tofu in a clean kitchen towel and place a heavy object on top for about 15 minutes. After pressing, cut the tofu into 1-inch cubes.
Coating with cornstarch for crispiness
Next, take a medium bowl and add the cubed tofu. Sprinkle 2 tablespoons of cornstarch over the tofu. Toss gently until every piece is coated. This coating gives the tofu a crispy crust when fried.
Cooking Process
Frying the tofu
Heat 2 tablespoons of vegetable oil in a large skillet over medium-high heat. When the oil is hot, add the cornstarch-coated tofu cubes. Fry for 6 to 8 minutes, turning occasionally. Look for a golden brown color and crisp edges. Once done, remove the tofu and set it aside on a plate.
Sautéing garlic and ginger
In the same skillet, add 1 tablespoon of vegetable oil. Once hot, add 3 cloves of minced garlic and 2 tablespoons of minced ginger. Sauté for about 1 minute. Stir constantly until fragrant but be careful not to burn them.
Mixing the sauce and stir-frying vegetables
Now, pour in 2 tablespoons of soy sauce, 1 tablespoon of chili paste, and 1 tablespoon of maple syrup. Mix well to create your sauce. Then, add 1 sliced red bell pepper, 1 cup of snap peas, and 1 julienned carrot to the skillet. Stir-fry these vegetables for 4 to 5 minutes. They should be tender but still colorful.
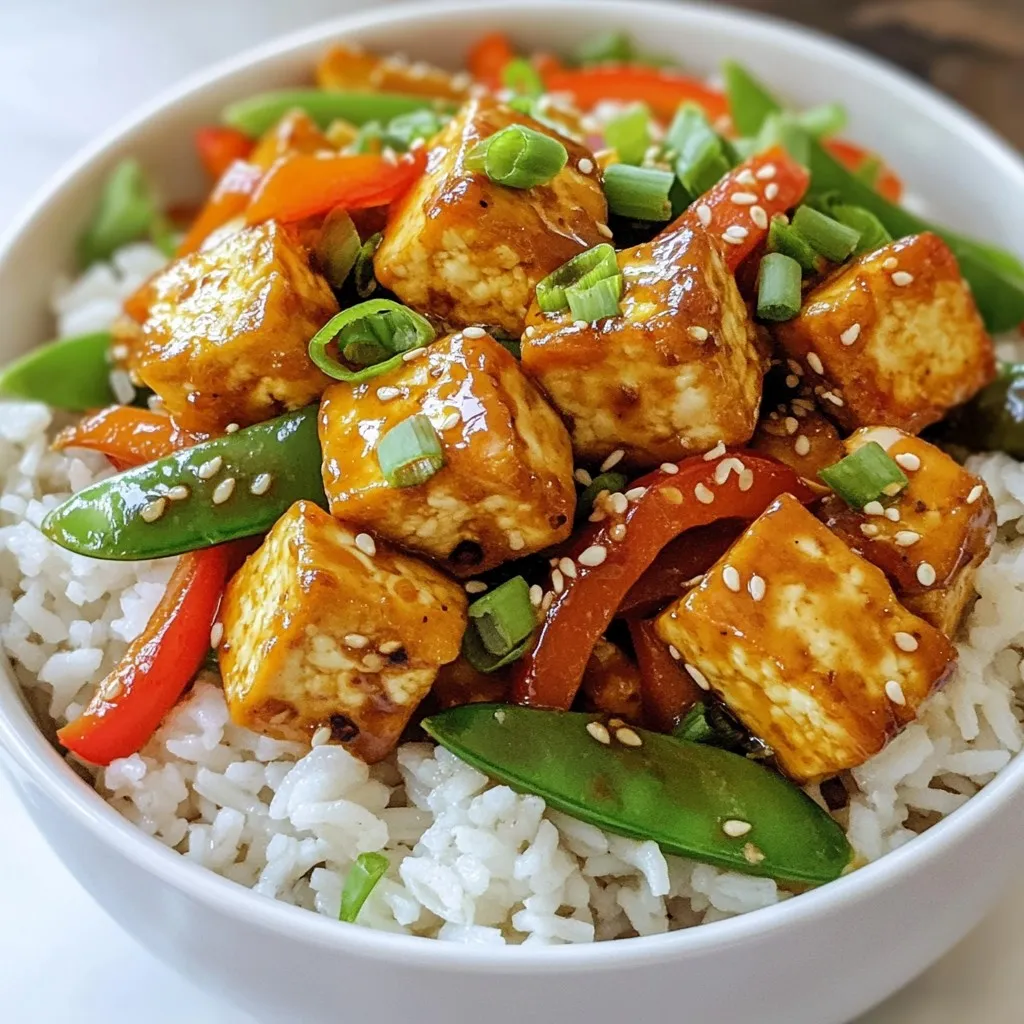
Final Assembly
Combining tofu and vegetables
Return the crispy tofu to the skillet. Gently toss everything together. Ensure the tofu is well-coated with sauce and heated through.
Serving over rice/quinoa
To serve, spoon the chili garlic tofu mixture over cooked jasmine rice or quinoa. Add some finely chopped green onions and a sprinkle of sesame seeds for extra flavor and crunch.
Tips & Tricks
Perfecting the Tofu Texture
Tofu can be tricky, but pressing it is key. When you press tofu, you remove extra water. This step helps the tofu absorb flavors and become crispy.
Here are some tips to achieve that perfect crunch:
– Use firm or extra-firm tofu for the best texture.
– After pressing, cut the tofu into 1-inch cubes.
– Coat the cubes with cornstarch. This creates a crispy layer when fried.
– Ensure the oil is hot before adding the tofu. This helps seal in moisture and promotes crispiness.
Adjusting Spice Level
Do you like it hot? You can modify the chili paste in this recipe. If you want less heat, use less chili paste.
Here are a few alternatives for milder flavors:
– Try using sweet chili sauce instead of chili paste.
– Add a touch of honey for sweetness without the heat.
– Mix in some coconut milk to tone down the spice.
Enhancing Flavor Profiles
Want to make your dish more colorful and tasty? Adding more veggies is a great idea. You can use:
– Broccoli florets for a nice crunch.
– Spinach for added nutrients.
– Mushrooms for a meaty texture.
You can also play with different sauces or seasonings. Here are some suggestions:
– Use teriyaki sauce for a sweet twist.
– Add a splash of rice vinegar for tanginess.
– Try sesame oil for a nutty flavor.
These tips will help you create a bowl that is not only delicious but also fits your taste. Enjoy experimenting!
Pro Tips
- Press the Tofu: Ensure you press the tofu for at least 30 minutes to remove excess moisture, resulting in a firmer texture and better absorption of flavors.
- Adjust Spice Levels: Taste the sauce before adding the tofu and adjust the chili paste to your preferred heat level for a perfect balance.
- Colorful Veggies: Use a variety of colorful vegetables to enhance not only the visual appeal but also the nutritional value of the dish.
- Garnish for Flavor: Don’t skip the sesame seeds and green onions; they add a delightful crunch and fresh flavor that elevate the dish.
Variations
Vegan Adaptations
If you want to keep your dish vegan, you can make easy swaps. For the soy sauce, use tamari. This gluten-free option tastes great. Instead of maple syrup, try agave nectar. Both sweeteners add a nice touch. If you want a creamy element, use coconut yogurt as a topping instead of sour cream.
Seasonal Variations
Change the veggies based on what’s fresh. In spring, add asparagus or peas. In summer, use zucchini or bell peppers. Fall brings great choices like butternut squash or mushrooms. During winter, think about using kale or Brussels sprouts. These swaps keep your dish bright and tasty.
Protein Alternatives
Want to switch up your protein? Tempeh is a great choice. It absorbs flavors well and has a hearty texture. You can also use seitan, which is very meaty. If you want to keep it simple, chickpeas or black beans can work too. Each option brings its own flavor and nutrition to your bowl.
Storage Info
Leftover Storage
To store leftover chili garlic tofu bowls, follow these steps:
– Allow the bowl to cool completely before storing.
– Use an airtight container for best results.
– Keep in the fridge for up to 3 days.
– If possible, store the tofu separate from the rice or quinoa. This keeps everything fresh and tasty.
Reheating Techniques
To reheat without losing texture, you have a few options:
– Stovetop: Heat a skillet over medium heat. Add a splash of water or oil. Place the tofu and veggies in the skillet. Stir gently until warm.
– Microwave: Use a microwave-safe dish. Cover loosely with a lid or paper towel. Heat in short bursts, checking often. This method may soften the tofu.
– Oven: Preheat to 350°F (175°C). Spread the tofu and veggies on a baking sheet. Heat for about 10-15 minutes. This helps keep the crispness of the tofu.
Freezing Options
Yes, you can freeze chili garlic tofu bowls! Follow these tips:
– Let the dish cool completely before freezing.
– Place in a freezer-safe container, leaving space for expansion.
– Freeze for up to 2 months.
– When ready to eat, thaw overnight in the fridge. Reheat using your favorite method.
Freezing may change the texture of the tofu slightly, but it still tastes great!
FAQs
How can I make Chili Garlic Tofu Bowls in advance?
You can prep the tofu and veggies one day ahead. Press and cut the tofu into cubes. Toss it with cornstarch and store it in the fridge. Chop your veggies and keep them in an airtight container. You can also mix the sauce ingredients and store them separately. On the day you want to eat, just fry the tofu and stir-fry your veggies. This keeps everything fresh and tasty.
What type of tofu is best for this recipe?
Firm tofu works best for these bowls. It holds its shape well during cooking. Silken tofu is too soft and won’t give you a nice texture. Extra-firm tofu is even denser, which is great for frying. If you want crispy edges, choose firm or extra-firm tofu. They soak up flavors well and give the bowls a lovely crunch.
What can I substitute for chili paste?
If you want less heat, use a mild sauce like sweet chili sauce. You can also blend red pepper flakes with soy sauce for a quick fix. If you love spice, try sriracha or harissa. Both add a nice kick. For those who avoid spice, use a dash of soy sauce and a hint of garlic for flavor without the heat.
This blog post showed you how to create tasty Chili Garlic Tofu Bowls. You learned about the key ingredients, from firm tofu to fresh veggies. I walked you through easy steps, ensuring your tofu is crispy and flavorful. Plus, you discovered tips for storage and making variations.
In summary, cooking should be fun and flexible. Explore the flavors and ingredients that excite you. Enjoy making this satisfying dish again and agai
Chili Garlic Tofu Bowls
Ingredients
- 400 g firm tofu, pressed and cut into 1-inch cubes
- 2 tablespoons cornstarch
- 3 tablespoons vegetable oil, divided
- 3 cloves garlic, minced
- 2 tablespoons fresh ginger, minced
- 2 tablespoons soy sauce
- 1 tablespoon chili paste (adjust according to heat preference)
- 1 tablespoon maple syrup
- 1 unit red bell pepper, thinly sliced
- 1 cup snap peas, trimmed
- 1 medium carrot, julienned
- 3 unit green onions, finely chopped
- to taste unit sesame seeds, for garnish
- to serve unit cooked jasmine rice or quinoa
Instructions
- Begin by pressing the firm tofu to eliminate excess moisture—this improves texture. After pressing, cut the tofu into 1-inch cubes.
- In a medium mixing bowl, toss the cubed tofu with cornstarch, ensuring each piece is evenly coated for a crispy exterior during frying.
- Heat 2 tablespoons of vegetable oil in a large skillet or frying pan over medium-high heat. Once the oil is hot, carefully add the cornstarch-coated tofu cubes. Fry for about 6-8 minutes, turning occasionally, until the tofu is golden brown and crispy on all sides. After frying, remove the tofu from the pan and set it aside on a plate.
- In the same skillet, add the remaining tablespoon of vegetable oil. Once the oil is hot, add the minced garlic and ginger. Sauté for approximately 1 minute, stirring constantly until fragrant but not burnt.
- Pour in the soy sauce, chili paste, and maple syrup; mix these ingredients well to create a flavorful sauce.
- Next, add the sliced red bell pepper, snap peas, and julienned carrot to the skillet. Stir-fry the vegetables for about 4-5 minutes, or until they become tender yet maintain their vibrant colors.
- Carefully return the crispy tofu to the skillet. Gently toss everything together, ensuring the tofu is well-coated with the sauce and heated through.
- To serve, spoon the chili garlic tofu mixture over a generous portion of cooked jasmine rice or quinoa. Finish with a sprinkle of chopped green onions and sesame seeds for added texture and flavor.
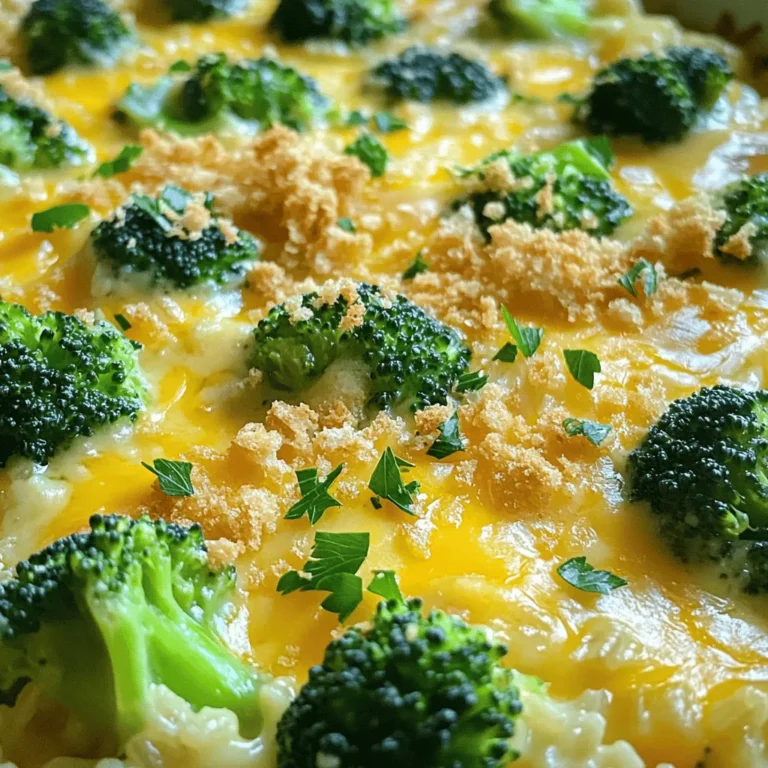
![- 4 large russet potatoes - 2 cups fresh broccoli florets, steamed to perfection - 1 cup sharp shredded cheddar cheese - 1/2 cup cream cheese, softened at room temperature To make cheesy broccoli stuffed potatoes, you need the right main ingredients. Start with large russet potatoes. These potatoes have thick skins and a fluffy inside. They hold the filling well. Next, grab fresh broccoli florets. Steaming them keeps their bright color and nutrients. For the cheesy goodness, use sharp cheddar cheese. It adds a bold flavor. Cream cheese makes the filling rich and creamy. Mixing these ingredients creates a tasty filling. - 1/4 cup sour cream for creaminess - 2 tablespoons unsalted butter, melted - 1 teaspoon garlic powder for flavor - Salt and freshly cracked black pepper to taste - Fresh chopped chives for an eye-catching garnish Seasonings enhance the flavors of your dish. Sour cream adds a nice creaminess. Melted butter gives richness to the filling. Garlic powder brings a warm, savory taste. Don't forget salt and pepper. They balance all the flavors perfectly. For a lovely garnish, use fresh chives. They add color and a mild onion taste. This combination of seasonings makes your cheesy broccoli stuffed potatoes even more delightful. For the full recipe, check [Full Recipe]. To start, you need to preheat your oven to 400°F (200°C). This helps ensure your potatoes bake evenly. Next, wash and scrub the russet potatoes to remove dirt. Use a fork to prick each potato 6-8 times. This allows steam to escape while baking. Place the potatoes on a baking sheet and bake them for 45-60 minutes. They should feel soft when you poke them with a fork. While your potatoes bake, it’s time to prepare the broccoli. Steam the fresh broccoli florets in a steamer basket over boiling water. This should take about 5-7 minutes. You want the broccoli to be bright green and tender. After steaming, set it aside to cool. In a large bowl, mix the steamed broccoli with shredded cheddar cheese, softened cream cheese, sour cream, melted butter, garlic powder, salt, and pepper. Stir until everything is creamy and well combined. Once your potatoes are done baking, take them out and let them cool for about 5 minutes. Cut each potato in half lengthwise. Scoop out some of the potato flesh, but leave a thin border for strength. Take the scooped potato and mix it into the cheesy broccoli filling. Stir until it is well blended. Now, spoon this mixture back into the potato skins. Make sure to pile it high for a nice look. Place the stuffed potatoes back on the baking sheet and return them to the oven. Bake for 15-20 minutes, or until the tops are golden and bubbly. Once they are ready, let them cool slightly before serving. You can find the full recipe for even more details on how to make this dish! To achieve a creamy consistency in your Cheesy Broccoli Stuffed Potatoes, you need the right balance of ingredients. Here’s how: - Use soft cheeses: Cream cheese and sour cream create a smooth mix. They help blend well with the broccoli. - Don’t overcook the broccoli: Steam it just until tender. Overcooking makes it mushy. - Mix well: Stir the cheese and broccoli together thoroughly. This way, every bite will be creamy. Ensuring the potatoes are fully cooked is crucial for best results. Here’s how to check: - Baking time: Bake russet potatoes for 45-60 minutes. They should feel soft when pierced. - Test for doneness: Use a fork to poke the potatoes. They should yield easily without resistance. You can add extra flavors to make your dish unique. Here are some ideas: - Bacon bits: Add crispy bacon for a salty crunch. It pairs well with broccoli. - Fresh herbs: Chopped chives or parsley can brighten the dish. They add a fresh taste. Adjusting spices can also elevate your stuffed potatoes. Here are some suggestions: - Garlic powder: Add more if you love garlic. It enhances the overall flavor. - Spice it up: A pinch of red pepper flakes gives a nice kick. For more details, check the Full Recipe. {{image_4}} You can switch up the cheese in your Cheesy Broccoli Stuffed Potatoes. Use different blends to create new flavors. For a milder taste, try using mozzarella or Monterey Jack. If you want a stronger flavor, go for Gouda or blue cheese. Mixing cheeses adds a fun twist to this dish! If you need a dairy-free option, try vegan cheese. Many brands offer tasty dairy-free cheese that melts well. You could also use nutritional yeast for a cheesy flavor without dairy. This keeps your dish creamy and delicious. Want to make your stuffed potatoes more filling? Add proteins! You can mix in cooked chicken or turkey. Shredded rotisserie chicken works great and saves time. For a vegetarian option, consider black beans or lentils. They add protein and make the dish hearty. If you love seafood, shrimp or crab can be exciting additions. Cook the seafood first, then fold it into the cheese and broccoli mix. This adds a unique flavor that makes your stuffed potatoes special. To store leftovers safely, let the stuffed potatoes cool to room temperature. Place them in an airtight container. You can keep them in the fridge for up to three days. When reheating, preheat your oven to 350°F (175°C). Place the stuffed potatoes on a baking sheet. Cover them with foil to prevent drying. Heat for about 15-20 minutes, or until they are hot throughout. This method helps keep them creamy and delicious. You can freeze stuffed potatoes for later use. First, let them cool completely after baking. Wrap each potato tightly in plastic wrap. Then, place them in a freezer bag or container. They can last up to three months in the freezer. When you want to enjoy them, take the potatoes out of the freezer. Let them thaw in the fridge overnight. Then, bake them in a preheated oven at 350°F (175°C) for about 30-40 minutes. Make sure they are hot inside before serving. This way, you can savor a tasty meal anytime. For the full recipe, check out the detailed steps included above. Cheesy broccoli stuffed potatoes are baked russet potatoes filled with a creamy mix of broccoli and cheese. The dish is hearty and comforting. You can serve them as a side or a main dish. They are perfect for family dinners or casual get-togethers. Kids and adults love this meal, making it a family favorite. To make these stuffed potatoes healthier, you can reduce calories by using low-fat cheese. You can also swap sour cream for Greek yogurt. This keeps the creaminess but cuts fat. Try using less butter or replacing it with olive oil for a healthier fat option. Fresh herbs can add flavor without extra calories. Yes, you can prepare cheesy broccoli stuffed potatoes ahead of time. After filling the potatoes, cover them and store them in the fridge for up to two days. When you are ready to eat, reheat them in the oven at 350°F (175°C) for about 20-25 minutes. Make sure they are warmed through before serving. In this post, we explored how to make Cheesy Broccoli Stuffed Potatoes. You learned about the key ingredients and the step-by-step process. I also shared tips and variations to make it your own. Remember, you can adjust flavors and textures to fit your taste. These stuffed potatoes are easy to prepare and perfect for any meal. Enjoy making them, and share your creations with friends and family!](https://goldendishy.com/wp-content/uploads/2025/07/b761c5e5-34eb-4a0c-a694-3380b074c9b4-768x768.webp)

![- 1 lb baby carrots (or regular carrots, peeled and sliced into sticks) - 2 tablespoons olive oil - 3 tablespoons pure maple syrup - 2 tablespoons Dijon mustard - 1 tablespoon fresh thyme leaves (or 1 teaspoon dried thyme) These key items create the sweet and tangy glaze that makes the carrots shine. Baby carrots are sweet and tender, while regular carrots add a heartier texture. The olive oil helps the glaze stick and adds a rich flavor. Pure maple syrup brings sweetness, and Dijon mustard adds a kick. Fresh thyme gives an earthy note that ties it all together. - Salt and pepper to taste - Zest of 1 lemon (for garnish) - Additional herbs (like parsley or chives) These optional items can elevate your dish. Salt and pepper enhance all flavors. Lemon zest adds a bright note that contrasts beautifully with the sweet glaze. Extra herbs can give a pop of color and flavor. Feel free to mix and match these garnishes to make your dish unique. For the full recipe, check out [Full Recipe]. First, you need to preheat your oven to 425°F (220°C). This step helps the carrots roast perfectly. If you’re using regular carrots, peel them first. Then, slice them into sticks about 1/2 inch thick. Cutting them evenly ensures they cook at the same rate. Baby carrots can go straight into the oven without any slicing. Next, grab a small mixing bowl. In it, whisk together the following ingredients: - 2 tablespoons olive oil - 3 tablespoons pure maple syrup - 2 tablespoons Dijon mustard - 1 tablespoon fresh thyme leaves (or 1 teaspoon dried thyme) - A pinch of salt and pepper Whisk until all the ingredients blend into a smooth glaze. This glaze gives the carrots a sweet and tangy flavor that really shines. Now, transfer the carrots to a large mixing bowl. Pour the glaze over the carrots. Toss them gently to coat each piece evenly. You want every carrot stick to be covered in that tasty mixture. Spread the glazed carrots in a single layer on a baking sheet lined with parchment paper. Make sure there's space between each piece; this helps them roast evenly. Place the baking sheet in the oven and roast for 20-25 minutes. Remember to toss the carrots halfway through. This ensures they brown nicely on all sides. When they finish roasting, the carrots should be tender and caramelized, looking delicious. You can find the full recipe for these amazing Maple Dijon Glazed Carrots to make them at home! To make your Maple Dijon glazed carrots pop, think about adding spices or herbs. Try a pinch of cayenne for heat or a dash of garlic powder for depth. Fresh herbs like parsley or dill can also brighten the dish. These small changes can bring a new twist to the recipe. Adjusting sweetness levels is another way to suit your taste. If you love sweet, add more maple syrup. If you prefer less sweetness, cut back slightly. Balancing the sweet and tangy flavors makes each bite exciting. Even cooking is key for great roasted carrots. Cut your carrots into uniform pieces. This ensures they cook at the same rate. For baby carrots, you can roast them whole. If using regular carrots, aim for 1/2 inch thick sticks. If you want to try alternatives to oven roasting, consider steaming or sautéing. Steaming keeps the carrots tender and bright. Sautéing in a pan with the glaze gives a nice caramelization as well. Both methods can work well, but roasting brings out the best flavors. Find the full recipe for Maple Dijon glazed carrots to explore even more cooking tips! {{image_4}} You can easily swap out some ingredients in this recipe. If you're out of maple syrup, try honey or agave syrup. Both add a nice sweetness but change the flavor a bit. You can also use brown sugar, but it will change the glaze's texture. For the mustard, Dijon is great, but you can use yellow mustard for a milder taste. Spicy brown mustard adds a kick. You can even try whole grain mustard for a rustic feel. Each option brings a new twist to the dish. You can make these glazed carrots on the stovetop if you prefer. Simply steam the carrots until tender. Then, toss them in the glaze in a pan over low heat. This method gives you a softer texture. If you're hosting a big dinner, you can serve these carrots in many ways. For a casual meal, serve them right from the baking dish. For a fancy dinner, arrange them on a platter and drizzle extra glaze on top. You can even add some nuts for crunch. For the full recipe, check the link provided. Enjoy exploring these variations! To keep your maple Dijon glazed carrots fresh, use airtight containers. Glass or plastic containers work well. Make sure the carrots cool down before sealing them. This helps prevent moisture build-up. Store the leftovers in the fridge. They stay good for about three to five days. When reheating glazed carrots, the oven is best. Preheat it to 350°F (175°C). Spread the carrots on a baking sheet and heat for about 10 minutes. This keeps them crispy and tasty. You can also use the microwave. Heat them in short bursts of 30 seconds. Stir between each burst to keep flavors intact. How long do roasted carrots last in the fridge? Roasted carrots can last about 3 to 5 days in the fridge. Store them in an airtight container. This helps keep them fresh and tasty. Can I make this recipe ahead of time? Yes, you can make this recipe ahead of time. Roast the carrots and let them cool. Then, store them in the fridge. Reheat them before serving for the best flavor. Is this recipe suitable for vegan diets? Yes, this recipe is vegan-friendly. It uses maple syrup and mustard, which are both plant-based. You can enjoy this dish without any animal products. How can I make this gluten-free? This recipe is already gluten-free. Dijon mustard is often gluten-free, but always check the label. This way, you ensure it fits your diet. What meals pair well with glazed carrots? Glazed carrots pair well with roasted chicken, grilled fish, or a hearty grain dish. Their sweet and tangy flavor adds balance to savory meals. Can I use other vegetables in this recipe? Yes! You can use other veggies like parsnips or sweet potatoes. Just adjust the cooking time for different vegetables. Enjoy the variety! For the full recipe, check out the Maple Dijon Glazed Carrots recipe to explore all the tasty details. Maple Dijon glazed carrots are both tasty and easy to make. We covered essential ingredients like carrots, olive oil, and Dijon mustard. Each step, from roasting to optional flavor tweaks, helps you create the best dish. Remember to store leftovers properly and reheat them for full flavor. Feel free to experiment with variations to match your taste. With this recipe, you can impress at any meal. Now, gather your ingredients and enjoy making these delicious carrots!](https://goldendishy.com/wp-content/uploads/2025/07/c1b9af90-3a4b-46ea-8cf2-4dca4008c015-768x768.webp)
![To make this tasty dish, gather these main items: - 1 large head of cauliflower, cut into bite-sized florets - 5 cloves of garlic, skins left on - 3 tablespoons extra virgin olive oil, divided - 1/4 cup unsweetened almond milk (or your preferred milk) - 2 tablespoons butter (or a vegan alternative) - Salt and freshly ground black pepper, to taste These ingredients form the base of the mash. The cauliflower gives the dish its creamy texture. Roasting the garlic adds a rich flavor. You can change the recipe to suit your taste. Here are some ideas: - Swap almond milk for regular milk or cream for a richer flavor. - Use ghee instead of butter for a unique twist. - Add a pinch of nutmeg for warmth. - Incorporate herbs like thyme or rosemary for added depth. These options let you make the dish your own. Feel free to get creative! Garnishing makes the dish look appealing. Here are some great choices: - Fresh chives, finely chopped, for a pop of color - A drizzle of extra virgin olive oil for richness - A sprinkle of smoked paprika for a touch of spice These garnishes enhance the flavor and presentation. They make your Roasted Garlic Cauliflower Mash shine on the table. For the full recipe, check the earlier section. To start, I preheat my oven to 400°F (200°C). This temperature works best for roasting. Next, I take one large head of cauliflower and cut it into bite-sized florets. I love using fresh cauliflower for the best flavor. On a baking sheet, I place the florets and five unpeeled cloves of garlic. Then, I drizzle two tablespoons of extra virgin olive oil over them. I sprinkle salt and black pepper generously, then toss everything together. It helps the veggies get well-coated. I spread the cauliflower and garlic in a single layer. Now, I roast them for 25 to 30 minutes. Halfway through, I gently toss them to ensure they cook evenly. I look for a nice golden brown color and tender texture when they are done. Once roasted, I let the garlic cool for a few minutes before handling it. After cooling, I squeeze the softened garlic out of its skin. I put it into a large mixing bowl with the roasted cauliflower. Then, I add a quarter cup of unsweetened almond milk, two tablespoons of butter, and the last tablespoon of olive oil. I grab a hand mixer or an immersion blender to blend the mix. I blend until it turns smooth and creamy. If I want a chunkier mash, I blend just until combined. I make sure not to overmix, as it can change the texture. Once blended, I taste the mash. If it needs more flavor, I adjust with extra salt and pepper. I love a well-seasoned mash! Now, I transfer the cauliflower mash to a serving bowl. For a fun finishing touch, I sprinkle freshly chopped chives on top. This adds color and a nice flavor. To make it look fancy, I might drizzle a bit of olive oil on top. This mash is now ready to impress! Enjoy this easy and tasty dish from the [Full Recipe]. To make the best roasted garlic cauliflower mash, follow these tips. First, use a large head of cauliflower. This gives you enough to work with. Cut the florets into even sizes. This helps them cook at the same rate. Roasting adds flavor, so don’t rush it. Allow the cauliflower to become tender and golden. When blending, don’t overmix. A few pulses will give you a nice texture. If you want it creamier, add a splash more milk. Always taste as you go. Adjust salt and pepper to your liking for the best flavor. Having the right tools makes cooking easier. Here’s what I recommend: - Baking sheet for roasting - Large mixing bowl for combining ingredients - Immersion blender or hand mixer for smoothness - Measuring cups and spoons for precise amounts - Knife and cutting board for prep These tools help you work efficiently and make the process enjoyable. Watch out for these common mistakes. First, don’t skip the roasting step. Raw cauliflower will not have the same rich taste. Second, avoid using too much liquid. It can make your mash watery. If you prefer a thicker mash, add less almond milk. Finally, remember to season well. Under-seasoning can leave your mash bland. Always taste your dish before serving. This way, you ensure it is full of flavor. For the full recipe, check the details above. Enjoy making your roasted garlic cauliflower mash! {{image_4}} You can easily make this dish dairy-free. Use almond milk or coconut milk instead of regular milk. For a buttery flavor, swap butter for vegan butter or olive oil. This keeps the mash creamy and rich without dairy. Adding flavors can elevate your mash. Fresh herbs like thyme or rosemary add a lovely touch. You can also sprinkle in garlic powder for extra garlic flavor. If you enjoy cheese, mix in some grated Parmesan for a savory kick. Get creative with how you serve this mash! Use it as a base for grilled chicken or fish. You can also serve it as a side dish with roasted vegetables. Try topping it with sautéed mushrooms or crispy bacon bits for added flavor and texture. After enjoying your roasted garlic cauliflower mash, let it cool. Place it in an airtight container. Store it in the fridge for up to 4 days. This keeps the flavor fresh and the texture nice. If you have more leftovers, freezing is a great option. Put the mash in a freezer-safe bag or container. Make sure to remove excess air. It will last for about 3 months. Label the container with the date so you can keep track. When you're ready to enjoy the mash again, reheat it gently. You can use the microwave or a stovetop. If it seems dry, add a splash of almond milk or butter. Stir it well as you heat it. This keeps it creamy and delicious. Yes, you can make Roasted Garlic Cauliflower Mash ahead of time. Prepare the mash, then let it cool. Store it in an airtight container in the fridge for up to three days. When you’re ready to eat, simply reheat it on the stove or in the microwave. You may need to add a splash of milk to bring back the creamy texture. Yes, cauliflower mash is a low-carb alternative to mashed potatoes. A cup of cooked cauliflower has about 5 grams of carbs, while a cup of mashed potatoes has around 35 grams. This makes cauliflower mash a great choice if you want to cut carbs but still enjoy a creamy side dish. Roasted Garlic Cauliflower Mash pairs well with many dishes. You can serve it with roasted chicken, grilled steak, or pan-seared fish. It also complements sautéed vegetables or a fresh salad. For a hearty meal, try it with a rich mushroom gravy or a savory sauce. The mash's creamy texture and garlic flavor enhance any main dish beautifully. Roasted Garlic Cauliflower Mash is simple and tasty. We covered its key ingredients, from cauliflower to garlic. You can customize it with optional ingredients and garnishes for more flavor. The step-by-step instructions ensure a smooth texture every time. You now have tips to avoid common mistakes. Variations allow for dairy-free or unique flavors. Storing is easy, and leftovers can even be frozen. This mash is a great low-carb option. Try it with your favorite dishes for a perfect side.](https://goldendishy.com/wp-content/uploads/2025/07/e8f9d6da-9905-472e-90b5-76f2ba9b0789-768x768.webp)