Light Chicken Penicillin Soup Nourishing and Simple Meal
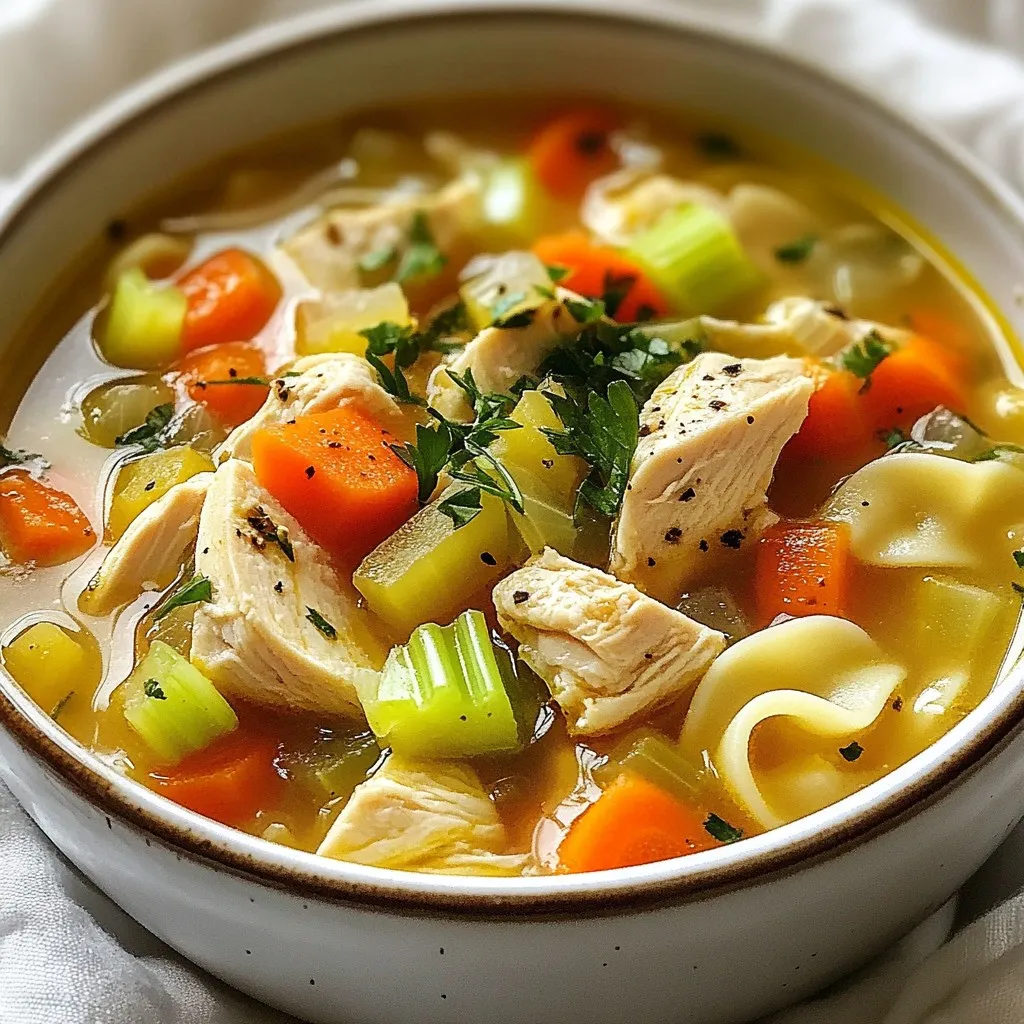

Are you looking for a warm, tasty dish that’s easy to make? Light Chicken Penicillin Soup is the perfect answer! Packed with wholesome ingredients, this soup warms your body and boosts your health. Whether you’re feeling under the weather or just want a comforting meal, my simple recipe has you covered. Stick around to learn how to make this nourishing soup in no time!
Why I Love This Recipe
- Comforting Flavor: This soup is packed with flavors that warm the soul, making it perfect for chilly days or when you’re feeling under the weather.
- Nutritious Ingredients: With plenty of vegetables and lean protein, this dish provides a nourishing boost to your health.
- Quick and Easy: In just 35 minutes, you can have a hearty meal ready, making it ideal for busy weeknights.
- Customizable: You can easily swap out ingredients based on what you have on hand or your dietary preferences, ensuring everyone can enjoy it.
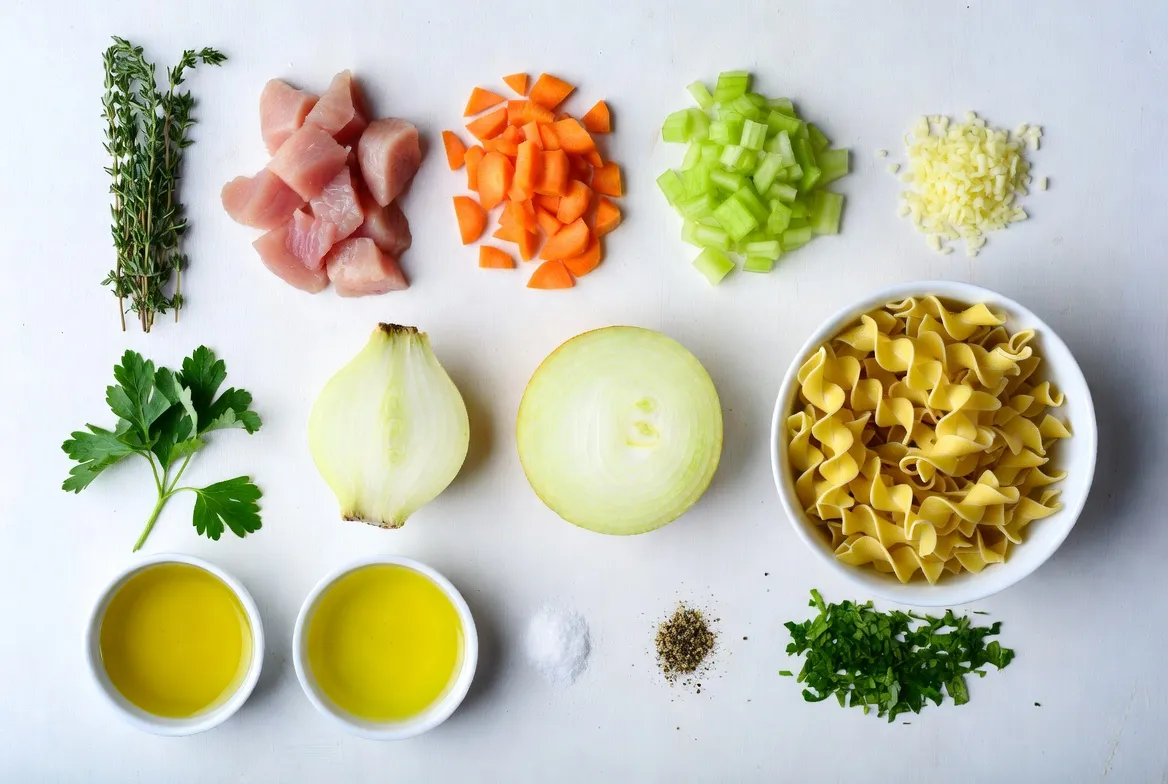
Ingredients
Main Ingredients
Chicken and Broth Essentials
– 1 lb boneless, skinless chicken thighs (or breasts), cut into 1-inch pieces
– 8 cups low-sodium chicken broth
Chicken is the heart of this soup. It adds protein and makes it filling. I prefer thighs for their rich flavor, but breasts work well too. The low-sodium broth keeps the soup healthy while still rich in taste.
Vegetables for Flavor and Nutrition
– 1 cup carrots, diced
– 1 cup celery, diced
– 1 medium onion, finely chopped
– 4 cloves garlic, minced
Vegetables boost nutrition and flavor. Carrots add sweetness, while celery gives a nice crunch. Onions and garlic bring depth to the taste. These veggies create a base that warms your soul.
Herbs and Seasoning Options
– 1 teaspoon fresh thyme (or ½ teaspoon dried thyme)
– 1 teaspoon fresh dill (or ½ teaspoon dried dill)
– Salt and freshly ground black pepper, to taste
– 2 tablespoons fresh lemon juice (about 1 lemon)
– Fresh parsley, chopped, for garnish
Herbs are key for flavor. Fresh thyme and dill elevate the soup. They also add a lovely aroma. Don’t forget the salt and pepper; they bring all the flavors together. A splash of lemon juice brightens the dish, while parsley adds a fresh touch.
Step-by-Step Instructions
Preparation of the Soup Base
Sautéing the Vegetables
Start by heating olive oil in a large pot over medium heat. Once the oil shimmers, add the chopped onion, diced carrots, and diced celery. Sauté the veggies for about 5 minutes. You want them soft, not brown. This step makes the soup taste great!
Adding Chicken and Seasonings
Next, toss in the minced garlic. Cook it for another minute until it smells amazing. Now, add the diced chicken pieces. Season them with salt, pepper, thyme, and dill. Sauté the chicken until it turns brown on all sides. This should take around 7-8 minutes. Browning the chicken adds depth to the flavor.
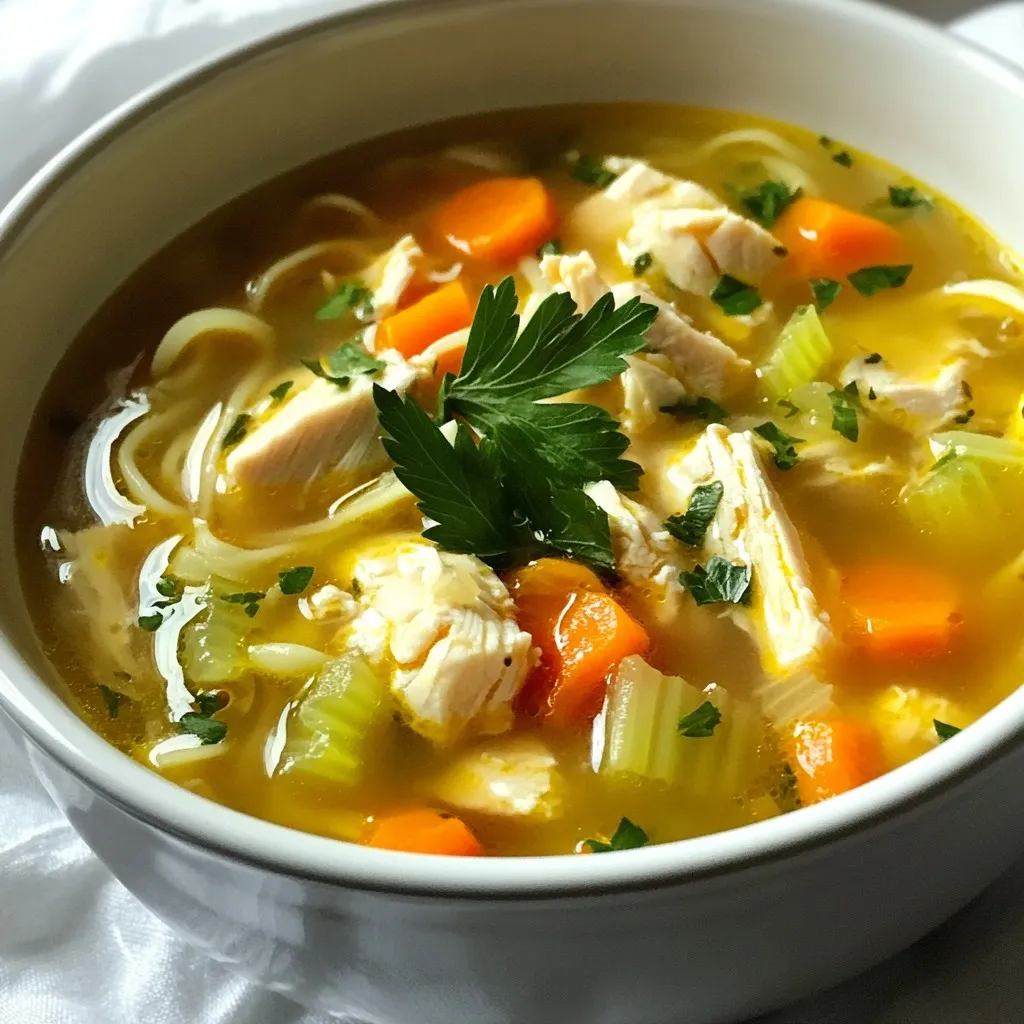
Incorporating Broth and Noodles
Pour in the low-sodium chicken broth. Bring the mixture to a rolling boil. Once it’s boiling, lower the heat to a gentle simmer. Add the egg noodles next and cook according to the package instructions, usually about 8-10 minutes. When the noodles are tender, stir in fresh lemon juice to brighten the taste. Taste the soup and adjust the seasoning if needed. Let the soup rest for a few minutes. This helps the flavors mix well. Serve it hot in bowls and add chopped parsley on top for a fresh touch.
Tips & Tricks
Healthier Ingredient Substitutions
Low-Calorie Noodle Options
You can swap regular egg noodles for whole grain noodles. This change adds fiber and keeps you full longer. You might also try zucchini noodles. They are light and add a nice twist.
Swaps for Traditional Ingredients
Instead of using regular chicken broth, choose low-sodium broth. This cut helps reduce salt intake. You can also replace olive oil with a cooking spray to lower calories. Use fresh herbs instead of dried ones for brighter flavors.
Flavor Enhancements Without Extra Calories
To boost flavor, add a splash of lemon juice. It brightens the soup without calories. Fresh herbs like dill and thyme add depth, too. Try adding a pinch of red pepper flakes for a little kick, which is also low-calorie.
Pro Tips
- Choose the Right Chicken: Opt for boneless, skinless chicken thighs for a juicier and more flavorful soup compared to chicken breasts.
- Enhance the Flavor: For deeper flavor, consider adding a splash of white wine after sautéing the vegetables before adding the broth.
- Vegetable Variations: Feel free to add other vegetables like spinach, kale, or peas for added nutrients and color.
- Make It Ahead: This soup stores well in the fridge for 3-4 days and can also be frozen; just undercook the noodles slightly for best results when reheating.
Variations
Dietary Adaptations
Low-Carb or Keto-Friendly Options
You can make this soup low-carb easily. Swap egg noodles for zucchini noodles or shirataki noodles. These options cut carbs but keep your soup tasty and filling. Use extra veggies like mushrooms or bell peppers to bulk up your dish without added carbs.
Vegetarian or Vegan Versions
To make a vegetarian version, replace chicken with chickpeas or lentils. Use vegetable broth instead of chicken broth. Add extra vegetables like spinach or kale for a nutrient boost. This keeps the heartiness while making it meat-free.
Seasonal Vegetable Incorporations
Seasonal veggies can add fresh flavors. In spring, use peas and asparagus. In fall, add butternut squash or sweet potatoes. These changes not only enhance taste but also make the soup colorful and fun. Adjust the herbs to match your veggie choices for a unique twist!
Storage Info
Proper Storage Techniques
Refrigeration Tips
After making your light chicken penicillin soup, let it cool. Store it in an airtight container. This keeps flavors fresh. You can keep it in the fridge for up to four days. If you want to eat it later, try the freezing method.
Freezing Instructions
To freeze, use freezer-safe containers. Leave some space at the top for expansion. This soup can last up to three months in the freezer. When you are ready to eat, thaw it in the fridge overnight.
Reheating Strategies for Best Flavor
Reheat your soup on the stove for the best taste. Use low to medium heat to warm it slowly. Stir often to avoid sticking. You can also use a microwave, but be careful not to overheat. Heat it in short bursts and stir in between. Enjoy your soup warm and flavorful!
FAQs
Common Questions About Light Chicken Penicillin Soup
How can I make this soup gluten-free?
To make this soup gluten-free, use gluten-free noodles. Many brands offer tasty options. Also, check your chicken broth label for gluten-free certification. This way, you enjoy a safe meal.
What are the best sides to serve with the soup?
I love pairing this soup with a fresh salad or crusty bread. A light green salad adds crunch and color. You can also serve it with whole grain crackers for a fun twist.
Can I make this soup in a slow cooker?
Yes! To make this soup in a slow cooker, add all ingredients except noodles. Cook on low for 6-8 hours. About 30 minutes before serving, stir in the noodles. This gives you a warm, tasty soup.
This blog post covered how to make Light Chicken Penicillin Soup. We explored the key ingredients, preparation steps, and healthy swaps. I shared tips for variations to suit any diet and easy storage techniques. You can adapt this dish for any season or preference.
Remember, soup is more than food; it’s comfort. Enjoy every si

Revitalizing Chicken Penicillin Soup
Ingredients
- 1 lb boneless, skinless chicken thighs (or breasts), cut into 1-inch pieces
- 8 cups low-sodium chicken broth
- 1 cup carrots, diced
- 1 cup celery, diced
- 1 medium onion, finely chopped
- 4 cloves garlic, minced
- 1 teaspoon fresh thyme (or ½ teaspoon dried thyme)
- 1 teaspoon fresh dill (or ½ teaspoon dried dill)
- 1 cup egg noodles (or substitute with whole grain noodles)
- 1 tablespoon olive oil
- to taste salt and freshly ground black pepper
- 2 tablespoons fresh lemon juice (about 1 lemon)
- for garnish fresh parsley, chopped
Instructions
- In a large pot, heat the olive oil over medium heat until shimmering.
- Add the chopped onion, diced carrots, and diced celery. Sauté for approximately 5 minutes, stirring occasionally, until the vegetables are softened but not browned.
- Incorporate the minced garlic to the pot and cook for an additional minute until the garlic releases its fragrant aroma.
- Add the diced chicken pieces to the mixture, seasoning generously with salt, pepper, fresh thyme, and dill. Sauté the chicken until it is browned on all sides, which should take about 7-8 minutes.
- Pour in the low-sodium chicken broth and bring the mixture to a rolling boil.
- Once boiling, reduce the heat to a gentle simmer and add the egg noodles. Cook according to package instructions (usually around 8-10 minutes) until the noodles are al dente and tender.
- Stir in the freshly squeezed lemon juice and taste the soup, adjusting the seasoning with additional salt and pepper if needed.
- Remove the pot from the heat and allow the soup to rest for a few minutes to meld the flavors.
- Serve hot, ladled into bowls and garnished generously with chopped fresh parsley on top.


. 1. Preheating the oven: Start by setting your oven to 400°F (200°C). This heat helps the chicken cook evenly and ensures a crispy skin. 2. Drying the chicken thighs: Use paper towels to pat the chicken thighs dry. Getting rid of moisture is key for that nice, crispy texture. 1. Mixing seasoning and applying to chicken: In a bowl, mix olive oil, garlic powder, dried oregano, salt, and black pepper. Rub this mix all over the chicken thighs. Be sure to coat them well for great flavor. 2. Layering the pesto: Take your basil pesto and spoon a good amount onto each thigh. Make sure each piece is coated well for the best taste. 1. Arranging chicken in the baking dish: Place the chicken thighs skin-side up in a baking dish. Scatter halved cherry tomatoes around the chicken. Their juices will add even more flavor. 2. Baking time and checking doneness: Put the dish in the oven. Bake for about 35-40 minutes. Check that the juices run clear and the thickest part of the thigh reads 165°F (74°C) on a meat thermometer. This step-by-step guide will help you create the best Baked Pesto Chicken Thighs. For the full recipe, check out the earlier section. To get crispy skin on your baked pesto chicken thighs, start by patting the chicken dry with paper towels. This step removes extra moisture, helping the skin crisp up nicely. Next, set your oven to 400°F (200°C). This temperature is key for cooking the chicken evenly while also achieving that perfect crispy finish. Mix your basil pesto with a teaspoon of olive oil if it feels thick. This makes it easier to coat the chicken thighs evenly. A good layer of pesto adds rich flavor to each bite. For a fresh touch, use herbs like basil or parsley to garnish the dish. They add color and a bright flavor. Serve your baked pesto chicken thighs on a large platter. Drizzle any juices from the baking dish over the chicken. Scatter the halved cherry tomatoes around for a colorful look. Pair this dish with a fresh salad or fluffy rice. Both sides complement the chicken well and make for a complete meal. For the full recipe, check out the details above. {{image_4}} You can use chicken breast instead of thighs. Chicken breasts are lean and cook faster. They will still soak up the pesto flavor. For a twist, try turkey. Turkey thighs or breasts work well too. They add a different taste while keeping it juicy. Experiment with homemade pesto. You can make it from sun-dried tomatoes or spinach. Both options give a unique flavor. If you like heat, add red pepper flakes. Just a pinch can spice things up without being too hot. This recipe can fit gluten-free diets. Just check that the pesto is gluten-free. Use gluten-free pasta or a side dish to complete the meal. For those avoiding dairy, choose dairy-free cheese. Many brands offer great options that melt well. Feel free to explore these variations to make your Baked Pesto Chicken Thighs even more exciting. For the full details on the base recipe, check the Full Recipe section. To store leftovers properly, let the chicken cool first. Place the chicken thighs in an airtight container. This will keep them fresh longer. I recommend using glass or BPA-free plastic. These containers seal well and prevent spills. You can freeze baked chicken thighs for later use. To do this, wrap each thigh in plastic wrap. Then, place them in a freezer bag. Remove as much air as possible before sealing. When you’re ready to eat, thaw the chicken overnight in the fridge. Reheat it in the oven at 350°F (175°C) until hot. In the fridge, baked pesto chicken thighs last about 3-4 days. Keep an eye on them. If you see any off-smells or discoloration, discard them right away. These signs mean the chicken is spoiled. Enjoy your meal with peace of mind by storing it properly. For the full recipe, check back to make this tasty dish! Bake chicken thighs for about 35 to 40 minutes. This time gives you juicy meat and crispy skin. Check the chicken at 35 minutes to see if it's done. The juices should run clear. If you have a meat thermometer, insert it in the thickest part. It should read 165°F (74°C). This temperature ensures the chicken is safe to eat. Yes, you can prep this dish ahead of time. Season the chicken and coat it with pesto. Place it in your baking dish and cover it. Store it in the fridge for up to 24 hours. When you're ready to cook, just bake it as directed. This makes meal prep easy and quick. Chicken should reach a safe cooking temperature of 165°F (74°C). This temperature kills harmful bacteria. Use a meat thermometer for the most accurate reading. Insert it into the thickest part of the thigh. Once it hits 165°F, your chicken is safe and ready to eat. This post covered juicy chicken thighs baked with pesto and cherry tomatoes. You learned about the key ingredients, seasoning, and steps to prepare this dish. I shared tips to achieve crispy skin and suggestions for variations. Storing leftovers and meal prep were also discussed. Incorporate these ideas in your cooking. Enjoy the flavors and share with others. Your kitchen is now ready for this tasty meal!](https://goldendishy.com/wp-content/uploads/2025/06/60e55a10-6222-4f06-b0be-30d915c75343-768x768.webp)