
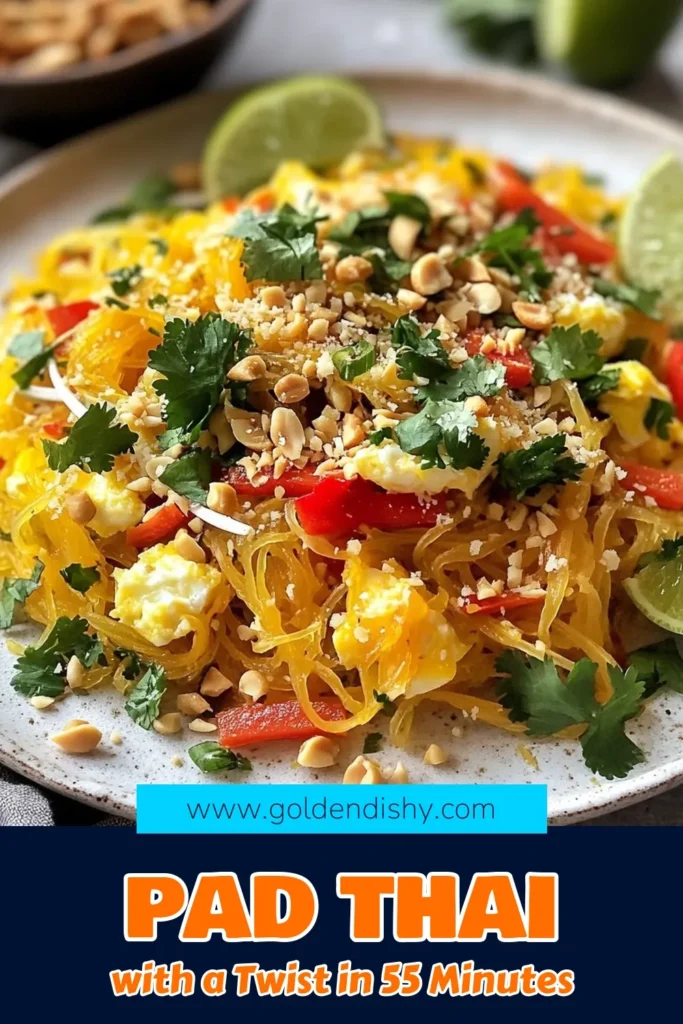
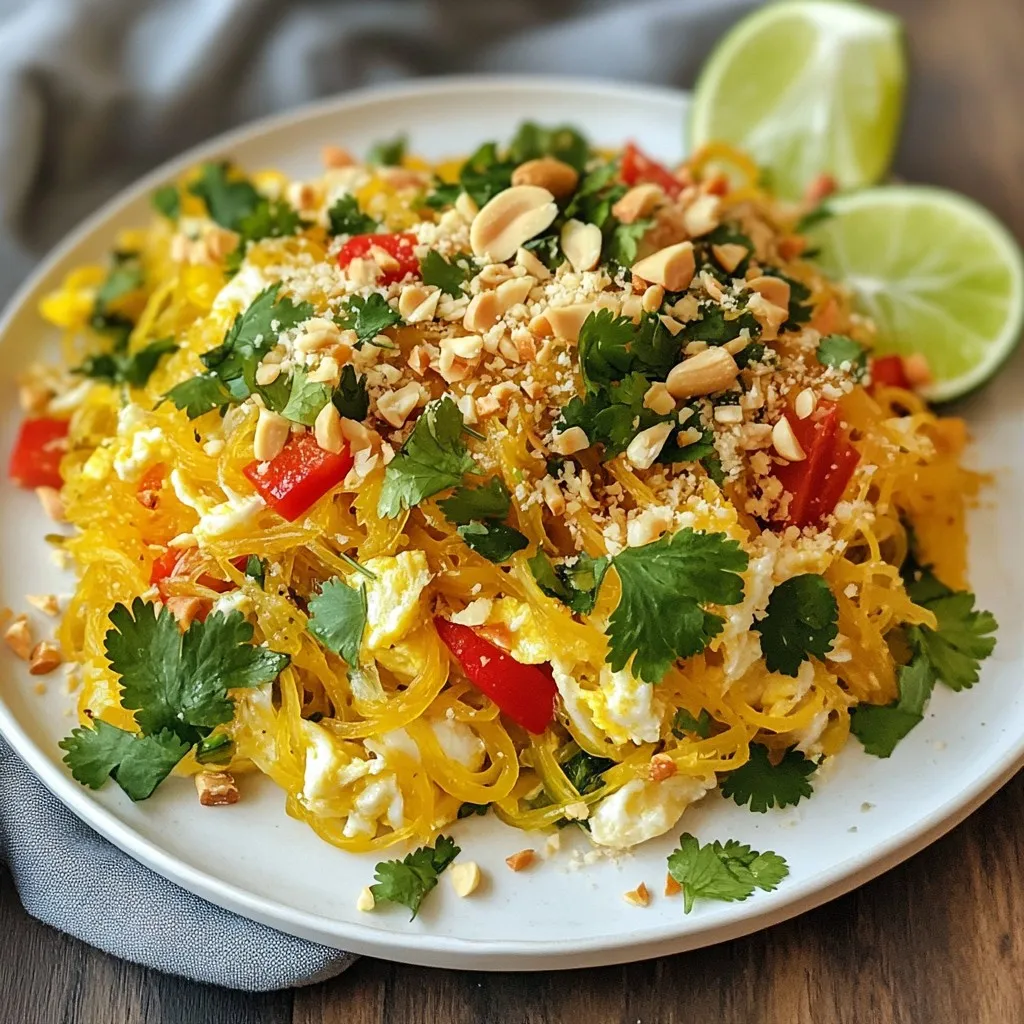
Spaghetti Squash Pad Thai Flavorful and Easy Recipe
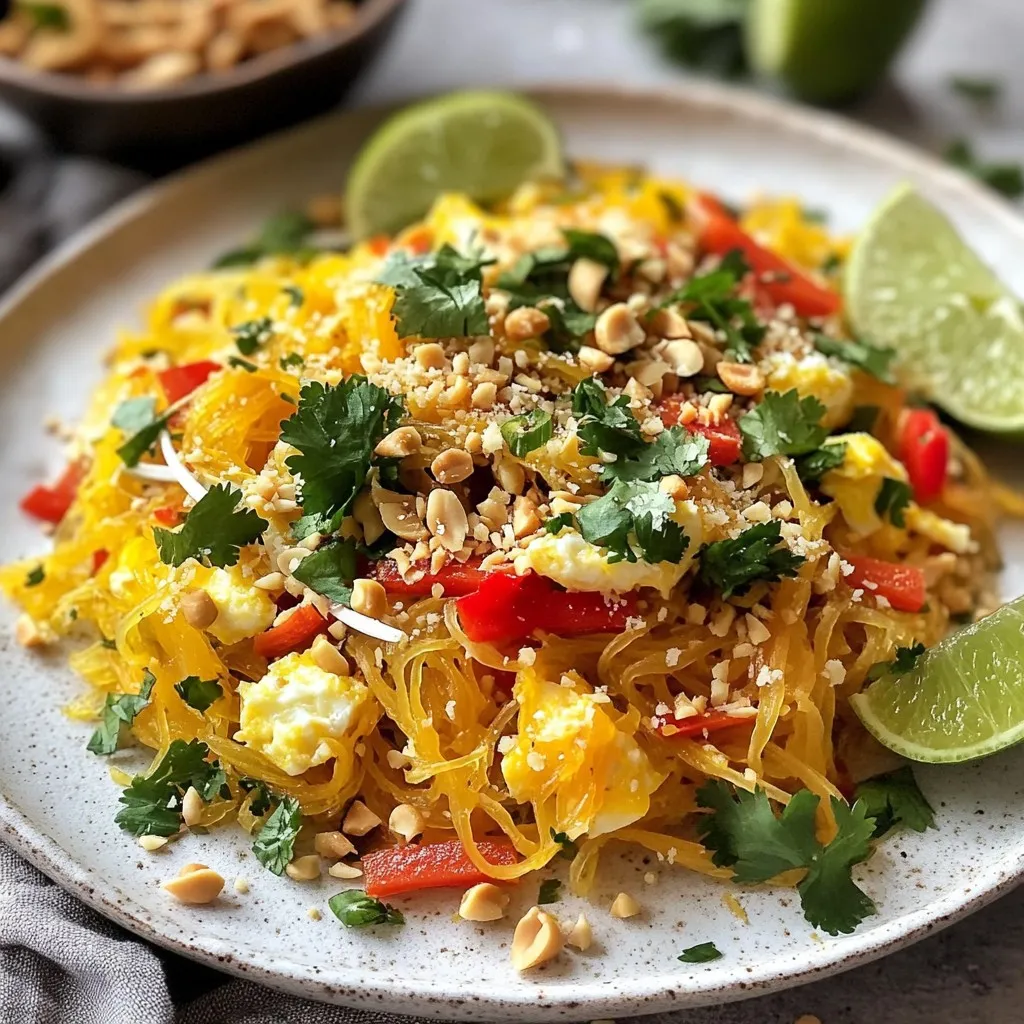
Are you ready to enjoy a delicious twist on a classic dish? My Spaghetti Squash Pad Thai is a fun, healthy alternative that’s packed with flavor. This recipe uses fresh veggies and a blend of tasty sauces to create a meal that satisfies and delights. Plus, it’s easy to make! Dive into my step-by-step guide for a dish that’s perfect for any night of the week. You won’t want to miss this!
Why I Love This Recipe
- Healthy Twist: This Pad Thai uses spaghetti squash instead of traditional noodles, making it lower in carbs and calories while still providing a hearty meal.
- Quick and Easy:
- Flavorful Sauce: The combination of soy sauce, tamarind paste, and brown sugar creates a perfectly balanced sauce that brings all the ingredients together beautifully.
- Customizable: This recipe can easily be adapted with your favorite vegetables or proteins, allowing you to make it your own every time.
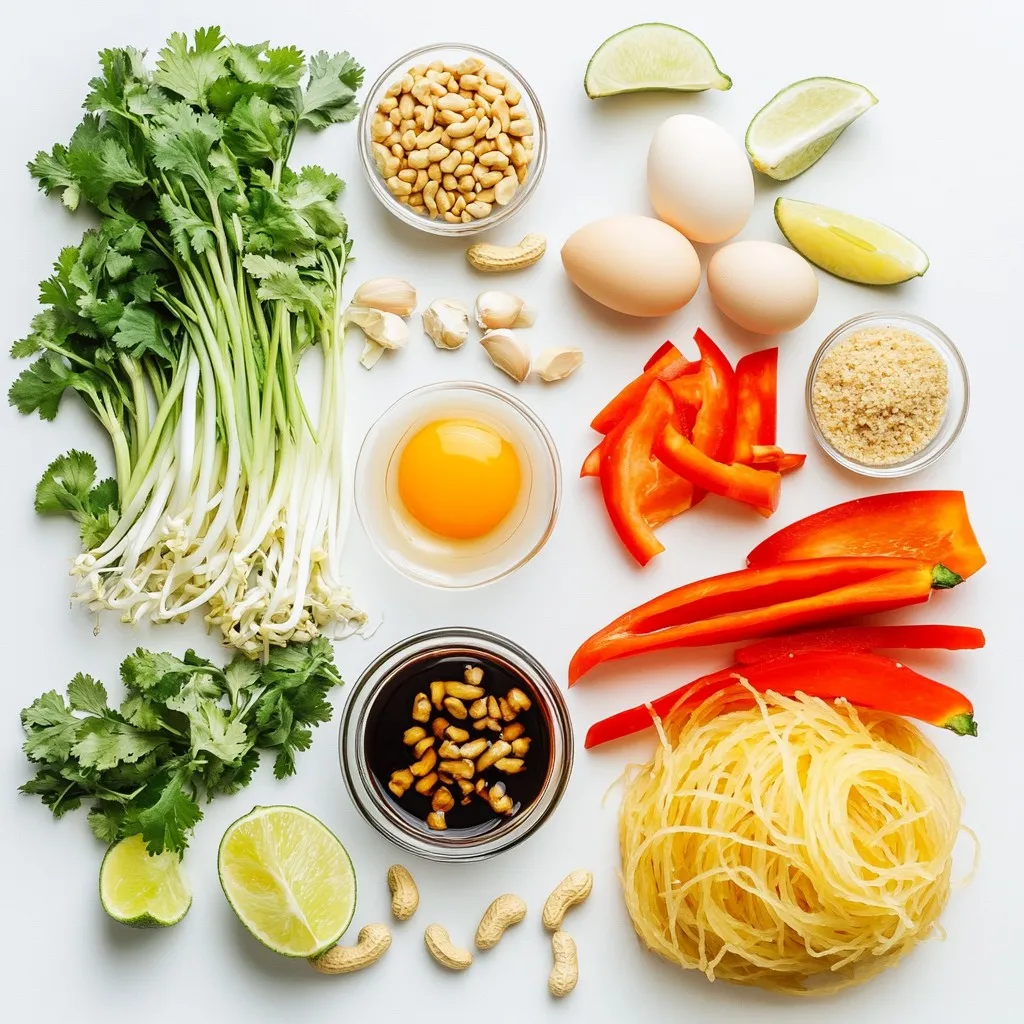
Ingredients
Main Ingredients
– 1 medium spaghetti squash
– 2 tablespoons peanut oil
– 2 cloves garlic, minced
– 1 red bell pepper, thinly sliced
– 1 cup fresh bean sprouts
– 2 green onions, sliced (separating the white and green parts)
– 2 large eggs, lightly beaten
The main ingredients create the base for our dish. The spaghetti squash acts as our noodle substitute. It has a mild taste and absorbs flavors well. Fresh vegetables add crunch and color. Garlic boosts the flavor, while eggs add richness.
Seasonings and Sauces
– 3 tablespoons soy sauce
– 1 tablespoon tamarind paste
– 1 tablespoon brown sugar
– ½ teaspoon red pepper flakes (or to taste)
Seasonings bring everything together. Soy sauce adds saltiness. Tamarind paste gives a tangy flavor. Brown sugar balances the taste. Red pepper flakes add heat, making it exciting. Adjust these to suit your taste.
Garnishes
– Fresh cilantro, for garnish
– Chopped peanuts, for garnish
– Lime wedges, for serving
Garnishes elevate the dish visually and in flavor. Fresh cilantro adds a burst of freshness. Chopped peanuts provide crunch. Lime wedges offer a zesty kick. Squeeze lime over the top before eating for extra zest.
Step-by-Step Instructions
Preparing the Spaghetti Squash
Roasting method
First, preheat your oven to 400°F (200°C). Take your medium spaghetti squash and cut it in half lengthwise. Be careful with the knife! Scoop out the seeds with a spoon. Brush the inside with olive oil and sprinkle some salt and pepper. Place the squash cut-side down on a baking sheet lined with parchment paper. Roast it for 35-40 minutes. The flesh should be tender and easy to scrape.
How to scrape strands
Once the squash cools slightly, grab a fork. Gently pull the flesh to create long spaghetti-like strands. This is the fun part! Set these strands aside while you cook the other ingredients.
Cooking the Vegetables
Heating oil and sautéing garlic
In a large skillet or wok, heat 2 tablespoons of peanut oil over medium-high heat. Add 2 cloves of minced garlic and sauté for about 30 seconds. You want the garlic to be fragrant and just golden.
Adding bell pepper and onions
Next, toss in the thinly sliced red bell pepper and the white parts of the green onions. Stir-fry these for about 3-4 minutes. Keep stirring until the veggies are tender but still a bit crisp.
Mixing and Combining Ingredients
Scrambling eggs
Now, push the cooked vegetables to one side of the skillet. Pour in 2 beaten eggs in the empty space. Scramble them until fully cooked, then mix them with the veggies.
Making and adding the sauce
In a small bowl, whisk together 3 tablespoons of soy sauce, 1 tablespoon of tamarind paste, 1 tablespoon of brown sugar, and ½ teaspoon of red pepper flakes. Pour this sauce over the veggie and egg mix. Stir everything well to coat it evenly.
Incorporating bean sprouts and squash
Turn off the heat and fold in 1 cup of fresh bean sprouts. Gently toss until the sprouts are just wilted. Finally, add the spaghetti squash strands to the skillet. Fold everything together until it’s well mixed and heated through.
Tips & Tricks
Cooking Tips
How to choose the perfect spaghetti squash
When picking a spaghetti squash, look for one that feels heavy. The skin should be firm and free of soft spots. A bright yellow color is best, as it shows ripeness.
Ensuring even cooking
Cut the squash in half lengthwise to help it cook evenly. Scoop out the seeds to allow the heat to penetrate. Roasting it cut-side down on parchment paper helps prevent sticking and promotes even cooking.
Flavor Enhancements
Adjusting spice levels
If you like heat, add more red pepper flakes. Start with half a teaspoon and taste as you mix. You can always add more, but it’s hard to take heat away!
Additional toppings for extra flavor
Consider adding fresh herbs like basil or mint for a fresh twist. Chopped peanuts add crunch, while lime juice brightens the dish. Try sesame seeds for a nutty flavor boost.
Presentation Tips
Garnishing ideas
To make your dish pop, sprinkle fresh cilantro and chopped peanuts on top. A wedge of lime on the side makes it look inviting.
Serving suggestions
Twirl the spaghetti strands into a nest on the plate. Let the colorful veggies peek out from the center. This makes for a beautiful and appetizing presentation.
Pro Tips
- Choose the Right Squash: Opt for a medium-sized spaghetti squash that feels heavy for its size. This ensures a better yield of spaghetti-like strands.
- Customize Your Sauce: Feel free to adjust the soy sauce and tamarind paste according to your taste preferences. A little extra sweetness or acidity can elevate the dish.
- Keep It Crisp: To maintain the crunchiness of the vegetables, avoid overcooking them. They should be tender yet retain a slight bite.
- Garnish for Flavor: Don’t skip the garnishes! Fresh cilantro, chopped peanuts, and lime wedges add essential flavor and texture to your Pad Thai.
Variations
Protein Alternatives
You can change the protein in this dish easily. Adding shrimp or chicken gives a tasty twist.
– Shrimp: Cook shrimp in peanut oil until pink. Toss them in with the veggies.
– Chicken: Use cooked chicken. Shred it and mix it in for extra flavor.
– Vegetarian options: You can skip meat and add tofu. Firm tofu works best. Cube it and sauté until golden.
Vegetable Swaps
Feel free to swap out the veggies based on what you have.
– Different bell peppers: Use yellow or green bell peppers if you like. They add color and taste.
– Incorporating other vegetables: Try adding carrots or snap peas. They add crunch and nutrition.
Gluten-Free Options
Making this dish gluten-free is simple.
– Ensuring gluten-free sauces: Choose gluten-free soy sauce. This keeps the flavor without the gluten.
– Alternative noodles if desired: If you want noodles, try rice noodles. They work well and keep it gluten-free.
Storage Info
Refrigeration
To store leftover Spaghetti Squash Pad Thai, let it cool first. Place it in an airtight container. This keeps out air and moisture. Use glass or plastic containers that seal tightly. I recommend using containers that are microwave-safe for easy reheating.
Freezing
You can freeze Spaghetti Squash Pad Thai for later. Just make sure to cool it down before packing. Place it in freezer-safe bags or containers. Squeeze out excess air to avoid freezer burn. When you’re ready to eat, thaw it overnight in the fridge. To reheat, warm it in a skillet on medium heat. Stir it regularly for even heating.
Shelf Life
In the fridge, Spaghetti Squash Pad Thai lasts about 3 to 5 days. Always check for signs of spoilage. If you see mold or an off smell, it’s best to toss it. Freshness is key!
FAQs
What is the best way to cook spaghetti squash?
The best way to cook spaghetti squash is to roast it. Here’s how:
– Preheat your oven to 400°F (200°C).
– Cut the squash in half lengthwise and remove the seeds.
– Brush the flesh with olive oil and sprinkle with salt and pepper.
– Place it cut-side down on a baking sheet lined with parchment paper.
– Roast for 35-40 minutes, until tender.
This method makes the squash easy to scrape into strands. You can also microwave it for a quicker option, but roasting gives it a fuller flavor.
Can I make Spaghetti Squash Pad Thai in advance?
Yes, you can make Spaghetti Squash Pad Thai in advance. Here are some tips:
– Roast the spaghetti squash and store it in the fridge.
– Cook the sauce and veggies, then keep them separate.
– Mix them together just before serving to keep it fresh.
This way, you can enjoy a quick meal without sacrificing taste. Just reheat everything gently on the stove.
How can I make this recipe vegetarian?
You can easily make this Pad Thai vegetarian with a few swaps:
– Replace the eggs with tofu or chickpeas for protein.
– Use vegetable broth instead of any meat-based sauces.
– Ensure the soy sauce is vegetarian by checking the label.
These simple changes keep all the flavors while making it meat-free.
Is Spaghetti Squash Pad Thai gluten-free?
Yes, Spaghetti Squash Pad Thai can be gluten-free. Consider these points:
– Use gluten-free soy sauce or tamari.
– Avoid any sauces that contain wheat.
– Check all labels for hidden gluten.
These modifications let you enjoy a tasty dish without gluten.
Spaghetti Squash Pad Thai is easy and fun to make. You learn about the best ingredients, from fresh veggies to eggs. I shared tips for cooking squash and mixing flavors. You can switch up proteins and veggies to fit your taste.
Remember to store leftovers right to enjoy them later. With the right methods, this dish is both tasty and healthy. This recipe supports many diets and is full of flavor. Enjoy cooking your unique version of this dis

Spaghetti Squash Pad Thai
Ingredients
- 1 medium spaghetti squash
- 2 tablespoons peanut oil
- 2 cloves garlic, minced
- 1 red bell pepper thinly sliced
- 1 cup fresh bean sprouts
- 2 green onions sliced (separating the white and green parts)
- 2 large eggs, lightly beaten
- 3 tablespoons soy sauce
- 1 tablespoon tamarind paste
- 1 tablespoon brown sugar
- 0.5 teaspoon red pepper flakes (or to taste)
- 1 bunch fresh cilantro, for garnish
- 0.5 cup chopped peanuts, for garnish
- 1 lime wedges, for serving
Instructions
- Prepare the Spaghetti Squash: Preheat your oven to 400°F (200°C). Carefully cut the spaghetti squash in half lengthwise and scoop out the seeds. Brush the flesh with olive oil and season with salt and pepper. Place the squash cut-side down on a baking sheet lined with parchment paper. Roast in the oven for 35-40 minutes, or until the flesh is tender enough to be scraped into strands with a fork.
- Cook the Vegetables: While the squash roasts, heat the peanut oil in a large skillet or wok over medium-high heat. Add the minced garlic and sauté for about 30 seconds, or until fragrant and golden.
- Add Bell Pepper and Onions: Toss in the sliced red bell pepper and the white parts of the green onions to the skillet. Stir-fry for about 3-4 minutes, stirring occasionally, until the vegetables are tender yet still crisp.
- Scramble the Eggs: Push the sautéed vegetables to one side of the skillet. Pour the beaten eggs into the cleared space and scramble until fully cooked. Once done, mix the scrambled eggs with the vegetables.
- Make the Sauce: In a small bowl, whisk together the soy sauce, tamarind paste, brown sugar, and red pepper flakes. Pour this flavorful sauce over the mixture in the skillet, stirring thoroughly to evenly coat everything.
- Add Bean Sprouts: Turn off the heat and add the fresh bean sprouts to the skillet. Gently toss everything together until the sprouts are just wilted from the residual heat.
- Combine with Spaghetti Squash: When the spaghetti squash is ready, use a fork to scrape its flesh into spaghetti-like strands. Add these strands to the skillet, gently folding and tossing to mix everything together until well combined and heated through.
- Serve and Garnish: Serve the Spaghetti Squash Pad Thai immediately while hot. Garnish with fresh cilantro and chopped peanuts, alongside lime wedges for an added burst of flavor.

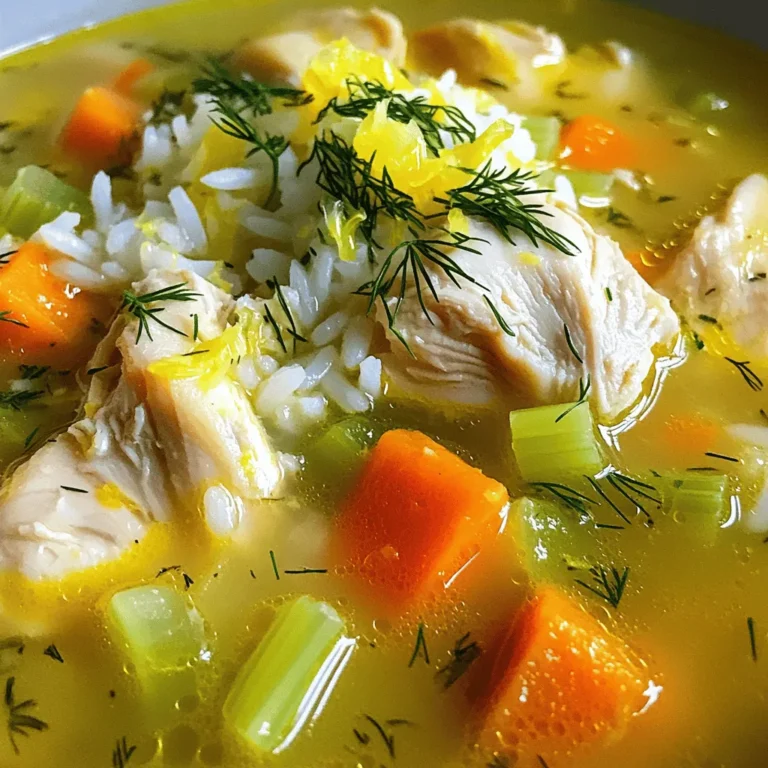
![To make this simple and tasty chicken and rice soup, gather these ingredients: - 2 boneless, skinless chicken breasts - 1 cup jasmine rice, thoroughly rinsed - 6 cups chicken broth (preferably low-sodium) - 2 carrots, peeled and diced - 2 stalks celery, chopped - 1 small onion, finely diced - 3 garlic cloves, minced - 1 teaspoon dried thyme - 1 bay leaf - 1 tablespoon extra virgin olive oil - Salt and freshly ground pepper, to taste - 1 cup frozen peas - Juice from 1 fresh lemon - Fresh parsley, roughly chopped (for garnish) Each serving of this chicken and rice soup is packed with nutrition. Here’s a quick look at what you get: - Calories: 300 - Protein: 25g - Carbohydrates: 40g - Fat: 6g - Fiber: 2g This soup is low in fat and rich in protein and carbs, making it a cozy choice for any meal. If you need to swap out some items, here are some ideas: - Chicken: Use shredded rotisserie chicken for a quick option. - Rice: Substitute with brown rice or quinoa for a different texture. - Broth: Vegetable broth works well for a lighter flavor. - Vegetables: Add bell peppers, corn, or spinach for extra nutrition. - Herbs: Fresh herbs like rosemary or dill can replace thyme for a new taste. These substitutions help you make this soup work for your pantry or dietary needs. Enjoy creating your version! Start by gathering your ingredients. You need chicken breasts, jasmine rice, broth, carrots, celery, onion, garlic, thyme, a bay leaf, olive oil, and peas. 1. Heat the olive oil: In a large pot, place the olive oil over medium heat. Wait until it shimmers. 2. Add the vegetables: Toss in the diced onion, carrots, and celery. Sauté these for about 5 minutes. You want them to soften and the onion to look clear. 3. Incorporate garlic: Stir in the minced garlic. Cook this for one minute. The smell should fill your kitchen. 1. Add chicken and broth: Place the chicken breasts into the pot. Pour in the chicken broth. Add thyme, bay leaf, salt, and pepper. 2. Bring to a boil: Turn up the heat until the mixture boils. Then, lower the heat to a gentle simmer. 3. Cook the chicken: Cover the pot and let it simmer for 15-20 minutes. Make sure the chicken cooks fully (165°F or 75°C inside). 1. Shred the chicken: Once cooked, remove the chicken and let it cool. Use two forks to shred it into smaller pieces. 2. Add rice: Stir in the rinsed jasmine rice into the pot. Cover it again and let it simmer for about 15 minutes. The rice should be tender. 3. Finish the soup: Return the shredded chicken to the pot. Add the frozen peas and lemon juice. Taste and adjust salt and pepper if needed. 4. Serve: Remember to take out the bay leaf. Serve hot in bowls. Top with fresh parsley for a nice touch. For the complete recipe, visit [Full Recipe]. To make your chicken and rice soup shine, focus on fresh ingredients. Start with quality chicken broth. Low-sodium broth gives you control over salt levels. Add fresh herbs like thyme and parsley for a bright taste. A splash of lemon juice at the end brightens the flavor too. You can also toss in some fresh garlic for depth. One big mistake is overcooking the chicken. Remove it from the pot once it reaches 165°F. Letting it simmer too long can make it dry. Another common error is not rinsing the rice. Rinsing removes excess starch, which helps keep the soup clear. Avoid adding too much water or broth. You want a nice balance of soup and rice. For a creamy texture, add a splash of heavy cream or coconut milk. Stir it in after you add the chicken back to the pot. You can also blend a portion of the soup. Use an immersion blender to create a creamy base while keeping some chunks intact. This mix gives you both texture and creaminess in every spoonful. Follow the [Full Recipe] for a step-by-step guide to making this comforting dish. {{image_4}} You can easily add veggies to your chicken and rice soup. Chopped carrots, celery, and peas work well. You can also try adding spinach, kale, or zucchini for more color and nutrition. These vegetables add flavor and make your soup more filling. Just toss them in during the last few minutes of cooking. This way, they will stay bright and fresh. If you like a kick, make a spicy version. Add diced jalapeños or red pepper flakes for heat. A splash of hot sauce or a spoonful of sriracha can also spice things up. Just keep in mind to adjust the salt. You want a balance of flavors. This spicy twist can warm you up on a cold day! Using a slow cooker makes this recipe even easier. Simply add all your ingredients into the slow cooker. Set it on low for 6-8 hours or high for 3-4 hours. This method allows all the flavors to blend beautifully. Plus, you can come home to a warm, tasty meal. Check out the Full Recipe for detailed steps and measurements. After you finish your chicken and rice soup, let it cool down. This helps keep the soup fresh. Transfer it to an airtight container. It will stay good in the fridge for 3 to 4 days. Make sure to label the container with the date. This way, you’ll know when to eat it. If you want to save some soup for later, freezing works great. First, let the soup cool completely. Then, pour it into freezer-safe bags or containers. Leave some space at the top for expansion. You can freeze it for up to 3 months. When you’re ready to eat, just thaw it overnight in the fridge. To reheat your soup, pour it into a pot. Heat it on medium-low heat. Stir it often to ensure it warms evenly. If the soup seems too thick, add a splash of broth or water. You can also microwave it in a safe bowl. Heat it in short intervals, stirring in between. This ensures every bite is warm and tasty. Enjoy your cozy meal! For the full recipe, check out the Cozy Chicken & Rice Delight section. Yes, you can use brown rice. Brown rice adds a nutty flavor and is more nutritious. However, it takes longer to cook. You should adjust the cooking time. Add brown rice early when you add the broth, and let it simmer for 40-45 minutes. This way, the rice becomes tender and blends well with the soup. To make the soup gluten-free, you need to check a few things. First, use a gluten-free chicken broth. Many brands offer gluten-free options. Also, make sure your rice is certified gluten-free. Jasmine rice is usually safe, but always check the label. By following these steps, your soup will be gluten-free and just as tasty. You can serve many tasty sides with your soup. Here are some great options: - A fresh green salad - Crusty bread or rolls - Garlic breadsticks - Steamed vegetables These sides will make your meal complete and satisfying. For more ideas, feel free to check the Full Recipe and explore different serving suggestions. We reviewed the key steps to make Chicken and Rice Soup, from choosing the right ingredients to cooking methods. You learned helpful tips to enhance flavor and avoid common mistakes. Variations and storage details ensure this dish suits your taste and convenience. Trust these insights to create a tasty soup every time. Enjoy warm bowls of nourishment that you made with care. Happy cooking!](https://goldendishy.com/wp-content/uploads/2025/06/7617fd4a-61d9-414c-8819-76abcb6635e5-768x768.webp)
. It includes detailed steps and all the ingredients needed for this dish. Enjoy your cooking! We explored the best ingredients for Garlic Herb Roasted Potatoes and detailed how to prepare them. I shared step-by-step instructions and helpful tips for perfect roasting. We also discussed variations to keep your dishes exciting and how to store leftovers effectively. Remember, the right techniques can make your roasted potatoes shine. With practice, you can impress friends and family with your cooking. Enjoy your culinary adventure!](https://goldendishy.com/wp-content/uploads/2025/06/ecc3322d-c379-4f60-a513-14af97ee26fb-768x768.webp)