
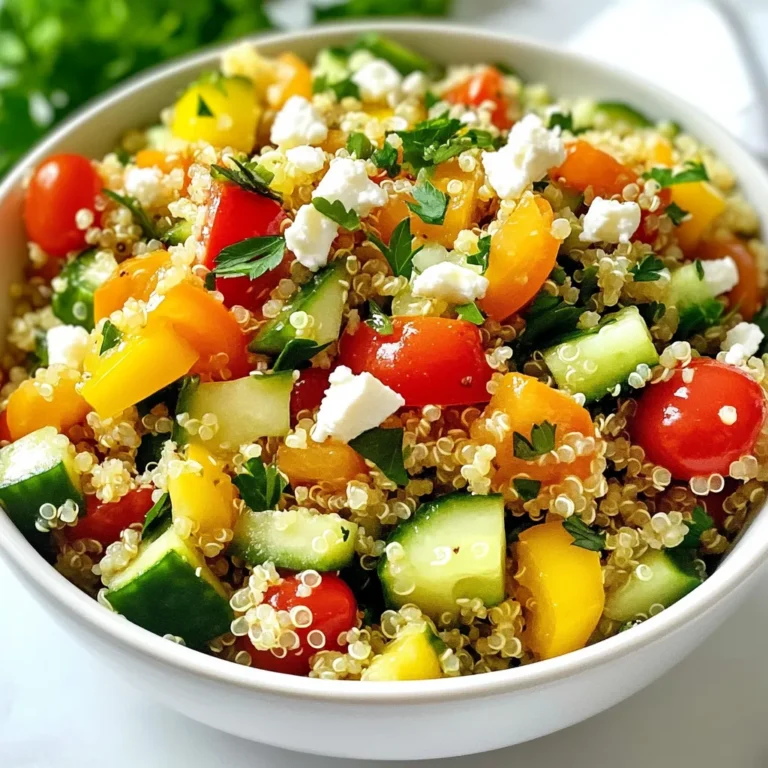
Southwest Chicken Quinoa Skillet Flavorful Power Meal
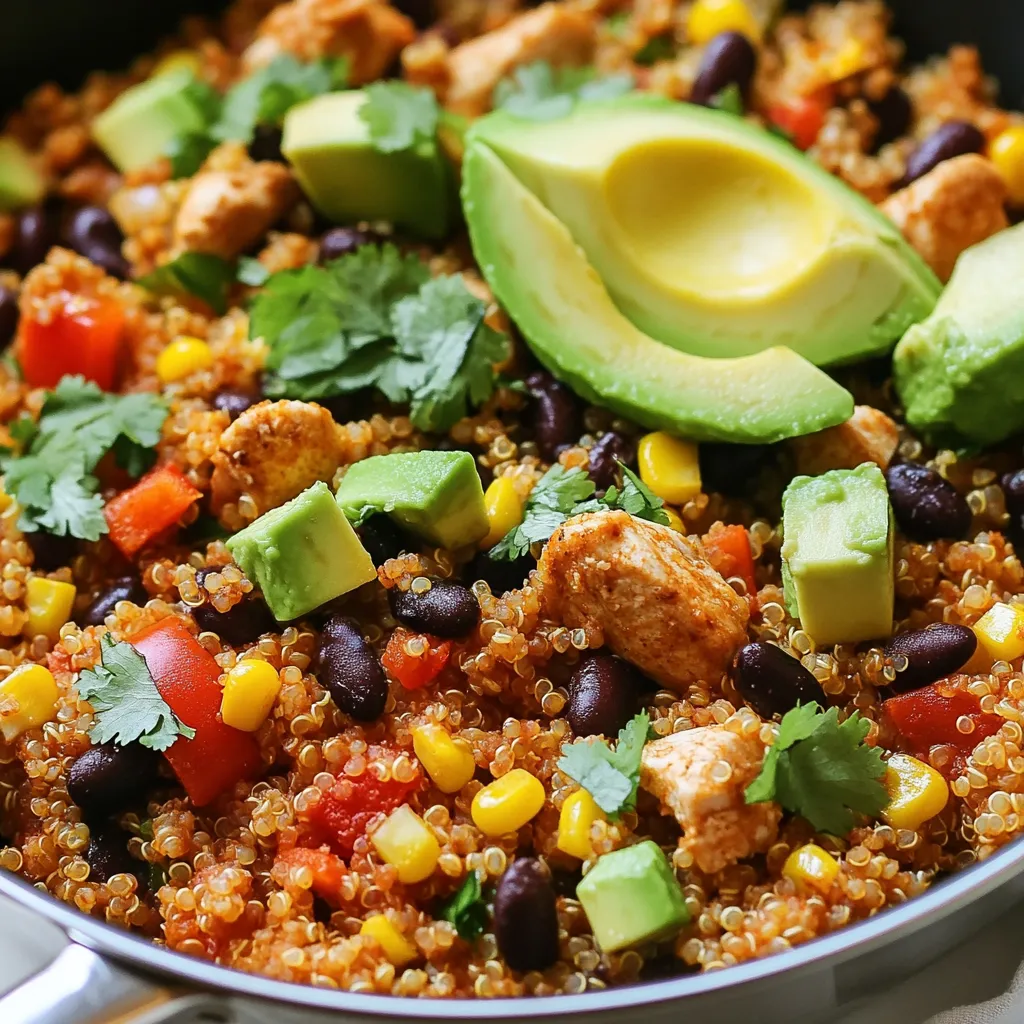

Looking for a quick and tasty dinner that packs a punch? The Southwest Chicken Quinoa Skillet is your answer! This dish combines protein-rich chicken and quinoa with vibrant veggies and bold spices. It’s simple to make, full of flavor, and perfect for busy weeknights. Ready to dive into a healthy meal that satisfies? Let’s get cooking and take your taste buds on a southwest adventure!
Why I Love This Recipe
- Healthy and Nutritious: This dish combines lean protein from chicken, fiber from quinoa and black beans, and vitamins from colorful vegetables, making it a balanced meal.
- One-Pan Wonder: With everything cooked in a single skillet, cleanup is a breeze, allowing you to enjoy your meal without the hassle of multiple pots and pans.
- Flavor Explosion: The combination of spices and fresh ingredients creates a vibrant, flavorful dish that tantalizes the taste buds.
- Customizable: This recipe is versatile; you can easily swap out ingredients based on your preferences or what you have on hand, making it adaptable for everyone!
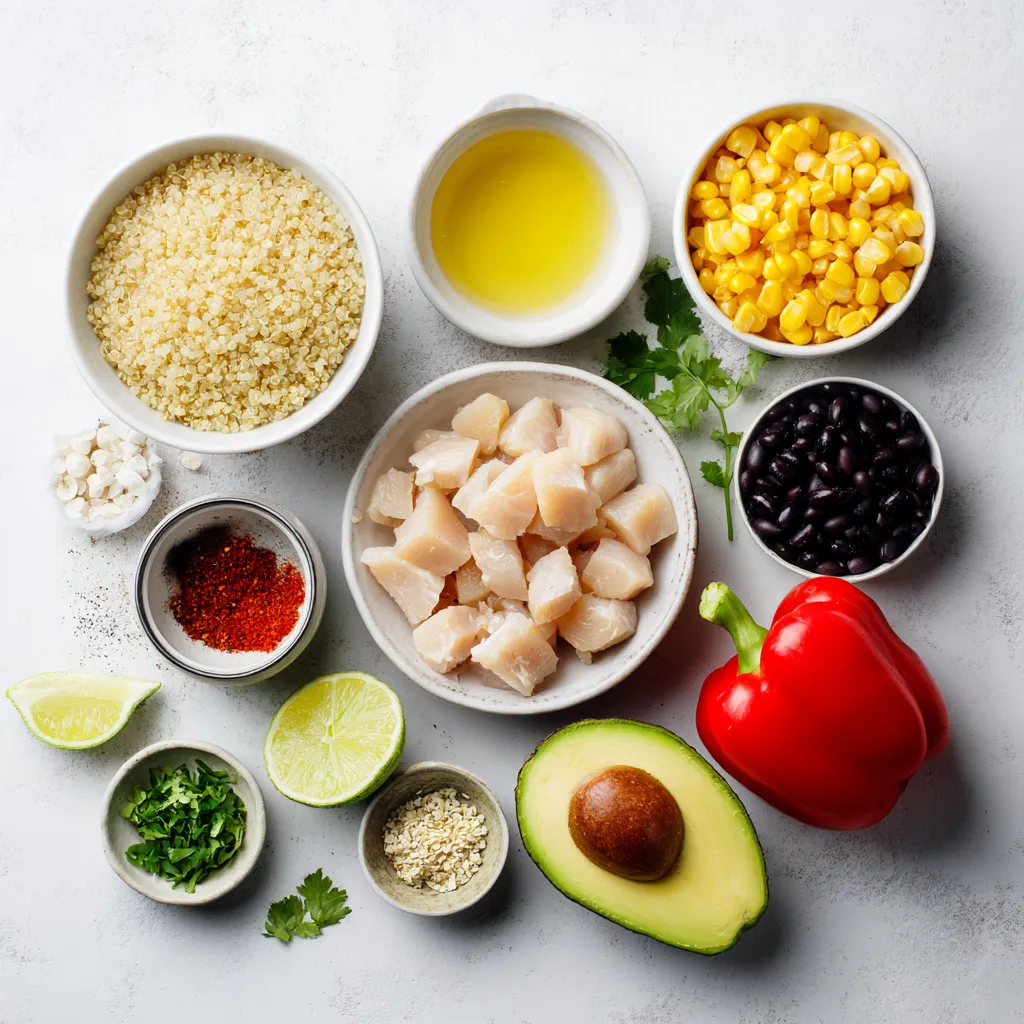
Ingredients
To make the Southwest Chicken Quinoa Skillet, you need a few key ingredients. Each one adds flavor and nutrition. Here’s what you’ll need:
– 1 cup quinoa, rinsed
– 2 cups chicken broth
– 1 pound boneless, skinless chicken breast, diced
– 1 tablespoon olive oil
– 1 red bell pepper, chopped
– 1 cup corn (fresh or frozen)
– 1 can (15 oz) black beans, rinsed and drained
– Spices and seasonings: ground cumin, smoked paprika, chili powder, cayenne pepper
– Salt and black pepper to taste
– 1 ripe avocado, sliced
– Fresh cilantro and lime juice for garnishing
Each ingredient plays a part in this dish. Quinoa acts as a base and provides protein. Chicken adds flavor and heartiness. The bell pepper and corn give bright colors and crunch. Black beans boost fiber and texture.
The spices bring warmth and depth. You can play with the spice levels to suit your taste. The avocado and cilantro add freshness, making each bite delightful.
With these simple ingredients, you can create a meal that is not only tasty but also healthy. Plus, it is quick to prepare, perfect for any day of the week.
Step-by-Step Instructions
Cooking the Quinoa
Start by rinsing the quinoa under cold water. This helps remove any bitter taste. Next, combine the rinsed quinoa and chicken broth in a medium saucepan. Turn the heat to medium-high and bring it to a boil. Once boiling, reduce the heat to low and cover the pan. Let it simmer for about 15 minutes. You know it’s done when the quinoa is tender and all the liquid has been absorbed. Fluff the quinoa gently with a fork and set it aside.
Sautéing the Chicken
In a large skillet, heat one tablespoon of olive oil over medium heat. Carefully add the diced chicken breast pieces to the skillet. Season the chicken with salt, black pepper, ground cumin, smoked paprika, chili powder, and cayenne pepper if you like a bit of heat. Cook the chicken for about 7 to 10 minutes. Stir occasionally until the chicken is browned and fully cooked.
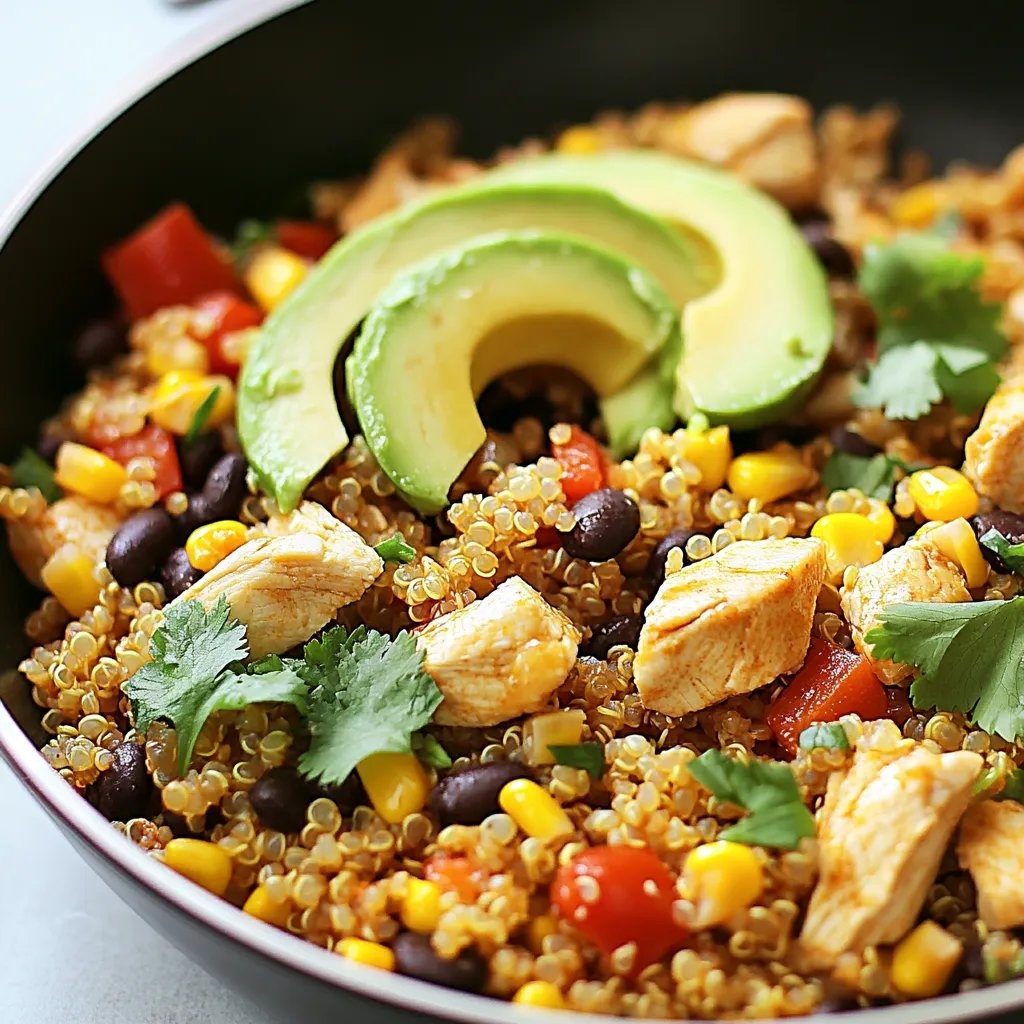
Adding Vegetables and Combining Ingredients
Now, add the chopped red bell pepper and corn to the skillet. Sauté these for 3 to 4 minutes until the bell pepper softens. Then, mix in the cooked quinoa and black beans. Stir everything gently to combine well. Cook for another 2 to 3 minutes. This step allows all the flavors to meld together beautifully. Remove the skillet from the heat and drizzle fresh lime juice on top. Toss in some chopped cilantro for a fresh burst. Serve hot, adding slices of avocado for creaminess. Enjoy your delicious Southwest Chicken Quinoa Skillet!
Tips & Tricks
Cooking Tips
– How to achieve perfectly cooked quinoa: Rinse the quinoa well before cooking. This removes the bitter coating. Use two cups of chicken broth for one cup of quinoa. Bring it to a boil, then lower the heat. Cover and let it simmer for about 15 minutes. When done, fluff it gently with a fork.
– Best practices for sautéing chicken: Cut the chicken into small, bite-sized pieces. This helps it cook evenly. Heat olive oil in a large skillet. Add the chicken and season with salt, black pepper, and spices. Cook for 7-10 minutes, stirring often. This way, the chicken gets nice and brown while staying juicy.
Serving Suggestions
– Ideal side dishes or toppings: This dish stands out on its own. But you can serve it with a fresh salad or tortilla chips for crunch. You can also add a dollop of Greek yogurt or sour cream for creaminess.
– Garnishing for enhanced visual appeal: Top each serving with avocado slices and chopped cilantro. This adds color and freshness. A squeeze of lime juice brightens the flavors too.
Flavor Enhancements
– Additional spices or ingredients for a kick: If you like heat, add more cayenne or chili powder. You can also try adding jalapeños or hot sauce for extra spice.
– Recommendations for heat adjustments: Adjust the cayenne pepper to suit your taste. For a milder dish, leave it out entirely. Always taste as you go!
Pro Tips
- Perfectly Cooked Quinoa: Rinse the quinoa thoroughly before cooking to remove any bitterness. This step enhances the flavor and gives a fluffier texture.
- Chicken Browning: Allow the chicken to sear properly in the skillet before stirring. This creates a delicious crust and locks in moisture, making your chicken more flavorful.
- Vegetable Freshness: Add the bell pepper and corn towards the end of the cooking process to maintain their vibrant colors and crisp texture, enhancing the dish’s overall appeal.
- Avocado Serving: For easier slicing, use a sharp knife and cut the avocado in half, removing the pit. Slice while still in the skin and scoop out with a spoon for perfectly shaped pieces.
Variations
Ingredient Substitutions
You can switch chicken for turkey if you like. Turkey has a similar taste and texture. If you want a plant-based option, try tofu. Just press it to remove extra water before cooking. For black beans, you can use pinto beans or kidney beans. They offer a different flavor but still work well in this dish.
Alternative Cooking Methods
If you prefer baking, you can make this meal in the oven. After cooking the chicken, mix all ingredients in a baking dish. Cover it and bake at 350°F for 25 minutes. For an Instant Pot version, add all ingredients to the pot. Cook on high pressure for 10 minutes. Let it release naturally for 5 minutes before serving.
Dietary Variations
This dish is easy to make gluten-free. Just ensure the chicken broth is gluten-free. For a vegetarian or vegan meal, skip the chicken and add more beans or veggies. You can also add mushrooms for a meaty texture. This way, everyone can enjoy a flavorful power meal.
Storage Info
How to Store Leftovers
Store your Southwest Chicken Quinoa Skillet in airtight containers. Glass containers work best. They keep food fresh and let you see what’s inside. You can keep it in the fridge for up to three days. If you want to store it longer, put it in the freezer. It can last for up to three months in the freezer.
Reheating Instructions
To reheat, you have two main options: the microwave or the stovetop. For the microwave, put your portion in a bowl. Heat on high for about two minutes. Stir halfway through to make sure it heats evenly. For stovetop, add your skillet back to medium heat. Stir while cooking for about five minutes. This helps keep the texture nice and fresh.
Meal Prep Ideas
You can prep the ingredients ahead of time. Rinse the quinoa and chop the bell pepper and chicken. Store them in separate containers in the fridge. This way, you can quickly assemble your meal on busy nights. Just cook the quinoa and chicken, add the veggies, and you’re ready to eat!
FAQs
How do I know when the quinoa is done cooking?
You will know quinoa is done when it is soft and fluffy. The grains will look like tiny spirals. All the liquid should be absorbed. It usually takes about 15 minutes to cook quinoa. After cooking, fluff it gently with a fork. This helps separate the grains and makes it light.
Can I use other beans instead of black beans?
Yes, you can use other beans. Some great options are pinto beans or kidney beans. Chickpeas also work well if you want a different texture. Just rinse and drain them like you do with black beans. Choose the beans you like best for a tasty twist.
What can I serve alongside the Southwest Chicken Quinoa Skillet?
This dish pairs well with a simple green salad. You can also serve it with tortilla chips for crunch. For a bit of spice, add salsa or hot sauce on the side. If you want something creamy, guacamole is a great choice. These sides enhance the meal and add fun flavor.
By using fresh ingredients and following these steps, you can make a flavorful Southwest Chicken Quinoa Skillet. Cook the quinoa, sauté the chicken, and mix in colorful veggies for a delicious meal. Remember, you can customize this dish with different proteins or spices. Store leftovers easily and reheat for a quick lunch or dinner. Enjoy experimenting with variations and serving suggestions. This dish is not just tasty; it’s also healthy and satisfying. Happy cookin
Southwest Chicken Quinoa Skillet
Ingredients
- 1 cup quinoa, rinsed
- 2 cups chicken broth
- 1 pound boneless, skinless chicken breast, diced
- 1 tablespoon olive oil
- 1 medium red bell pepper, chopped
- 1 cup corn (fresh or frozen)
- 1 can (15 oz) black beans, rinsed and drained
- 1 teaspoon ground cumin
- 1 teaspoon smoked paprika
- 1 teaspoon chili powder
- 0.25 teaspoon cayenne pepper (optional)
- 1 to taste salt
- 1 to taste black pepper
- 1 ripe avocado, sliced (for serving)
- 1 bunch fresh cilantro, roughly chopped (for garnish)
- 1 juice of fresh lime
Instructions
- In a medium saucepan, combine the rinsed quinoa and chicken broth. Bring to a vigorous boil over medium-high heat, then reduce the heat to low. Cover the saucepan and let it simmer for about 15 minutes, or until the quinoa is tender and all the liquid has been absorbed. Once cooked, fluff the quinoa gently with a fork and set it aside.
- In a large skillet, heat the olive oil over medium heat. Carefully add the diced chicken pieces, seasoning them with a generous pinch of salt, black pepper, ground cumin, smoked paprika, chili powder, and cayenne pepper (if using). Cook the chicken for about 7-10 minutes, stirring occasionally, until it is browned on the outside and fully cooked through.
- Incorporate the chopped red bell pepper and corn into the skillet. Continue to sauté for an additional 3-4 minutes until the bell pepper has softened.
- Add the cooked quinoa and black beans to the skillet, gently stirring to combine all ingredients. Cook for another 2-3 minutes, allowing everything to heat through and the flavors to meld.
- Remove the skillet from the heat and drizzle with fresh lime juice. Toss in a sprinkle of chopped cilantro for a burst of freshness.
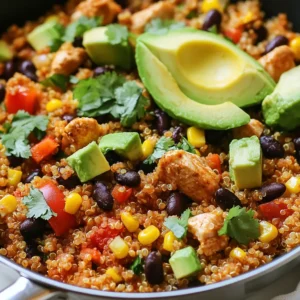
- Serve the dish hot, topping each portion with luscious slices of avocado and a sprinkle of extra cilantro if desired for added color and flavor.


![- 2 large eggplants - 1 cup ricotta cheese - 1 cup grated mozzarella cheese, plus extra for topping - 1/2 cup grated Parmesan cheese - 1 large egg - 2 cups marinara sauce - 1 teaspoon dried oregano - 1 teaspoon garlic powder - Salt and pepper - Fresh basil leaves - 2 tablespoons olive oil For this dish, you need two large eggplants. Slice them lengthwise into 1/4-inch thick pieces. This thickness helps them cook well and roll easily. For the cheese filling, combine 1 cup of ricotta, 1 cup of grated mozzarella, and 1/2 cup of grated Parmesan. Add one large egg to bind the filling. The egg helps to keep the filling together when you roll it. When selecting eggplants, look for ones that feel heavy for their size. They should have smooth, shiny skin. Avoid any with blemishes or wrinkles. Fresh cheese gives the best taste, so choose high-quality ricotta and mozzarella. Use 2 cups of marinara sauce for a rich flavor. You can use store-bought or homemade. It adds moisture and taste to the dish. Dried oregano and garlic powder enhance the flavor; adjust them to suit your taste. This recipe serves four, making it perfect for a family dinner or a small gathering. Enjoy the process and feel free to add your unique twist! For the full recipe, check out the detailed instructions. To start, slice the eggplants. Cut them lengthwise into 1/4-inch thick slices. This helps them cook evenly. Next, arrange the slices on a baking sheet in a single layer. Brush both sides with olive oil. Sprinkle salt and pepper on top. Bake them in a preheated oven at 375°F (190°C) for about 20 minutes. Remember to flip the slices halfway through. They should be tender and lightly caramelized. While the eggplant bakes, prepare the cheese filling. In a large bowl, mix together the ricotta cheese, grated mozzarella, and grated Parmesan. Add the egg, dried oregano, garlic powder, and a pinch of salt and pepper. Stir until the mixture is smooth and creamy. This blend gives a rich flavor and a great texture. Once your eggplant slices cool, it’s time to roll them. Spread a thin layer of marinara sauce at the bottom of a 9x13-inch baking dish. Take one eggplant slice and place about 2 tablespoons of the cheese filling at one end. Carefully roll it up tightly and place it seam-side down in the dish. Repeat this for all the slices. After placing all the rollatini in the dish, pour the remaining marinara sauce on top. Finish with extra grated mozzarella cheese for a gooey finish. Cover with foil and bake for 25 minutes. Then, remove the foil and bake for an additional 10 minutes until the cheese is bubbly and golden. For more details, check the Full Recipe. To keep your eggplant from becoming soggy, salt it first. Here’s how: - Slice the eggplants and lay them flat. - Sprinkle salt on both sides of the slices. - Let them sit for about 30 minutes. - Rinse off the salt and pat them dry. This draws out excess moisture, making them firmer when cooked. For flavor enhancement, try adding herbs. Fresh basil and oregano pair well. You can also mix in some red pepper flakes for a hint of spice. Another tip is to use high-quality olive oil. It adds depth to the dish and a rich taste. When serving, you have options. Serve the rollatini straight from the baking dish for a rustic feel. For a fancier touch, place them on individual plates. Drizzle some extra marinara sauce around the plate for color. Garnishing makes a big difference. Add fresh basil leaves on top for a pop of green. Consider a sprinkle of extra grated cheese as well. It makes the dish look appealing and inviting. This recipe not only tastes great but also looks beautiful. Enjoy making your Eggplant Rollatini with these simple tips! For the full recipe, check out the instructions above. {{image_4}} You can swap out cheeses in this dish. If you want a lighter option, try cottage cheese instead of ricotta. For a plant-based twist, use cashew cheese or tofu. Both choices work well in the filling. You can also add more veggies to your rollatini. Spinach, zucchini, or mushrooms can mix nicely with the cheese. This not only adds flavor but also boosts nutrition. Feel free to get creative with your fillings! Making this dish gluten-free is easy. Just ensure your marinara sauce is gluten-free. Most are, but check the label to be sure. You can also use gluten-free breadcrumbs if you want a crunch on top. For a vegetarian option, stick with the original recipe. If you want a vegan version, replace the egg and cheese. You can use a flax egg and a vegan cheese blend instead. Both will give you that creamy texture without dairy! [Full Recipe] has all you need to create this delightful dish. To keep your eggplant rollatini fresh, store leftovers in an airtight container. Refrigerate them if you plan to eat them in a few days. They will stay good for about 3 to 5 days in the fridge. If you want to keep them longer, freezing is a great option. Wrap each rollatini in foil or plastic wrap and place them in a freezer-safe bag. They can last up to 3 months in the freezer. When you’re ready to enjoy your leftovers, reheat them gently. The best way is to use the oven. Preheat it to 350°F (175°C). Place the rollatini in a baking dish, cover with foil, and heat for about 20 minutes. This helps keep the cheese soft and the eggplant moist. Avoid reheating in the microwave if you can. It can dry out the rollatini. If you must use the microwave, cover them with a damp paper towel. This adds moisture and helps prevent dryness. Enjoy your meal just as tasty as the first time! What can I use instead of ricotta cheese? You can use cottage cheese or vegan cream cheese. Both give a creamy texture. For a dairy-free option, try tofu blended with a bit of lemon juice. This will mimic the flavor and texture of ricotta. How do I know when eggplant is cooked properly? Eggplant is done when it feels soft and tender. Use a fork to check; it should pierce easily. The edges may brown slightly, which adds flavor. Keep an eye on it to avoid overcooking. Can this recipe be made low-carb? Yes! You can swap eggplant for zucchini or use a low-carb cheese mix. Using fewer eggplant slices per roll can also help keep the carbs low. Adjust the sauce to fit your diet. What is the nutritional value of Eggplant Rollatini? Eggplant Rollatini is low in calories and rich in fiber. It provides protein from cheese and essential vitamins from eggplant. Each serving typically has around 250 calories, depending on ingredients used. What to serve with Eggplant Rollatini? Pair it with a fresh salad or garlic bread for a full meal. A side of steamed veggies also complements the dish well. You can drizzle extra marinara sauce on the plate for added flavor. Can it be made ahead of time? Absolutely! You can prepare the rollatini and store them in the fridge. Just cover it well. When you’re ready to eat, bake it straight from the fridge, adding a few extra minutes to the cooking time. For the full recipe, check the section above. In this post, we explored how to make a delicious eggplant rollatini. We covered key ingredients, helpful preparation tips, and specific cooking techniques. You learned how to assemble and present your dish beautifully. We also discussed alternatives to fit different diets and storage methods for leftovers. Eggplant rollatini is both tasty and flexible. With these steps, you can customize it to your taste. Enjoy making this dish for friends or family!](https://goldendishy.com/wp-content/uploads/2025/07/27d7144c-a390-4303-99e3-b84864a0b33f-768x768.webp)
![To make your Fajita Veggie Sheet Pan, gather these simple and fresh ingredients: - Bell peppers (red, yellow, or green) - Zucchini - Red onion - Cherry tomatoes - Black beans - Olive oil - Spices and seasonings (chili powder, cumin, garlic powder, salt, pepper) - Fresh cilantro for garnish - Lime wedges for serving - Tortillas (corn or flour) These ingredients create a colorful and tasty dish. Using fresh veggies adds great flavor and texture. The spices make everything pop! You can adjust the veggies based on what you have or prefer. For example, you might try adding corn or mushrooms. Each change can lead to a new twist on this tasty recipe. This Fajita Veggie Sheet Pan really shows how simple ingredients can shine together. When you gather these items, you set the stage for a fun cooking adventure. Check out the Full Recipe for complete details on how to bring this delicious dish to life. 1. First, preheat your oven to 425°F (220°C). This helps the veggies cook just right. 2. Next, line a large sheet pan with parchment paper. This makes cleanup easy. 3. In a big mixing bowl, combine the sliced bell pepper, zucchini rounds, red onion wedges, halved cherry tomatoes, and rinsed black beans. 4. Drizzle 3 tablespoons of olive oil over the mixture. It helps the flavors blend. 5. Now, add 2 teaspoons of chili powder, 1 teaspoon of ground cumin, and 1 teaspoon of garlic powder. Don't forget a pinch of salt and black pepper. 6. Toss everything gently until each piece is well-coated with oil and spices. 1. Spread the veggie and bean mixture evenly on the prepared sheet pan. Make sure they are not crowded. 2. Place the pan in the preheated oven and roast for 20-25 minutes. Stir halfway through for even cooking. 3. The veggies should be tender and have slightly caramelized edges when done. 1. To warm the tortillas, you can use a skillet or microwave. Just a minute or two will do. 2. Fill each warm tortilla with the roasted fajita veggies. 3. Top with fresh cilantro and a drizzle of lime juice for extra flavor. 4. Serve the filled tortillas on a platter, garnished with lime wedges and extra cilantro for a beautiful display. For the complete recipe, check out the [Full Recipe]. To get the best from your fajita veggies, even cooking is key. Spread the veggies in a single layer on the sheet pan. This helps them roast well. Stir them halfway through cooking. This way, they brown nicely on all sides. Each oven runs a bit differently. You may need to adjust the cooking time. Keep an eye on the veggies. They should be tender and slightly charred. Want to kick up the flavor? Add more spices! A pinch of smoked paprika or cayenne pepper can work wonders. Fresh herbs like oregano or thyme also add depth. Don’t forget lime juice! A squeeze right before serving makes the dish pop. It gives a fresh, zesty flavor that brightens everything up. When serving, arrange the filled tortillas on a pretty platter. It makes the meal more inviting. Garnish with lime wedges and extra cilantro for color. You can also sprinkle some crumbled cheese on top. This adds a nice touch and looks great. A vibrant display makes your Fajita Veggie Sheet Pan Delight even more appetizing. {{image_4}} You can swap out veggies to suit your taste. Try adding mushrooms or sweet potatoes. Seasonal choices like asparagus or butternut squash work well, too. Think of what’s fresh at your local market. Broccoli and cauliflower also add great texture. Mix and match for a colorful plate. Want to make this dish heartier? Tofu or tempeh are great choices. Cube them and toss with your veggies. You can also add chickpeas for extra protein. They blend well with the spices. If you eat meat, grilled chicken or shrimp can elevate this dish. Just season them like your veggies for a tasty mix. Experimenting with spices can change your dish. For a mild flavor, stick with cumin and garlic. If you like heat, add cayenne or smoked paprika. Try a taco seasoning mix for a new twist. You could even toss in fresh herbs like cilantro or oregano. This will keep your fajita veggie sheet pan exciting each time! To keep your fajita veggies fresh, store them in an airtight container. Place the container in the fridge. This way, your flavors stay bright. Use leftover veggies within three to four days for best taste. For reheating, the oven is your best friend. Preheat it to 350°F (175°C). Spread the veggies on a baking sheet and heat for about 10 minutes. This restores texture and taste. You can also use the microwave, but the oven keeps them crisp. If you have extras, try adding them to a salad or a quesadilla for a tasty twist. To freeze the fajita veggie mix, let it cool first. Then, transfer it to a freezer-safe bag. Remove as much air as you can before sealing. This helps prevent freezer burn. When ready to use, move it to the fridge overnight to thaw. Reheat as mentioned above, and enjoy! It takes about 10 minutes to prep. Roasting in the oven takes 20-25 minutes. Altogether, you can enjoy this dish in about 30-35 minutes. Yes, you can easily swap veggies. Try adding mushrooms, asparagus, or even corn. Just make sure they cut evenly for even cooking. Absolutely! This dish is great for meal prep. You can store it in the fridge for up to four days. Just reheat portions as needed. Corn or flour tortillas are both great options. Corn tortillas give a nice crunch, while flour tortillas are soft and chewy. To spice things up, add more chili powder. You can also include fresh jalapeños or a splash of hot sauce. Experiment with heat to find your perfect level. You can prepare the veggies and seasoning ahead. Just store them in the fridge. When ready, roast them for a quick, fresh meal. For the full recipe, check out the details in the main article! This blog post covered how to make delicious fajita veggies on a sheet pan. We talked about the ingredients, preparation steps, and tips for perfect roasting. You learned about storing leftovers and customizing the recipe to fit your taste. In summary, this dish is both fun and easy to prepare. You can explore different veggies and spices, making it your own. Enjoy this tasty meal with friends or family, and remember, cooking should always bring joy!](https://goldendishy.com/wp-content/uploads/2025/07/261fee1c-f0d4-4ba8-a84d-53625610978f-768x768.webp)