Cilantro Lime Shrimp Bowls Fresh and Flavorful Meal

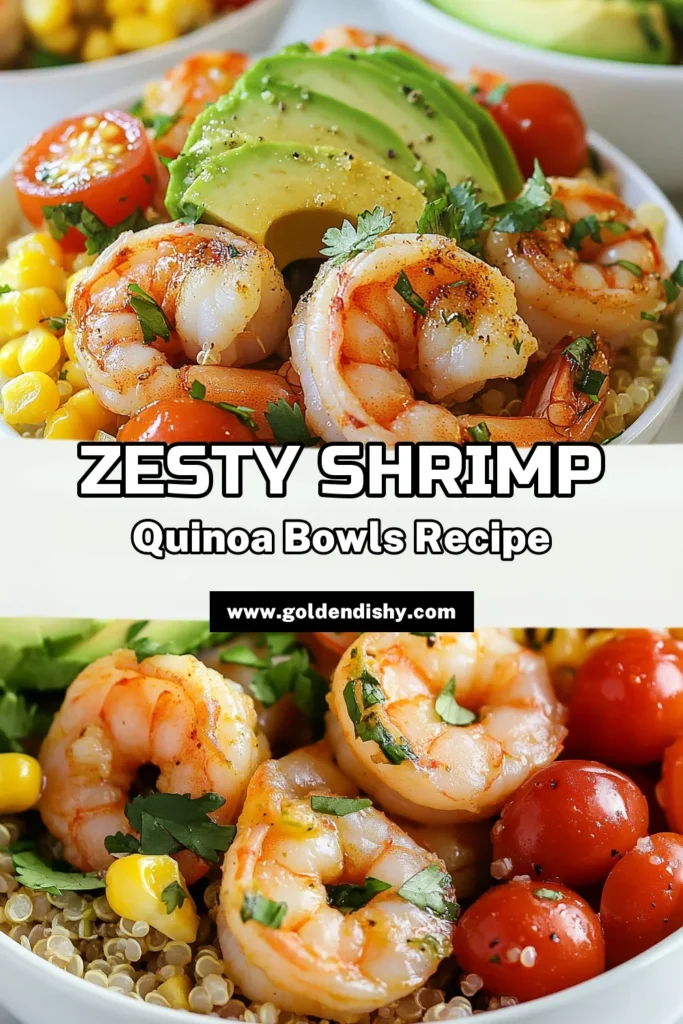
Looking for a fresh and tasty meal? Cilantro Lime Shrimp Bowls are your answer! These bowls burst with flavor, using simple ingredients you love. In this post, I’ll share easy steps to make them, as well as helpful tips and swaps for your favorite flavors. Whether you’re a busy parent or just want something quick, this dish is perfect for you. Let’s dive in and get cooking!
Why I Love This Recipe
- Fresh and Flavorful: This dish combines the bright flavors of lime and cilantro, making every bite feel refreshing and vibrant.
- Quick and Easy: With a total prep time of just 40 minutes, this recipe is perfect for busy weeknights or last-minute gatherings.
- Healthy and Nutritious: Packed with protein from shrimp and fiber from quinoa, this bowl is a wholesome meal option that doesn’t compromise on taste.
- Customizable Toppings: With a variety of optional toppings, you can easily adjust the dish to suit your taste preferences or dietary needs.
Ingredients
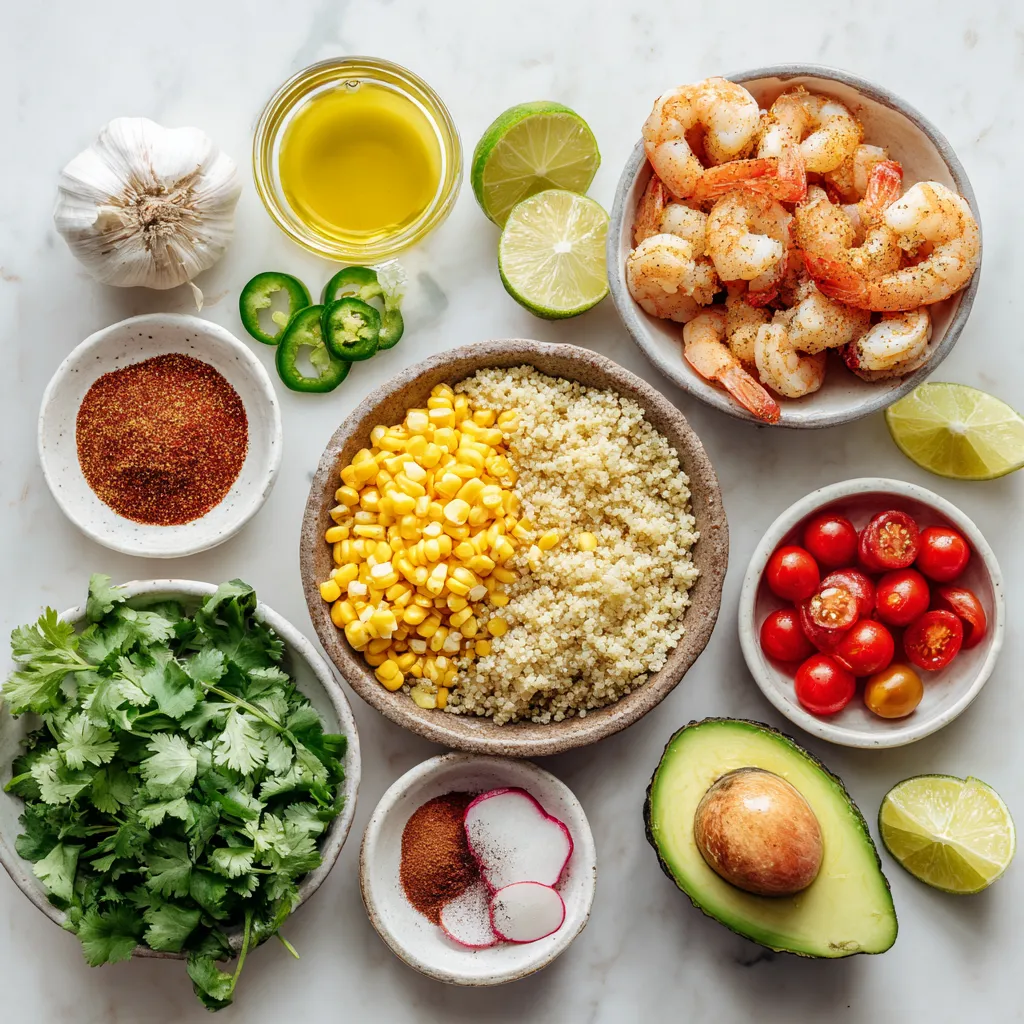
Complete list of ingredients for Cilantro Lime Shrimp Bowls
To create these Cilantro Lime Shrimp Bowls, gather the following ingredients:
– 1 lb large shrimp, peeled and deveined
– 2 tablespoons olive oil
– 3 cloves garlic, minced
– Juice and zest of 2 limes
– 1 teaspoon ground cumin
– 1 teaspoon chili powder
– Salt and pepper to taste
– 1 cup quinoa, rinsed
– 2 cups vegetable broth or water
– 1 cup corn (canned or frozen, thawed)
– 1 cup cherry tomatoes, halved
– 1 avocado, sliced
– 1/2 cup fresh cilantro, chopped
– Optional toppings: sliced jalapeños, lime wedges, radish for garnish
Ingredient substitutions
You can easily swap some ingredients based on what you have. If you don’t have quinoa, use brown rice or couscous. For shrimp, you can use scallops or cooked chicken. If you prefer a milder taste, skip the chili powder or use a sweet paprika instead. Fresh cilantro can be replaced with parsley for a different flavor profile.
Tips for selecting fresh ingredients
Choosing fresh ingredients makes a big difference. For shrimp, look for a firm texture and a mild ocean smell. Avoid shrimp that smell overly fishy. When picking limes, choose ones that feel heavy for their size. They should be firm but not hard. For the avocado, select ones that yield slightly to gentle pressure. This indicates ripeness. Fresh garlic should be firm and dry, not sprouted.

Step-by-Step Instructions
Marinating the shrimp
First, gather your large shrimp. You need one pound that is peeled and deveined. In a large bowl, mix two tablespoons of olive oil with three cloves of minced garlic. Add in the juice and zest of two limes, one teaspoon of ground cumin, and one teaspoon of chili powder. Season with salt and pepper to your taste. Toss the shrimp in this mixture, coating them evenly. Let them sit for 10 to 15 minutes. This helps the shrimp soak up all the tasty flavors.
Cooking the quinoa
While the shrimp is marinating, it’s time to cook the quinoa. In a medium saucepan, bring two cups of vegetable broth or water to a boil. Once it’s boiling, add one cup of rinsed quinoa. Cover the saucepan and lower the heat to let it simmer. Cook it for about 15 minutes or until all the liquid is absorbed. When done, fluff the quinoa with a fork. This will give it a nice texture.
Cooking the shrimp in a skillet
Now, let’s cook the shrimp. Heat a large skillet over medium-high heat. When it’s hot, add the marinated shrimp in a single layer. Cook for 2 to 3 minutes on each side. The shrimp should turn pink and opaque when done. Be careful not to overcook them, or they will get tough. Once cooked, take them off the heat.
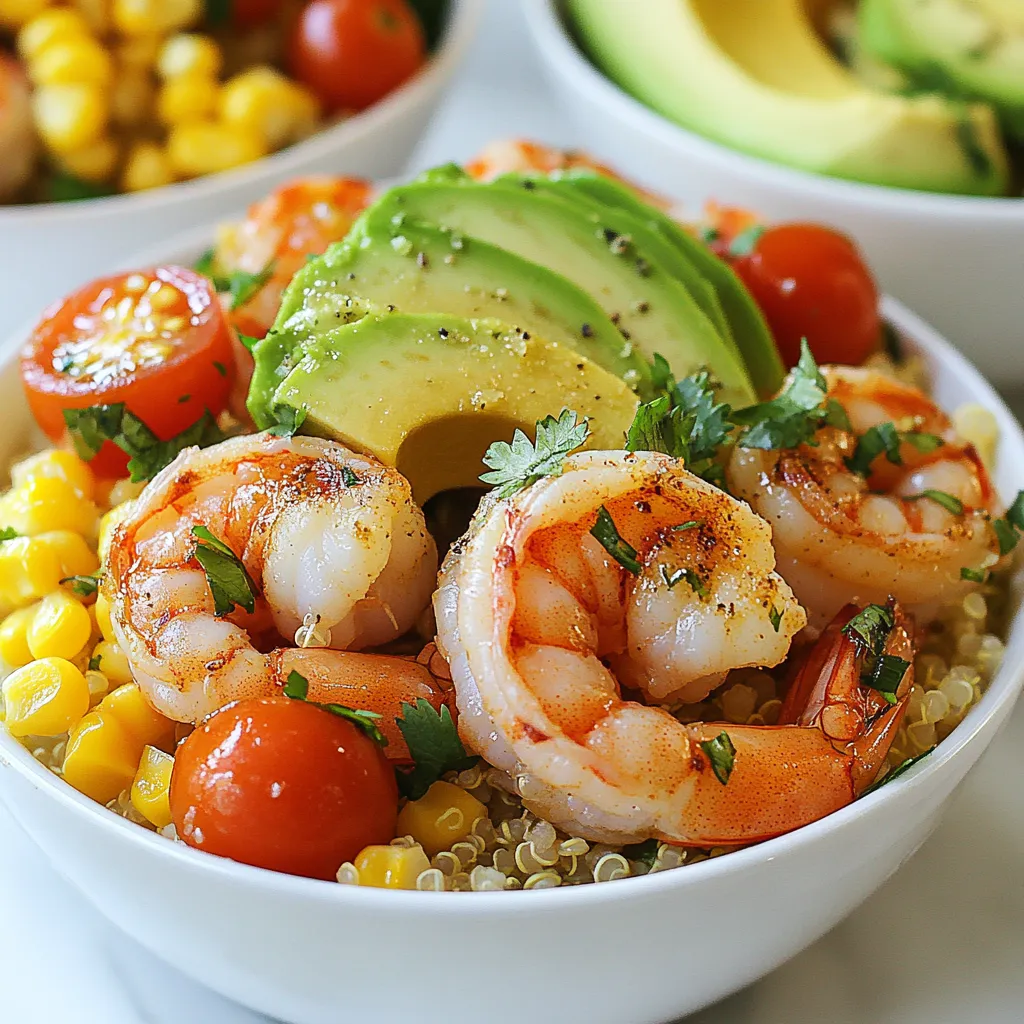
Assembling the bowls with toppings
Time to build your bowls! Start with a layer of cooked quinoa at the bottom of each bowl. Place the cooked shrimp on top. Next, add one cup of corn, one cup of halved cherry tomatoes, and sliced avocado. Finish with a sprinkle of chopped cilantro for that fresh touch. For extra brightness, drizzle some lime juice on top. Adjust the seasoning with more salt and pepper if you like. You can also add sliced jalapeños, lime wedges, and thinly sliced radish as optional toppings for some extra flair. Enjoy your flavorful meal!
Tips & Tricks
How to ensure perfectly cooked shrimp
To cook shrimp perfectly, start with fresh shrimp. Look for shrimp that smell like the ocean, not fishy. When cooking, heat the skillet to medium-high. Add the marinated shrimp in a single layer. Cook each side for 2-3 minutes. The shrimp will turn pink and opaque when done. Remove them from heat right away. Overcooking can make shrimp tough, so watch them closely.
Flavor-enhancing tips for the marinade
The marinade is key to great flavor. Use fresh lime juice and zest for the best taste. The garlic adds a nice kick, so don’t skip it. Ground cumin and chili powder give depth. For a little heat, add a pinch of cayenne pepper. Let the shrimp marinate for 10-15 minutes. This allows the flavors to soak in well, making every bite delicious.
Serving suggestions for extra flavor
To make your bowls pop, add fresh toppings. Sliced jalapeños add spice and crunch. Lime wedges boost the tangy taste of the dish. Thinly sliced radish gives a nice crunch too. Don’t forget the chopped cilantro for freshness. These extras make the meal not just tasty but colorful too. Enjoy the mix of flavors in every bite!
Pro Tips
- Marinate for Maximum Flavor: Allow the shrimp to marinate for at least 15 minutes; this enhances the flavor by allowing the spices and lime to penetrate the shrimp.
- Perfectly Cooked Shrimp: Keep an eye on the shrimp while cooking; they only need 2-3 minutes per side. Overcooking can make them rubbery.
- Quinoa Cooking Tips: Rinse the quinoa before cooking to remove its natural coating, which can make it taste bitter. This step is crucial for a delicious side.
- Presentation Matters: For a stunning presentation, layer your ingredients neatly and sprinkle with fresh cilantro and lime wedges to give a vibrant color contrast.

Variations
Vegetarian/vegan alternatives
For a vegetarian or vegan option, swap shrimp for tofu or chickpeas. Tofu has a great texture. Use firm tofu for the best results. Press it to remove excess water, then cut it into cubes. Marinate it just like the shrimp. Chickpeas are a fantastic choice too. They soak up flavors well. Toss them in the marinade and cook them until warm.
Ingredient swaps for different flavor profiles
You can change flavors easily in this dish. Instead of quinoa, try brown rice or farro as your base. Each grain brings its own taste and texture. For a spicy kick, add smoked paprika or cayenne pepper to the marinade. You can also switch lime juice for lemon juice. This gives a different zest that still works well.
Additional toppings to customize your bowls
Toppings play a big role in flavor and fun. Try adding sliced jalapeños for heat. A sprinkle of feta cheese gives a creamy texture. You can also include black beans for extra protein and fiber. For crunch, thinly sliced radish or cucumbers work great. Don’t forget lime wedges on the side. They enhance every bite with fresh juice!
Storage Info
Storing leftovers
You can store leftover Cilantro Lime Shrimp Bowls in an airtight container. Keep them in the fridge for up to three days. Make sure to separate the shrimp from the quinoa and veggies. This helps keep everything fresh and tasty. If you mix them, the quinoa can absorb too much moisture.
Reheating tips for best flavor and texture
When you want to reheat, do it gently. Use a skillet over low heat to warm the shrimp. This keeps them tender. You can add a splash of lime juice to freshen up the flavor. If you prefer the microwave, heat in short bursts. Stir in between to avoid overcooking.
Freezing options and guidelines
You can freeze the shrimp bowls, but it’s best to freeze shrimp and quinoa separately. Place them in freezer-safe bags. Remove as much air as possible to prevent freezer burn. They can stay in the freezer for up to three months. To defrost, move them to the fridge overnight before reheating.
FAQs
How do I know when shrimp is fully cooked?
Shrimp is done when it turns pink and opaque. It should curl into a C shape. If it forms an O shape, it is overcooked. The cooking time is about 2-3 minutes on each side. Use a timer to avoid overcooking. Perfectly cooked shrimp feels firm to the touch.
Can I use frozen shrimp for this recipe?
Yes, you can use frozen shrimp! Just thaw them first. You can do this by placing them in cold water for about 15 minutes. Drain well before marinating. This helps the shrimp absorb the tasty flavors. Frozen shrimp is often just as good as fresh.
What can I serve with Cilantro Lime Shrimp Bowls?
You can serve Cilantro Lime Shrimp Bowls with many sides. Here are some great options:
– Black beans for added protein
– A fresh green salad for crunch
– Tortilla chips for a fun crunch
– Grilled vegetables for extra flavor
– A dollop of sour cream for creaminess
These sides enhance your meal and add more nutrition.
Cilantro Lime Shrimp Bowls offer simple steps and fresh ingredients for a great meal. You learned about ingredient choices, cooking techniques, and creative variations. Remember to select fresh items for the best taste. Enjoy experimenting with toppings and finding new flavor combinations. This dish is easy to store and reheat, making it perfect for busy days. Embrace these tips and enjoy a delicious and satisfying meal any time. Happy cookin

Cilantro Lime Shrimp Bowls
Ingredients
- 1 lb large shrimp, peeled and deveined
- 2 tablespoons olive oil
- 3 cloves garlic, minced
- 2 limes juice and zest
- 1 teaspoon ground cumin
- 1 teaspoon chili powder
- to taste salt and pepper
- 1 cup quinoa, rinsed
- 2 cups vegetable broth or water
- 1 cup corn (canned or frozen, thawed)
- 1 cup cherry tomatoes, halved
- 1 avocado sliced
- 1/2 cup fresh cilantro, chopped
- to taste optional toppings: sliced jalapeños, lime wedges, radish for garnish
Instructions
- In a large mixing bowl, combine the peeled and deveined shrimp with olive oil, minced garlic, lime juice, lime zest, ground cumin, chili powder, salt, and pepper. Gently toss the mixture until all the shrimp are evenly coated in the marinade. Allow to marinate for 10-15 minutes to let the flavors infuse.
- While the shrimp is marinating, prepare the quinoa. In a medium saucepan, bring 2 cups of vegetable broth or water to a rapid boil. Once boiling, add the rinsed quinoa, cover the saucepan with a lid, and reduce the heat to low. Let it simmer for about 15 minutes, or until all the liquid has been absorbed and the quinoa is fluffy. Remove from heat and fluff with a fork.
- In a large skillet, heat over medium-high heat. Once hot, add the marinated shrimp to the skillet in a single layer. Cook the shrimp for 2-3 minutes on each side, or until they are pink, opaque, and cooked through. Be careful not to overcook, as shrimp can become tough. Once cooked, remove from heat.
- To assemble the bowls, start by layering the cooked quinoa at the bottom of each serving bowl. Arrange the cooked shrimp on top of the quinoa. Then add the corn, halved cherry tomatoes, and sliced avocado. Finish off with a generous sprinkle of chopped cilantro for freshness.
- Drizzle a bit of extra lime juice over the top for added brightness. Taste and adjust seasoning with additional salt and pepper if desired.
- For an additional touch, garnish the bowls with optional toppings such as sliced jalapeños for spice, lime wedges for extra zest, and thinly sliced radish for a crunchy contrast.


![For this tasty dish, you need the following main ingredients: - 1 block (15 oz) firm tofu, pressed and cut into 1-inch cubes - ½ cup soy sauce (or tamari for a gluten-free option) - ¼ cup pure maple syrup - 2 tablespoons rice vinegar - 2 tablespoons sesame oil - 3 cloves garlic, finely minced - 1 tablespoon freshly grated ginger - 2 tablespoons cornstarch - 1 tablespoon sesame seeds (for garnish) - 3 green onions, thinly sliced (for garnish) These ingredients create a savory sauce that brings the tofu to life. Firm tofu works best because it absorbs flavors well and holds its shape during baking. The soy sauce adds saltiness, while maple syrup gives a hint of sweetness. Garlic and ginger provide warmth and depth to the dish. You can add a few optional ingredients to boost the flavor even more: - 1 tablespoon sriracha or chili paste for heat - 1 tablespoon mirin for extra sweetness - 1 teaspoon sesame oil for richer flavor These options allow you to customize the dish to your taste. If you like a little heat, sriracha will spice things up. Mirin adds a sweet and tangy note that pairs well with the other flavors. If you have dietary restrictions, here are some great substitutes: - Use tempeh instead of tofu for more protein and a firmer texture - Coconut aminos can replace soy sauce for a soy-free option - Use agave syrup instead of maple syrup for a different sweetness These substitutes keep the dish delicious while catering to different diets. Tempeh offers a nutty flavor and is packed with protein. Coconut aminos give a similar taste without soy. Agave syrup is a simple way to adjust sweetness levels. For more details, check the Full Recipe. First, you need to prepare the tofu. Start with one block of firm tofu. Press it between two plates to remove excess water. This step is key for better texture. After pressing, cut the tofu into 1-inch cubes. This size helps it cook evenly. Next, let’s make the teriyaki sauce. In a medium bowl, mix together the following ingredients: - ½ cup soy sauce (or tamari) - ¼ cup pure maple syrup - 2 tablespoons rice vinegar - 2 tablespoons sesame oil - 3 cloves garlic, finely minced - 1 tablespoon freshly grated ginger Whisk these ingredients until smooth. This sauce adds rich flavor to the tofu. Now, it’s time to bake the tofu. Preheat your oven to 400°F (200°C). Line a baking sheet with parchment paper. This prevents sticking. Place the cubed tofu in a bowl and sprinkle with 2 tablespoons of cornstarch. Gently toss until each piece is coated. Spread the tofu on the baking sheet in a single layer. Drizzle half of the teriyaki sauce over the tofu. Bake for 25-30 minutes. Halfway through, turn the tofu cubes for even cooking. After baking, pour the remaining teriyaki sauce over the tofu. Toss gently to coat. Return the tofu to the oven for another 5-10 minutes. This step caramelizes the sauce, making it sticky and flavorful. Once baked, remove the tofu from the oven. Finish by sprinkling sesame seeds and sliced green onions on top. This adds color and crunch. Enjoy your tasty baked teriyaki tofu! For the complete recipe, check out the Full Recipe. To get crispy tofu, press it well. Remove as much moisture as you can. After cutting it, coat each cube in cornstarch. This step is key for that crunch. Bake at 400°F for 25-30 minutes. Flip the tofu halfway through for even cooking. The golden brown color means it is ready. Use fresh garlic and ginger for the best taste. These ingredients boost the teriyaki sauce’s flavor. Let your tofu soak in the sauce for a bit. This helps it absorb all those yummy flavors. Drizzle some sauce just before the end of baking. It adds a sticky glaze that is hard to resist. Don’t skip pressing the tofu. It will turn out soggy if you do. Avoid using too much sauce too soon. This can make your tofu mushy instead of crispy. Make sure to coat each piece evenly with cornstarch. If you don’t, some cubes may not get crispy. For the best results, follow the [Full Recipe]. {{image_4}} You can make your baked teriyaki tofu even more colorful and tasty by adding vegetables. Carrots, bell peppers, and broccoli work well. Just chop them into bite-sized pieces. Toss them with the tofu before baking. This step adds nutrients and makes the dish pop with color. If you want to switch up the protein, try using tempeh or seitan instead of tofu. Both options absorb flavors well and have great textures. Tempeh is nutty and has a firm bite. Seitan mimics meat and is very chewy. These choices keep the meal exciting and cater to different tastes. To keep this dish gluten-free, use tamari instead of soy sauce. Tamari is a great choice and tastes the same. For a nut-free option, skip the sesame oil and use olive oil instead. This way, you can enjoy the dish while sticking to your dietary needs. For the full recipe, check the earlier section. To keep your baked teriyaki tofu fresh, store it in an airtight container. Let the tofu cool down first. It can last in the fridge for up to four days. If you notice any moisture, use a paper towel to absorb it before sealing the container. This helps keep the tofu from getting soggy. When you are ready to enjoy leftovers, the best way to reheat the tofu is in the oven. Preheat your oven to 350°F (175°C). Spread the tofu on a baking sheet and cover it with foil. Heat for about 10-15 minutes. This method helps restore some crispiness. You can also microwave it for quicker results. Just remember to cover it with a damp paper towel to keep it moist. Yes, you can freeze baked teriyaki tofu! Start by letting it cool completely. Place the tofu in a freezer bag, removing as much air as possible. It can stay frozen for up to three months. When you’re ready to eat, thaw it in the fridge overnight. Then, reheat as mentioned above. Enjoy your flavorful tofu anytime! Tofu is done when it turns golden brown and crispy. You should bake it for 25 to 30 minutes. Halfway through, turn the tofu cubes for even cooking. It should feel firm to the touch and have a nice texture. Once you see a beautiful caramel color, it's ready to enjoy! Yes, you can! Try soy sauce with honey or maple syrup. A sweet chili sauce works well too. For a spicy kick, use sriracha mixed with soy. Each sauce will give a new flavor twist to your baked tofu. Feel free to explore and find what you love! Baked teriyaki tofu pairs well with steamed rice or quinoa. You can also serve it with stir-fried vegetables for a colorful plate. A fresh salad adds crunch and balance. For a complete meal, add some pickled veggies on the side. This dish is versatile and fits many sides! In this guide, we explored how to make baked teriyaki tofu. We discussed key ingredients, step-by-step prep, and tips for crispiness. You learned about tasty variations and storage tips. Always remember, cooking is fun and easy. With the right ingredients and methods, you can make delicious meals. Enjoy your kitchen journey with baked teriyaki tofu. Happy cooking!](https://goldendishy.com/wp-content/uploads/2025/07/16dcdce2-c600-4865-9aa6-5e182bb228ee-768x768.webp)


![To make Caprese Pasta with Balsamic Glaze, gather these key ingredients: - 12 oz pasta (fusilli or penne recommended) - 2 cups cherry tomatoes, halved - 1 cup fresh mozzarella balls (bocconcini), drained and patted dry - 1/2 cup fresh basil leaves, roughly torn - 1/4 cup extra virgin olive oil - 2 tablespoons balsamic glaze (store-bought or homemade) - 1 teaspoon garlic powder - Salt and freshly ground black pepper to taste Each ingredient plays a vital role. The pasta serves as the base. Cherry tomatoes add sweetness and color. Fresh mozzarella adds creaminess. Basil brings freshness, while balsamic glaze ties everything together with a sweet-tangy kick. You can enhance your dish with a few optional garnishes: - Freshly grated Parmesan cheese - Extra basil leaves for a pop of color - A drizzle of olive oil before serving These garnishes boost flavor and make your pasta look stunning. They add a gourmet touch that impresses everyone. Choosing high-quality ingredients makes a big difference. Here are some tips: - Use fresh pasta for a softer texture and richer flavor. - Select ripe cherry tomatoes for better sweetness. - Buy mozzarella balls packed in water for the best taste. - Pick fresh basil with vibrant green leaves. When you use quality ingredients, your Caprese Pasta will shine. Each bite will burst with flavor, making your meal truly special. For the full recipe, check the section above. Start by boiling a large pot of salted water. Once it reaches a rolling boil, add 12 ounces of pasta. I recommend using fusilli or penne for this dish. Cook the pasta according to the package instructions, usually around 8 to 10 minutes. You want it al dente, which means it should remain firm to the bite. After cooking, drain the pasta in a colander. Rinse it under cold water to stop the cooking process, then set it aside. In a small mixing bowl, combine 1/4 cup of extra virgin olive oil, 1 teaspoon of garlic powder, and salt and black pepper to taste. Whisk these ingredients together until they form a smooth mixture. This dressing adds flavor to your pasta and brings all the ingredients together. Set the dressing aside for now. In a large mixing bowl, add the drained pasta, 2 cups of halved cherry tomatoes, and 1 cup of fresh mozzarella balls. Use a spatula or wooden spoon to gently mix these ingredients together. Next, pour the prepared dressing over the pasta mix. Toss everything until all the ingredients are coated with the dressing. Then, gently fold in 1/2 cup of torn fresh basil leaves. Be careful not to bruise them. Just before serving, drizzle 2 tablespoons of balsamic glaze over the pasta. Toss the dish again for an even flavor. You can serve this pasta warm or chill it in the fridge for about 30 minutes for a cold salad. Enjoy your Caprese Pasta with Balsamic Glaze! For the complete recipe, check the Full Recipe section. To boost the flavors in your Caprese pasta, focus on fresh ingredients. The magic lies in ripe cherry tomatoes and creamy mozzarella. Use extra virgin olive oil for a rich taste. If you want a zesty kick, add a bit of lemon juice. It brightens the dish. Consider also using garlic powder for depth—just a teaspoon will do. Lastly, a sprinkle of salt and pepper can make all the difference. Cooking pasta to the right texture is key. Aim for al dente, which means it should be firm but cooked. Start with a large pot of salted boiling water. This helps flavor the pasta. Follow the package’s recommended cook time, usually about 8-10 minutes. Once cooked, drain it but do not rinse. Rinsing washes away the starch, which helps sauce cling to the pasta. A beautiful presentation makes any meal special. Use a large, shallow bowl for serving. This allows the colors to pop. Top your pasta with fresh basil leaves and a sprinkle of Parmesan cheese. You can drizzle a bit more balsamic glaze on top for that extra visual appeal. Serve it warm or chill it for a refreshing treat. Remember, we eat with our eyes first! For the full recipe, check out the Caprese Pasta Delight. {{image_4}} You can mix up this Caprese pasta recipe easily. Use different pasta shapes like spaghetti or farfalle for fun. Swap cherry tomatoes for sun-dried tomatoes if you want a bolder taste. You can also try adding grilled chicken or shrimp for protein. Instead of fresh mozzarella, use feta for a tangy twist. Seasonal ingredients can brighten this dish. In spring, add asparagus or peas for freshness. Summer is perfect for zucchini or bell peppers. In fall, consider roasted butternut squash for a sweet flavor. Winter calls for hearty greens like kale or spinach. These additions can enhance color and taste. You can make this dish fit many diets. To make it vegan, skip the mozzarella and use avocado or cashew cheese instead. For a gluten-free option, choose gluten-free pasta made from rice or quinoa. Adjust the dressing by using a vegan-friendly oil. This way, everyone can enjoy Caprese pasta. For the full recipe, check [Full Recipe]. To keep your Caprese pasta fresh, store it properly. Place any leftovers in an airtight container. This helps keep moisture in and prevents the pasta from drying out. If you have extra balsamic glaze, store it separately. This way, you can drizzle it on just before serving. When it's time to eat your leftovers, reheat the pasta gently. Use a microwave or a pan on low heat. If using the microwave, heat in short bursts to avoid overcooking. Add a splash of olive oil or a bit of water to keep it moist. Stir well to ensure even heat. Caprese pasta stays fresh for about 3 days in the fridge. After that, the flavors can fade. If you want to keep it longer, consider freezing it. But remember, the texture might change once it's thawed. Enjoy your delicious meal within those days for the best taste! To make balsamic glaze, start with balsamic vinegar. Pour one cup of vinegar into a small saucepan. Heat it over medium heat. Stir it often as it heats. Once it boils, reduce the heat. Let it simmer for about 15 to 20 minutes. The vinegar will reduce and thicken. You want it to coat the back of a spoon. Take it off the heat and let it cool. The glaze will thicken more as it cools. Yes, you can use many types of pasta. Fusilli and penne are great choices. You can also try rotini, farfalle, or spaghetti. Each type offers a unique texture. Choose what you like best. Just remember to cook it until it is al dente. Absolutely! Caprese pasta is great for meal prep. You can make it ahead of time. Store it in an airtight container in the fridge. It keeps well for up to three days. Just add the balsamic glaze right before serving. This will keep the flavors fresh. For the full recipe, check out the Caprese Pasta Delight section. This article covered key ingredients for Caprese pasta, how to cook it, and tips for flavor and texture. We also explored variations for different diets and seasonal tastes. Remember, quality ingredients make a big difference. Experiment with flavors and enjoy your meals. It’s all about making food that you love. Enjoy creating your perfect Caprese pasta!](https://goldendishy.com/wp-content/uploads/2025/05/8e484e0a-c503-4741-abc1-b7211b9a34a5-768x768.webp)