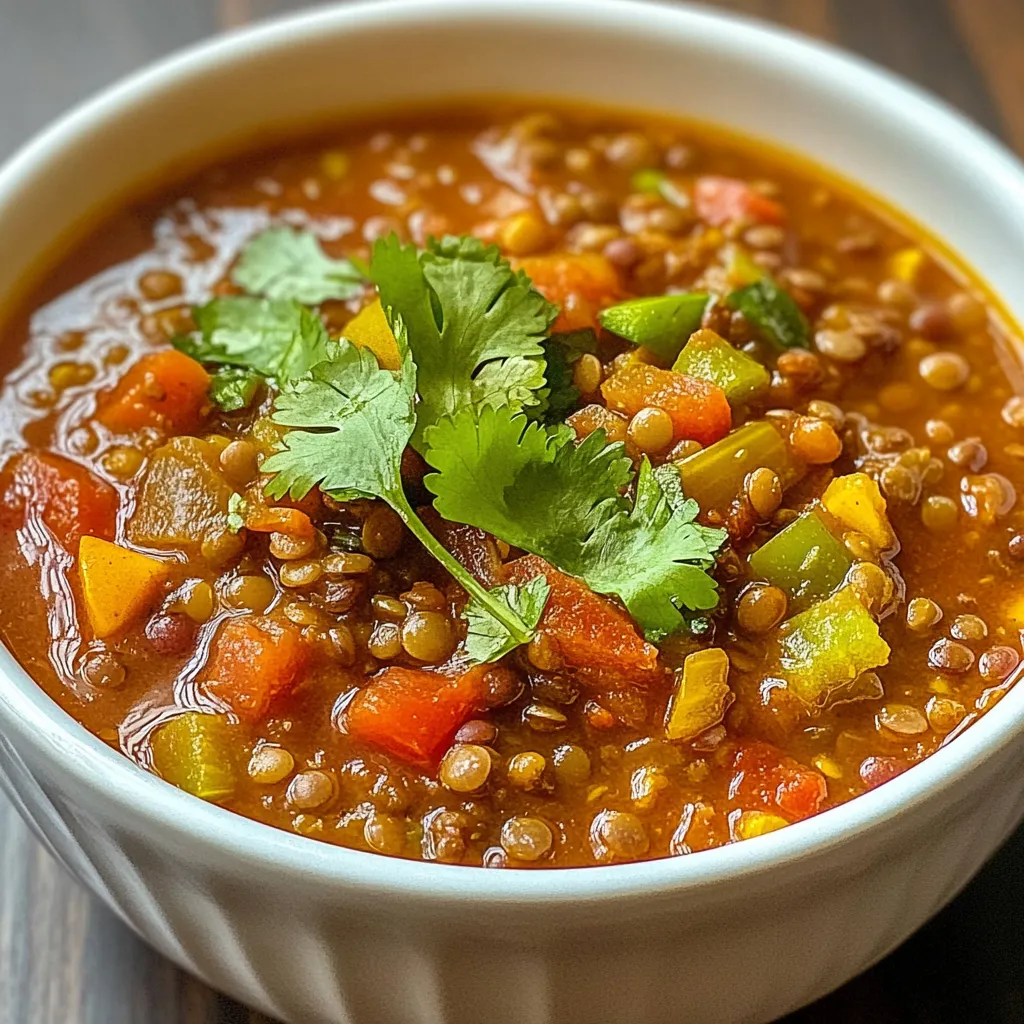
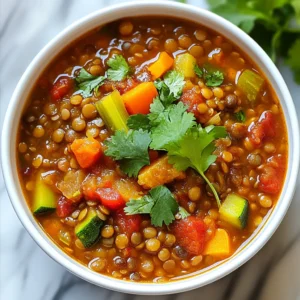
Veggie Packed Lentil Chili Hearty and Flavorful Dish

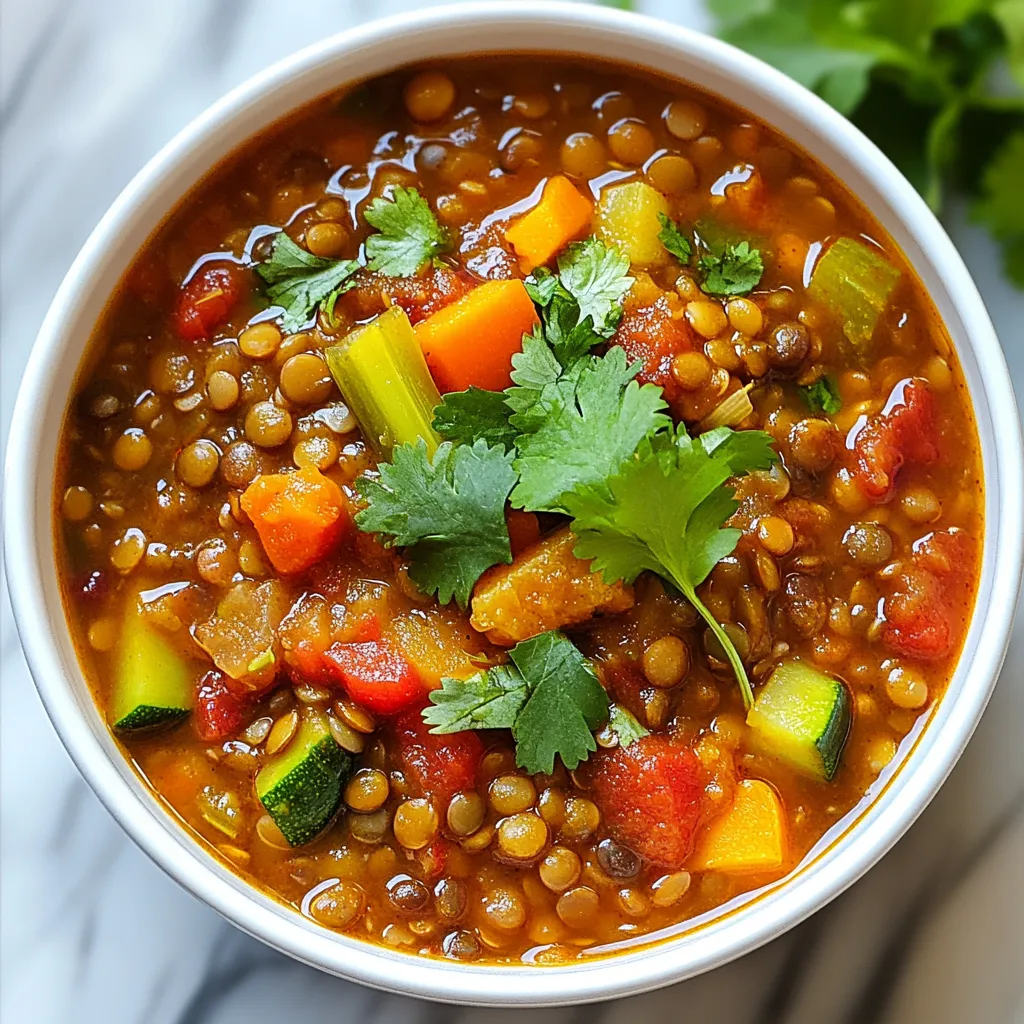
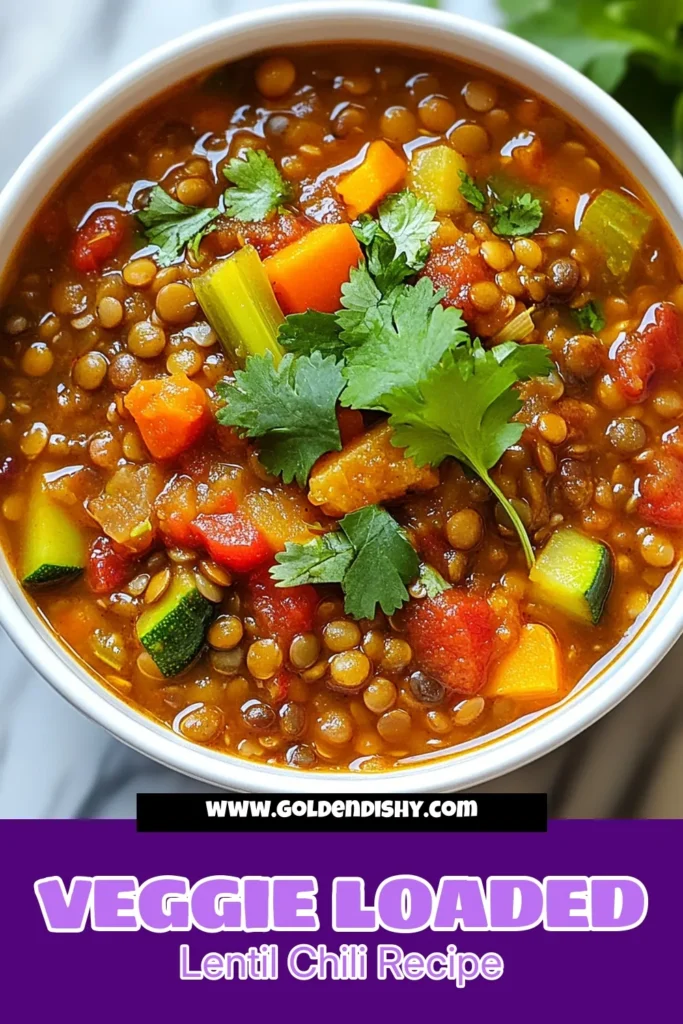
If you crave a robust dish that’s both hearty and healthy, my Veggie Packed Lentil Chili is a must-try! It’s loaded with vibrant veggies and rich lentils, offering a burst of flavors in every bite. This recipe is not only easy to make, but it’s also flexible, catering to your taste and dietary needs. Let’s dive into how you can create this warm, comforting bowl of chili that everyone will love!
Why I Love This Recipe
- Nutritious and Filling: This lentil chili is packed with protein and fiber, making it a hearty meal that keeps you satisfied.
- Versatile Ingredients: You can easily customize this recipe by adding your favorite vegetables or beans, adapting it to your taste preferences.
- Perfect for Meal Prep: This chili stores well in the fridge or freezer, making it a great option for meal prep throughout the week.
- Easy to Make: With simple steps and minimal cooking time, this recipe is perfect for busy weeknights or when you need a quick, comforting dish.
Ingredients
Complete Ingredient List
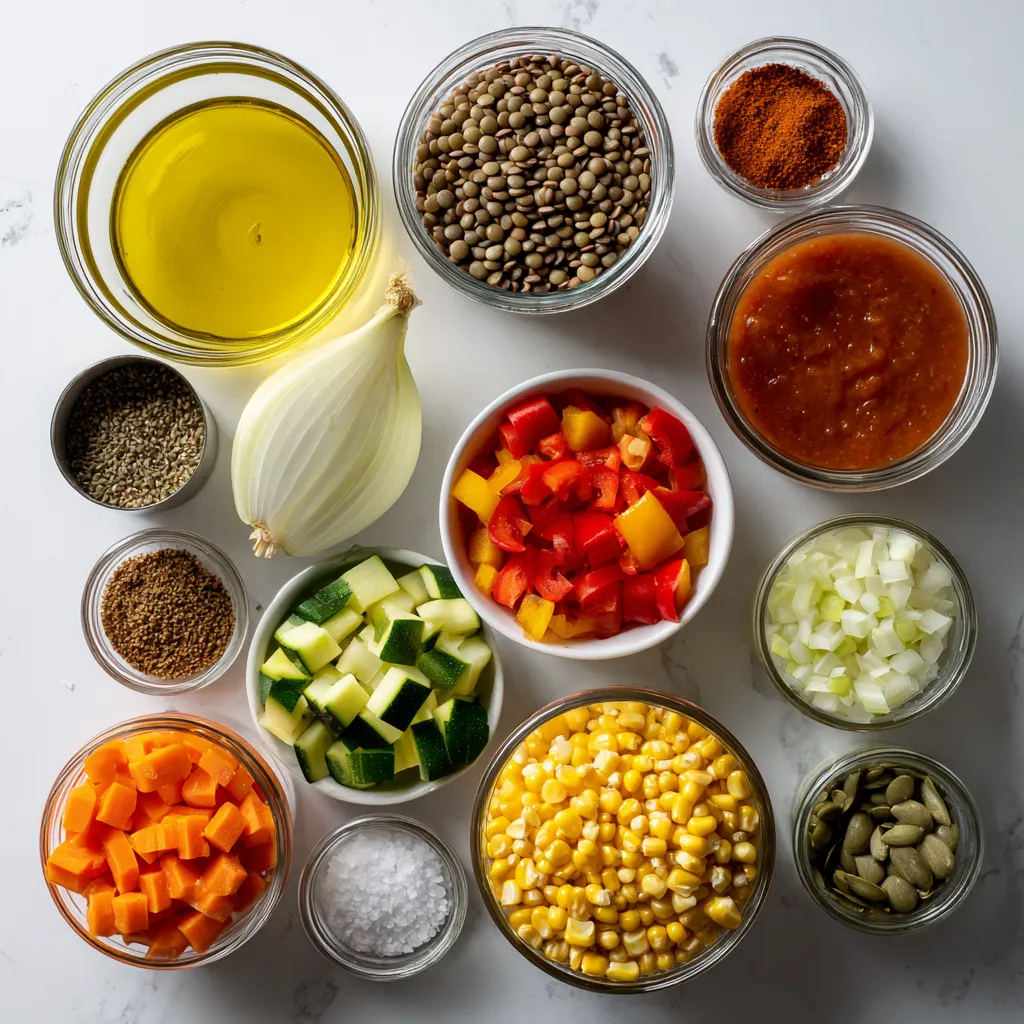
To make veggie-packed lentil chili, gather these ingredients:
– 1 cup green or brown lentils, thoroughly rinsed
– 1 tablespoon olive oil
– 1 medium onion, diced
– 3 cloves garlic, minced
– 1 bell pepper (any color), diced
– 2 medium carrots, diced
– 2 celery stalks, diced
– 1 medium zucchini, diced
– 1 can (14 oz) diced tomatoes, including juice
– 2 cups vegetable broth
– 1 tablespoon chili powder
– 1 teaspoon ground cumin
– 1 teaspoon smoked paprika
– 1/2 teaspoon cayenne pepper (adjust to your spice preference)
– Salt and freshly ground pepper to taste
– 1 can (15 oz) kidney beans, drained and rinsed
– 1 cup fresh or frozen corn kernels
– Chopped fresh cilantro or parsley for garnish (optional)
Substitutions for Lentils and Beans
You can switch lentils based on what you have. Try red lentils for a sweeter taste. Black beans or pinto beans can replace kidney beans for a different flavor. Use chickpeas for a unique twist. This chili is flexible and can adapt to your pantry needs!
Nutritional Benefits of Key Ingredients
Lentils are great for protein and fiber. They help keep you full and satisfied. Bell peppers add vitamin C, which boosts your immune system. Zucchini is low in calories and high in water, helping you stay hydrated. Carrots give you beta-carotene for healthy eyes. Each ingredient adds flavor and nutrition to your dish, making it both hearty and wholesome.

Step-by-Step Instructions
Preparing the Vegetables
First, gather all your fresh veggies. You need onion, garlic, bell pepper, carrots, celery, and zucchini. Dice them all into small pieces. This helps them cook evenly. Heat a large pot over medium heat. Pour in the olive oil and let it warm up. Add the diced onion and stir for about 3-4 minutes until it turns soft and clear. Next, add the minced garlic. Cook this for 1-2 minutes. You want to smell that lovely garlic aroma. Then, toss in the bell pepper, carrots, and celery. Stir and cook for 5 minutes. The goal is to get them tender without browning.
Cooking the Chili Mixture
Now, add the diced zucchini into the pot. Cook this for another 3 minutes until it softens. Then, pour in the rinsed lentils and the can of diced tomatoes, including their juice. Next, add the vegetable broth, chili powder, cumin, smoked paprika, and cayenne pepper. Season it all with salt and pepper to your taste. Bring the chili to a boil. When it bubbles, lower the heat. Cover the pot and let it simmer for 25-30 minutes. Stir it occasionally to keep it from sticking.
Simmering and Final Touches
After 30 minutes, check the lentils. They should be soft and cooked through. Fold in the drained kidney beans and corn. Let it simmer for another 5 minutes to warm them up. Taste the chili again and adjust your spices if you need to. When ready, serve it hot. You can add chopped cilantro or parsley on top for some color. Enjoy your veggie-packed chili!
Tips & Tricks
How to Perfect the Flavor
To make your lentil chili shine, start with fresh veggies. Use ripe tomatoes and fragrant garlic. This adds depth to the dish. Sauté onions until they turn soft and sweet. This step builds a rich base. Mix in spices early to let them bloom. This brings out their aromas and flavors. Taste as you go, and adjust salt and pepper. A touch of sweetness can come from a dash of sugar or a splash of balsamic vinegar.
Adjusting Spice Levels
Know your spice preference. If you like it hot, add more cayenne pepper. For a milder dish, reduce the cayenne. You can also add a dollop of sour cream or yogurt at the end. This cools down the heat. Always taste the chili before serving. You can change the spice level after cooking. A squeeze of lime juice can also brighten the flavor without adding heat.
Making Ahead of Time
Lentil chili tastes even better the next day. Make it a day ahead for deeper flavors. Store it in an airtight container in the fridge. Reheat on the stove or in the microwave. If the chili thickens, add a splash of broth. This keeps it creamy and smooth. You can also freeze leftovers. Just let them cool before transferring to freezer-safe containers.
Pro Tips
- Use Fresh Ingredients: Whenever possible, opt for fresh vegetables and herbs to enhance the flavor and nutritional value of your chili.
- Adjust the Spice Level: Feel free to modify the amount of cayenne pepper or add fresh chilies if you prefer a spicier chili.
- Let it Rest: For even better flavor, let the chili sit for a few hours or refrigerate overnight before reheating to serve.
- Experiment with Toppings: Try various toppings like avocado, cheese, or jalapeños to customize each bowl to your liking.

Variations
Vegan and Gluten-Free Options
This chili is naturally vegan. It uses lentils and veggies for great flavor and texture. To ensure it is gluten-free, simply check your vegetable broth and spices. Most brands are gluten-free, but it’s smart to verify. This way, everyone can enjoy a hearty bowl without worry.
Adding Extra Protein
Want to boost the protein? You can add cooked quinoa or shredded tofu. Both blend well in the chili. Another option is to include chickpeas. They add a nice texture and flavor. Each of these options helps make the dish even more filling and nutritious.
Alternative Vegetables to Include
Feel free to get creative with your veggies! Sweet potatoes or butternut squash add a touch of sweetness. You might also try adding kale or spinach for extra greens. If you have other favorite vegetables, toss them in! This chili is versatile and welcomes your personal touch.
Storage Info
Best Practices for Storing Leftovers
After you enjoy your Veggie Packed Lentil Chili, store leftovers in an airtight container. This keeps the chili fresh and tasty. Let it cool down to room temperature before sealing it up. Store the chili in the fridge for up to five days. Make sure to label your container with the date. This way, you won’t forget how long it has been.
Freezing Instructions
If you want to save your chili for later, freezing is a great option. Pour the cooled chili into freezer-safe bags or containers. Leave some space at the top for the chili to expand when it freezes. You can freeze the chili for up to three months. When you’re ready to eat it, just thaw it in the fridge overnight.
Reheating Tips
To reheat your chili, you can use the stove or microwave. For the stove, pour the chili into a pot and heat on low. Stir often until it’s hot all the way through. If you use the microwave, place it in a microwave-safe bowl. Heat it in short bursts of one to two minutes, stirring in between. Always check the temperature before serving to make sure it’s hot enough. Enjoy your warm and hearty chili!
FAQs
Can I use canned lentils instead?
Yes, you can use canned lentils. They save time and are easy to use. Rinse them well before adding to the chili. Since they are already cooked, add them in the last few minutes of cooking. This way, they warm up without getting mushy.
How long does lentil chili last in the fridge?
Lentil chili lasts about four to five days in the fridge. Store it in an airtight container to keep it fresh. When you’re ready to eat, just heat it up on the stove or in the microwave.
What can I serve with Veggie Packed Lentil Chili?
You can serve lentil chili with a few tasty sides. Here are some ideas:
– Crispy tortilla chips for crunch
– Avocado slices for creaminess
– A dollop of sour cream for richness
– Fresh bread for dipping
– A simple salad for freshness
Mix and match these sides to make your meal even better!
In this post, we explored how to make a delicious Veggie Packed Lentil Chili. I shared ingredient lists, cooking steps, and tips to enhance flavor. We also looked at variations for vegan and gluten-free diets. Proper storage and reheating methods help you enjoy leftovers longer.
Remember, cooking should be fun and easy. With these tips, you can make a meal everyone loves. Enjoy your chili adventur

Hearty Veggie-Packed Lentil Chili
Ingredients
- 1 cup green or brown lentils, thoroughly rinsed
- 1 tablespoon olive oil
- 1 medium onion, diced
- 3 cloves garlic, minced
- 1 bell pepper any color, diced
- 2 medium carrots, diced
- 2 stalks celery, diced
- 1 medium zucchini, diced
- 1 can 14 oz diced tomatoes, including juice
- 2 cups vegetable broth
- 1 tablespoon chili powder
- 1 teaspoon ground cumin
- 1 teaspoon smoked paprika
- 0.5 teaspoon cayenne pepper (adjust to your spice preference)
- to taste Salt and freshly ground pepper
- 1 can 15 oz kidney beans, drained and rinsed
- 1 cup fresh or frozen corn kernels
- optional Chopped fresh cilantro or parsley for garnish
Instructions
- In a large pot or Dutch oven, warm the olive oil over medium heat. Once heated, add the diced onion and sauté for approximately 3-4 minutes until it becomes translucent and tender.
- Incorporate the minced garlic into the pot and continue to cook for an additional 1-2 minutes, stirring frequently until the garlic releases its aroma.
- Add the diced bell pepper, carrots, and celery, cooking for about 5 minutes. Stir occasionally to ensure the vegetables soften gracefully without browning.
- Introduce the diced zucchini to the mixture, cooking for an additional 3 minutes until it begins to soften.
- Pour in the lentils along with the canned diced tomatoes (including all the juices), the vegetable broth, chili powder, cumin, smoked paprika, cayenne pepper, and season with salt and pepper to your liking.
- Bring the chili to a vigorous boil. Once boiling, reduce the heat to low, cover the pot, and let it simmer for approximately 25-30 minutes, or until the lentils are tender, stirring occasionally to prevent sticking.
- Once the lentils are fully cooked, fold in the kidney beans and corn. Allow the chili to simmer for an additional 5 minutes until everything is heated through. Taste and adjust the seasoning as necessary.
- Serve the chili hot, garnished with chopped fresh cilantro or parsley if desired.


![- 9 lasagna noodles - 2 cups cooked chicken, shredded - 2 cups Alfredo sauce (store-bought or homemade) - 2 cups ricotta cheese - 2 cups shredded mozzarella cheese - 1 cup grated Parmesan cheese - 1 cup fresh spinach, chopped - 1 teaspoon garlic powder - 1 teaspoon onion powder - Salt and pepper to taste - Fresh basil leaves for garnish Each ingredient plays a big role in flavor and texture. - Lasagna noodles form the base, holding all the layers together. - Cooked chicken adds protein and heartiness. Use rotisserie chicken for ease. - Alfredo sauce gives creaminess and rich flavor. Store-bought saves time, or you can make your own. - Ricotta cheese provides a creamy filling. It’s soft and mild, blending well with other flavors. - Shredded mozzarella cheese melts beautifully, adding gooey texture. - Grated Parmesan cheese gives a salty, nutty kick on top. - Fresh spinach brings a pop of color and nutrients. - Garlic and onion powder enhance the flavor without overpowering the dish. - Salt and pepper are essential for seasoning, balancing the taste. - Fresh basil adds brightness when you serve the dish. You can change some ingredients to suit your taste. - Swap chicken for turkey or keep it meatless with a veggie mix. - Use cottage cheese instead of ricotta for a lighter option. - Try different cheeses like gouda or cheddar for unique flavors. - If you don't have Alfredo sauce, use a white sauce or a creamy tomato sauce. - For a gluten-free version, look for gluten-free lasagna noodles. These adjustments keep the spirit of the dish while catering to your needs. For the complete recipe, check the Full Recipe. To start, bring a large pot of salted water to a boil. This water helps cook the noodles evenly. Add 9 lasagna noodles to the pot. Cook them according to the package instructions. Aim for an al dente texture, which means they should be slightly firm. Once cooked, drain the noodles. Rinse them briefly under cold water to stop the cooking process and prevent sticking. Set them aside on a clean surface or a plate. Now, grab a spacious mixing bowl. In this bowl, combine 2 cups of shredded cooked chicken, 2 cups of ricotta cheese, and 1 cup of chopped fresh spinach. Add 1 teaspoon each of garlic powder and onion powder for flavor. Don’t forget to sprinkle in some salt and pepper to taste. Mix all these ingredients thoroughly. You want a nice, smooth filling that binds together well. This mixture is the heart of your lasagna. Take a 9x13 inch baking dish and spread a thin layer of Alfredo sauce on the bottom. This helps prevent the noodles from sticking. Lay down 3 noodles side by side over the sauce. Next, spread half of your chicken and ricotta mixture over the noodles. Top this layer with a third of the shredded mozzarella cheese. Repeat this layering: add another 3 noodles, the remaining chicken mixture, and another third of mozzarella cheese. For the final layer, place the last 3 noodles on top. Cover these noodles with the rest of the Alfredo sauce. Finish with the remaining mozzarella and all of the grated Parmesan cheese on top. This will create a beautiful, bubbly crust when baked. Now, cover the dish with aluminum foil and place it in your preheated oven at 375°F (190°C). Bake for 25 minutes. After that, remove the foil and bake for another 15 minutes. Keep an eye on it until the cheese is bubbly and golden brown. This step is key for that perfect, cheesy finish. When you layer your lasagna, start with a thin layer of sauce. This helps the noodles not stick. Use three noodles for each layer. Spread half of your filling evenly over the noodles. Sprinkle some cheese on top. Repeat until you have used all ingredients. Finish with noodles, sauce, and lots of cheese on top. Bake your lasagna at 375°F (190°C). Cover it with foil for the first 25 minutes. This keeps it moist. After that, take off the foil and bake for another 15 minutes. This makes the cheese bubbly and golden. Let it cool for 10 minutes before slicing. This helps the layers hold together. Cut the lasagna into squares for serving. Garnish with fresh basil leaves and extra Parmesan cheese. This makes it look great! Pair it with a green salad or garlic bread for a complete meal. Enjoy your cheesy chicken Alfredo lasagna with family or friends for a comforting dinner. For the full recipe, check the earlier section. {{image_4}} You can easily make a vegetarian version of this dish. Just swap the chicken for a mix of veggies. Try using mushrooms, zucchini, or bell peppers instead. For added flavor, sauté the veggies before mixing them with the ricotta. This change keeps the dish creamy and satisfying. Feel free to add more vegetables or proteins. Spinach is great for color and taste. You can also toss in some chopped broccoli or roasted red peppers. If you want more protein, consider adding cooked lentils or chickpeas. These ingredients boost nutrition and make the dish heartier. You can switch up the sauce or cheese for a twist. Use a white sauce or pesto instead of Alfredo for a different flavor. For cheese, try blending mozzarella with gouda or fontina for a richer taste. Mixing cheeses adds depth and makes each bite unique. For the full recipe, check out [Full Recipe]. After enjoying your cheesy chicken Alfredo lasagna, you may have some leftovers. To store them, let the lasagna cool completely. Then, cover it tightly with plastic wrap or aluminum foil. You can also place it in an airtight container. This helps keep it fresh for up to three days in the fridge. Make sure to keep it away from strong-smelling foods to avoid any unwanted flavors. When it's time to enjoy your leftovers, reheating is simple. Preheat your oven to 350°F (175°C). Place the lasagna in a baking dish. If you want, add a splash of Alfredo sauce on top to keep it moist. Cover it with foil to prevent drying out. Bake for about 20-25 minutes, or until heated through. You can also reheat individual slices in the microwave for about 1-2 minutes on high. Just check and stir halfway through for even heating. If you want to save some for later, freezing is a great option. Cut the lasagna into portions for easy serving. Wrap each piece tightly in plastic wrap, then foil. This double wrapping helps prevent freezer burn. You can freeze it for up to three months. When ready to eat, let it thaw in the fridge overnight. Reheat in the oven or microwave as mentioned above. Enjoy your homemade meal anytime! For the full recipe, refer to the earlier section. Yes, you can use different pasta shapes. You might try wide egg noodles or even gluten-free options. Just make sure they fit well in your dish. Cook them according to the package directions. This way, they will blend smoothly with the other layers. To make Alfredo sauce, start with butter and cream. Melt 1/2 cup of butter in a pan. Then stir in 1 cup of heavy cream. Cook for about 5 minutes on low heat. Add 1 cup of grated Parmesan cheese. Mix well until it melts. Season with salt, pepper, and garlic powder for flavor. Homemade sauce tastes fresh and creamy. You can tell your lasagna is done when the cheese on top is golden brown and bubbly. Insert a knife in the center; it should slide in easily. If the layers are hot and firm, your lasagna is ready to enjoy. Let it cool a bit before serving for the best slices. For the full recipe, check out the details above. This blog post covered key ingredients for an amazing lasagna. You learned about substitutions, step-by-step cooking, and tips for a perfect dish. I shared tasty variations and smart storage ideas. When you try this recipe, you’ll enjoy a delicious meal that fits your taste. Remember, cooking is fun. Experiment with different flavors and enjoy the process!](https://goldendishy.com/wp-content/uploads/2025/07/68bc65d6-2565-4554-ba8a-7f3921e48887-768x768.webp)

![To make maple glazed butternut squash, you’ll need the following items: - 1 medium butternut squash, peeled and cut into 1-inch cubes - 3 tablespoons pure maple syrup - 2 tablespoons extra virgin olive oil - 1 teaspoon ground cinnamon - 1/2 teaspoon freshly grated nutmeg - 1/4 teaspoon cayenne pepper (optional, for a kick) - Sea salt and freshly cracked black pepper, to taste - 1/4 cup pecans, roughly chopped (for garnish) - Fresh parsley, finely chopped (for garnish) When cooking, measuring accurately is key. Use dry measuring cups for solid items like squash and nuts. For liquids, use a liquid measuring cup. Always level off dry ingredients with a straight edge. This step ensures you get the right amount for best results. You can swap ingredients based on your needs. If you prefer a sweeter taste, try honey instead of maple syrup. For a nut-free option, skip the pecans or use seeds like pumpkin seeds. Always check for allergies, especially with nuts and spices. To make maple glazed butternut squash, start by gathering your ingredients. You'll need: - 1 medium butternut squash, peeled and cut into 1-inch cubes - 3 tablespoons pure maple syrup - 2 tablespoons extra virgin olive oil - 1 teaspoon ground cinnamon - 1/2 teaspoon freshly grated nutmeg - 1/4 teaspoon cayenne pepper (optional) - Sea salt and freshly cracked black pepper, to taste - 1/4 cup pecans, roughly chopped (for garnish) - Fresh parsley, finely chopped (for garnish) First, preheat your oven to 400°F (200°C). This step is key for good roasting. Next, peel and cube the butternut squash. Place the cubes in a large bowl. Drizzle the olive oil and maple syrup over the squash. Then, sprinkle the ground cinnamon, nutmeg, cayenne, sea salt, and black pepper. Toss gently until all the pieces are well coated. Now, it's time to roast your squash. Line a baking sheet with parchment paper. This helps prevent sticking and makes cleanup easy. Spread the coated squash in a single layer on the sheet. Place the baking sheet in the oven. Roast the squash for 25-30 minutes. About halfway through the cooking time, stir the squash. This ensures all sides caramelize and cook evenly. When the squash is fork-tender and has a nice golden color, it's done. Remove it from the oven and let it cool for 2-3 minutes. To get that perfect caramelization, watch your cooking time closely. Stirring halfway through helps. The key is to spread the squash out evenly. If it's too crowded, it will steam instead of roast. You can also adjust the maple syrup for sweetness. A little extra can help with caramelization. If you like a kick, add the cayenne pepper. It balances the sweet and savory flavors beautifully. Once cooked, transfer the squash to a serving dish. Top with chopped pecans and parsley for a fresh touch. This dish is sure to impress! For the complete recipe, check out the [Full Recipe]. When making maple glazed butternut squash, avoid cutting the squash too small. Smaller pieces cook too fast and can burn. Also, don’t skip the olive oil. It helps the squash caramelize and adds flavor. Overcrowding the baking sheet is another mistake. Leave space between the cubes to ensure even cooking. To boost the flavor, add a splash of balsamic vinegar before roasting. This adds depth to the sweetness. Try different spices, too. A pinch of smoked paprika can give a nice twist. For a savory touch, mix in garlic powder or fresh garlic. These will elevate your dish. Use a sturdy baking sheet lined with parchment paper. This helps with easy cleanup and prevents sticking. A large mixing bowl is great for tossing the squash and spices. If you have one, a vegetable peeler makes peeling the squash quick and easy. For a perfect roast, an oven thermometer ensures your oven is at the right temperature. For the full recipe, refer to the above instructions. {{image_4}} You can make this dish even better by adding other veggies. Try sweet potatoes for a richer flavor. Carrots add sweetness and color, while red onions bring a slight bite. Just cut them into similar sizes as the squash. Toss them in the same maple glaze for a yummy blend. You’ll create a colorful and flavorful dish that everyone will love. Want to change the taste? You can use different spices. Try ginger for a warm kick. If you like it spicy, add more cayenne pepper. You can also use smoked paprika for a smoky flavor. Experiment with herbs like thyme or rosemary. Just remember to keep it balanced, so no single flavor overpowers the dish. This recipe is naturally vegan and gluten-free. You can enjoy it without worry. If you want to add protein, try chickpeas. They pair well with the flavors and add a nice crunch. For those who need low-carb options, skip the maple syrup and use a sugar substitute. It’s easy to adapt this dish to fit your needs. For the full recipe, check out the detailed instructions above. To keep your maple glazed butternut squash fresh, store it in an airtight container. Let the squash cool down after cooking. Then, place it in the fridge. It will stay fresh for about 3 to 5 days. If you want to keep it longer, consider freezing. Reheat your butternut squash in the oven for the best results. Preheat your oven to 350°F (175°C). Spread the squash on a baking sheet. Heat it for about 10-15 minutes or until warm. You can also use the microwave. Place it in a microwave-safe dish and cover it. Heat in short bursts, checking to avoid overcooking. Freezing is a great way to save this dish for later. First, let the squash cool completely. Then, spread it on a baking sheet in a single layer. Freeze it for about 1-2 hours until firm. Once frozen, transfer the squash to a freezer-safe bag or container. It can last for up to 3 months in the freezer. When ready to eat, thaw overnight in the fridge before reheating. For more details, check the Full Recipe. Yes, you can prepare this dish ahead of time. Cook the butternut squash and let it cool. Store it in an airtight container in the fridge. You can make it up to two days in advance. When you're ready to eat, just reheat it in the oven or microwave. This makes it great for meal prep. Maple glazed butternut squash lasts about 3 to 5 days in the fridge. Make sure it’s in a sealed container. Check for any signs of spoilage before eating. If it looks or smells off, it’s best to toss it. Freshness is key for enjoying this tasty dish. You can pair this dish with many foods. It goes well with roasted chicken or turkey. You can also serve it with quinoa or brown rice for a healthy meal. For a vegetarian option, pair it with a bean salad. The sweet and savory flavors work well with many sides. For more details on how to whip up this incredible dish, check out the Full Recipe. This guide walked you through each step of making Maple Glazed Butternut Squash. We covered ingredients, how to prepare, cook, and store your dish. I shared tips to avoid mistakes and ideas for adding your own twist. Remember, the key to perfect caramelization is patience. Enjoy experimenting with flavors and variations. This dish can be a crowd-pleaser and is easy to adapt. I hope you feel ready to try it out. Enjoy your cooking!](https://goldendishy.com/wp-content/uploads/2025/07/e9e7eb41-1a1b-4d7a-9d20-35ffe8b1aa92-768x768.webp)
![- 8 ounces fettuccine or spaghetti - 1 pound boneless, skinless chicken breast - 2 cups cremini or button mushrooms - 3 cloves garlic - 1 medium onion - 1 cup heavy cream - 1 tablespoon extra virgin olive oil - 1 teaspoon dried thyme - 1/2 cup freshly grated Parmesan cheese When you gather these ingredients, you're on your way to a delicious meal. The fettuccine or spaghetti forms the base of the dish. I love using fresh chicken breast; it cooks quickly and stays juicy. The mushrooms add a rich flavor that pairs perfectly with the cream sauce. For the additional ingredients, garlic and onion bring depth. They form the aromatic base of your sauce. The heavy cream is key for that creamy finish that makes this dish so comforting. Don't forget the seasonings! Extra virgin olive oil helps cook the chicken and gives a lovely flavor. Dried thyme adds a nice herbal note, while the Parmesan cheese makes everything taste even better. This dish is not just tasty; it’s simple and quick. You can find the full recipe to guide you step by step. Enjoy the process of cooking and savor your savory chicken and mushroom pasta! To start, bring a large pot of salted water to a rolling boil. Add 8 ounces of fettuccine or spaghetti. Cook the pasta according to the package directions until it is al dente. This usually takes about 8-10 minutes. When the pasta is ready, drain it but save about 1 cup of the pasta water. This water is important for later. It helps make the sauce creamy and smooth. While the pasta cooks, heat 1 tablespoon of extra virgin olive oil in a large skillet over medium heat. Add 1 pound of diced boneless, skinless chicken breast to the skillet. Cook the chicken for about 6-8 minutes, stirring occasionally. You want it golden brown and fully cooked. Season the chicken with salt and freshly ground black pepper. This will boost the flavor. Once done, take the chicken out and set it aside on a plate. In the same skillet, add 1 medium onion, finely chopped, and 3 cloves of minced garlic. Sauté these for about 3 minutes. You want the onion to turn translucent and fragrant. Next, add 2 cups of sliced cremini or button mushrooms to the skillet. Cook the mushrooms for about 5 minutes, stirring now and then. They should soften and release their moisture. Now, sprinkle 1 teaspoon of dried thyme and 1 teaspoon of Italian seasoning blend over the mushrooms. Stir to mix it well. Pour in 1 cup of heavy cream and bring the mixture to a gentle simmer. Let it thicken for about 3-5 minutes, stirring often. Finally, return the cooked chicken to the skillet. Mix it well with the sauce. If the sauce is too thick, gradually add some reserved pasta water until you reach your desired consistency. Now, add the drained pasta to the skillet. Toss everything together until the pasta is well coated with the sauce. Stir in 1/2 cup of freshly grated Parmesan cheese until it melts and creates a rich, creamy texture. Taste and adjust the seasoning with more salt or pepper if needed. For more detail, check the [Full Recipe]. Enjoy creating this delightful dish! To make your chicken and mushroom pasta really shine, consider adding a dash of lemon juice or zest. It brightens up the dish. Fresh herbs like basil or oregano also add great flavor. You can use a splash of white wine while cooking the chicken. This adds depth and richness. For cooking techniques, try searing the chicken on high heat. This gives it a nice golden crust. When cooking mushrooms, don't crowd the pan. This helps them brown nicely. To thicken your sauce, let it simmer longer. Stir it often to avoid burning. You can also add a bit of grated cheese. This helps create a creamy texture. If your sauce is too thick, use reserved pasta water. Slowly add it in, mixing well. This water has starch that helps the sauce stick to the pasta. For plating, use a large bowl or individual plates. Twirl the pasta with a fork for a neat look. Top each serving with a sprinkle of fresh parsley. This adds color and a fresh taste. To elevate your dish, add more grated Parmesan on top. A light sprinkle of cracked black pepper adds a nice touch. Enjoy your beautiful and tasty meal! {{image_4}} You can change the protein in this dish to fit your taste. If you want to try other meats, consider using shrimp or turkey. Both blend well with the creamy sauce and mushrooms. If you're looking for vegetarian options, tofu or chickpeas work great. They add protein and soak up the flavors. If you have dietary restrictions, you can swap the chicken for plant-based alternatives. Many brands offer delicious meatless chicken that mimics the texture and taste. This makes it easy for everyone to enjoy this dish. Switching up the type of pasta can give your meal a fresh twist. You can use penne, rigatoni, or even whole wheat pasta. Each choice brings its own flavor and texture. If you need gluten-free options, look for pasta made from rice, corn, or lentils. These options are tasty and keep the dish light. If you're looking for dairy-free options, substitute heavy cream with coconut milk or cashew cream. Both will provide a rich and creamy texture. You can also add veggies to boost flavor. Spinach, broccoli, or bell peppers can enhance the dish. Just sauté them with the onions and garlic for added taste. For the full recipe, check out Heavenly Chicken & Mushroom Fettuccine. To keep chicken and mushroom pasta fresh, store it in an airtight container. Always let it cool first before sealing. Place the container in the fridge. It should last for 3 to 4 days. Use glass or BPA-free plastic containers for the best results. To freeze chicken and mushroom pasta, follow these steps: 1. Allow the dish to cool completely. 2. Place it in a freezer-safe container or heavy-duty freezer bag. 3. Remove as much air as possible before sealing. 4. Label the container with the date. It can stay frozen for up to 2 months. When ready to eat, thaw it in the fridge overnight. To reheat your pasta, use these methods: - Stovetop: Heat in a skillet over medium heat. Add a splash of water or broth to prevent sticking. - Microwave: Place in a microwave-safe bowl. Cover with a damp paper towel and heat in 1-minute intervals. Avoid overcooking by checking often. Stir to ensure even heating. Enjoy your meal! For the full recipe, check out Heavenly Chicken & Mushroom Fettuccine. Chicken and mushroom pasta lasts about 3 to 4 days in the fridge. Store it in an airtight container. This keeps the pasta fresh and safe to eat. Make sure to cool it to room temperature before putting it in the fridge. This helps prevent bacteria growth. Yes, you can make chicken and mushroom pasta ahead of time. Cook the dish and let it cool completely. Then, store it in the fridge. When you are ready to eat, reheat it on low heat. Add a splash of cream or pasta water to keep it creamy. Side dishes that pair well include: - Garlic bread - A fresh green salad - Steamed vegetables - Roasted asparagus These options add variety and color to your meal. Yes, chicken and mushroom pasta is great for meal prep. You can store individual portions in containers. This makes it easy to grab a meal on busy days. Just remember to keep the pasta sauce separate if you want to avoid soggy noodles. You can use dried mushrooms if fresh ones are not available. Just soak them in warm water for about 20 to 30 minutes. Drain and chop them before adding to the dish. This way, you still get rich mushroom flavor in your pasta. For the best results, use a mix of dried and fresh mushrooms if you can. In this post, we covered how to make a tasty Chicken and Mushroom Pasta. You learned about key ingredients like chicken, mushrooms, and pasta. We walked through each step, from cooking the pasta to making a creamy sauce. You now have tips to boost flavor and present your dish well. Remember, you can adapt this recipe with different proteins or sauces. Keep it fresh by following our storage tips. Enjoy cooking and sharing this delicious meal!](https://goldendishy.com/wp-content/uploads/2025/06/be10f885-e993-4582-ae05-a82ade9d612d-768x768.webp)