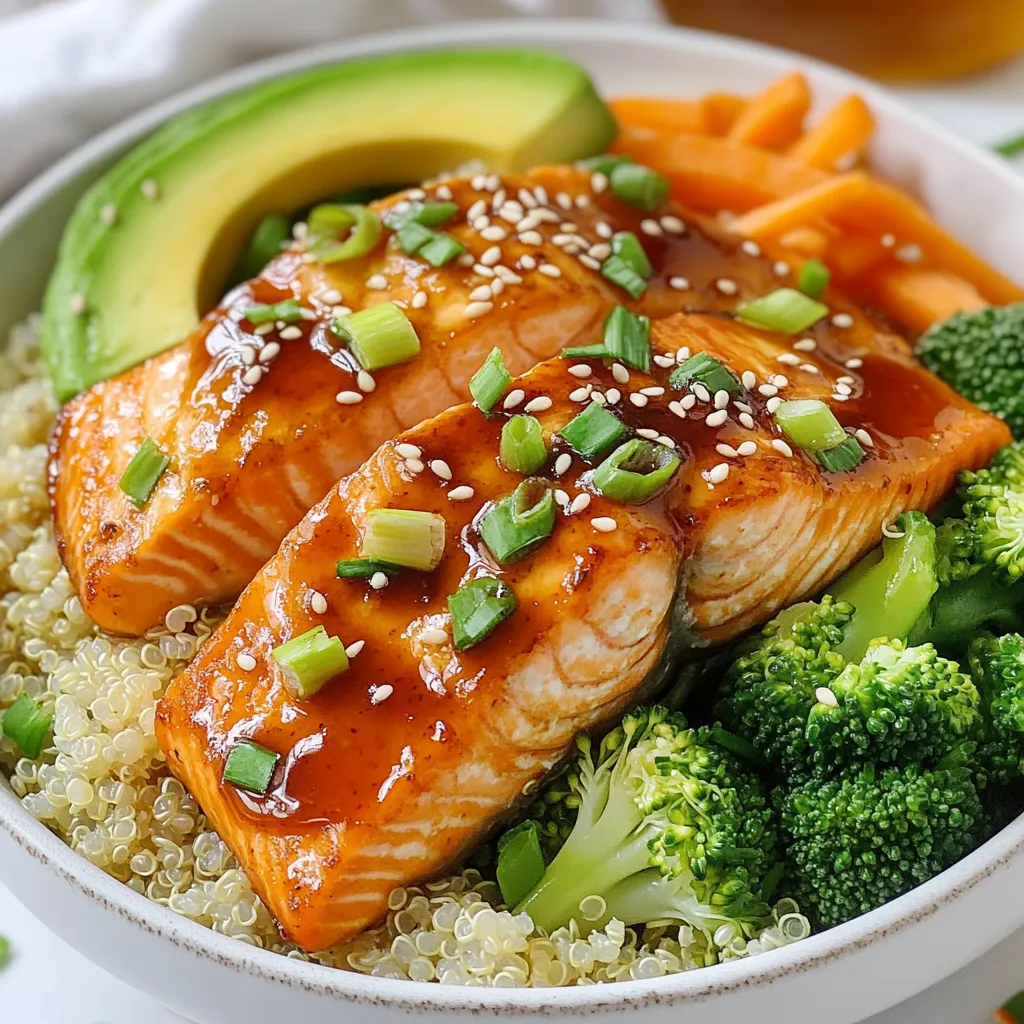
Teriyaki Salmon Bowls Flavorful and Easy Dinner Guide


Are you ready to enjoy a delicious and healthy dinner? Teriyaki Salmon Bowls are not just flavorful; they are also quick and easy to make. With a few simple steps, you can create a dish that impresses your family and friends. In this guide, I’ll show you how to prepare mouthwatering teriyaki salmon, choose the right ingredients, and even provide tasty variations for everyone. Let’s dive into this tasty adventure!
Why I Love This Recipe
- Healthy and Nutritious: This teriyaki salmon bowl is packed with omega-3 fatty acids from the salmon, fiber from the quinoa or brown rice, and a variety of vitamins from the fresh vegetables.
- Quick and Easy: With a total preparation time of just 40 minutes, this dish is perfect for busy weeknights or a last-minute dinner idea.
- Flavor Explosion: The homemade teriyaki sauce combines sweet, savory, and umami flavors, making every bite of this salmon bowl incredibly delicious.
- Customizable: You can easily swap out the vegetables or grains based on your preferences or what you have on hand, making this recipe versatile and adaptable.
Ingredients
List of Ingredients
– 2 fresh salmon fillets (6 oz each)
– 1/4 cup low-sodium soy sauce
– 2 tablespoons honey
– 1 tablespoon sesame oil
– 1 tablespoon rice vinegar
– 1 teaspoon fresh ginger, finely grated
– 1 teaspoon garlic, finely minced
– 1 cup quinoa or brown rice, cooked
– 1 cup broccoli florets, trimmed
– 1/2 cup carrots, thinly sliced
– 1/2 ripe avocado, carefully sliced
– 2 green onions, finely chopped
– Sesame seeds, for garnish
– Salt and pepper, to taste
Optional Ingredients for Added Flavor
– Red pepper flakes for heat
– Lime juice for a tangy twist
– Cashews for crunch
– Cilantro for freshness
These optional ingredients can take your teriyaki salmon bowls to another level. A sprinkle of red pepper flakes can add a nice kick. Fresh lime juice brightens the dish. Cashews give a crunchy texture, while cilantro adds a fresh note.
Nutritional Information per Serving
– Calories: 550
– Protein: 30g
– Carbohydrates: 50g
– Fat: 25g
– Fiber: 9g
– Sodium: 600mg
This meal is packed with protein and healthy fats. The fiber from quinoa and veggies helps keep you full. It’s a great choice for a balanced dinner.

Step-by-Step Instructions
Preparing the Teriyaki Sauce
To make the teriyaki sauce, gather your ingredients. You need low-sodium soy sauce, honey, sesame oil, rice vinegar, ginger, and garlic. In a small bowl, whisk them together until smooth. This sauce adds a sweet and savory flavor to the salmon. It is easy to make and brings everything together.
Marinating the Salmon
Now, take your fresh salmon fillets. Place them skin-side down in a shallow dish. Pour half of the teriyaki sauce over the fillets. Make sure they are well-coated. Cover the dish with plastic wrap and let it marinate for at least 15 minutes. This step is key for flavor.
Cooking the Grains and Steaming Vegetables
While the salmon marinates, cook your grains. You can use quinoa or brown rice. Follow the package instructions for cooking time. Once done, fluff it with a fork. Next, steam the broccoli and carrots in a steaming pot for about 5-7 minutes. They should be tender but still bright and crunchy.
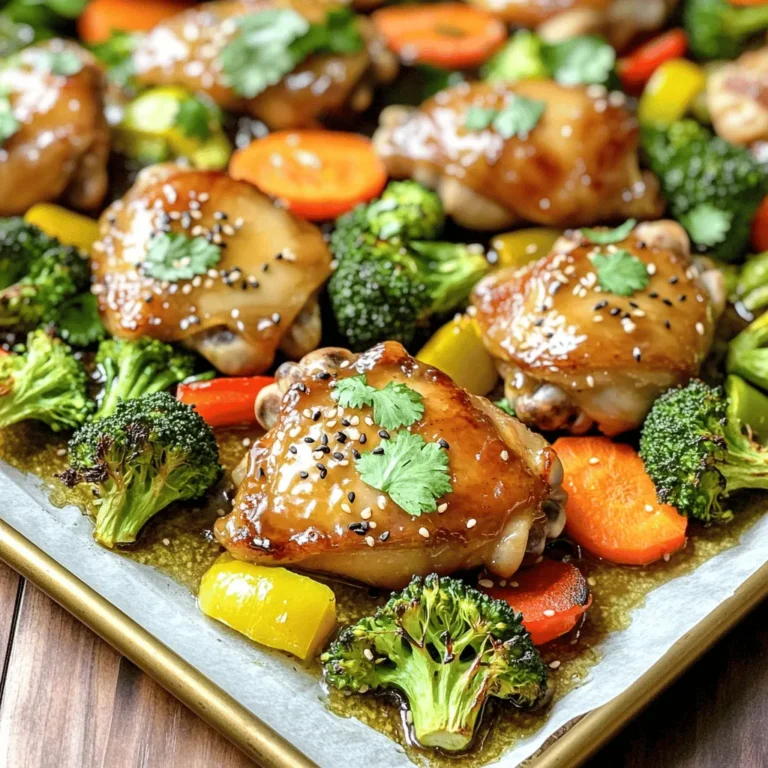
Cooking the Salmon and Assembling the Bowls
Heat a non-stick skillet over medium heat. Place the marinated salmon fillets skin-side down in the skillet. Cook for 4-5 minutes. Gently flip them and cook for another 4-5 minutes. Brush the fillets with the remaining teriyaki sauce while cooking. Once cooked, the salmon should flake easily.
To assemble the bowls, start with a layer of quinoa or rice as the base. Next, add the steamed broccoli and carrots around the grains. Finally, place a perfectly cooked salmon fillet on top of the vegetables.
Final Garnishing Techniques
For the final touch, slice half an avocado and place it on the side of the bowl. Sprinkle chopped green onions over the salmon. Finish with a light dusting of sesame seeds. This adds flavor and makes the dish look beautiful. For extra flavor, drizzle any leftover teriyaki sauce before serving.
Tips & Tricks
Best Cooking Methods for Salmon
The best way to cook salmon is in a skillet. A non-stick skillet keeps the fish from sticking and makes cleanup easy. You can also bake or grill salmon for a tasty flavor. Baking will keep the fish tender and juicy. Grilling adds a nice char and smokiness.
Marination Time Recommendations
I suggest marinating the salmon for at least 15 minutes. This time lets the flavors soak in. If you have more time, marinating for 30 minutes to an hour works even better. Just remember not to marinate too long. The soy sauce can make the fish too salty.
Suggestions for Perfectly Cooked Rice or Quinoa
For fluffy quinoa or rice, follow the package cooking instructions. Rinse the grains before cooking to remove extra starch. This step helps achieve a light texture. After cooking, let the grains sit for 5 minutes, then fluff them with a fork. This makes the rice or quinoa nice and airy.
Pro Tips
- Use Fresh Ingredients: Always opt for fresh salmon and vibrant vegetables to enhance the flavor and nutritional value of your dish.
- Adjust the Marinade: Feel free to tweak the teriyaki sauce ingredients to suit your taste—add more honey for sweetness or extra ginger for a spicy kick!
- Perfectly Cooked Salmon: Cook salmon skin-side down first; this helps to keep the fillet moist and allows the skin to crisp up beautifully.
- Meal Prep Friendly: Prepare extra quinoa or brown rice and vegetables to use for meal prep throughout the week. They pair well with various proteins!
Variations
Alternative Protein Options
You can swap salmon for other proteins. Chicken breast works well with teriyaki sauce. Just marinate and cook it like you do with salmon. Tofu is another great choice. It soaks up the sauce nicely. Use firm tofu for the best texture. Cook it until golden for a nice crunch. Shrimp is also a fun option. Just be sure to adjust cooking times, as shrimp cooks quickly.
Vegan Adaptations
To make this dish vegan, replace salmon with jackfruit or tempeh. Jackfruit has a meaty texture and absorbs flavors well. Marinate it in the same teriyaki sauce. For tempeh, steam it first for a softer bite. Then, marinate and cook it as you would with salmon. You can also use cauliflower steaks. They grill nicely and add a great flavor.
Different Vegetable Combinations
Feel free to mix and match your veggies. Bell peppers add a sweet crunch. Snap peas bring a fresh taste. Zucchini or squash can be sliced and steamed, too. You can also include edamame for a protein boost. Just be creative with what you have! The goal is to keep the colors bright and flavors bold. Remember to steam or sauté until tender but crisp. Enjoy the variety!
Storage Info
How to Store Leftovers
To keep your teriyaki salmon bowls fresh, store the leftovers in an airtight container. Place the salmon, quinoa or rice, and vegetables in separate sections if possible. This keeps the flavors intact. You can store the leftovers in the fridge for up to three days.
Reheating Techniques
When you’re ready to enjoy the leftovers, use a microwave or a skillet. If using a microwave, heat for one minute, then stir and heat in 30-second bursts until warm. If using a skillet, add a splash of water and cover. Heat over medium-low until everything warms up. This keeps the salmon moist.
Freezing Options for Meal Prep
You can freeze the individual parts of the teriyaki salmon bowls. Make sure to use freezer-safe containers. Store the salmon, grains, and veggies in separate bags or containers. They can last up to three months in the freezer. When you’re ready to eat, thaw in the fridge overnight. Then, reheat as mentioned above. This makes meal prep easy and delicious!
FAQs
Can I use other sauces besides teriyaki?
Yes, you can use other sauces. Soy sauce, hoisin, or a sweet chili sauce work well too. Each sauce brings a unique flavor. Experimenting can add fun twists to your dish. If you like a spicy kick, try sriracha mixed with soy sauce. Just make sure to balance flavors with sweetness or acidity.
What side dishes pair well with Teriyaki Salmon Bowls?
Many side dishes complement Teriyaki Salmon Bowls. Here are a few ideas:
– Steamed edamame
– Cucumber salad
– Miso soup
– Pickled vegetables
These sides add freshness and crunch. They also enhance the meal’s overall taste.
How can I adjust the recipe for more servings?
To make more servings, simply increase the ingredients. Use a larger amount of salmon and grains. For example, use four salmon fillets if serving four people. Adjust the sauce too. A double batch of the teriyaki sauce works well. Keep the ratio of sauce to salmon the same for the best flavor.
Can I make this dish ahead of time?
Yes, you can prepare parts ahead of time. Cook the grains and steam the veggies in advance. Store them in the fridge for up to three days. You can also marinate the salmon earlier. For the best taste, cook the salmon fresh right before serving. This keeps it tender and flaky.
This blog post covered making Teriyaki Salmon Bowls from start to finish. We discussed key ingredients, step-by-step cooking methods, and useful tips for success. You learned about variations for protein and vegetables, plus storage options.
Experimenting with flavors will make this dish your own. Enjoy your cooking journey and try new things along the way. These bowls are not just tasty; they’re easy and fun to make. With practice, you’ll find what works best for you and your famil

Teriyaki Salmon Bowls
Ingredients
- 2 fillets fresh salmon fillets (approximately 6 oz each)
- 0.25 cup low-sodium soy sauce
- 2 tablespoons honey
- 1 tablespoon sesame oil
- 1 tablespoon rice vinegar
- 1 teaspoon fresh ginger, finely grated
- 1 teaspoon garlic, finely minced
- 1 cup quinoa or brown rice, cooked
- 1 cup broccoli florets, trimmed
- 0.5 cup carrots, thinly sliced
- 0.5 fruit ripe avocado, carefully sliced
- 2 stalks green onions, finely chopped
- 1 tablespoon sesame seeds, for garnish
- to taste salt and pepper
Instructions
- Prepare the Teriyaki Sauce: In a small mixing bowl, thoroughly whisk together the low-sodium soy sauce, honey, sesame oil, rice vinegar, grated ginger, and minced garlic until the mixture is smooth and well-blended.
- Marinate the Salmon: In a shallow dish, place the salmon fillets skin-side down. Generously pour half of the prepared teriyaki sauce over the fillets, ensuring they are well-coated. Cover with plastic wrap and allow the salmon to marinate for a minimum of 15 minutes to absorb the flavors.
- Cook the Grains: While the salmon is marinating, prepare the quinoa or brown rice according to the package instructions. Once cooked, remove it from heat and fluff it gently with a fork to separate the grains.
- Steam the Vegetables: In a steaming pot or a microwave steamer, add the broccoli florets and sliced carrots. Steam them for about 5-7 minutes, until they are tender but still vibrant green, retaining their nutrients and crunch.
- Cook the Salmon: Heat a non-stick skillet over medium heat. Carefully place the marinated salmon fillets in the skillet, skin-side down. Cook for 4-5 minutes, then gently flip and continue cooking for another 4-5 minutes. Brush the fillets with the remaining teriyaki sauce during cooking to enhance their flavor. The salmon should be cooked through and flake easily with a fork.
- Assemble the Bowls: In each serving bowl, scoop a generous layer of quinoa or brown rice as the base. Next, elegantly arrange the steamed broccoli and carrots around the grains, and place a beautifully cooked salmon fillet right on top of the vegetables.
- Garnish: Artfully add the sliced avocado on the side, sprinkle chopped green onions over the top, and finish with a light dusting of sesame seeds for texture and visual appeal.
- Serve: For an extra burst of flavor, drizzle any remaining teriyaki sauce over the assembled bowls right before serving.
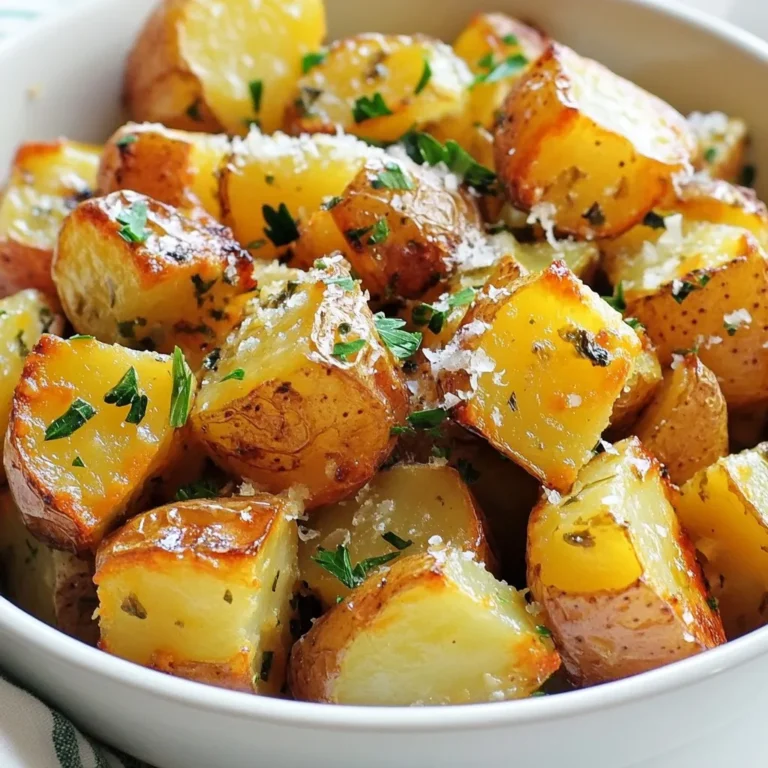
![- 1 lb baby carrots (or regular carrots, peeled and sliced into sticks) - 2 tablespoons olive oil - 3 tablespoons pure maple syrup - 2 tablespoons Dijon mustard - 1 tablespoon fresh thyme leaves (or 1 teaspoon dried thyme) These key items create the sweet and tangy glaze that makes the carrots shine. Baby carrots are sweet and tender, while regular carrots add a heartier texture. The olive oil helps the glaze stick and adds a rich flavor. Pure maple syrup brings sweetness, and Dijon mustard adds a kick. Fresh thyme gives an earthy note that ties it all together. - Salt and pepper to taste - Zest of 1 lemon (for garnish) - Additional herbs (like parsley or chives) These optional items can elevate your dish. Salt and pepper enhance all flavors. Lemon zest adds a bright note that contrasts beautifully with the sweet glaze. Extra herbs can give a pop of color and flavor. Feel free to mix and match these garnishes to make your dish unique. For the full recipe, check out [Full Recipe]. First, you need to preheat your oven to 425°F (220°C). This step helps the carrots roast perfectly. If you’re using regular carrots, peel them first. Then, slice them into sticks about 1/2 inch thick. Cutting them evenly ensures they cook at the same rate. Baby carrots can go straight into the oven without any slicing. Next, grab a small mixing bowl. In it, whisk together the following ingredients: - 2 tablespoons olive oil - 3 tablespoons pure maple syrup - 2 tablespoons Dijon mustard - 1 tablespoon fresh thyme leaves (or 1 teaspoon dried thyme) - A pinch of salt and pepper Whisk until all the ingredients blend into a smooth glaze. This glaze gives the carrots a sweet and tangy flavor that really shines. Now, transfer the carrots to a large mixing bowl. Pour the glaze over the carrots. Toss them gently to coat each piece evenly. You want every carrot stick to be covered in that tasty mixture. Spread the glazed carrots in a single layer on a baking sheet lined with parchment paper. Make sure there's space between each piece; this helps them roast evenly. Place the baking sheet in the oven and roast for 20-25 minutes. Remember to toss the carrots halfway through. This ensures they brown nicely on all sides. When they finish roasting, the carrots should be tender and caramelized, looking delicious. You can find the full recipe for these amazing Maple Dijon Glazed Carrots to make them at home! To make your Maple Dijon glazed carrots pop, think about adding spices or herbs. Try a pinch of cayenne for heat or a dash of garlic powder for depth. Fresh herbs like parsley or dill can also brighten the dish. These small changes can bring a new twist to the recipe. Adjusting sweetness levels is another way to suit your taste. If you love sweet, add more maple syrup. If you prefer less sweetness, cut back slightly. Balancing the sweet and tangy flavors makes each bite exciting. Even cooking is key for great roasted carrots. Cut your carrots into uniform pieces. This ensures they cook at the same rate. For baby carrots, you can roast them whole. If using regular carrots, aim for 1/2 inch thick sticks. If you want to try alternatives to oven roasting, consider steaming or sautéing. Steaming keeps the carrots tender and bright. Sautéing in a pan with the glaze gives a nice caramelization as well. Both methods can work well, but roasting brings out the best flavors. Find the full recipe for Maple Dijon glazed carrots to explore even more cooking tips! {{image_4}} You can easily swap out some ingredients in this recipe. If you're out of maple syrup, try honey or agave syrup. Both add a nice sweetness but change the flavor a bit. You can also use brown sugar, but it will change the glaze's texture. For the mustard, Dijon is great, but you can use yellow mustard for a milder taste. Spicy brown mustard adds a kick. You can even try whole grain mustard for a rustic feel. Each option brings a new twist to the dish. You can make these glazed carrots on the stovetop if you prefer. Simply steam the carrots until tender. Then, toss them in the glaze in a pan over low heat. This method gives you a softer texture. If you're hosting a big dinner, you can serve these carrots in many ways. For a casual meal, serve them right from the baking dish. For a fancy dinner, arrange them on a platter and drizzle extra glaze on top. You can even add some nuts for crunch. For the full recipe, check the link provided. Enjoy exploring these variations! To keep your maple Dijon glazed carrots fresh, use airtight containers. Glass or plastic containers work well. Make sure the carrots cool down before sealing them. This helps prevent moisture build-up. Store the leftovers in the fridge. They stay good for about three to five days. When reheating glazed carrots, the oven is best. Preheat it to 350°F (175°C). Spread the carrots on a baking sheet and heat for about 10 minutes. This keeps them crispy and tasty. You can also use the microwave. Heat them in short bursts of 30 seconds. Stir between each burst to keep flavors intact. How long do roasted carrots last in the fridge? Roasted carrots can last about 3 to 5 days in the fridge. Store them in an airtight container. This helps keep them fresh and tasty. Can I make this recipe ahead of time? Yes, you can make this recipe ahead of time. Roast the carrots and let them cool. Then, store them in the fridge. Reheat them before serving for the best flavor. Is this recipe suitable for vegan diets? Yes, this recipe is vegan-friendly. It uses maple syrup and mustard, which are both plant-based. You can enjoy this dish without any animal products. How can I make this gluten-free? This recipe is already gluten-free. Dijon mustard is often gluten-free, but always check the label. This way, you ensure it fits your diet. What meals pair well with glazed carrots? Glazed carrots pair well with roasted chicken, grilled fish, or a hearty grain dish. Their sweet and tangy flavor adds balance to savory meals. Can I use other vegetables in this recipe? Yes! You can use other veggies like parsnips or sweet potatoes. Just adjust the cooking time for different vegetables. Enjoy the variety! For the full recipe, check out the Maple Dijon Glazed Carrots recipe to explore all the tasty details. Maple Dijon glazed carrots are both tasty and easy to make. We covered essential ingredients like carrots, olive oil, and Dijon mustard. Each step, from roasting to optional flavor tweaks, helps you create the best dish. Remember to store leftovers properly and reheat them for full flavor. Feel free to experiment with variations to match your taste. With this recipe, you can impress at any meal. Now, gather your ingredients and enjoy making these delicious carrots!](https://goldendishy.com/wp-content/uploads/2025/07/c1b9af90-3a4b-46ea-8cf2-4dca4008c015-768x768.webp)
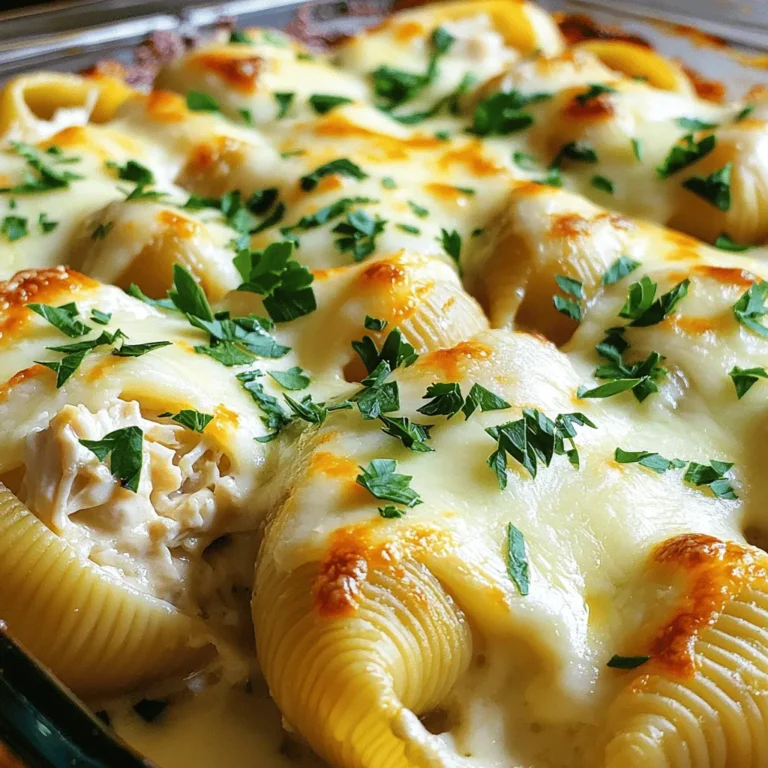
![- 2 boneless, skinless chicken breasts - 8 oz fettuccine pasta - 2 cups fresh spinach, roughly chopped - 1 cup heavy cream - 1 cup finely grated Parmesan cheese - 2 tablespoons olive oil - 2 cloves garlic, minced - Salt and freshly ground black pepper, to taste - Fresh basil leaves, for garnish (optional) - Red pepper flakes, for a spicy kick (optional) When I cook Chicken and Spinach Alfredo, I gather these key ingredients first. The chicken breasts are a must because they add protein and flavor. I prefer fettuccine pasta for its wide shape, which holds the creamy sauce well. Fresh spinach adds a pop of green and nutrients, making the dish feel lighter. Next, I grab heavy cream. It’s the star of the sauce, bringing that rich, smooth texture. Of course, Parmesan cheese can't be skipped. It gives depth and a savory taste that blends perfectly with the cream. In the additional ingredients, olive oil is essential for cooking. It adds a nice flavor base. Minced garlic brings a wonderful aroma and a bit of zing. I always keep salt and pepper handy to season the dish just right. Lastly, I suggest garnishing with fresh basil for that extra flair. A sprinkle of red pepper flakes can bring heat if you like a spicy bite. For the full list of ingredients, check out the Full Recipe. First, I boil a large pot of salted water. Once it bubbles, I add the fettuccine. I cook it until it's al dente, which takes about 8-10 minutes. After cooking, I drain the pasta but keep a small cup of the pasta water for later. While the pasta cooks, I heat olive oil in a skillet over medium heat. I take the chicken breasts and season them with salt and pepper on both sides. I place the chicken in the hot skillet and cook for about 6-7 minutes on each side. When they turn golden brown and are fully cooked, I remove them from the skillet. I let them rest for a few minutes before slicing them into thin strips. In the same skillet, I lower the heat and add minced garlic. I sauté it for about 30 seconds until it smells amazing. Then, I slowly pour in heavy cream while stirring. I let it simmer gently, making sure it doesn’t boil. Next, I whisk in grated Parmesan cheese until the sauce is smooth and creamy. I add the chopped spinach and let it cook for 1-2 minutes until it wilts. Now, I carefully fold the cooked fettuccine into the creamy sauce. I mix it well so each strand is coated. If the sauce is too thick, I add a bit of the reserved pasta water to get the right consistency. Finally, I arrange the sliced chicken on top of the pasta. If I want a spicy touch, I sprinkle some red pepper flakes over everything. For the full recipe, check out the earlier section. - Adjusting seasoning: Start by tasting your sauce as you cook. Add more salt or pepper if needed. A pinch of nutmeg can also enhance the flavor. This small touch makes a big difference. - Whisking technique for smooth sauce: When you add the cream and cheese, whisk constantly. This helps to blend everything smoothly. It prevents lumps and ensures a creamy texture. - Presentation tips: Serve the Chicken and Spinach Alfredo in shallow bowls. Drizzle extra sauce on top for a rich look. Finish with freshly grated Parmesan and a basil sprig. This adds color and makes the dish pop. - Best accompaniments: Garlic bread or a fresh salad pairs perfectly. The crunch of the salad balances the creaminess of the dish. A glass of white wine complements the flavors well too. - Multitasking during prep: While the pasta cooks, focus on the chicken. Season it and cook it in the same skillet. This saves time and adds flavor to the sauce. Always keep an eye on the pasta so it doesn’t overcook. By using these tips, you can make your Chicken and Spinach Alfredo even better. Each step adds to the dish's overall experience, making it truly enjoyable. Enjoy the process and get creative! {{image_4}} You can switch out the chicken for other proteins. Shrimp works great in this dish. It adds a nice flavor and cooks quickly. Tofu is a good option for a vegetarian meal. Just make sure to season it well before cooking. For pasta, fettuccine is classic, but you can try penne or whole wheat. Penne holds the sauce well due to its shape. Whole wheat adds a nutty flavor and more fiber. Want to boost nutrition? Add seasonal vegetables. Broccoli brings crunch and color. You can steam it lightly before adding. Bell peppers add sweetness and vibrancy. Slice them thinly to mix in easily. Feel free to experiment! Seasonal vegetables can change the dish each time. Enhancing flavor is simple. You can add herbs like Italian seasoning for a savory kick. A sprinkle of lemon zest brightens the dish and adds freshness. For a bit of heat, red pepper flakes are great. Just a pinch goes a long way. These variations keep your Chicken and Spinach Alfredo fun and fresh. Check out the Full Recipe to get started! After you enjoy your Chicken and Spinach Alfredo, store any leftovers in the fridge. Use an airtight container to keep it fresh. You can keep it for about 3 to 4 days. To reheat, put the pasta in a pan over low heat. Add a splash of water or cream to help it warm evenly. Stir often to keep it creamy and avoid burning. If you want to keep it longer, you can freeze Chicken and Spinach Alfredo. Place it in a freezer-safe container or bag. Make sure to remove as much air as possible. It can last in the freezer for up to 2 months. When you are ready to eat it, take it out and thaw it in the fridge overnight. To reheat, warm it in a pan over low heat, adding a bit of water or cream to restore its creaminess. For the complete recipe, check the [Full Recipe]. Chicken and Spinach Alfredo lasts about 3 to 4 days in the fridge. Store it in an airtight container to keep it fresh. Make sure to cool it down before placing it in the fridge. This helps prevent condensation, which can make the dish soggy. Yes, you can make this recipe ahead of time. Cook the pasta and chicken in advance. Store them separately from the sauce. When you’re ready to eat, just heat everything together. This keeps the pasta from getting mushy. For the best taste, try to eat it within a few days. You can use half-and-half for a lighter option. If you want a dairy-free choice, try coconut cream or cashew cream. Both options give a nice creamy texture. You may need to adjust the seasonings to match your taste. Yes, you can make this dish gluten-free. Use gluten-free pasta such as rice or corn pasta. For the sauce, just check the labels on your cream and cheese. Most are gluten-free, but it’s good to be sure. This way, everyone can enjoy your Chicken and Spinach Alfredo. For the full recipe, check the details above! This blog post covered the key ingredients and steps for making Chicken and Spinach Alfredo. We discussed how to prepare the pasta, cook the chicken, and create a creamy sauce. Plus, I shared tips for enhancing flavors and serving. Remember, you can mix it up with different proteins and veggies. Also, I provided storage advice to keep your meal fresh. Embrace your creativity in the kitchen. Enjoy a tasty meal and share it with friends or family!](https://goldendishy.com/wp-content/uploads/2025/06/ee4d0533-23fd-4fc4-b715-1820a1e3e494-768x768.webp)