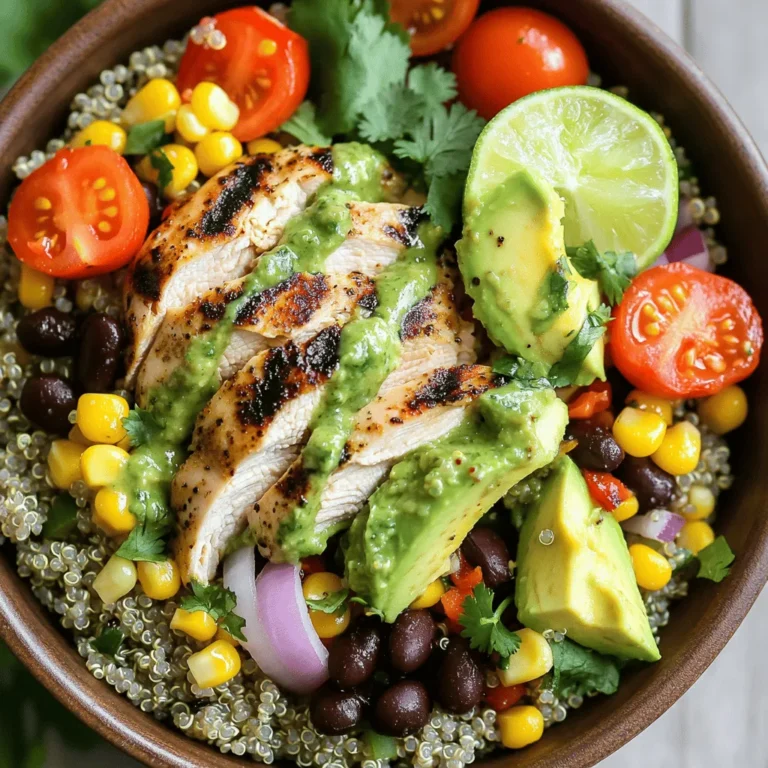
Savory BBQ Chicken Flatbread Easy and Tasty Recipe
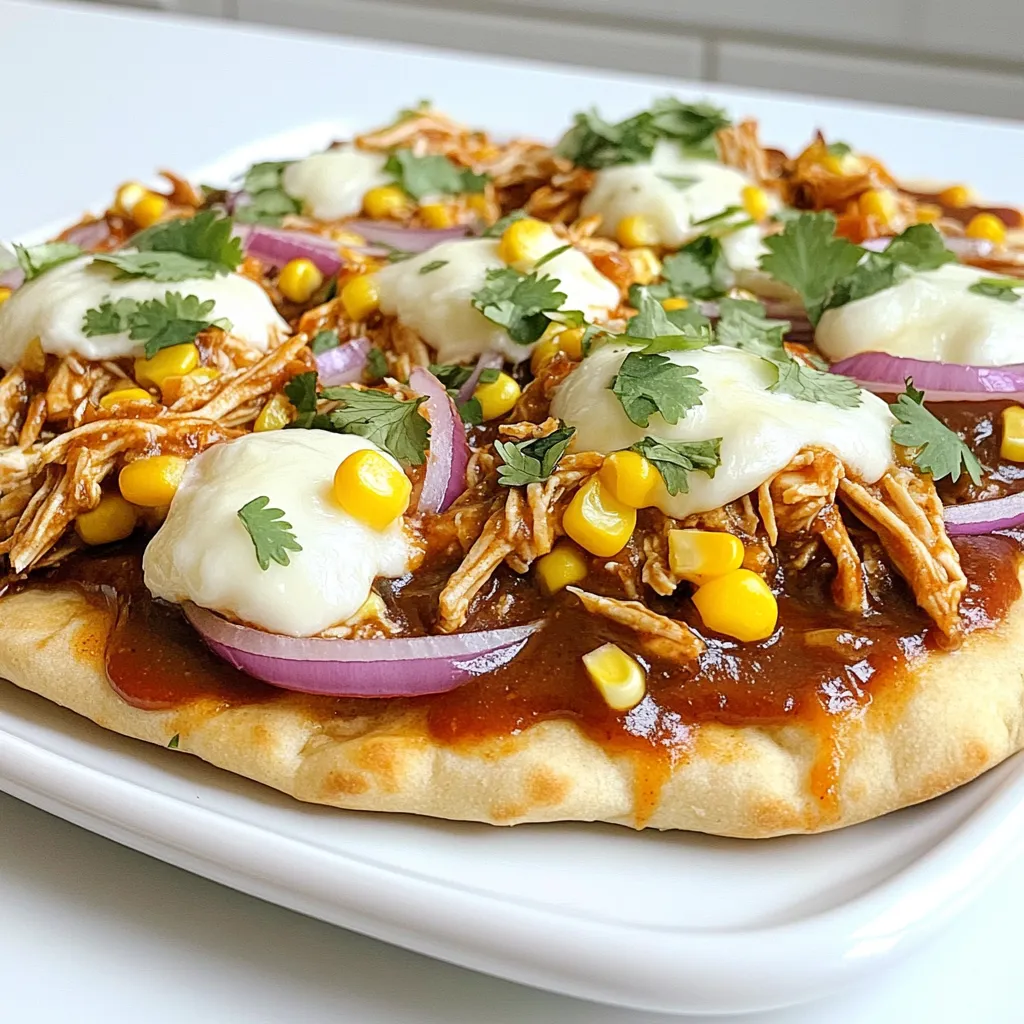
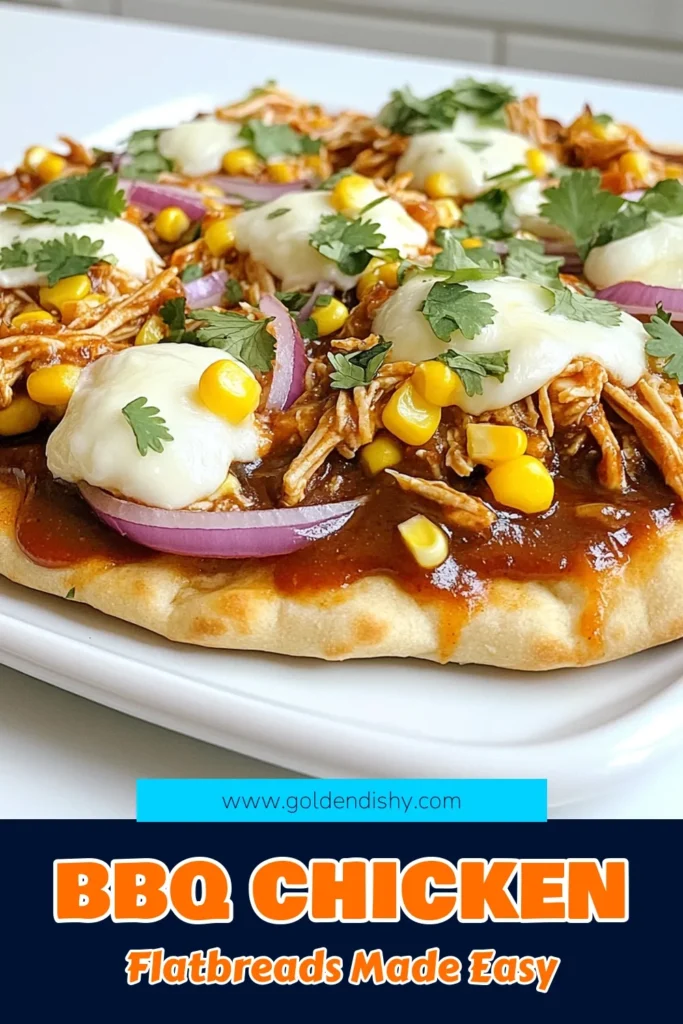
Are you ready to impress your family and friends with a meal that’s easy and delicious? This Savory BBQ Chicken Flatbread recipe is a crowd-pleaser that promises bold flavors and crispy textures. With simple ingredients and quick steps, you can whip up this tasty dish in no time. Get ready to indulge in a mouthwatering creation that you can customize to your liking! Let’s dive into the details.
Ingredients
Main Ingredients Overview
For this BBQ chicken flatbread, you will need a few key items:
– 2 large flatbreads or naan
– 1 cup cooked chicken, shredded
– 1/2 cup BBQ sauce
– 1 cup mozzarella cheese, shredded
These main ingredients create a tasty base for your meal. The flatbreads serve as a perfect canvas. The shredded chicken brings protein and flavor. The BBQ sauce adds that sweet and smoky taste. Lastly, the mozzarella melts beautifully, making everything gooey and yummy.
Additional Ingredients for Flavor
To amp up the taste, include these extras:
– 1/2 red onion, thinly sliced
– 1/2 cup corn (canned or fresh)
– 1/4 cup fresh cilantro, chopped
– Salt and pepper to taste
– Olive oil for brushing
These ingredients add depth and color. The red onion gives a nice crunch and sharpness. Corn adds sweetness and a fun texture. The cilantro brings freshness, while salt and pepper boost all the flavors. Olive oil helps create a crispy crust.
Optional Ingredients for Customization
Feel free to customize your flatbread with these options:
– Sliced jalapeños for heat
– Avocado for creaminess
– Different cheeses like cheddar or gouda
– Your favorite vegetables like bell peppers or spinach
These optional ingredients let you make the recipe your own. Add spice with jalapeños or creaminess with avocado. Using different cheeses can change the flavor profile. Adding veggies boosts nutrition and adds color. Enjoy experimenting with your flavors!
Step-by-Step Instructions
Prepping the Oven and Flatbreads
Start by preheating your oven to 400°F (200°C). This temperature ensures your flatbreads will be crispy and delicious. While the oven heats, lay out your flatbreads or naan on a baking sheet lined with parchment paper. This step makes cleanup easier later. Lightly brush olive oil on each flatbread. This adds flavor and helps with crispiness.
Combining Chicken and BBQ Sauce
In a medium bowl, mix the shredded chicken with the BBQ sauce. Use your hands or a spoon to coat every piece of chicken well. This sauce gives the chicken a smoky flavor. Once mixed, set it aside so the flavors can blend.
Assembling and Baking the Flatbreads
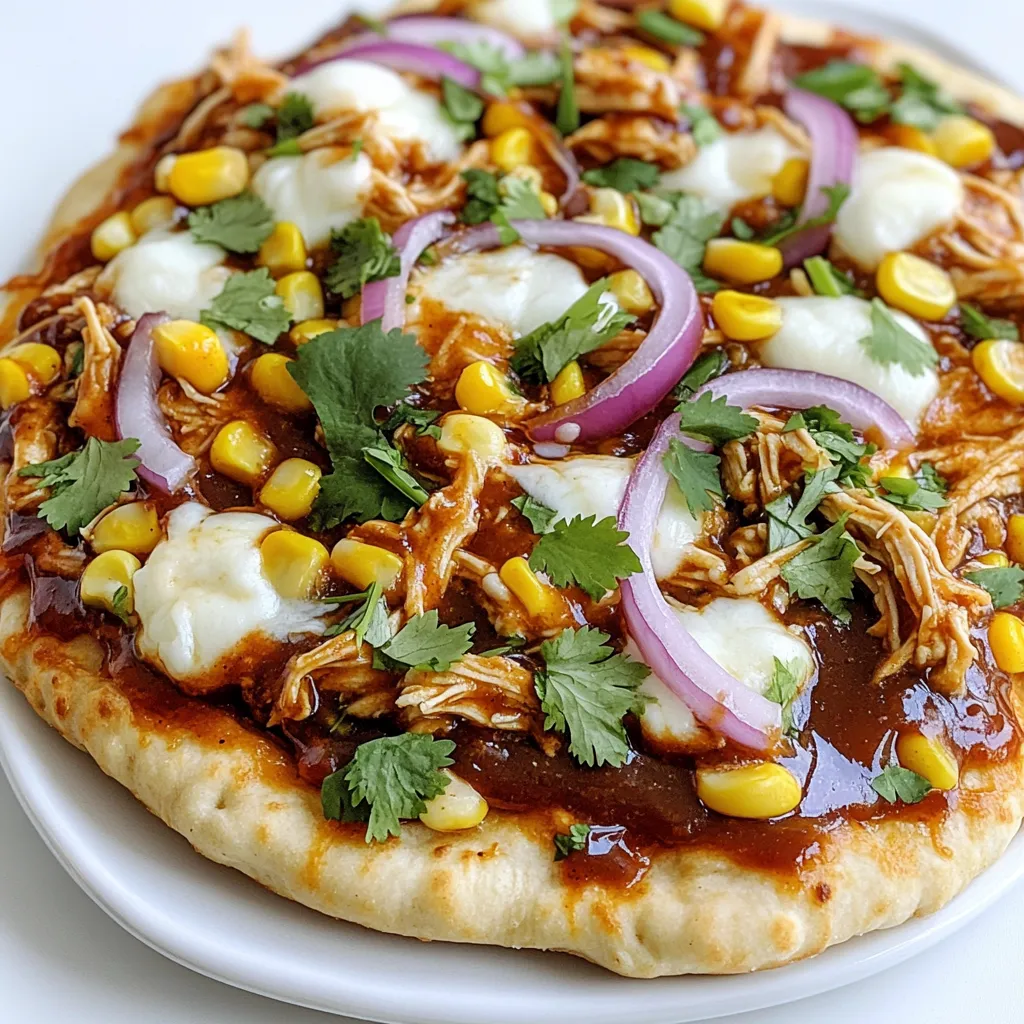
Spread the saucy chicken evenly over the flatbreads. Make sure each bite has that tasty BBQ chicken flavor. Next, sprinkle the shredded mozzarella cheese on top. This will melt and become gooey during baking.
Then, add the thinly sliced red onion and corn. These ingredients add color and sweetness to your flatbread. Season with salt and pepper to enhance the flavors.
Now, slide the baking sheet into the oven. Bake for 12 to 15 minutes. Watch closely as the cheese melts and the edges turn golden-brown.
Tips for Achieving Perfect Crispiness
To get perfectly crispy flatbreads, make sure to brush the oil evenly. Don’t overload the flatbread with toppings; this helps them cook evenly.
How to Know When They’re Done
You’ll know the flatbreads are ready when the cheese bubbles and the edges are golden. Let them cool for a few minutes after baking. This makes cutting them easier. Before serving, add fresh cilantro on top for a burst of flavor. Now, slice them into pieces and enjoy!
Tips & Tricks
Best Practices for Cooking Chicken
To cook chicken perfectly, start with fresh or thawed meat. Make sure the chicken is fully cooked. The safe internal temperature for chicken is 165°F (75°C). You can use a meat thermometer for this. Shredded chicken works best for flatbreads. You can use rotisserie chicken for a quick option. Just shred it and mix it with the BBQ sauce.
How to Customize Your Flatbread
You can make your flatbread unique by adding toppings. Try adding bell peppers or jalapeños for extra flavor. You can swap mozzarella for sharp cheddar or pepper jack cheese. If you want a healthier version, add spinach or kale. For a sweeter taste, consider adding pineapple chunks. The options are endless, so feel free to explore!
Serving Suggestions and Pairings
Serve your BBQ chicken flatbread on a wooden board for a rustic look. A small bowl of extra BBQ sauce makes a great dip. Pair it with a fresh salad for balance. You can also serve it with chips or a veggie platter. This meal is perfect for game day or a casual dinner with friends. Enjoy your tasty creation!
Variations
BBQ Chicken Flatbread with Veggies
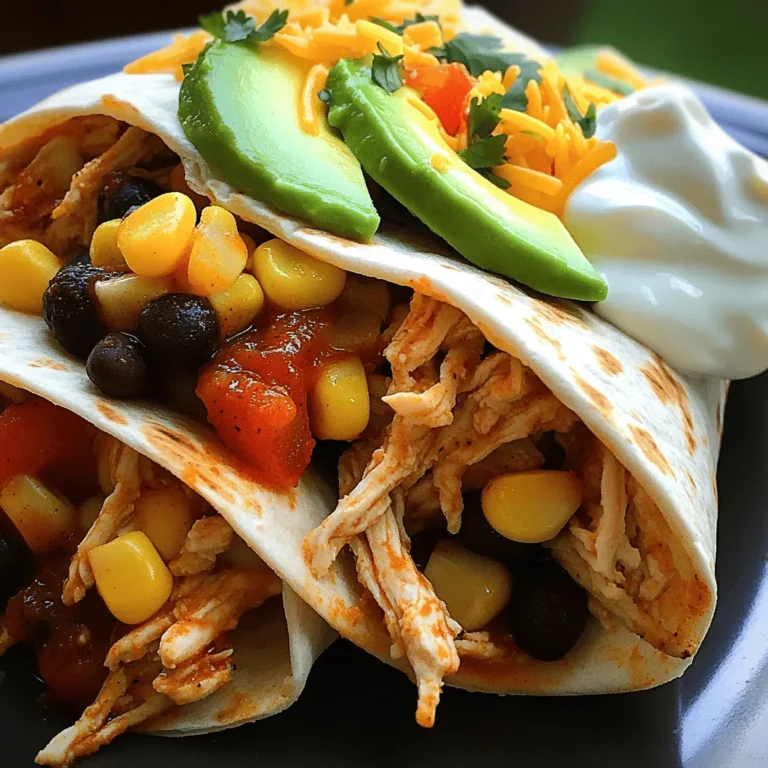
You can add veggies to your BBQ chicken flatbread for extra flavor and crunch. Use bell peppers, zucchini, or spinach. Slice the veggies thinly and spread them on top of the cheese. This adds color and nutrition to your meal.
Spicy BBQ Chicken Flatbread
If you like heat, try a spicy BBQ chicken flatbread. Mix some hot sauce into the BBQ sauce. You can also sprinkle some red pepper flakes on top before baking. This gives the flatbread a nice kick that pairs well with the sweet BBQ flavor.
Vegetarian BBQ Flatbread Options
For a vegetarian twist, swap out the chicken with grilled mushrooms or eggplant. You can also use black beans or chickpeas for protein. Top with your favorite veggies, like onions and peppers. Drizzle with BBQ sauce for a tasty meat-free option.
Storage Info
How to Store Leftovers
To keep your BBQ chicken flatbread fresh, let it cool first. Wrap each flatbread tightly in plastic wrap or foil. Place them in an airtight container. This way, they stay tasty for up to three days in the fridge.
Reheating Instructions
When you want to enjoy your leftovers, preheat your oven to 350°F (175°C). Place the flatbreads on a baking sheet. Heat them for about 10-12 minutes. This will help the cheese melt again and the flatbread crisp up nicely. You can also use a microwave, but it may not be as crispy.
Freezing Flatbreads for Future Meals
If you want to save flatbreads for later, wrap them tightly in plastic wrap. Then, place them in a freezer-safe bag. They can stay fresh for up to three months. When you’re ready to eat, thaw them in the fridge overnight. Then, reheat as mentioned above.
FAQs
Can I make BBQ chicken flatbread ahead of time?
Yes, you can make BBQ chicken flatbread ahead of time. Prepare the flatbreads and store them in the fridge. Just assemble them, but don’t bake yet. You can bake them later when you are ready to eat. This saves time and makes serving easier.
What are the best BBQ sauces to use?
The best BBQ sauces depend on your taste. Use a sweet sauce for a tasty blend. A tangy sauce adds a nice kick. A smoky sauce gives depth to the flavor. Try your favorite brand or homemade sauce for the best results.
How do I make homemade flatbreads?
Making homemade flatbreads is simple. You need flour, water, salt, and yeast. Mix the dry ingredients first. Then add water to form a dough. Knead it well and let it rise. Roll it out and cook on a hot pan for a few minutes on each side.
Can I use other cheeses for this recipe?
Yes, you can use other cheeses for BBQ chicken flatbread. Cheddar cheese offers a sharp flavor. Gouda adds a rich, smoky taste. Feta brings a tangy touch. Mix and match to find your favorite combination!
Are there gluten-free options available?
Yes, there are gluten-free options for flatbreads. Use gluten-free flour blends or store-bought gluten-free flatbreads. You can also make cauliflower flatbreads as a healthy choice. Just ensure all other ingredients are gluten-free as well.
This blog covered all you need for BBQ chicken flatbreads. We explored main and extra ingredients, step-by-step cooking, and tips for success. You can customize the flatbreads to fit your taste.
Remember to store leftovers the right way and enjoy them later. With this guide, you can make a fun meal that everyone will love. Happy cooking!

![- 1 pre-made pie crust - 2 medium zucchinis, grated - 2 cups fresh spinach, chopped - 1 small onion, finely chopped - 3 large eggs - 1 cup milk I love using a pre-made pie crust for this quiche. It saves time and effort. The zucchinis bring a fresh taste, while the spinach adds color and nutrients. Eggs and milk create a rich, creamy texture that binds everything together. - 1 teaspoon garlic powder - Salt and pepper to taste - 1 tablespoon olive oil Garlic powder gives this dish a warm flavor. I always add salt and pepper to enhance the taste. Olive oil is perfect for cooking the veggies and adds a nice depth of flavor. - 1 cup shredded mozzarella cheese - 1/2 cup grated Parmesan cheese Cheese is key for a tasty quiche. Mozzarella melts beautifully, while Parmesan adds a sharp, salty kick. Together, they create a delightful flavor mix that elevates your dish. Don't forget to check the full recipe for complete details! First, heat olive oil in a skillet over medium heat. Add the finely chopped onion. Sauté it for about 3-4 minutes until it turns soft and clear. Next, add the grated zucchini and chopped spinach. Stir often and cook for about 5 minutes. The veggies should become tender, and any extra water will cook off. I love adding garlic powder, salt, and pepper to boost the flavor. After cooking, take it off the heat and let it cool for a moment. In a large bowl, whisk together the eggs and milk until they blend smoothly. This is where the magic begins! Next, add in the shredded mozzarella and grated Parmesan cheese. Fold them in gently. This mixture will bring richness to your quiche. It’s important that the cheese mixes well but still keeps some texture. Now, pour the vegetable and egg mixture into the prepared pie crust. Spread it out evenly to help it cook well. Place the quiche in your preheated oven. Bake for 30-35 minutes. You’ll know it’s ready when the edges turn golden brown and a toothpick inserted in the center comes out clean. Let it cool for about 10 minutes before slicing. This resting time helps enhance the flavors. You can find the full recipe in the previous section for all these steps! To get the best texture for your quiche, you must control moisture. Zucchini has a lot of water, which can make your quiche soggy. To fix this, grate the zucchini and lightly salt it. Let it sit for 10 minutes, then squeeze out the excess liquid. This step is key to a firm quiche. The cooking time can vary based on your oven. I find that checking it a few minutes early helps. If the edges look golden and a toothpick comes out clean, it's ready! For more flavor, consider adding fresh herbs like thyme or basil. A pinch of red pepper flakes can add a nice kick. You can also play with spices, like paprika or onion powder. Each of these can change the taste in a fun way. Cheese is another way to boost flavor. While mozzarella and Parmesan are great, try using feta or goat cheese for a tangy twist. These types add both creaminess and a bit of zest to the dish. When serving your zucchini spinach quiche, aim for a bright plate. A colorful plate makes a dish look more appealing. Add fresh basil or parsley on top for an eye-catching touch. You can also serve it with a light salad drizzled with citrus vinaigrette. This adds freshness and balance. For a photo-worthy presentation, slice the quiche into neat pieces. Arrange them in a circle on the plate. This simple trick makes your dish look polished and ready for sharing. Don't forget to snap a picture before you dig in! For the complete recipe, check out the [Full Recipe]. {{image_4}} You can switch up the veggies in your quiche. Broccoli, bell peppers, or mushrooms work great. Each veggie brings its own taste and texture. You can also try seasonal additions. In spring, add asparagus, and in fall, use roasted squash. This keeps your quiche fresh and exciting. If you need a gluten-free quiche, use a gluten-free crust. Many stores sell these now, or you can make your own. If you make your crust, use almond flour or coconut flour for a nice texture. You may need to adjust the liquid in the filling. This helps keep the quiche moist and tasty. Making mini quiches is fun and easy. You can use a muffin tin for individual servings. Just pour the mixture into each cup and fill them about three-quarters full. Bake for about 20-25 minutes. Keep an eye on them to avoid burning. These mini quiches are perfect for snacks or brunch. You can even freeze them for later! Check out the Full Recipe for more details. To keep your quiche fresh, store it in an airtight container. This helps keep moisture out. It stays fresh in the fridge for up to three days. If you plan to eat it later, cover it tightly with plastic wrap or foil. You can freeze your quiche before or after baking. If freezing before baking, wrap it well. This way, you can bake it fresh later. For freezing after baking, let it cool completely first. Store it in an airtight container. It can last up to three months in the freezer. When ready to eat, thaw it in the fridge overnight. For the best taste, reheat your quiche in the oven. Set it to 350°F (175°C) and heat for about 15-20 minutes. This keeps the crust crispy. You can also use a microwave for quick heating. However, the crust may not stay as crunchy. Heat slices for about 1-2 minutes. Always check that it's hot in the middle before serving. You can tell the quiche is done by looking for a few key signs. The edges should be golden brown, and the center should be firm. If you gently shake the quiche, it should not jiggle. Another great way to check is with a toothpick. Insert it into the center of the quiche. If it comes out clean, your quiche is ready to enjoy. Yes, you can use frozen spinach in this recipe. However, it’s important to make a few adjustments. First, thaw the spinach completely and drain any excess water. This helps prevent the quiche from becoming too watery. You may also want to chop the spinach further after thawing. This ensures even distribution in your quiche. Zucchini spinach quiche pairs well with many side dishes. A simple green salad with a light vinaigrette works great. You can also serve it with roasted vegetables for added flavor. If you want something heartier, serve it alongside a bowl of creamy tomato soup. This combination makes for a balanced and tasty meal. This blog post covers how to make a tasty zucchini and spinach quiche. You learned about the main ingredients, like pre-made crust and eggs, plus the best seasonings. I shared step-by-step instructions for preparing and baking. You also got tips for perfecting texture and ideas for variations. Making this dish can be easy and fun. Enjoy experimenting with flavors and ingredients. Whether you serve it for breakfast or dinner, this quiche will impress. Get cooking and enjoy your delicious creation!](https://goldendishy.com/wp-content/uploads/2025/06/2284a9f2-dfec-450d-ba9a-23981f99d5f6-768x768.webp)
![To make a fresh Mediterranean quinoa salad, gather these key ingredients: - 1 cup quinoa, thoroughly rinsed - 2 cups vegetable broth (preferably low-sodium) - 1 bell pepper (either red or yellow), finely diced - 1 medium cucumber, diced into bite-sized pieces - 1 cup cherry tomatoes, halved - 1/4 of a medium red onion, finely chopped - 1/2 cup Kalamata olives, pitted and sliced - 1/2 cup feta cheese, crumbled - 1/4 cup fresh parsley, finely chopped - 1/4 cup extra virgin olive oil - 2 tablespoons freshly squeezed lemon juice - 1 teaspoon dried oregano - Sea salt and freshly cracked black pepper to taste These ingredients blend well together. Each one adds a unique flavor. The quinoa forms the base, while the vegetables add crunch and color. Kalamata olives give it a salty twist, and feta cheese adds creaminess. You can customize your salad with these optional add-ins: - Avocado for creaminess - Grilled chicken for protein - Chickpeas for extra fiber - Spinach or arugula for leafy greens - Sun-dried tomatoes for a tangy kick These add-ins can enhance the salad's taste and texture. Feel free to experiment with what you love! This salad is a healthy choice. It is packed with nutrients. Here’s a quick look at its benefits: - Quinoa: High in protein and fiber - Vegetables: Rich in vitamins and minerals - Olive oil: A source of healthy fats - Feta cheese: Adds calcium and flavor One serving provides a balanced mix of protein, healthy fats, and carbs. Eating this salad can support your health while satisfying your taste buds. For the full recipe, check out Mediterranean Quinoa Salad Delight! To start, rinse 1 cup of quinoa under cold water. This step removes the bitter coating. Next, combine the rinsed quinoa and 2 cups of vegetable broth in a medium saucepan. Bring this mixture to a rolling boil over medium-high heat. Once boiling, reduce the heat to a gentle simmer. Cover the saucepan and let it cook for about 15 minutes. The quinoa is ready when it absorbs all the liquid and becomes fluffy. After cooking, fluff it with a fork and transfer it to a large mixing bowl. Let it cool for a few minutes. While the quinoa cools, prepare the vegetables. Dice 1 bell pepper and 1 medium cucumber. Halve 1 cup of cherry tomatoes. Finely chop 1/4 of a medium red onion, and slice 1/2 cup of Kalamata olives. In the same large bowl with the quinoa, add all these diced vegetables along with 1/2 cup of crumbled feta cheese. Gently stir to mix everything together. For the dressing, take a separate small bowl. Whisk together 1/4 cup of extra virgin olive oil, 2 tablespoons of freshly squeezed lemon juice, and 1 teaspoon of dried oregano. Add sea salt and freshly cracked black pepper to taste. Whisk until the dressing is well combined and emulsified. Pour the dressing over the quinoa and vegetable mixture. Toss everything together until the quinoa and veggies are well coated with the dressing. Finally, fold in 1/4 cup of finely chopped fresh parsley. Be careful not to break the feta or overcrowd the grains. Cover the bowl and let the salad sit at room temperature for at least 30 minutes. This time helps the flavors blend beautifully. For the full recipe, check out the Mediterranean Quinoa Salad Delight. To cook quinoa, rinse it well in cold water. This removes bitterness. Use a ratio of 1 part quinoa to 2 parts vegetable broth. Boil the mixture, then reduce the heat to simmer. Cover and cook for about 15 minutes. When done, fluff it gently with a fork. Let it cool before mixing it with other ingredients. To boost flavors, add fresh herbs like basil or mint. You can also toss in some garlic or lemon zest for a zing. Experiment with different olives or cheese types. Each will give a unique twist. Don't forget to season with salt and pepper to taste. Serve the salad in a large bowl for sharing. For individual servings, use small plates. Garnish with lemon wedges and extra parsley for color. A drizzle of olive oil on top adds shine and flavor. You can also pair it with grilled chicken or fish for a complete meal. Find the full recipe in the article to enjoy a fresh and tasty meal. {{image_4}} You can easily boost the protein in your Mediterranean quinoa salad. Adding cooked chicken gives a hearty touch. Simply grill or roast chicken breasts, then slice them up and mix them in. If you prefer a meatless option, chickpeas work great. Use canned chickpeas for quick prep. Rinse and drain them before adding. While the olive oil and lemon dressing is tasty, you can try other dressings too. A balsamic vinaigrette adds a sweet tang. For a creamy twist, mix Greek yogurt with lemon juice and herbs. This will make the salad richer and even more satisfying. Swap in seasonal veggies for fresh flavor. In the spring, add sweet peas or asparagus. In summer, try zucchini or fresh corn. Autumn brings squash or roasted root vegetables. Winter is great for kale or Brussels sprouts. These swaps keep your salad exciting and varied all year round. Feel free to check the Full Recipe for more details! After enjoying your Mediterranean quinoa salad, store leftovers in the fridge. Place the salad in a bowl and cover it tightly with plastic wrap or a lid. This helps keep the salad fresh and tasty. If you want to save some for later, portion it out into meal prep containers. When storing your salad, use airtight containers. Glass containers work great because they don't stain or retain odors. If you prefer plastic, choose BPA-free containers. Ensure they are deep enough to hold the salad without squishing it. If you have a dressing, keep it separate until you are ready to eat to avoid sogginess. Your Mediterranean quinoa salad will last in the fridge for about 3 to 5 days. If you notice any change in smell or color, it’s best to toss it out. Reheating is not recommended for salads with fresh veggies. Instead, enjoy the salad cold or at room temperature. If you want to warm it up, heat the quinoa-only portion in a microwave for about 30 seconds, but avoid reheating the veggies and feta. For the full recipe, check [Full Recipe]. Quinoa is a tiny seed rich in protein, fiber, and vitamins. It is gluten-free and very nutritious. It helps in building muscles and keeps you full longer. Quinoa contains all nine essential amino acids, making it a complete protein. This is great for vegans and vegetarians. It also has antioxidants that help fight inflammation. Eating quinoa may support heart health and improve digestion. Yes, you can make this salad ahead of time. It tastes even better after sitting for a few hours. Just keep it in the fridge for up to three days. The flavors meld together nicely. If you add the dressing later, it stays fresh longer. Just remember to mix it before serving to spread the flavors. To make this salad vegan, skip the feta cheese. You can use avocado instead for creaminess. You can also add extra olives or nuts for texture. The dressing is already vegan with olive oil and lemon juice. This way, you keep it tasty without any animal products. This salad pairs well with many dishes. You can serve it with grilled chicken or fish for protein. It also goes nicely with roasted vegetables or hummus. For a lighter meal, enjoy it with pita bread. This salad is great as a side or a main dish. The Mediterranean quinoa salad is a tasty and healthy dish. We covered key ingredients, from quinoa and fresh veggies to possible add-ins. I shared easy steps for preparing the salad and tips for cooking quinoa just right. You learned about variations and how to store leftovers properly. Remember, this salad is very flexible; you can change the protein and dressing as you like. Enjoy this dish for its flavor and nutrition. It’s simple, refreshing, and great for any meal!](https://goldendishy.com/wp-content/uploads/2025/06/0bb42d2e-6f0a-4b63-945d-06b8684c6b2f-768x768.webp)
