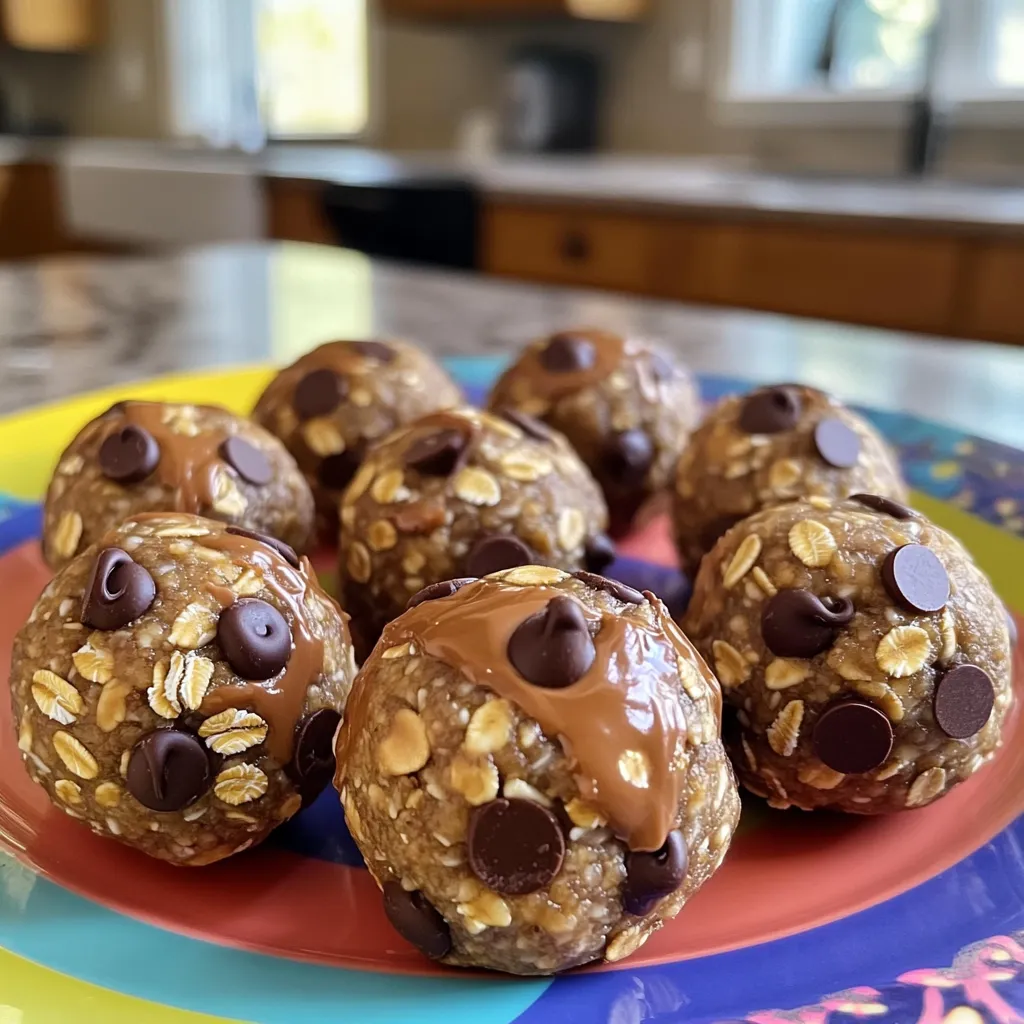
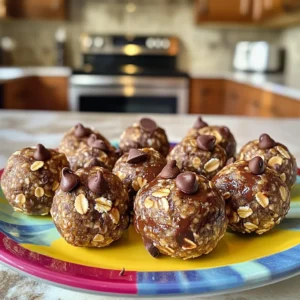
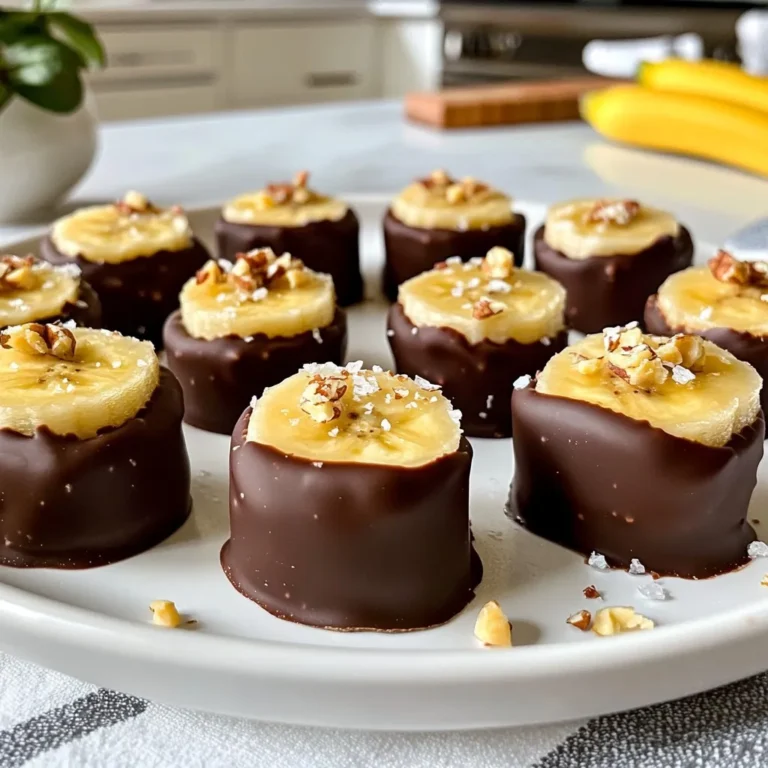
No Bake Peanut Butter Cup Energy Balls Easy Recipe

Are you looking for a quick, tasty snack that fuels your day? Look no further! These No Bake Peanut Butter Cup Energy Balls are super easy to make and offer a perfect blend of flavors. With simple ingredients like rolled oats, peanut butter, and chocolate chips, you’ll whip up a healthy treat in no time. Let me show you how to create these delicious bites that satisfy your sweet tooth and keep you energized!
Ingredients
Rolled Oats
Rolled oats are your main base. They add fiber and help keep you full. I always use old-fashioned rolled oats for the best texture. Quick oats can work, but they may make your energy balls too soft.
Peanut Butter (Natural Options)
Natural peanut butter is key here. It has no added sugar or oils. You can choose smooth or crunchy peanut butter based on what you like. Both options taste great! You can also swap it for almond or cashew butter if you want a change.
Sweetener Choices (Honey vs. Maple Syrup)
You have two sweetener options: honey or maple syrup. Honey gives a nice, rich flavor. Maple syrup is perfect for a vegan choice. Both will help bind the ingredients. Use the same amount of either, so it’s easy to switch.
Chocolate Chips (Semi-sweet vs. Dark)
For chocolate chips, you can use semi-sweet or dark. Semi-sweet is classic and sweet. Dark chocolate adds a richer taste and more cocoa. I love mixing both for a fun twist. Just be sure they are mini chips for easy mixing.
Cocoa Powder and Vanilla Extract
Cocoa powder adds a deep chocolate flavor. Use unsweetened cocoa powder for the best taste. Vanilla extract enhances the overall flavor, making it richer. Both ingredients are important for that classic peanut butter cup taste.
Sea Salt
A pinch of sea salt balances the sweetness. It enhances all the flavors in your energy balls. Don’t skip it! Just a little salt goes a long way in making the taste pop.
Step-by-Step Instructions
Mixing Dry Ingredients
First, grab a medium bowl. Add 1 cup of rolled oats. Next, add 2 tablespoons of unsweetened cocoa powder. Finally, sprinkle in a pinch of sea salt. Use a wooden spoon to stir until mixed well. This mix sets the base for your energy balls.
Preparing the Wet Mixture
In another bowl, combine ½ cup of natural peanut butter. If you prefer it sweet, add ¼ cup of honey or maple syrup. Then, pour in 1 teaspoon of pure vanilla extract. Mix this well until it’s smooth and creamy. Make sure there are no lumps left. This mix adds the rich flavor.
Combining Both Mixtures
Slowly add the wet mixture to the dry ingredients. Use a spatula or wooden spoon to stir. You want to mix until the dry and wet parts are fully blended. The dough will be sticky, which is perfect for rolling.
Folding in Chocolate Chips
Gently fold in ¼ cup of chocolate chips. You can use semi-sweet or dark, based on your taste. Make sure the chips are spread throughout the mixture. This will give your energy balls a sweet surprise.
Shaping the Energy Balls
Now it’s time to shape the mixture. Scoop out about 1 tablespoon of the dough. Using your hands, roll it into a ball about 1 inch wide. Repeat this process until you have rolled all the mixture into balls.
Refrigeration for Firmness
Place the energy balls on a parchment-lined baking sheet or plate. Make sure they are spaced out to avoid sticking together. Refrigerate them for at least 30 minutes. This will help them hold their shape when you serve them. Enjoy your tasty, no-bake treats!
Tips & Tricks
How to Perfect the Texture
To make these energy balls just right, focus on the mix. The oats should blend well with the wet ingredients. If the mixture feels dry, add a bit more peanut butter or honey. If it’s too wet, add a few more oats. The goal is a sticky but manageable dough that holds its shape without crumbling.
Best Substitutions for Allergies
If you’re dealing with allergies, don’t worry. You can swap peanut butter for almond or sunflower seed butter. Use gluten-free oats if you need to avoid gluten. For sweeteners, agave syrup also works well. Always read labels to ensure your substitutes are safe for your needs.
Vegan Variations
To keep this recipe vegan, simply use maple syrup instead of honey. This small change makes a big difference. Also, check that your chocolate chips are dairy-free. Many brands offer great vegan options that taste amazing.
Presentation Tips for Serving
For a fun presentation, place the energy balls on a colorful plate. Scatter a few extra chocolate chips around them for a pop of color. You can also use mason jars to create a lovely gift. Layer the balls with ribbons for a charming look. This adds a special touch and makes them perfect for sharing.
Variations
Nut-Free Alternatives
If you want a nut-free version, use sun butter or soy nut butter. These options work well. They have a nice flavor and still give a great texture. You can also try pumpkin seed butter for a fun twist.
Adding Superfoods (Chia Seeds, Flaxseeds)
Superfoods can boost the health of your energy balls. Add 1-2 tablespoons of chia seeds or ground flaxseeds. Both options add fiber and omega-3 fatty acids. They also give a nice crunch without changing the taste much.
Flavor Variations (Mint, Coconut)
Mixing in different flavors can make your energy balls exciting. Try adding mint extract for a fresh twist. You can also fold in shredded coconut for a tropical vibe. Both add flavor and a fun texture.
Adjusting Sweetness Level
You can control how sweet your energy balls are. If you like them sweeter, add more honey or maple syrup. Taste the mix before rolling the balls. This way, you can adjust the sweetness to fit your preferences perfectly.
Storage Info
Best Storage Practices
To keep your No Bake Peanut Butter Cup Energy Balls fresh, store them in an airtight container. This method keeps them moist and tasty. You can use a glass jar or a plastic container. Make sure the lid seals tightly to avoid air getting in.
Freezing Energy Balls for Long-Term Use
If you want to save some for later, freezing is a great option. Place the energy balls in a single layer on a baking sheet. Once they are frozen, transfer them to a freezer-safe bag. This way, they won’t stick together. You can take out a few whenever you like. Just let them thaw for a few minutes before eating.
How Long Do They Last in the Fridge?
In the fridge, these energy balls last about one week. Keep them in the airtight container to ensure they stay fresh. If you notice any changes in smell or texture, it’s best to toss them. Always check before eating!
FAQs
Can I use natural sweeteners instead of honey or maple syrup?
Yes, you can use natural sweeteners like agave syrup or date syrup. These work well and keep the energy balls sweet. Just remember that these sweeteners may change the taste a bit.
How many energy balls can I make with this recipe?
This recipe makes about 12 to 15 energy balls. The exact number depends on how big you roll them. If you want more, just double the recipe!
Do I need to use a specific type of peanut butter?
No, you can use any type of peanut butter you like. Smooth or crunchy, it’s your choice! Just make sure it’s natural and free from added sugars. This keeps the energy balls healthy and tasty.
Can I add protein powder to the energy balls?
Yes, adding protein powder is a great idea! It boosts the protein content. Just mix in about 1 to 2 tablespoons with the dry ingredients. This makes the energy balls even more filling.
Are these energy balls kid-friendly?
Definitely! Kids love the taste and texture of these energy balls. They are a great snack for school or after playtime. Plus, they are healthy and easy to eat.
What is the nutritional information per serving?
Each energy ball has about 100 calories. They contain healthy fats, fiber, and protein. Here’s a quick breakdown per ball:
– Calories: 100
– Protein: 3g
– Fat: 5g
– Carbohydrates: 12g
– Fiber: 2g
These are just estimates and can vary based on the ingredients you choose.
You now know how to make tasty energy balls. We covered the key ingredients, including oats, peanut butter, and sweeteners. I shared steps to mix and shape your snacks perfectly. You learned tips for texture and fun variations. Storing your energy balls helps keep them fresh longer.
These treats are easy to personalize and great for everyone. Enjoy making them and discover your favorite flavors!
. This blog post covered how to make delicious chocolate chip scones. You learned about the key ingredients, step-by-step instructions, and tips for success. Remember, cold butter and careful mixing are key to flaky, tasty scones. Feel free to explore different flavors and variations. They can impress your friends or brighten your morning. With good storage methods, you can enjoy them later, too. Baking scones is fun, and the results are always worth it. Enjoy your baking journey and share your creations!](https://goldendishy.com/wp-content/uploads/2025/07/8341b68f-e0af-4c5e-ad3a-191f22800308-768x768.webp)
![- 1 cup cherries, pitted and chopped - 1 cup unsweetened applesauce - 1/2 cup peanut butter or almond butter - 1/2 cup honey or maple syrup - 1 teaspoon vanilla extract - 2 cups rolled oats - 1/2 cup chocolate protein powder - 1 teaspoon baking powder - 1/2 teaspoon baking soda - 1/4 teaspoon salt - 1/3 cup dark chocolate chips To make the best Cherry Chocolate Protein Muffins, you need fresh ingredients. Start with cherries. Choose ripe cherries for a sweet taste. Pitting and chopping them helps mix them into the batter easily. Next, use unsweetened applesauce. It adds moisture and replaces some fat. This keeps the muffins light and fluffy. If you prefer a nutty flavor, choose between peanut butter or almond butter. Both work well. For sweetness, you can pick honey or maple syrup. Each adds a unique flavor. Don’t forget the vanilla extract. It enhances the overall taste. Now, let’s talk about the dry ingredients. Rolled oats add texture and fiber. They also help bind the muffins. The chocolate protein powder is key for a protein boost. It makes these muffins a healthy snack. Add baking powder and baking soda for lift. This ensures your muffins rise well. Lastly, sprinkle in some salt to balance the sweetness. The dark chocolate chips are the fun part. They melt in the oven and create pockets of gooey chocolate. This makes every bite a treat! For the full recipe, check out the instructions in the next section. Enjoy every step of making these delicious muffins! 1. First, preheat your oven to 350°F (175°C). This step is key to baking muffins evenly. 2. Prepare your muffin tin by lining it with paper liners. You can also lightly grease each cup to help prevent sticking. 3. In a large mixing bowl, combine the unsweetened applesauce, your choice of nut butter, honey, and vanilla extract. Mix well with a whisk or spatula until smooth. 4. Now, it’s time to fold in the chopped cherries. Gently stir them into the wet mixture. Make sure they spread evenly throughout the batter. 5. In another bowl, whisk together the rolled oats, chocolate protein powder, baking powder, baking soda, and salt. This mix will give your muffins a nice rise. 6. Gradually add the dry mix to the wet mixture. Fold them together gently, being careful not to overmix. Overmixing can make your muffins tough. 7. Next, fold in the dark chocolate chips. Ensure they are well-distributed, so you get a chocolate burst in every bite. 8. Use a spoon or an ice cream scoop to pour the batter into the muffin tin. Fill each cup about 2/3 full to allow room for rising. 9. Bake the muffins in your preheated oven for 18-20 minutes. Check for doneness by inserting a toothpick into the center. If it comes out clean, they are ready! 10. Once baked, remove the muffins and let them cool in the tin for 5 minutes. Then, transfer them to a wire rack to cool completely. This step helps keep the texture light and fluffy. For the full recipe, check out the details above. Enjoy your delicious Cherry Chocolate Protein Muffins! To make the best Cherry Chocolate Protein Muffins, avoid overmixing the batter. Overmixing can lead to tough muffins. Mix just until the dry and wet ingredients combine. This keeps your muffins light and fluffy. Measuring ingredients accurately is also key. Use dry measuring cups for solids like oats and protein powder. For liquids, use a liquid measuring cup. This ensures you add the right amounts for great results. I love serving these muffins warm. They taste best right out of the oven. A light dusting of powdered sugar or a drizzle of melted dark chocolate adds a special touch. You can also pair them with Greek yogurt for extra protein and creaminess. For a balanced meal, enjoy these muffins with a side of fruit. Slices of banana or a handful of berries can brighten your plate and add freshness. These muffins are packed with health benefits. Protein powder offers a great source of protein. It helps build and repair muscles. This makes them perfect for post-workout snacks. Cherries are rich in antioxidants. They help fight inflammation and support heart health. Oats provide fiber, which is good for digestion. They also keep you feeling full longer, making these muffins a smart choice for any time of day. For the complete recipe, check out the [Full Recipe]. {{image_4}} You can make Cherry Chocolate Protein Muffins gluten-free by using certified gluten-free oats. Almond flour also works well here. For a vegan option, replace honey with maple syrup. Use a vegan protein powder to keep it plant-based. This way, everyone can enjoy these tasty muffins, no matter their diet. - Gluten-free: Use gluten-free oats and almond flour. - Vegan: Swap honey for maple syrup and use vegan protein powder. Spicing up your muffins can add a fun twist. Try adding 1 teaspoon of cinnamon or nutmeg to the mix. This small change can bring warmth and depth to the flavor. You might also want to mix in nuts or seeds. Chopped walnuts or sunflower seeds can add crunch and nutrition to your muffins. - Spices: Add 1 teaspoon of cinnamon or nutmeg. - Nuts or seeds: Incorporate chopped walnuts or sunflower seeds. You can customize these muffins with fruits that are in season. In summer, try adding blueberries or peaches. In fall, diced apples or pumpkin puree would be delightful. Different types of chocolate can also change the taste. Dark chocolate, milk chocolate, or even white chocolate can make the muffins exciting and unique. - Seasonal fruits: Use blueberries in summer or apples in fall. - Chocolate types: Experiment with dark, milk, or white chocolate. To keep your Cherry Chocolate Protein Muffins fresh, follow these simple steps: - Allow the muffins to cool completely before storage. - Use an airtight container to maintain moisture. - Place parchment paper between layers to avoid sticking. I find that glass containers work best because they help keep the muffins soft and fresh. Freezing muffins is a great way to enjoy them later. Here’s how to do it: - Allow the muffins to cool fully. - Wrap each muffin in plastic wrap or aluminum foil, then place them in a freezer bag. - Label the bag with the date for easy tracking. When you’re ready to eat, thaw the muffins by leaving them out at room temperature. For quicker results, pop them in the microwave for about 20 seconds. This method keeps them moist and tasty. Cherry Chocolate Protein Muffins can last: - At room temperature: 3 to 4 days in an airtight container. - In the fridge: 1 week if stored properly. This means you can enjoy these muffins without worry for several days! Remember to check for freshness before eating. Enjoy your delicious snacks! Can I make these muffins ahead of time? Yes, you can make these muffins ahead of time. They store well for a few days. Just make sure to keep them in an airtight container. You can also freeze them for longer storage. What can I use instead of protein powder? If you don't have protein powder, you can use ground oats or almond flour. This will change the texture a bit but keeps the muffins tasty. You might need to adjust the liquid in the recipe. How can I reduce sugar in the recipe? To cut down on sugar, use less honey or maple syrup. You can also swap in a sugar substitute like stevia. This will help keep the sweetness but lower the sugar content. Is it possible to use fresh cherries instead of frozen? Yes, fresh cherries work great too! Just chop them up and remove the pits. Fresh cherries can add a nice burst of flavor. They may make the muffins a bit moister, so keep an eye on baking time. What is the protein content per muffin? Each muffin has about 7 grams of protein. This comes mainly from the protein powder and nut butter. It makes a healthy snack or breakfast option. Are these muffins suitable for kids? Absolutely! These muffins are great for kids. They are tasty and packed with nutrients. Plus, the chocolate bits make them fun to eat. In this article, we explored how to make delicious Cherry Chocolate Protein Muffins. We covered ingredients, step-by-step instructions, and tips for perfecting the recipe. You learned how to store these muffins and adapt them for different diets. These muffins are not just tasty; they offer health benefits too. Experiment with flavors and enjoy them as snacks or meals. Now, grab your ingredients and start baking your own batch today!](https://goldendishy.com/wp-content/uploads/2025/07/bcf12119-4bc4-4824-810e-f617231ac2e7-768x768.webp)