Garlic Butter Shrimp Zoodle Noodles Flavorful Delight
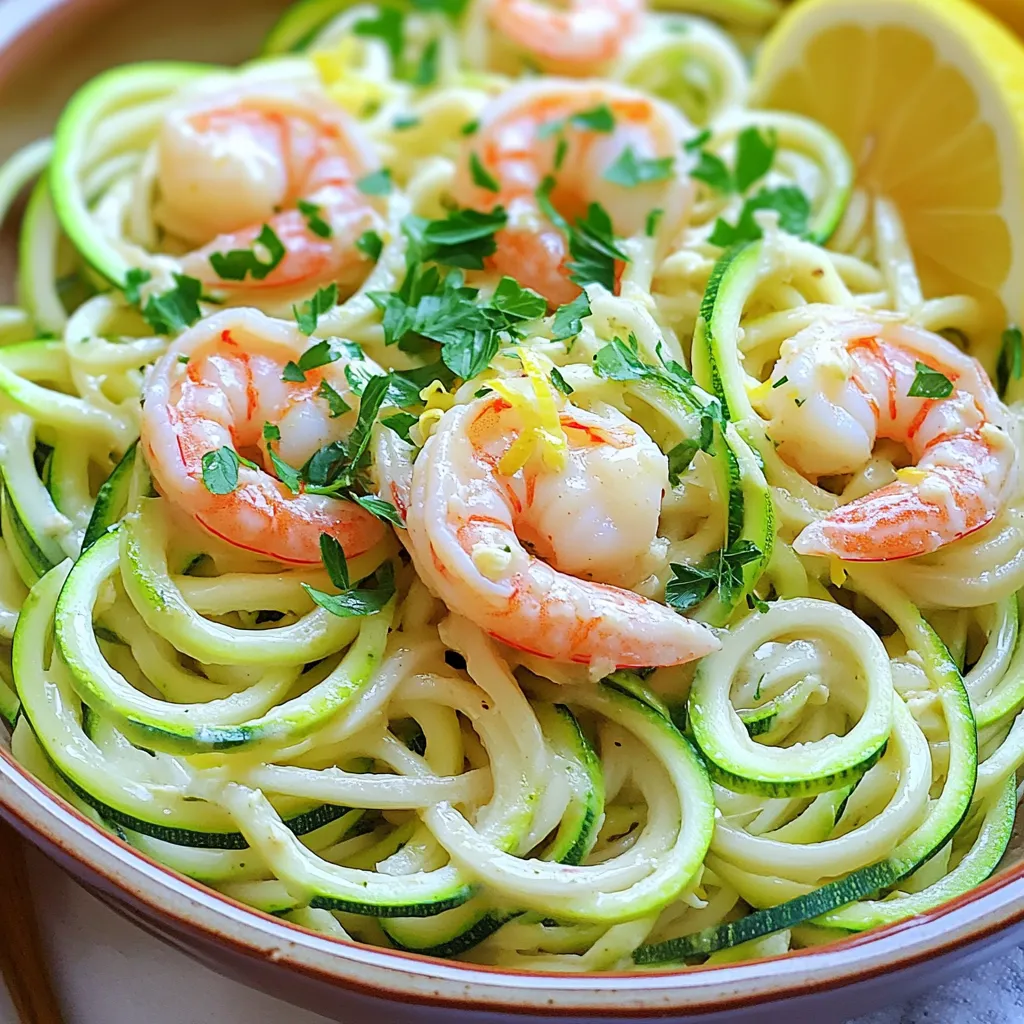
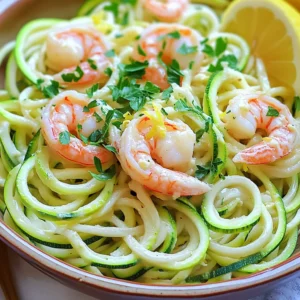
Are you ready to dive into a dish that’s packed with flavor and health? Garlic Butter Shrimp Zoodle Noodles is a delicious way to enjoy fresh ingredients while staying light on carbs. In this guide, I’ll walk you through every step, from spiralizing zoodles to cooking succulent shrimp in rich garlic butter. You’ll impress your family and friends with this quick, tasty meal. Let’s get cooking!
Ingredients
Main Ingredients
– 2 medium zucchinis, spiralized into noodles (zoodles)
– 1 lb (450g) large shrimp, peeled and deveined
– 4 tablespoons unsalted butter
– 4 cloves garlic, finely minced
– 1 teaspoon red pepper flakes
Zucchini noodles, or zoodles, are a fun and healthy base. I love how they soak up flavors. Large shrimp add a nice texture and taste. Unsalted butter is perfect for rich flavor. Garlic brings warmth, while red pepper flakes offer a kick.
Seasoning and Garnishes
– Salt and freshly ground black pepper, to taste
– 2 tablespoons fresh parsley, chopped for garnish
– Zest of 1 lemon, for brightness
– Juice of 1 lemon, for acidity
Seasoning makes all the difference. Use salt and pepper to enhance the dish. Fresh parsley adds color and freshness. Lemon zest brightens the flavors, while lemon juice adds a nice tang. Each ingredient plays a role in creating a delightful meal.
Step-by-Step Instructions
Preparing the Zoodles
Spiralizing Zucchini
To start, take your zucchinis and spiralize them. You can use a spiralizer or a vegetable peeler. Both will create long, thin strips that look like noodles. This is the fun part!
Salting to Remove Moisture
Once you have your zoodles, place them on a clean paper towel. Sprinkle them lightly with salt. This step helps draw out extra moisture. Let them sit while you prepare the shrimp. This keeps your dish from getting soggy.
Cooking the Shrimp
Melting Butter and Cooking Garlic
Heat a large skillet over medium heat. Add the unsalted butter. Watch it melt and become bubbly. Then, add the minced garlic and red pepper flakes. Stir it all for about one minute. You want the garlic to smell great but not turn brown.
Seasoning and Cooking Shrimp
Next, add the peeled and deveined shrimp into the skillet. Season them well with salt and black pepper. Cook the shrimp for 2-3 minutes on one side until they turn pink. Flip them over and cook for another 1-2 minutes. They should be fully cooked and opaque.
Combining Ingredients
Tossing Zoodles and Shrimp
Now, gently stir in the zoodles with the shrimp and the garlic-butter sauce. Toss everything together carefully for about 2 minutes. This warms the zoodles but keeps them crunchy. Avoid overcooking them for the best texture!
Adding Lemon Zest and Juice
Remove your skillet from the heat. Immediately add the lemon zest and juice. This adds a bright and fresh flavor. Toss everything again to coat the zoodles and shrimp evenly in the citrusy goodness.
Tips & Tricks
Perfecting the Zoodles
To get the best zoodles, follow these tips.
– Preventing Overcooking: Cook zoodles for only 2-3 minutes. They need to remain crisp. Overcooked zoodles become mushy and lose their charm. Stir gently when mixing with shrimp to keep them firm.
– Alternate Methods for Zoodle Preparation: If you don’t own a spiralizer, a vegetable peeler works well. Cut thin strips of zucchini. You can also use a box grater for a different texture. Try different shapes for fun.
Enhancing Flavor
Flavor is key to a great dish. Here are ways to boost it.
– Adjusting Spice Levels: Red pepper flakes add heat. If you prefer less spice, start with half a teaspoon. You can always add more later. Adjust based on your taste.
– Variations in Seasoning: Don’t be afraid to mix things up. Try adding fresh herbs like basil or dill. Experiment with lemon zest and juice for a brighter taste. You can also add a dash of soy sauce for an umami kick.
Variations
Protein Alternatives
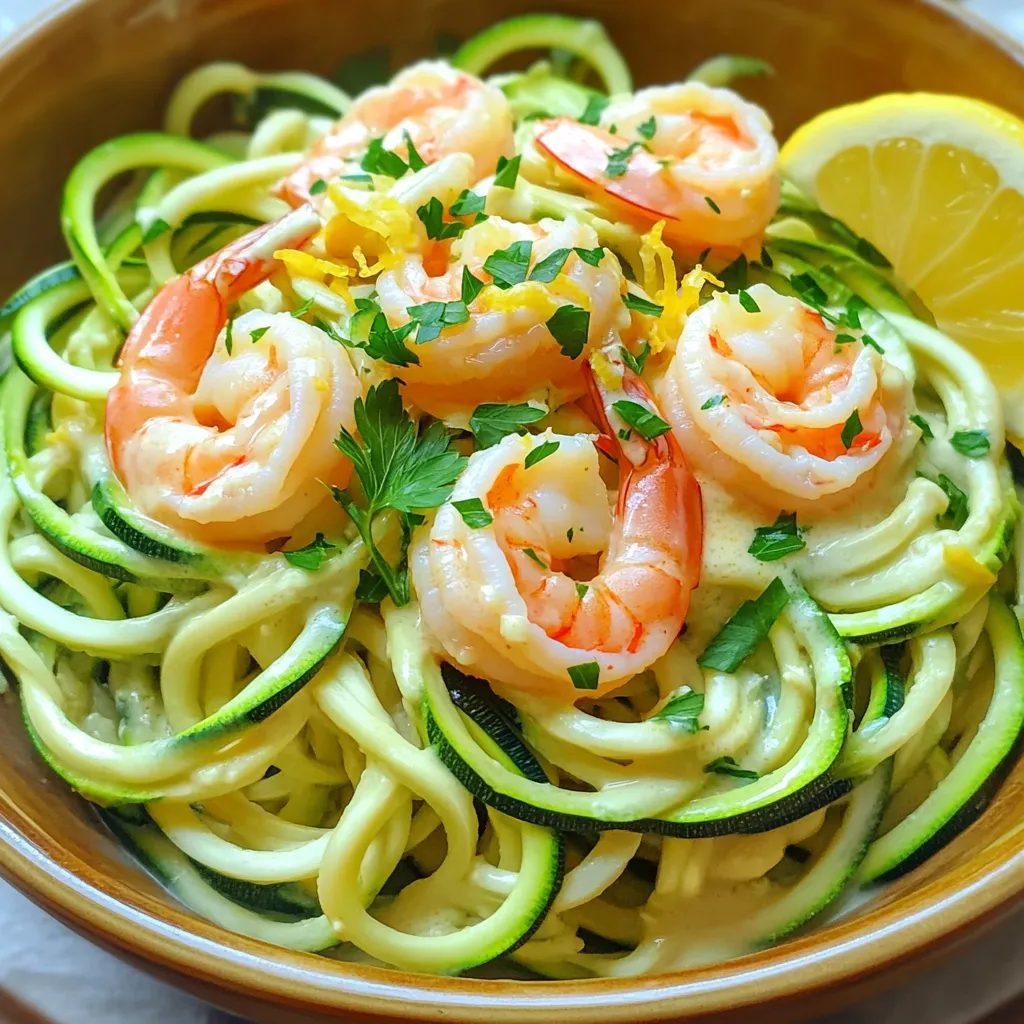
You can switch up the protein in Garlic Butter Shrimp Zoodle Noodles. Chicken and tofu work well.
– Chicken or Tofu Substitutions: For chicken, use boneless, skinless breasts. Cut them into bite-sized pieces. Cook them like shrimp until they are golden. Tofu is a great plant-based choice. Use firm tofu, and press it to remove extra water. Then, cube it and sauté until crispy.
– Additional Seafood Options: Feel free to add more seafood! Scallops or mussels can bring a new taste. Cook them the same way as shrimp, adjusting the cooking time as needed.
Incorporating Vegetables
Adding more veggies makes this dish colorful and healthy. You can mix in spinach, bell peppers, or carrots.
– Adding Spinach, Bell Peppers, or Carrots: Tossing in fresh spinach adds nutrients. Slice bell peppers for a sweet crunch. Grate carrots for a hint of sweetness. Add these veggies after the shrimp cooks. This will keep them bright and crisp.
– Other Noodle Alternatives for Non-Zoodles: If you want a different base, try using spaghetti squash or whole wheat pasta. Spaghetti squash is low in carbs and has a fun texture. Cook it until tender and mix it with the sauce. Whole wheat pasta adds fiber and is filling. Cook it according to package instructions before mixing.
These variations let you customize Garlic Butter Shrimp Zoodle Noodles to your taste!
Storage Info
Storing Leftovers
Refrigeration Guidelines
After making Garlic Butter Shrimp Zoodle Noodles, let it cool down. Place leftovers in an airtight container. They can stay fresh in the fridge for up to 2 days. When you want to eat them again, check for any signs of spoilage. If everything looks good, you can enjoy your meal!
Freezing Instructions
If you want to keep leftovers longer, freezing is a good option. However, zoodles can become soggy when thawed. To freeze, separate the shrimp from the zoodles. Place shrimp in a freezer-safe bag. Store zoodles in another bag. They can last in the freezer for about 1 month. When ready to eat, thaw shrimp in the fridge overnight. Cook zoodles fresh for the best texture.
Reheating Tips
Best Methods to Maintain Texture
To reheat Garlic Butter Shrimp Zoodle Noodles, the stovetop is your best friend. Heat a skillet over medium heat. Add a splash of olive oil or butter. Toss in the shrimp and zoodles. Stir gently until warm. This method helps keep the zoodles from getting mushy. You can also use the microwave, but be careful not to overheat. Heat in short bursts and stir in between. This keeps the flavors fresh!
FAQs
How can I make Garlic Butter Shrimp Zoodle Noodles gluten-free?
To make this dish gluten-free, focus on the zoodles and shrimp. Zucchini is naturally gluten-free, which is great! For the butter, ensure it is pure and free from additives. Check your seasoning too. Use gluten-free red pepper flakes. Most spices should be safe, but always read the labels.
Can I use frozen shrimp for this recipe?
Yes, you can use frozen shrimp! Just remember to thaw them first. To defrost shrimp, place them in cold water for about 15-20 minutes. Once thawed, pat them dry with a paper towel. This helps them cook evenly. Adjust cooking time slightly if using larger shrimp; they may need an extra minute or two.
What else can I serve with Garlic Butter Shrimp Zoodle Noodles?
This dish pairs well with simple sides. Consider a fresh salad with mixed greens. A light cucumber salad can add crunch and coolness. Garlic bread is another great option if you want something hearty. For extra veggies, try roasted asparagus or steamed broccoli. These sides will balance the meal and enhance the flavors.
This recipe blends fresh ingredients like zucchini noodles and shrimp for a tasty dish. You learned how to prepare zoodles and cook shrimp in garlic butter. You also saw tips for storing and reheating, plus variations to match your taste. Feel free to try different proteins or veggies. Cooking should be fun and creative. Enjoy making this dish and share your own twists! The flavors are sure to impress anyone who tries it.

![To make your Fajita Veggie Sheet Pan, gather these simple and fresh ingredients: - Bell peppers (red, yellow, or green) - Zucchini - Red onion - Cherry tomatoes - Black beans - Olive oil - Spices and seasonings (chili powder, cumin, garlic powder, salt, pepper) - Fresh cilantro for garnish - Lime wedges for serving - Tortillas (corn or flour) These ingredients create a colorful and tasty dish. Using fresh veggies adds great flavor and texture. The spices make everything pop! You can adjust the veggies based on what you have or prefer. For example, you might try adding corn or mushrooms. Each change can lead to a new twist on this tasty recipe. This Fajita Veggie Sheet Pan really shows how simple ingredients can shine together. When you gather these items, you set the stage for a fun cooking adventure. Check out the Full Recipe for complete details on how to bring this delicious dish to life. 1. First, preheat your oven to 425°F (220°C). This helps the veggies cook just right. 2. Next, line a large sheet pan with parchment paper. This makes cleanup easy. 3. In a big mixing bowl, combine the sliced bell pepper, zucchini rounds, red onion wedges, halved cherry tomatoes, and rinsed black beans. 4. Drizzle 3 tablespoons of olive oil over the mixture. It helps the flavors blend. 5. Now, add 2 teaspoons of chili powder, 1 teaspoon of ground cumin, and 1 teaspoon of garlic powder. Don't forget a pinch of salt and black pepper. 6. Toss everything gently until each piece is well-coated with oil and spices. 1. Spread the veggie and bean mixture evenly on the prepared sheet pan. Make sure they are not crowded. 2. Place the pan in the preheated oven and roast for 20-25 minutes. Stir halfway through for even cooking. 3. The veggies should be tender and have slightly caramelized edges when done. 1. To warm the tortillas, you can use a skillet or microwave. Just a minute or two will do. 2. Fill each warm tortilla with the roasted fajita veggies. 3. Top with fresh cilantro and a drizzle of lime juice for extra flavor. 4. Serve the filled tortillas on a platter, garnished with lime wedges and extra cilantro for a beautiful display. For the complete recipe, check out the [Full Recipe]. To get the best from your fajita veggies, even cooking is key. Spread the veggies in a single layer on the sheet pan. This helps them roast well. Stir them halfway through cooking. This way, they brown nicely on all sides. Each oven runs a bit differently. You may need to adjust the cooking time. Keep an eye on the veggies. They should be tender and slightly charred. Want to kick up the flavor? Add more spices! A pinch of smoked paprika or cayenne pepper can work wonders. Fresh herbs like oregano or thyme also add depth. Don’t forget lime juice! A squeeze right before serving makes the dish pop. It gives a fresh, zesty flavor that brightens everything up. When serving, arrange the filled tortillas on a pretty platter. It makes the meal more inviting. Garnish with lime wedges and extra cilantro for color. You can also sprinkle some crumbled cheese on top. This adds a nice touch and looks great. A vibrant display makes your Fajita Veggie Sheet Pan Delight even more appetizing. {{image_4}} You can swap out veggies to suit your taste. Try adding mushrooms or sweet potatoes. Seasonal choices like asparagus or butternut squash work well, too. Think of what’s fresh at your local market. Broccoli and cauliflower also add great texture. Mix and match for a colorful plate. Want to make this dish heartier? Tofu or tempeh are great choices. Cube them and toss with your veggies. You can also add chickpeas for extra protein. They blend well with the spices. If you eat meat, grilled chicken or shrimp can elevate this dish. Just season them like your veggies for a tasty mix. Experimenting with spices can change your dish. For a mild flavor, stick with cumin and garlic. If you like heat, add cayenne or smoked paprika. Try a taco seasoning mix for a new twist. You could even toss in fresh herbs like cilantro or oregano. This will keep your fajita veggie sheet pan exciting each time! To keep your fajita veggies fresh, store them in an airtight container. Place the container in the fridge. This way, your flavors stay bright. Use leftover veggies within three to four days for best taste. For reheating, the oven is your best friend. Preheat it to 350°F (175°C). Spread the veggies on a baking sheet and heat for about 10 minutes. This restores texture and taste. You can also use the microwave, but the oven keeps them crisp. If you have extras, try adding them to a salad or a quesadilla for a tasty twist. To freeze the fajita veggie mix, let it cool first. Then, transfer it to a freezer-safe bag. Remove as much air as you can before sealing. This helps prevent freezer burn. When ready to use, move it to the fridge overnight to thaw. Reheat as mentioned above, and enjoy! It takes about 10 minutes to prep. Roasting in the oven takes 20-25 minutes. Altogether, you can enjoy this dish in about 30-35 minutes. Yes, you can easily swap veggies. Try adding mushrooms, asparagus, or even corn. Just make sure they cut evenly for even cooking. Absolutely! This dish is great for meal prep. You can store it in the fridge for up to four days. Just reheat portions as needed. Corn or flour tortillas are both great options. Corn tortillas give a nice crunch, while flour tortillas are soft and chewy. To spice things up, add more chili powder. You can also include fresh jalapeños or a splash of hot sauce. Experiment with heat to find your perfect level. You can prepare the veggies and seasoning ahead. Just store them in the fridge. When ready, roast them for a quick, fresh meal. For the full recipe, check out the details in the main article! This blog post covered how to make delicious fajita veggies on a sheet pan. We talked about the ingredients, preparation steps, and tips for perfect roasting. You learned about storing leftovers and customizing the recipe to fit your taste. In summary, this dish is both fun and easy to prepare. You can explore different veggies and spices, making it your own. Enjoy this tasty meal with friends or family, and remember, cooking should always bring joy!](https://goldendishy.com/wp-content/uploads/2025/07/261fee1c-f0d4-4ba8-a84d-53625610978f-768x768.webp)
