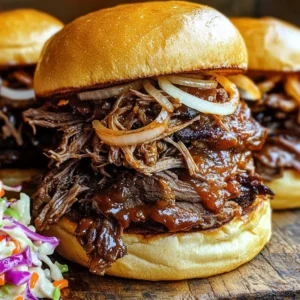
BBQ Pulled Beef Sandwiches Slow Cooker Delight

Ready to impress your family with mouthwatering BBQ Pulled Beef Sandwiches? Using a slow cooker makes this tasty meal easy and stress-free. You’ll love how simple it is to create a tender, flavorful beef dish with just a few key ingredients. Let’s dive into the juicy world of slow-cooked perfection! Whether you’re a cooking novice or a pro, this guide has something for everyone.
Ingredients
List of Ingredients
– 3-4 pounds beef chuck roast
– 1 cup beef broth
– 1 medium onion, finely chopped
– 4 cloves garlic, minced
– 1 cup barbecue sauce (your favorite brand)
– 1 tablespoon brown sugar
– 1 tablespoon Worcestershire sauce
– 2 teaspoons smoked paprika
– 1 teaspoon chili powder
– 1/2 teaspoon black pepper
– 1/2 teaspoon salt
– 8 hamburger buns
– Coleslaw (optional for topping)
Measurement Details
When cooking BBQ pulled beef, precise measurements matter. Use 3-4 pounds of beef. This cut has enough fat to keep the meat juicy. One cup of beef broth adds moisture. A medium onion and four cloves of garlic enhance the flavor.
For the sauce, one cup of your favorite barbecue sauce gives the dish its signature taste. Brown sugar and Worcestershire sauce add depth and sweetness. Two teaspoons of smoked paprika provide a lovely smokiness. One teaspoon of chili powder adds warmth. Use half a teaspoon each of black pepper and salt to balance the flavors.
Flavor Enhancers
To elevate your pulled beef, consider a few flavor enhancers. The brown sugar caramelizes as it cooks, adding a sweet touch. Worcestershire sauce brings umami and tang. Smoked paprika adds a rich, smoky flavor that pairs perfectly with beef.
For a spicy kick, increase the chili powder to suit your taste. If you love garlic, adding a few more cloves can boost the aroma. Lastly, if you choose to add coleslaw on top, it adds crunch and freshness to the sandwich. Enjoy creating your flavor-packed BBQ pulled beef sandwiches!
Step-by-Step Instructions
Preparing the Beef
Start by seasoning the beef chuck roast. Take a small bowl and mix salt, black pepper, smoked paprika, and chili powder. Rub this spice mix all over the roast. Make sure every part is covered well. This step adds lots of flavor.
Setting Up the Slow Cooker
Next, prepare your slow cooker. Sprinkle the finely chopped onion and minced garlic at the bottom. This creates a nice base for your beef. The onion and garlic add great aroma while cooking.
Then, layer the seasoned beef roast on top of the onions and garlic. This placement allows the meat to soak up all the flavors.
Cooking Process Overview
In another bowl, mix beef broth, barbecue sauce, brown sugar, and Worcestershire sauce. Whisk them together until smooth. Pour this sauce over the roast in the slow cooker. Make sure the roast is well moistened.
Cover the slow cooker with its lid. Set it to low heat and let it cook for 8-10 hours. The beef should become very tender. After cooking, remove the roast carefully and shred it with two forks.
Return the shredded beef to the slow cooker and stir it into the sauce. Let it warm for about 30 minutes.
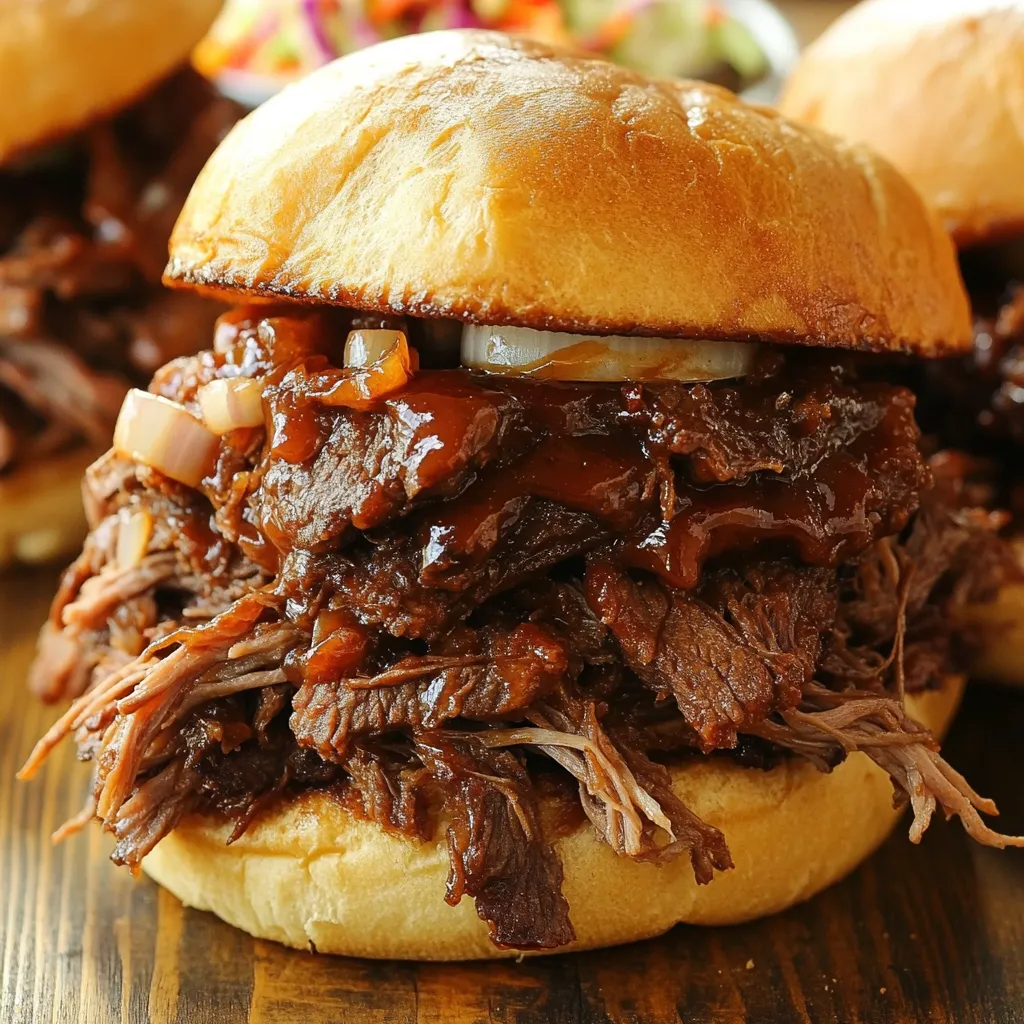
Now, it’s time to assemble your sandwiches! Take a hamburger bun and pile on the pulled beef. If you like, add some coleslaw for extra crunch. Enjoy your BBQ pulled beef sandwich!
Tips & Tricks
Seasoning Suggestions
To make BBQ pulled beef shine, seasoning is key. Start with a blend of salt, black pepper, smoked paprika, and chili powder. This mix gives the beef a warm, smoky taste. You can adjust the spices to your liking. For a kick, add a pinch of cayenne. For sweetness, a bit more brown sugar works wonders.
Achieving the Perfect Texture
For tender pulled beef, choose a chuck roast. This cut has fat, which melts during cooking. The slow cooker helps break down tough fibers. Cook on low heat for 8-10 hours. That long cook time helps the beef become soft and easy to shred. When it’s done, it should pull apart with little effort.
Common Mistakes to Avoid
Avoid skipping the seasoning. A well-seasoned roast makes a big difference in flavor. Don’t rush the cooking time; cooking too fast can lead to tough meat. Also, ensure you cover the slow cooker. This keeps moisture in and helps the beef cook evenly. Lastly, resist the urge to open the lid often. Each time you peek, heat escapes and can extend cooking time.

Variations
Alternative BBQ Sauces
You can switch up the BBQ sauce to change the taste. Try a spicy sauce for heat. A sweet sauce adds a nice twist. You might enjoy a mustard-based sauce for a tangy kick. If you like smoky flavors, look for a chipotle BBQ sauce. Feel free to experiment with homemade sauces too. Mixing a bit of honey or maple syrup can enhance sweetness.
Different Cooking Methods
The slow cooker is great, but other methods work too. You can use an Instant Pot for faster cooking. Cook the beef under pressure for about 60-90 minutes. If you prefer grilling, you can also cook the beef on a smoker. This method gives a nice smoky taste. Just remember to wrap it in foil to keep it moist.
Creative Serving Ideas
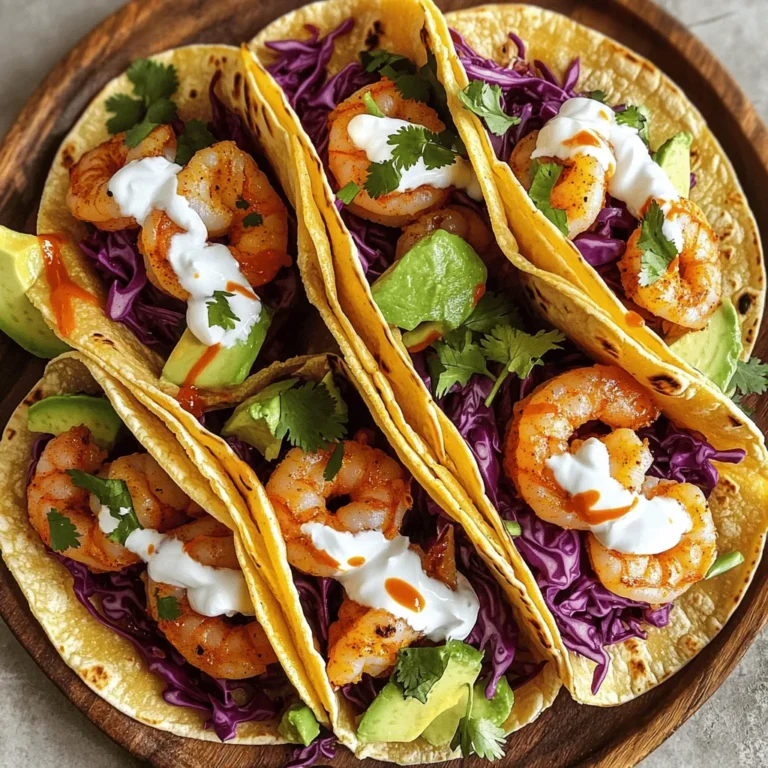
Serving your BBQ pulled beef can be fun. Try it on cornbread instead of buns for a Southern twist. You can also serve it in tacos or lettuce wraps for a lighter option. Adding pickles or jalapeños gives extra flavor. For a complete meal, pair it with baked beans or coleslaw. Don’t forget to top it with fresh herbs, like cilantro, for a pop of color.
Storage Info
Refrigeration Guidelines
After you make BBQ pulled beef sandwiches, let any leftovers cool down. Place the beef in an airtight container. Store it in the fridge for up to three days. When you want to eat it again, just check for any off smells or colors before serving.
Freezing Instructions
If you want to keep the pulled beef longer, freezing is a great option. First, let the beef cool completely. Then, package it in freezer-safe bags or containers. Make sure to remove as much air as possible. You can freeze the beef for up to three months. Remember to label the bags with the date, so you know when to use it.
Reheating Tips
To reheat, take the pulled beef out of the fridge or freezer. If frozen, let it thaw overnight in the fridge. For heating, use a pot on low heat. Stir in a little beef broth or barbecue sauce to keep it moist. You can also use the microwave. Heat in short bursts, stirring in between, until it’s hot all the way through. Enjoy your tasty pulled beef sandwiches again!
FAQs
How long to cook pulled beef in the slow cooker?
You should cook pulled beef in the slow cooker for 8 to 10 hours on low heat. This long cooking time helps the beef become very tender. Check it after 8 hours. If a fork goes in easily, it’s ready to shred. If not, let it cook longer. The beef should pull apart with no effort.
Can I use a different cut of meat?
Yes, you can use other cuts of meat. While beef chuck roast works best, brisket, round, or even pork can be good options. Each cut will give a slightly different taste and texture. Just make sure it has some fat to keep it moist during cooking.
What side dishes pair well with BBQ pulled beef sandwiches?
Many side dishes go great with BBQ pulled beef sandwiches. Here are a few ideas:
– Coleslaw for crunch
– Potato salad for creaminess
– Baked beans for a sweet touch
– Corn on the cob for a fresh bite
– Sweet potato fries for a twist
These sides complement the flavors of the pulled beef and create a hearty meal. Enjoy your cooking!
This post covered key steps for making pulled beef in a slow cooker. We talked about ingredients, preparation, cooking, and even tips for perfect texture. You learned about meat variations and delicious serving ideas. Remember to follow the right storage tips for leftovers to enjoy later. Cooking should be fun and tasty. With these methods, you can create a dish that delights everyone. Enjoy your cooking journey and savor every bite!


![- 9 lasagna noodles - 2 cups cooked chicken, shredded - 2 cups Alfredo sauce (store-bought or homemade) - 2 cups ricotta cheese - 2 cups shredded mozzarella cheese - 1 cup grated Parmesan cheese - 1 cup fresh spinach, chopped - 1 teaspoon garlic powder - 1 teaspoon onion powder - Salt and pepper to taste - Fresh basil leaves for garnish Each ingredient plays a big role in flavor and texture. - Lasagna noodles form the base, holding all the layers together. - Cooked chicken adds protein and heartiness. Use rotisserie chicken for ease. - Alfredo sauce gives creaminess and rich flavor. Store-bought saves time, or you can make your own. - Ricotta cheese provides a creamy filling. It’s soft and mild, blending well with other flavors. - Shredded mozzarella cheese melts beautifully, adding gooey texture. - Grated Parmesan cheese gives a salty, nutty kick on top. - Fresh spinach brings a pop of color and nutrients. - Garlic and onion powder enhance the flavor without overpowering the dish. - Salt and pepper are essential for seasoning, balancing the taste. - Fresh basil adds brightness when you serve the dish. You can change some ingredients to suit your taste. - Swap chicken for turkey or keep it meatless with a veggie mix. - Use cottage cheese instead of ricotta for a lighter option. - Try different cheeses like gouda or cheddar for unique flavors. - If you don't have Alfredo sauce, use a white sauce or a creamy tomato sauce. - For a gluten-free version, look for gluten-free lasagna noodles. These adjustments keep the spirit of the dish while catering to your needs. For the complete recipe, check the Full Recipe. To start, bring a large pot of salted water to a boil. This water helps cook the noodles evenly. Add 9 lasagna noodles to the pot. Cook them according to the package instructions. Aim for an al dente texture, which means they should be slightly firm. Once cooked, drain the noodles. Rinse them briefly under cold water to stop the cooking process and prevent sticking. Set them aside on a clean surface or a plate. Now, grab a spacious mixing bowl. In this bowl, combine 2 cups of shredded cooked chicken, 2 cups of ricotta cheese, and 1 cup of chopped fresh spinach. Add 1 teaspoon each of garlic powder and onion powder for flavor. Don’t forget to sprinkle in some salt and pepper to taste. Mix all these ingredients thoroughly. You want a nice, smooth filling that binds together well. This mixture is the heart of your lasagna. Take a 9x13 inch baking dish and spread a thin layer of Alfredo sauce on the bottom. This helps prevent the noodles from sticking. Lay down 3 noodles side by side over the sauce. Next, spread half of your chicken and ricotta mixture over the noodles. Top this layer with a third of the shredded mozzarella cheese. Repeat this layering: add another 3 noodles, the remaining chicken mixture, and another third of mozzarella cheese. For the final layer, place the last 3 noodles on top. Cover these noodles with the rest of the Alfredo sauce. Finish with the remaining mozzarella and all of the grated Parmesan cheese on top. This will create a beautiful, bubbly crust when baked. Now, cover the dish with aluminum foil and place it in your preheated oven at 375°F (190°C). Bake for 25 minutes. After that, remove the foil and bake for another 15 minutes. Keep an eye on it until the cheese is bubbly and golden brown. This step is key for that perfect, cheesy finish. When you layer your lasagna, start with a thin layer of sauce. This helps the noodles not stick. Use three noodles for each layer. Spread half of your filling evenly over the noodles. Sprinkle some cheese on top. Repeat until you have used all ingredients. Finish with noodles, sauce, and lots of cheese on top. Bake your lasagna at 375°F (190°C). Cover it with foil for the first 25 minutes. This keeps it moist. After that, take off the foil and bake for another 15 minutes. This makes the cheese bubbly and golden. Let it cool for 10 minutes before slicing. This helps the layers hold together. Cut the lasagna into squares for serving. Garnish with fresh basil leaves and extra Parmesan cheese. This makes it look great! Pair it with a green salad or garlic bread for a complete meal. Enjoy your cheesy chicken Alfredo lasagna with family or friends for a comforting dinner. For the full recipe, check the earlier section. {{image_4}} You can easily make a vegetarian version of this dish. Just swap the chicken for a mix of veggies. Try using mushrooms, zucchini, or bell peppers instead. For added flavor, sauté the veggies before mixing them with the ricotta. This change keeps the dish creamy and satisfying. Feel free to add more vegetables or proteins. Spinach is great for color and taste. You can also toss in some chopped broccoli or roasted red peppers. If you want more protein, consider adding cooked lentils or chickpeas. These ingredients boost nutrition and make the dish heartier. You can switch up the sauce or cheese for a twist. Use a white sauce or pesto instead of Alfredo for a different flavor. For cheese, try blending mozzarella with gouda or fontina for a richer taste. Mixing cheeses adds depth and makes each bite unique. For the full recipe, check out [Full Recipe]. After enjoying your cheesy chicken Alfredo lasagna, you may have some leftovers. To store them, let the lasagna cool completely. Then, cover it tightly with plastic wrap or aluminum foil. You can also place it in an airtight container. This helps keep it fresh for up to three days in the fridge. Make sure to keep it away from strong-smelling foods to avoid any unwanted flavors. When it's time to enjoy your leftovers, reheating is simple. Preheat your oven to 350°F (175°C). Place the lasagna in a baking dish. If you want, add a splash of Alfredo sauce on top to keep it moist. Cover it with foil to prevent drying out. Bake for about 20-25 minutes, or until heated through. You can also reheat individual slices in the microwave for about 1-2 minutes on high. Just check and stir halfway through for even heating. If you want to save some for later, freezing is a great option. Cut the lasagna into portions for easy serving. Wrap each piece tightly in plastic wrap, then foil. This double wrapping helps prevent freezer burn. You can freeze it for up to three months. When ready to eat, let it thaw in the fridge overnight. Reheat in the oven or microwave as mentioned above. Enjoy your homemade meal anytime! For the full recipe, refer to the earlier section. Yes, you can use different pasta shapes. You might try wide egg noodles or even gluten-free options. Just make sure they fit well in your dish. Cook them according to the package directions. This way, they will blend smoothly with the other layers. To make Alfredo sauce, start with butter and cream. Melt 1/2 cup of butter in a pan. Then stir in 1 cup of heavy cream. Cook for about 5 minutes on low heat. Add 1 cup of grated Parmesan cheese. Mix well until it melts. Season with salt, pepper, and garlic powder for flavor. Homemade sauce tastes fresh and creamy. You can tell your lasagna is done when the cheese on top is golden brown and bubbly. Insert a knife in the center; it should slide in easily. If the layers are hot and firm, your lasagna is ready to enjoy. Let it cool a bit before serving for the best slices. For the full recipe, check out the details above. This blog post covered key ingredients for an amazing lasagna. You learned about substitutions, step-by-step cooking, and tips for a perfect dish. I shared tasty variations and smart storage ideas. When you try this recipe, you’ll enjoy a delicious meal that fits your taste. Remember, cooking is fun. Experiment with different flavors and enjoy the process!](https://goldendishy.com/wp-content/uploads/2025/07/68bc65d6-2565-4554-ba8a-7f3921e48887-768x768.webp)
![To make a delightful vegan sweet potato curry, gather these simple ingredients: - 2 medium sweet potatoes, peeled and diced - 1 can (400ml) coconut milk - 1 can (400g) chickpeas, drained and rinsed - 1 medium onion, finely diced - 3 cloves of garlic, minced - 1 inch piece of fresh ginger, grated - 2 tablespoons of red curry paste - 1 bell pepper, chopped - 2 cups of fresh baby spinach - 1 tablespoon of olive oil - Salt and freshly ground pepper to taste - Fresh cilantro leaves for garnish - Lime wedges for serving Each ingredient plays a key role in the flavor and texture of the dish. The sweet potatoes give a creamy and sweet base, while the coconut milk adds richness. Chickpeas give protein and heartiness, making this dish filling. The fresh ginger and garlic bring a boost of flavor that warms your soul. Don't worry if you want to switch things up! The beauty of this curry is its flexibility. You can mix in other veggies or spices. Just keep the core ingredients for the best results. For the full recipe, check the reference above. Enjoy cooking! 1. Start by heating olive oil in a large pot over medium heat. 2. Add the diced onion and sauté for about 5 minutes. The onion should become soft and clear. 3. Mix in the minced garlic and grated ginger. Let it cook for one minute. This will make your kitchen smell amazing! 4. Next, add the red curry paste. Stir it in well and let it cook for 2 minutes. This helps deepen the flavors. 5. Now, add the diced sweet potatoes and chopped bell pepper. Stir everything well so the veggies are coated with the curry mix. 1. Pour in the creamy coconut milk and add the rinsed chickpeas. Stir everything together. 2. Turn up the heat slightly to bring the mixture to a gentle simmer. 3. Once it's simmering, lower the heat and cover the pot. Let it cook for about 20 minutes. The sweet potatoes should be tender by now. 4. After 20 minutes, gently fold in the baby spinach. Let it wilt into the curry for another 2 to 3 minutes. 5. Season with salt and freshly ground pepper. Adjust to your taste for the best flavor. 1. Serve the curry hot, garnished with fresh cilantro leaves. 2. Add lime wedges on the side for a zesty touch. 3. For a beautiful dish, use shallow bowls. This helps show off the vibrant colors. 4. Drizzle a bit of extra coconut milk on top for a stunning finish. A sprinkle of chopped cilantro looks great, too. For the complete recipe, check out the [Full Recipe]. To make your curry just right, focus on the texture. The curry should be thick but not dry. If it seems too thick, add a splash of water or more coconut milk. Stir often to keep it from sticking to the pot. When it comes to spice, taste is key. Start with a little red curry paste. You can always add more for some heat. If you prefer a milder dish, reduce the paste or add more coconut milk to balance. Want to add more color and nutrition? Toss in some extra veggies! Zucchini, carrots, or peas work great. You can also use frozen mixed veggies for convenience. Looking for protein? Try adding tofu or tempeh. These options soak up the curry flavor well. You can also use lentils for a hearty twist. To elevate the dish, consider adding spices like cumin or turmeric. These spices bring warmth and depth. A squeeze of lime juice can also brighten the flavors. Pair your curry with fluffy rice or warm naan. These sides soak up the sauce and make each bite special. You can also serve it with a fresh salad for a crunchy contrast. For the full recipe, check out the detailed instructions above. {{image_4}} You can easily adjust the spice level in your vegan sweet potato curry. For a mild dish, use less red curry paste. A medium heat works well with the standard amount of paste. If you want spice, add extra paste or mix in cayenne pepper. Different curry pastes offer unique flavors too. Try green curry paste for a fresh twist or massaman paste for a warm, nutty taste. You can play with various vegetables in your curry. Carrots, peas, or zucchini work well. For extra nutrition, add protein sources like tofu or tempeh. These options boost the dish's texture and flavor. If you want a heartier meal, consider adding lentils or quinoa. The right grain or bread makes your curry shine. Serve it with fluffy jasmine rice or warm naan. They soak up the delicious sauce and complement the curry's taste. If you have leftovers, use them in a wrap or as a topping on a salad. This way, you enjoy the flavors in different ways. For the full recipe, check the earlier section. You can keep the vegan sweet potato curry in the fridge for about 4 to 5 days. To store it, let the curry cool down first. Then, transfer it to an airtight container. This keeps the flavors fresh and tasty. When you want to eat it again, just scoop out what you need. If you want to save it for later, freezing is a great option. Pour it into a freezer-safe container. Leave some space at the top because it will expand when frozen. You can freeze the curry for up to 3 months. When you're ready to eat, take it out and place it in the fridge to thaw overnight. To reheat, warm it on the stove over low heat. Stir it well, and if needed, add a splash of coconut milk to bring back its creamy texture. Enjoy this cozy dish anytime! For the full recipe, check out the details above. Can I make this curry ahead of time? Yes, you can make this curry ahead of time. It tastes even better after a day. Just store it in the fridge. Heat it on the stove or in the microwave before serving. What other toppings can I use besides cilantro? You can use many toppings! Try fresh parsley, green onions, or avocado slices. These add color and flavor. Toasted nuts or seeds also bring a nice crunch. Is this dish gluten-free? Absolutely! This vegan sweet potato curry is gluten-free. All the ingredients in the recipe are safe for a gluten-free diet. Overview of caloric content per serving Each serving has about 350 calories. This makes it a hearty meal without being too heavy. Breakdown of key nutrients - Fiber: 10 grams - Protein: 12 grams - Carbohydrates: 45 grams This curry is rich in fiber and plant protein, making it filling and satisfying. What can I use instead of chickpeas? If you want a different protein, use lentils or black beans. Both are great choices and will still taste yummy. Alternative ingredients for coconut milk You can swap coconut milk for almond milk or oat milk. Just make sure to use a full-fat version for creaminess. If you want a richer flavor, try cashew cream. This blog covered how to make a tasty sweet potato curry. We explored essential ingredients, step-by-step cooking instructions, and tips for customizing your dish. I shared ideas for serving and storing your curry, along with answers to common questions. Incorporating these tips will help you create a flavorful meal. Enjoy experimenting with different spices and ingredients to make it your own. Cooking should be fun, and this curry recipe makes it easy to add joy to your table.](https://goldendishy.com/wp-content/uploads/2025/07/0119eb20-3e5b-446c-8228-d1dcea4a67d2-768x768.webp)

