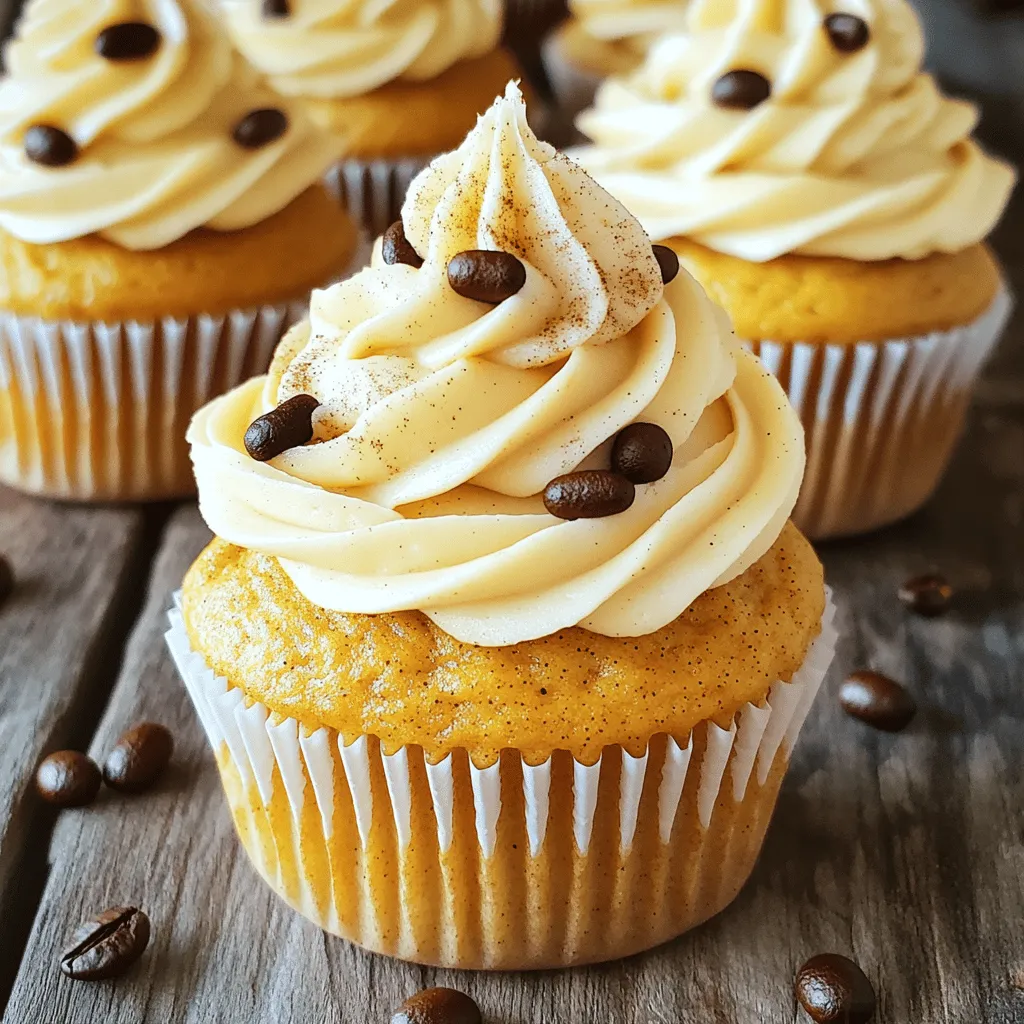
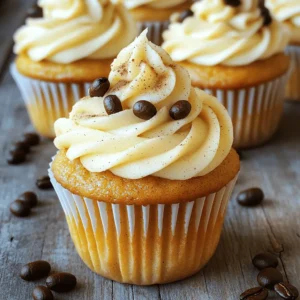
Pumpkin Spice Latte Cupcakes Delightful Fall Treat

Fall is here, and so is the craving for warm, cozy flavors! If you love the taste of pumpkin spice lattes, you’ll adore these Pumpkin Spice Latte Cupcakes. Moist, spiced, and topped with creamy frosting, these treats bring your favorite coffee house drink right to your kitchen. Join me as I guide you step-by-step through this delightful recipe that will make your autumn even sweeter!
Ingredients
Main Ingredients for Cupcakes
– 1 cup all-purpose flour
– 1/2 cup pumpkin puree
– 1/2 cup brewed coffee
– 1 cup packed brown sugar
To make these cupcakes, we start with key ingredients. All-purpose flour gives structure. Pumpkin puree adds moisture and flavor. Brewed coffee enhances the rich taste. Brown sugar brings sweetness and a hint of caramel. Each ingredient plays a vital role in creating the perfect cupcake.
Ingredients for Frosting
– 1/2 cup unsalted butter
– 2 cups powdered sugar
– 2 tablespoons pumpkin puree
– 1/2 teaspoon cinnamon
For the frosting, we need unsalted butter for creaminess. Powdered sugar provides sweetness and smooth texture. Pumpkin puree adds flavor, while cinnamon gives a warm spice note. This frosting will elevate your cupcakes and make them irresistible.
Step-by-Step Instructions
Preparing the Cupcake Batter
1. First, preheat your oven to 350°F (175°C). Line your muffin tin with cupcake liners. This helps the cupcakes come out easily.
2. In a medium bowl, mix together the dry ingredients. Whisk the all-purpose flour, baking powder, baking soda, salt, and pumpkin pie spice. Set this aside for now.
3. In a large bowl, cream the softened butter and brown sugar. Use an electric mixer on medium speed. Keep mixing until it is light and fluffy, about 3 to 4 minutes.
Baking the Cupcakes
4. Next, add the eggs one at a time. Mix well after each egg. Now, add the pumpkin puree, cooled brewed coffee, and vanilla extract. Stir until everything is combined.
5. Gradually add the dry mixture to the wet ingredients. Alternate with the milk, starting and ending with the dry mix. Stir gently to avoid overmixing. This keeps your cupcakes soft.
6. Now, fill each muffin cup with batter about two-thirds full. This allows room for rising.
7. Bake in your preheated oven for 18 to 20 minutes. Check if a toothpick inserted in the center comes out clean. If it does, they are ready!
Making the Frosting
8. In a new bowl, beat the softened butter with an electric mixer. Mix until it is creamy and smooth.
9. Slowly add the powdered sugar. Start on low speed to avoid a sugar cloud. Once mixed, increase the speed to medium until fluffy.
10. Next, mix in the pumpkin puree, vanilla extract, cinnamon, and brewed coffee. Beat until the frosting is light and smooth.
11. Once your cupcakes are cool, frost each one generously. Use a piping bag or a spatula for this.
These simple steps will help you create delicious pumpkin spice latte cupcakes. Enjoy the rich flavors and the cozy vibes of fall!
Tips & Tricks
Perfecting Your Cupcakes
– Avoiding overmixing: Mix your batter gently. Stir until just combined. This keeps your cupcakes light and fluffy. Too much mixing makes them dense and tough.
– Ideal baking time and temperature: Bake at 350°F (175°C) for 18-20 minutes. Check for doneness with a toothpick. If it comes out clean, your cupcakes are ready!
– Cooling cupcakes properly: Let them cool in the pan for 5 minutes. Then, move them to a wire rack. This helps them cool evenly and prevents sogginess.
Decorating Ideas
– Sprinkling cinnamon or pumpkin pie spice: After frosting, add a light dusting of spice. It adds flavor and looks great!
– Adding coffee beans or mini pumpkins: Place a few coffee beans on top or use mini pumpkins as fun decorations. They enhance the fall vibe.
– Using a piping bag for frosting: This gives your cupcakes a professional look. Use different tips to create fun shapes. It makes your treats even more appealing!
Variations
Different Flavor Additions
You can make pumpkin spice latte cupcakes even better with some fun flavors. Here are a few ideas to try:
– Adding chocolate chips: Mix in 1/2 cup of chocolate chips to the batter. This adds a rich, sweet touch to each bite. The chocolate pairs well with the spice and pumpkin.
– Swapping in different spices: If you want to change the flavor, try using nutmeg or ginger. Just replace the pumpkin pie spice with 1 tablespoon of your chosen spice. This gives your cupcakes a unique twist.
– Using flavored coffee: Swap out regular coffee for flavored coffee. Hazelnut or vanilla coffee adds an extra layer of taste. Just use the same amount of brewed coffee for the recipe.
Dietary Alternatives
You can also cater to different diets with some easy swaps:
– Gluten-free options: Use a gluten-free flour blend instead of all-purpose flour. This keeps the cupcakes tasty while making them safe for those with gluten allergies.
– Vegan substitutes for eggs and butter: Replace the eggs with 1/2 cup of unsweetened applesauce for each egg. Use coconut oil or vegan butter instead of regular butter. This makes the cupcakes vegan-friendly without losing flavor.
– Low-sugar alternatives: Use coconut sugar or a sugar substitute to cut down on sugar. This helps lower calories while keeping your cupcakes sweet. Just ensure the substitute measures like sugar.
Storage Info
How to Store Cupcakes
To keep your pumpkin spice latte cupcakes fresh, you have a few options:
– Storing at room temperature: Place the cupcakes in an airtight container. This keeps them soft and moist. They can last up to three days this way.
– Refrigerating cupcakes: If you want them to last longer, put them in the fridge. Use an airtight container to prevent them from drying out. They can stay fresh for about a week.
– Freezing for longer storage: For even longer storage, freeze the cupcakes. Wrap them tightly in plastic wrap and then place them in a freezer-safe bag. They can last for up to three months. Thaw them in the fridge overnight before serving.
Shelf Life
– How long do they last? At room temperature, the cupcakes last about three days. In the fridge, they last about one week. Frozen cupcakes can last up to three months.
– Signs of spoilage: Check for dryness or a change in color. If you see mold, discard them. A stale smell is also a sign that they are no longer fresh. Always trust your senses when it comes to food safety!
FAQs
Can I use fresh pumpkin instead of canned?
Yes, you can use fresh pumpkin. Just make sure to cook and puree it first. Fresh pumpkin may have a slightly different taste and texture. It can add a nice homemade touch to your cupcakes.
How can I make my cupcakes more moist?
To keep your cupcakes moist, use room temperature ingredients. This includes eggs, butter, and milk. Also, do not overmix your batter. Overmixing can make them dense. Lastly, adding a bit more pumpkin puree can help add moisture too.
Can I make these cupcakes ahead of time?
Yes, you can make these cupcakes ahead of time. Bake them a day or two in advance. Just store them in an airtight container at room temperature. If you frost them right before serving, they will stay fresh and delicious.
Can I freeze the cupcakes?
Absolutely! You can freeze the cupcakes without frosting. Wrap each cupcake in plastic wrap and place them in a freezer-safe bag. They can last up to two months. To enjoy, thaw them at room temperature before serving.
What can I use instead of coffee?
If you want to skip the coffee, try using milk or a milk alternative. You can also use brewed tea for a different flavor. Just keep in mind that it will change the taste a bit.
How can I make the frosting more flavorful?
To enhance your frosting, add more pumpkin puree or a touch of maple syrup. You can also mix in spices like nutmeg or ginger for extra warmth. Adjusting these flavors can make your frosting pop.
Can I decorate these cupcakes differently?
Yes! You can use different toppings like chocolate chips, nuts, or sprinkles. You can also drizzle caramel or chocolate sauce on top. Get creative and have fun with your cupcake designs!
This blog post showed you how to make delicious pumpkin coffee cupcakes. We covered the main ingredients for both the cupcakes and frosting. I provided step-by-step instructions to guide you through baking and decorating. You also got tips to perfect your cupcakes and creative ideas to make them special.
With these simple steps and variations, you can enjoy a tasty treat any time. Happy baking!
![To make Peach Cobbler French Toast, gather these items: - 4 slices of thick bread (brioche or challah is best) - 2 ripe peaches, sliced (canned peaches work too; drain them) - 2 large eggs - 1 cup milk (whole or almond milk is great) - 1 tablespoon pure vanilla extract - 1 teaspoon ground cinnamon - 1 tablespoon brown sugar - 1 tablespoon unsalted butter (for cooking) - ½ cup granola (optional, for crunch) - Whipped cream (optional, for serving) If you have dietary needs, consider these swaps: - For gluten-free, use gluten-free bread. - Vegan? Swap eggs with flaxseed meal and use plant-based milk. - For low-sugar diets, try a sugar substitute in place of brown sugar. Picking peaches is easy with these tips: - Look for peaches that are firm but slightly soft when squeezed. - Choose fruit with a sweet smell; this indicates ripeness. - Avoid peaches with bruises or dark spots, as these can affect flavor and texture. By following these tips and using the right ingredients, you’ll make a delightful Peach Cobbler French Toast that everyone will love! Check out the Full Recipe for more details. Making Peach Cobbler French Toast is a fun and simple process. I’ll walk you through each step to ensure your dish turns out perfectly. 1. Mixing the egg custard: In a medium bowl, whisk together 2 large eggs, 1 cup of milk, 1 tablespoon of pure vanilla extract, and 1 teaspoon of ground cinnamon. Mix well until it is smooth and creamy. This egg custard gives the French toast its rich flavor. 2. Soaking the bread slices: Pour the egg mixture into a shallow dish. Take 4 slices of thick bread, like brioche or challah. Place each slice in the dish, soaking for about 2-3 minutes on each side. Make sure they absorb the custard well. 3. Preparing the peach topping: While the bread soaks, slice 2 ripe peaches. If you use canned peaches, ensure they are drained. In a small saucepan, combine the sliced peaches with 1 tablespoon of brown sugar. Cook over medium heat for about 5-7 minutes, stirring often. When the peaches are soft and syrupy, take them off the heat. 4. Cooking the French toast: Heat a skillet over medium heat and add 1 tablespoon of unsalted butter. Let the butter melt completely. Place the soaked bread slices in the skillet. Cook each side for 3-4 minutes until golden brown. The butter helps give the toast a nice, crisp texture. Once cooked, arrange the French toast on plates and spoon the warm peach topping over each slice. For a delightful crunch, you can sprinkle granola on top. If you want to indulge, add a dollop of whipped cream. For detailed steps, refer to the Full Recipe. - Achieving the perfect golden crust: To get that nice, golden crust, use thick bread. Brioche or challah works best. Soak each slice well, but don't leave it too long. This ensures the center stays soft while the outside crisps up. - Temperature control for even cooking: Keep your skillet or griddle at medium heat. If it’s too hot, the bread will burn before cooking through. If it’s too cool, you won’t get the lovely crust. Adjust as needed while cooking each slice. - How to avoid soggy bread: Soak the bread just enough to absorb the flavors. If the bread is too soggy, it won’t cook well. A quick 2-3 minute soak on each side is perfect for keeping it fluffy yet not falling apart. - Pairing with syrup or whipped cream: Drizzle with maple syrup for sweetness. A dollop of whipped cream adds a creamy touch. Both make your Peach Cobbler French Toast even more delightful. - Presentation ideas for special occasions: Stack the slices on a platter. Add warm peach syrup on top. Garnish with fresh peach slices. A sprinkle of cinnamon creates an eye-catching centerpiece for brunch. - Best sides to complement Peach Cobbler French Toast: Serve with crispy bacon or sausages for a savory balance. Fresh fruit adds color and freshness, making your meal more appealing. You can also add a light salad for a refreshing touch. For the full recipe, check out [Full Recipe]. {{image_4}} You can make Peach Cobbler French Toast to fit your diet. If you need gluten-free options, choose gluten-free bread. Many brands offer tasty alternatives. For dairy-free choices, almond or oat milk works well. Both give a nice flavor. You can also swap out spices. Try nutmeg or allspice for a twist. Extracts like almond or maple add a fun taste. To make this dish even better, think about adding nuts or seeds. Chopped pecans or walnuts give a nice crunch. You can also mix in berries. Blueberries or raspberries pair well with peaches. They add color and flavor. If you want new fruit choices, try apples or mango. Both fruits bring a fresh taste and keep it exciting. With these tips, you can create your own unique version. Check out the Full Recipe for more details! To keep your Peach Cobbler French Toast fresh, follow these tips: - Refrigerate promptly: Place leftover French toast in an airtight container within two hours of cooking. - Layer wisely: If you have multiple pieces, insert parchment paper between them to prevent sticking. - Use within three days: For the best taste and texture, enjoy your leftovers within this time. When it comes to reheating, use a skillet or microwave: - Skillet method: Heat on low for about 3-4 minutes on each side. This keeps the toast crispy. - Microwave method: Heat on medium for 30-second intervals until warm. This method may soften the toast. You can freeze Peach Cobbler French Toast for later enjoyment! Here’s how: - Cool completely: Let the French toast cool to room temperature before freezing. - Wrap well: Use freezer-safe bags or wrap each slice in plastic wrap, then aluminum foil. - Label and date: Write the date on the bag for easy tracking. To thaw and reheat: - Thaw overnight: Place in the fridge for several hours or overnight. - Reheat: Use the skillet method mentioned above or microwave for 1-2 minutes until hot. Now you can enjoy this delicious treat anytime! Check out the Full Recipe for all the details. Choosing the right bread makes a big difference. I recommend using thick slices of brioche or challah. These breads soak up the egg mixture well and become nice and fluffy. Look for bread that is fresh but not too soft. You want a sturdy texture that holds up during cooking. Yes, you can prepare some parts ahead of time. You can soak the bread slices in the egg mixture and store them in the fridge for a few hours. Just be sure to cook them right before serving. You can also prepare the peach topping in advance and warm it up when you are ready to eat. If you don’t have peaches, you can try other fruits. Fresh or canned sliced pears work well. You can also use berries like blueberries or strawberries. Just keep in mind that cooking times may vary slightly. The cooked Peach Cobbler French Toast lasts about three days in the fridge. Store it in an airtight container to keep it fresh. When you reheat it, warm it in a skillet or microwave until hot. This helps keep the texture nice. For the full recipe, check the one provided above. Peach Cobbler French Toast is a delightful dish that brings joy to breakfast. We covered ingredients, preparation steps, and useful tips for cooking. I offered ideas for variations, storage, and answers to common questions. Embrace your creativity with this recipe. Try different fruits or spices for unique flavors. Enjoy the process and make it your own! Happy cooking!](https://goldendishy.com/wp-content/uploads/2025/06/19b86d0b-72ea-4091-b6de-feef30e599d4-768x768.webp)