Air Fryer Coconut Chicken Strips Crispy Delight
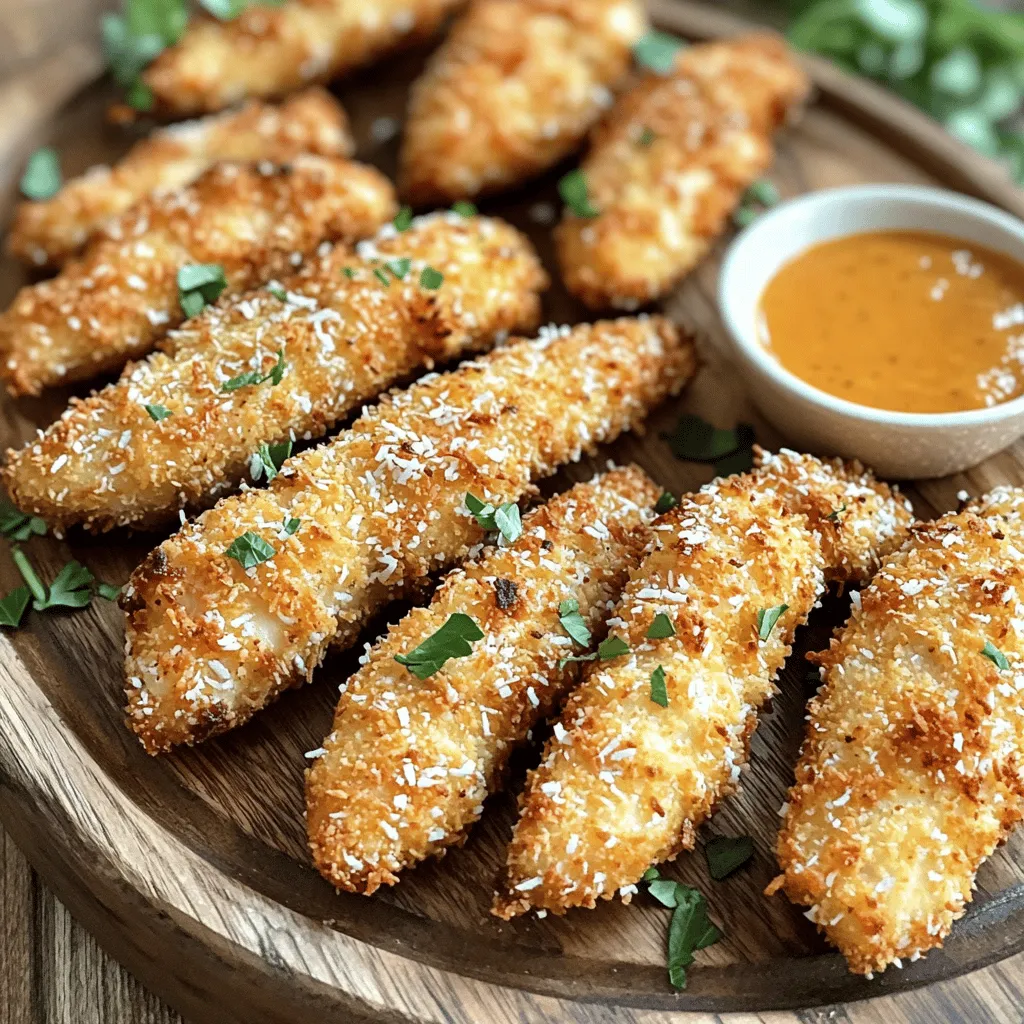
Craving a tasty snack that’s both crispy and fun? You’re in for a treat! My Air Fryer Coconut Chicken Strips are the perfect blend of sweet coconut and crunchy panko. In this guide, I’ll walk you through easy steps to create a crunchy delight that your family and friends will love. With simple ingredients and quick prep, you’ll want to make these again and again. Let’s get cooking!
Ingredients
Main Ingredients for Coconut Chicken Strips
– 1 lb chicken breast, cut into uniform strips
– 1 cup unsweetened shredded coconut
– 1/2 cup panko breadcrumbs
– 1/2 cup all-purpose flour
– 2 large eggs, beaten
Seasoning and Coating Ingredients
– 1 teaspoon garlic powder
– 1 teaspoon onion powder
– 1 teaspoon smoked paprika
– Salt and freshly ground black pepper to taste
– Cooking spray
Equipment Needed
– Air fryer
– Mixing bowls and dredging station
When making air fryer coconut chicken strips, focus on the right ingredients. Start with fresh chicken breast. Cutting it into even strips helps cook it all the same. Use unsweetened shredded coconut for that sweet crunch. Panko breadcrumbs add extra crispness to the coating.
For flavor, garlic powder, onion powder, and smoked paprika are key. They bring out the best in the chicken. Don’t forget salt and pepper to taste. Cooking spray is vital too. It ensures the strips cook without sticking.
You will need an air fryer for this recipe. Set up a simple dredging station with mixing bowls. This makes breading easy. Remember, the right setup leads to the best results!
Step-by-Step Instructions
Preparing the Chicken
Cutting the Chicken Strips
Start by slicing the chicken breast into even strips. Aim for strips that are about 1 inch wide. Uniform strips cook evenly and give great results.
Marinating the Chicken with Seasoning
In a bowl, mix salt, pepper, garlic powder, onion powder, and smoked paprika. Generously coat the chicken strips with this mix. Let the chicken sit for about 15 minutes. This time allows the flavors to soak in.
Setting Up the Breading Station
Assembly Line for Breading
Create a simple three-bowl setup. In the first bowl, add all-purpose flour. The second bowl holds the beaten eggs. In the third bowl, mix the shredded coconut with panko breadcrumbs. This setup makes the breading process smooth and quick.
Dredging and Coating Process
First, take a chicken strip and dredge it in flour. Shake off any extra flour. Next, dip it in the beaten eggs, ensuring full coverage. Finally, press the strip into the coconut-breadcrumb mix. Make sure it’s well-coated. Place the breaded strips on a tray and repeat until all strips are covered.
Air Frying the Chicken Strips
Preheating the Air Fryer
Set your air fryer to 375°F (190°C) and let it preheat for about 5 minutes. This step is key for getting that crispy texture.
Cooking Time and Temperature
Lightly spray the air fryer basket with cooking spray to prevent sticking. Arrange the breaded chicken strips in a single layer. Leave space between the strips for even cooking. Lightly spray the tops of the strips too for extra crispiness.
Flipping the Strips for Even Cooking
Air fry the chicken strips for 10-12 minutes. Flip them halfway through cooking. This ensures both sides become golden and crispy. Check that they reach an internal temperature of 165°F (74°C) when done. Enjoy your crispy coconut chicken!
Tips & Tricks
Achieving Crispy Coating
Panko breadcrumbs are key for a crunchy coating. They are lighter than regular breadcrumbs. This gives your coconut chicken strips a nice texture. Make sure to press the chicken strips into the panko mixture well. This helps them stick better and fry up crispy.
Using cooking spray is also important. It helps to brown the coating evenly. A light spray on the chicken strips before cooking makes a big difference. It ensures they become golden and crunchy without using too much oil.
Flavor Enhancements
You can add more flavor to your coconut chicken strips. Try adding a pinch of cayenne pepper for heat. You can also mix in a bit of lime zest for a fresh taste. These small tweaks can really boost the flavors.
For dipping sauces, consider sweet chili sauce or mango salsa. Both pair great with the coconut flavor. They add a sweet and tangy touch that complements the dish. Serve them on the side for extra enjoyment.
Cooking in Batches
Avoid overcrowding your air fryer. Cook in batches if necessary. This allows hot air to circulate around each strip. The result is even cooking and crispiness.
When cooking in batches, keep an eye on the time. You may need to adjust for larger amounts. Flip the chicken strips halfway through. This ensures each side gets that perfect golden color.

Variations
Gluten-Free Options
For a gluten-free twist, you can easily swap out the flour and breadcrumbs.
– Substituting with Gluten-Free Flour: Use a gluten-free flour blend instead of all-purpose flour. This keeps the texture while making it safe for those with gluten sensitivity.
– Using Gluten-Free Breadcrumbs: Look for gluten-free panko or traditional breadcrumbs. They will provide the same crunch and flavor without any gluten.
Flavor Variations
You can make these chicken strips even more exciting with simple additions.
– Adding Spices for Different Profiles: Try adding cayenne for heat or cumin for a warm taste. A dash of curry powder can give a fun twist too. Get creative and mix spices you love!
– Sweet Coconut Variation with Honey: For a sweet touch, drizzle honey over the coconut before coating the chicken. This will give a caramelized flavor when cooked. It’s a great option for those who enjoy a sweet and savory mix.
Serving Suggestions
How you serve these chicken strips can elevate the meal.
– Pairing with Salads or Sides: Serve them with a fresh salad or coleslaw for a crunch. You can also add them to wraps for a tasty lunch.
– Creative Plating Ideas: Arrange the strips in a fan shape on a platter. Garnish with lime wedges and fresh herbs like cilantro. This adds color and makes the dish eye-catching.
Storage Info
Storing Leftovers
To keep your coconut chicken strips fresh, place them in an airtight container. This method prevents moisture loss and keeps them crispy. Store them in the fridge within two hours of cooking. They stay good for up to 3 days. If you want them to last longer, consider freezing.
Reheating Tips
To keep the strips crispy when reheating, use the air fryer. Set it to 375°F (190°C). Place the strips in the basket in a single layer. Heat for about 5-7 minutes. This method revives the crunchiness you love. You can also use an oven at the same temperature for about 10 minutes.
Freezing Instructions
To freeze cooked chicken strips, let them cool completely first. Arrange them in a single layer on a baking sheet and freeze for about an hour. Once frozen, transfer them to a freezer-safe bag. They can stay in the freezer for up to 3 months. For thawing, move them to the fridge overnight. Reheat them using the air fryer or oven for best results.
FAQs
How long do you cook chicken strips in an air fryer?
Cook chicken strips in an air fryer for 10-12 minutes. Set the temperature to 375°F (190°C). This time ensures they cook through and get crispy. Flip the strips halfway to get an even brown color. Check that they reach 165°F (74°C) inside for safety.
Can I use chicken thighs instead of chicken breast?
Yes, you can use chicken thighs instead of chicken breast. Thighs are juicier and have more flavor. Cut them into strips just like the breast. The cooking time may stay the same, but check their internal temperature to be sure.
What dipping sauces go well with coconut chicken strips?
Many sauces pair well with coconut chicken strips. Here are some popular choices:
– Sweet chili sauce
– Mango salsa
– Honey mustard
– Barbecue sauce
– Ranch dressing
These sauces add extra flavor and make your meal even more fun!
Coconut chicken strips are easy to make and taste great. We covered key ingredients like chicken breast, shredded coconut, and panko breadcrumbs. You learned how to prepare, bread, and air fry them for the best results. Tips for crispiness and tasty variations add even more fun.
Now, you can enjoy your homemade coconut chicken strips. Share them with friends or try new flavors. Remember to store leftovers properly and reheat them for that perfect crunch. Enjoy your cooking journey!