Creamy Spinach Mushroom Pasta Irresistible Delight
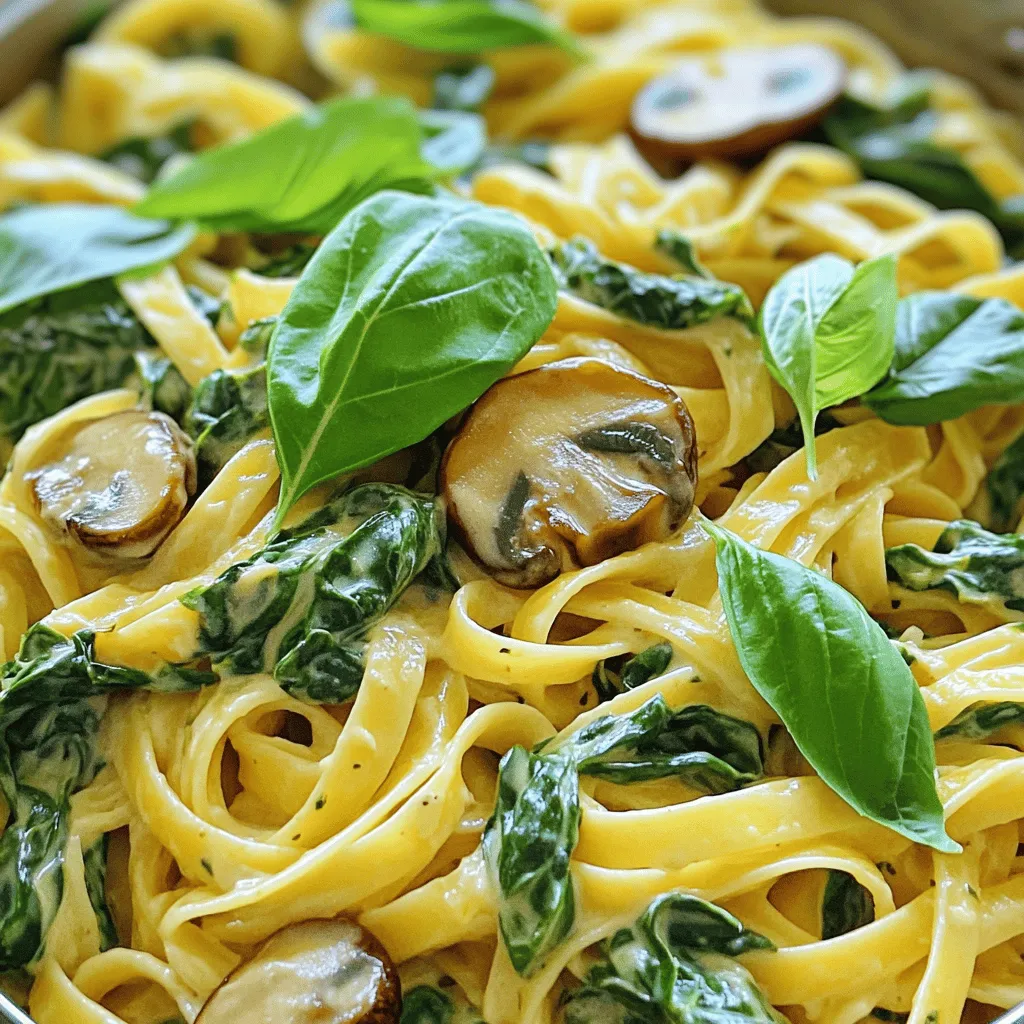
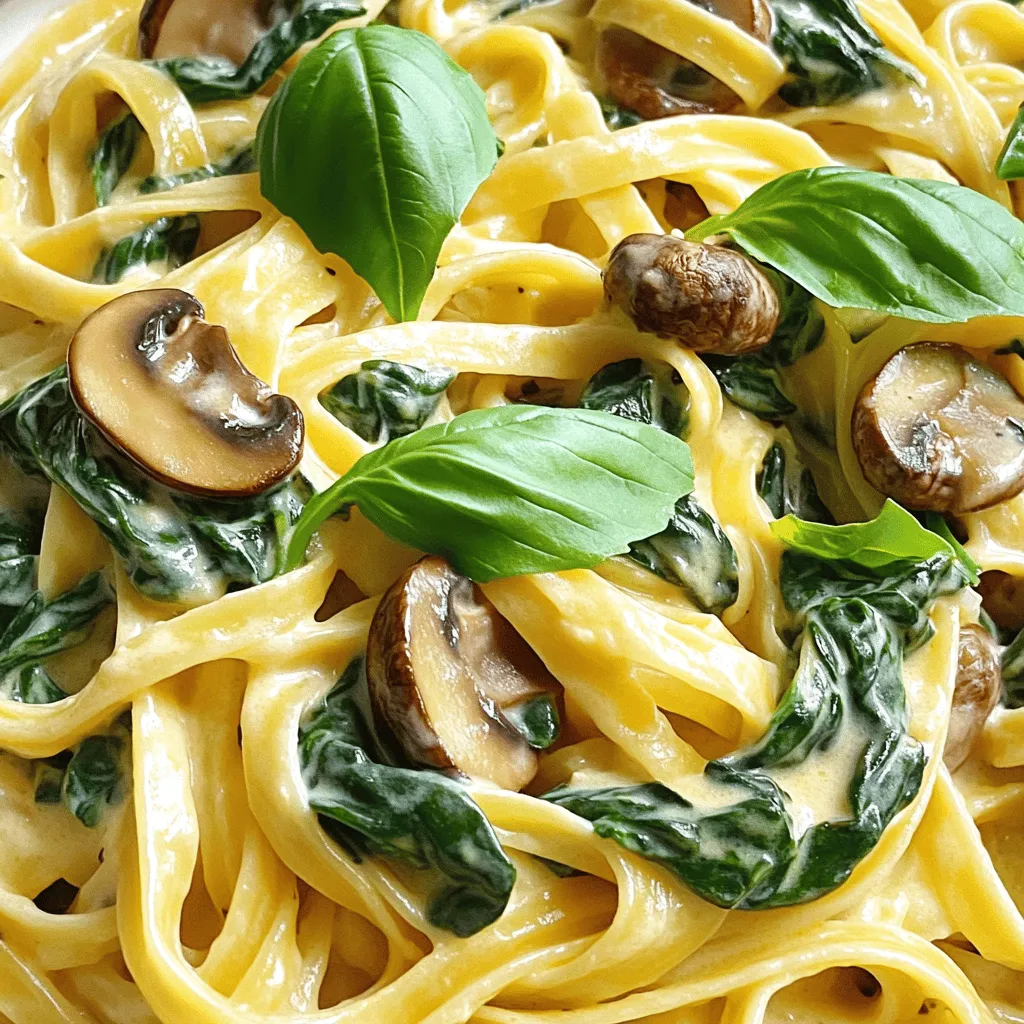
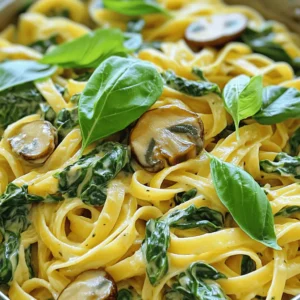
If you love pasta and creamy dishes, you’ll adore my Creamy Spinach Mushroom Pasta. This recipe combines fresh spinach and savory mushrooms into a rich sauce that hugs every noodle. It’s simple to make, and you can easily adapt it to fit your taste. Join me as we explore the ingredients and steps to create this delicious dish that anyone can enjoy. Your new favorite pasta night awaits!
Ingredients
Detailed Ingredient List
To make creamy spinach mushroom pasta, gather the following:
– 8 oz. fettuccine or spaghetti
– 2 tablespoons olive oil
– 1 small onion, finely chopped
– 2 garlic cloves, minced
– 8 oz. mushrooms, sliced
– 4 cups fresh spinach, roughly chopped
– 1 cup heavy cream or coconut cream
– 1/2 cup vegetable broth
– 1/2 cup grated Parmesan cheese
– Salt and freshly cracked black pepper
– 1/4 teaspoon nutmeg (optional)
– Fresh basil or parsley for garnish
Suggested Ingredient Quality
Using high-quality ingredients makes this dish shine. Choose fresh, organic spinach and mushrooms for the best flavor. For pasta, opt for whole grain or artisanal options. Freshly grated Parmesan cheese enhances the taste. If you pick coconut cream, look for full-fat varieties for richness. Always use good olive oil for sautéing, as it adds depth to the dish.
Substitutions and Alternatives
If you need substitutions, here are some ideas:
– Use gluten-free pasta if you have dietary needs.
– Swap heavy cream with coconut cream for a dairy-free option.
– Nutritional yeast can stand in for Parmesan cheese for a vegan dish.
– Try different greens like kale or arugula if you want variety.
– For added protein, toss in cooked chicken, shrimp, or chickpeas.
These options ensure that you can adapt the recipe to your tastes or needs while keeping it delicious!
Step-by-Step Instructions
Cooking the Pasta
First, grab a large pot and fill it with water. Add a good amount of salt. This will flavor the pasta as it cooks. Bring the water to a boil. Once boiling, add 8 oz. of fettuccine or spaghetti. Check the package for cooking time. You want it to be al dente, which means it should be firm to the bite. Once cooked, drain the pasta in a colander. Remember to save about 1/2 cup of the pasta water for later. This water will help make the sauce creamier.
Sautéing the Vegetables
Now, take a large skillet and add 2 tablespoons of olive oil. Heat the oil over medium heat. When the oil is hot, add 1 small, finely chopped onion. Stir it occasionally for about 3-4 minutes until the onion turns soft and translucent. Next, add 2 minced garlic cloves. Cook for 1 minute until you smell the garlic. Then, toss in 8 oz. of sliced mushrooms. Let them cook for 5-6 minutes. You want the mushrooms golden brown and tender. Finally, add 4 cups of roughly chopped spinach. Stir it in and cook for about 2-3 minutes, until the spinach wilts down.
Mixing in Cream and Cheese
Reduce the heat a bit and pour in 1 cup of heavy cream. If you prefer a dairy-free option, use coconut cream instead. Add 1/2 cup of vegetable broth too. Stir everything well to mix. Let this simmer for about 5 minutes. This helps the sauce thicken. Now, add 1/2 cup of grated Parmesan cheese. If you want a vegan dish, use nutritional yeast instead. Stir until the cheese melts into the sauce. Season with salt, freshly cracked black pepper, and a pinch of nutmeg for extra warmth. If the sauce is too thick, add some of the reserved pasta water until it reaches the right creamy consistency.
Then, carefully add the cooked pasta to the skillet. Toss everything together so the pasta is well-coated with the creamy sauce. Enjoy your dish!
Tips & Tricks
Perfecting the Creaminess
To make your sauce creamy, use heavy cream or coconut cream. Both give a rich texture. If you want a lighter sauce, use less cream and more vegetable broth. If your sauce is too thick, add some reserved pasta water. This will help achieve a smooth consistency. Don’t rush the simmering step; it allows the flavors to blend well. Mix in the cheese slowly, stirring until it melts completely.
Storing Leftovers
Store any leftover creamy spinach mushroom pasta in an airtight container. It can stay fresh for up to three days in the fridge. When you reheat it, add a splash of water or broth. This keeps the pasta from drying out. If you want to freeze it, do so without the cheese. This helps maintain the right texture. Freeze in a suitable container for up to two months.
Pairing Suggestions
This pasta pairs well with a light salad. A simple arugula salad brings a peppery crunch. You can also serve it with garlic bread for a hearty meal. For drinks, a crisp white wine or sparkling water complements the dish nicely. If you’d like more flavor, top it with fresh herbs like basil or parsley. These add color and brightness to your plate.
Variations
Vegan Creamy Spinach Mushroom Pasta
To make a vegan version, swap the heavy cream for coconut cream. Use nutritional yeast instead of Parmesan cheese. This gives a nice cheesy flavor without dairy. You can also add a splash of lemon juice for brightness. This dish stays creamy and delicious while being plant-based.
Gluten-Free Alternatives
If you need a gluten-free option, use gluten-free pasta. There are many choices like rice, quinoa, or chickpea pasta. These options cook well and absorb the sauce just like regular pasta. Just be sure to follow the specific cooking time on the package.
Adding Protein Options
To boost protein, add cooked chickpeas or lentils. You can also use grilled chicken or sautéed shrimp. These options mix well with the creamy sauce and add flavor. Just remember to adjust cooking times based on your protein choice.
Storage Info
Refrigerator Storage
You can store leftover creamy spinach mushroom pasta in the fridge. Place it in an airtight container. It will last for about 3 to 4 days. Make sure to let it cool before sealing. This will keep the flavors fresh and tasty.
Freezer Storage
If you want to keep it longer, you can freeze the pasta. Use a freezer-safe container or bag. It will stay good for about 2 to 3 months. When you are ready to eat, thaw it overnight in the fridge before reheating.
Reheating Instructions
To reheat, use a skillet on low heat. Add a splash of water or broth to avoid dryness. Stir it gently until warm. You can also microwave it in short bursts. Just make sure it heats evenly. Adjust seasoning if needed. Enjoy your creamy pasta again!
FAQs
How can I make this recipe lighter?
To lighten this creamy spinach mushroom pasta, you can make a few simple swaps. Use half-and-half instead of heavy cream. This cuts the fat but keeps the creaminess. You might also try Greek yogurt or silken tofu for a creamy texture with less fat. You can also reduce the cheese or use a low-fat cheese option. Lastly, add more spinach or vegetables to increase bulk without extra calories.
Can I use frozen spinach?
Yes, you can use frozen spinach in this dish. It’s a great time-saver and still has good flavor. Just make sure to thaw and squeeze out excess water before adding it to the pan. This helps keep your sauce from becoming too watery. Use about 2 cups of frozen spinach to replace the fresh spinach.
What pasta works best for this recipe?
Fettuccine or spaghetti are best for this creamy sauce. They hold the sauce well and provide a nice bite. You can also use other pasta shapes like penne or rigatoni. Just make sure to cook the pasta al dente for the best texture. Feel free to choose whole grain or gluten-free pasta if that fits your diet.
This article covered the key steps to make a creamy pasta dish. We explored good ingredient choices, cooking methods, and tips for great flavor. You learned about variations, storage options, and answers to common questions.
In the end, you can enjoy a tasty dish that fits your needs. Experiment with options and make it your own. Happy cooking!


![To make Ranch Chicken and Rice Casserole, gather these items: - 1 lb (450g) boneless, skinless chicken breasts, cut into bite-sized pieces - 1 cup uncooked white rice (e.g., jasmine or basmati) - 2 cups low-sodium chicken broth - 1 cup creamy ranch dressing - 1 cup frozen mixed vegetables (a colorful blend of peas, carrots, and corn) - 1 cup shredded sharp cheddar cheese - 1 teaspoon onion powder - 1 teaspoon garlic powder - Salt and freshly ground black pepper to taste - Fresh parsley, chopped (for garnish, optional) Garnishes add beauty and taste to your dish. Here are a few: - Fresh parsley, chopped - Extra shredded cheddar cheese - A drizzle of ranch dressing These add color and a fresh taste to the casserole. You can mix and match based on what you like! Sometimes, you may need to swap out ingredients. Here are some ideas: - Chicken: Use turkey breast or cooked rotisserie chicken for a quicker option. - Rice: Brown rice or quinoa can work well. Just adjust the cooking time. - Vegetables: Feel free to use any frozen veggies you have, like broccoli or bell peppers. - Dressing: If you prefer, swap ranch dressing for other creamy dressings like blue cheese or Caesar. With these swaps, you can make the dish fit your taste or what you have on hand. First, preheat your oven to 375°F (190°C). This step is key for even cooking. A hot oven helps the chicken cook well and the cheese melt perfectly. In a large bowl, add the diced chicken, uncooked rice, chicken broth, and creamy ranch dressing. Then, sprinkle in the onion powder and garlic powder. Use a spatula to mix everything well. Make sure the chicken and rice are coated with the ranch dressing. Add salt and pepper to taste. Next, fold in the frozen mixed vegetables. This gives your casserole color and nutrition. Make sure the veggies are spread throughout the mixture. Pour your chicken and rice mixture into a greased 9x13-inch baking dish. Spread it out evenly for best results. Cover the dish tightly with aluminum foil. This traps moisture and helps the dish cook well. Bake in the preheated oven for 25 minutes. After 25 minutes, remove the foil carefully. Watch out for steam! Now, sprinkle the shredded cheddar cheese on top. Return the dish to the oven, uncovered, for another 15-20 minutes. You will know it’s ready when the chicken is cooked through, and the cheese is melted and bubbly. Once done, take it out and let it cool for about 5 minutes. This resting time helps the flavors settle. If you like, add freshly chopped parsley for a nice touch before serving. To make perfect rice, rinse it first. This removes extra starch. Use a 1:2 ratio of rice to broth. This keeps the rice moist. Cook it covered for even heat. If you want extra flavor, add herbs to the broth. You can mix in extras to change the taste. Try adding diced bell peppers for crunch. Use different frozen veggies like broccoli or green beans. You can also swap ranch dressing for a spicy sauce. This gives it a kick. For a cheesy twist, add cream cheese with the ranch. One mistake is not covering the dish while baking. This can dry out the rice. Another error is using too much liquid. Stick to the right amounts in the recipe. Don’t skip the resting time after baking. This helps the flavors blend well. Always taste before serving. Adjust salt and pepper as needed. For a full recipe with all these tips, check out the [Full Recipe]. {{image_4}} You can make a tasty vegetarian version of this dish. Start by swapping the chicken for a mix of beans or lentils. Use 2 cups of cooked black beans or chickpeas instead. Then, keep all the other ingredients the same. The ranch dressing adds great flavor, and the veggies provide crunch. This version is hearty and filling, perfect for a meatless meal. If you love heat, try a spicy twist on the classic recipe. Add diced jalapeños or a pinch of cayenne pepper to the mix. You can also use spicy ranch dressing in place of the regular one. This gives the dish a nice kick. Top it off with pepper jack cheese instead of cheddar for extra spice. Your taste buds will thank you! For a one-pan meal, mix everything in a large oven-safe skillet. This saves on clean-up time. Just add the rice and broth to the skillet along with the chicken and veggies. Cover and bake as you normally would. The flavors blend well, and you still get that creamy goodness from the ranch dressing. This method makes dinner even easier and quicker. You can find the full recipe linked above, allowing you to create these delicious variations! You can keep leftover Ranch Chicken and Rice Casserole in the fridge. Place it in an airtight container. It will stay fresh for up to three days. Make sure the casserole is cool before sealing it. This helps prevent moisture from building up. If you want to save some for later, freezing is easy. Use a freezer-safe container or heavy-duty freezer bag. Store the casserole in portions for easy meals. It will keep well for up to three months. To freeze, let it cool completely first. Label the container with the date to track freshness. When you’re ready to enjoy your casserole again, you can reheat it in different ways. The oven gives the best results. Preheat it to 350°F (175°C). Bake the casserole for about 20-30 minutes, covered with foil. This keeps it moist. You can also use a microwave. Heat in short bursts, stirring in between to ensure even warming. Always check that the chicken is heated all the way through. For extra flavor, add a little ranch dressing before serving. To adjust the recipe for fewer servings, simply halve the ingredients. Use ½ lb of chicken and ½ cup of rice. Also, cut the broth and dressing in half. This way, you keep the same flavors. Make sure to check the baking time. Smaller portions may cook faster, so keep an eye on them. Yes, you can use brown rice. However, brown rice takes longer to cook. It may need more liquid too. I recommend cooking it for a few minutes before adding it to the casserole. This helps it soften. Follow the same steps, but adjust the cooking time. Ranch Chicken and Rice Casserole goes well with many sides. Here are a few tasty options: - Simple green salad with a light dressing - Steamed broccoli or green beans for a crunchy bite - Garlic bread for a cozy touch - Roasted vegetables for extra flavor and color These sides add balance and make your meal complete. Enjoy the casserole with your favorite sides! For the full recipe, check out the link above. In this blog post, we covered the key steps to make a delicious Ranch Chicken and Rice Casserole. We explored the ingredients, sharing options for garnishes and substitutions. The step-by-step instructions guide you from preheating the oven to baking. I also shared tips to perfect your dish and variations for added flavor. Finally, we discussed how to store leftovers for later enjoyment. Follow these tips, and you’ll create a tasty meal that everyone will love!](https://goldendishy.com/wp-content/uploads/2025/06/349f3b9c-e648-45ce-b7ed-2f76b31339ac-768x768.webp)
![To make honey lemon roasted salmon, you need a few simple items: - 4 salmon fillets (6 oz each) - 1/4 cup honey - 2 tablespoons freshly squeezed lemon juice - Zest of 1 lemon (about 1 teaspoon) - 2 tablespoons extra virgin olive oil - 3 cloves garlic, finely minced - Salt and black pepper to taste These ingredients work well together. The honey adds sweetness, while the lemon gives a bright flavor. The olive oil helps keep the salmon moist. Garlic brings a nice kick to the dish. You can add some optional garnishes to make your dish look even better. Consider these: - Fresh dill sprigs for a pop of color and taste - Extra lemon wedges for serving These garnishes add freshness and make the dish more appealing. They also enhance the flavors. If you don't have all the ingredients, don't worry! You can swap some things out: - Use maple syrup instead of honey for a different sweet flavor. - Lime juice can replace lemon juice for a zesty twist. - If you lack fresh garlic, garlic powder works in a pinch. These swaps can still give you a tasty meal. Feel free to get creative! For the full recipe, check the detailed steps. To start, preheat your oven to 400°F (200°C). This gives the salmon a nice roast. In a bowl, mix honey, lemon juice, lemon zest, olive oil, and minced garlic. Whisk it well until smooth. Next, take your salmon fillets and season both sides with salt and black pepper. This will boost the flavor. Place the fillets skin-side down on a baking sheet lined with parchment paper. This step makes cleanup easy. Now, use a brush or spoon to spread the honey lemon mix over the salmon fillets. Make sure to coat them well for great taste. Now, place the baking sheet in the oven. Roast the salmon for 12-15 minutes. It’s done when the flesh looks opaque and flakes easily with a fork. This means it's tender and juicy. After roasting, take the salmon out of the oven. Let it rest for a few minutes. This keeps it warm and moist. When serving, lay the salmon on a white platter. Drizzle any leftover honey lemon mixture from the baking sheet on top. For a nice touch, add lemon wedges around the salmon. If you like, you can garnish with fresh dill sprigs. This adds color and flavor. You can find the full recipe and more tips at [Full Recipe]. Enjoy your meal! To get perfectly roasted salmon, start with fresh fillets. Fresh fish tastes better. Always preheat your oven to 400°F (200°C). This helps the salmon cook evenly. Make sure to line your baking sheet with parchment paper. This keeps the salmon from sticking. For a nice glaze, brush the honey lemon mixture on thick. This adds more flavor and caramelizes well. Roast for 12 to 15 minutes. The salmon is done when it flakes easily with a fork. One common mistake is overcooking the salmon. This makes it dry and tough. Always check it a few minutes before the time is up. Another mistake is not seasoning enough. Salt and pepper bring out the salmon's natural taste. Skipping the marinade is also a no-go. The honey and lemon mix adds great flavor. Lastly, don’t skip resting the salmon after cooking. This keeps it juicy and tender. Marinating is key to enhancing flavor. You can use the honey lemon mix as a marinade. Let the salmon sit in the mixture for 30 minutes before cooking. This allows the fish to soak up all the flavors. Feel free to add herbs like thyme or rosemary. These herbs pair well with salmon. You can also try different citrus juices for a twist. Orange or lime can add a nice touch. For more ideas, check out the Full Recipe. {{image_4}} Grilling salmon gives it a lovely smoky flavor. Start with the same honey lemon mix. Marinate the salmon in this blend for about 30 minutes. Preheat your grill to medium-high heat. Cook each side for about 5-7 minutes. Look for grill marks and a nice char. This method adds depth to the dish. Fresh herbs can brighten your meal. Add herbs like thyme or parsley to the honey lemon mix. These herbs work well with the salmon's rich flavor. Simply brush the mixture over the salmon fillets before cooking. It gives each bite a fresh taste. You can also sprinkle herbs on top after cooking for added color and flavor. Want a faster option? Pan-searing is quick and easy. Heat a bit of olive oil in a skillet over medium heat. Season the salmon with the honey lemon mix. Place the fillets skin-side down in the hot skillet. Cook for about 4-5 minutes per side. This method gives you a crispy skin and juicy inside. It's a great way to enjoy salmon on a busy night. For more cooking ideas, check out the Full Recipe. After cooking your honey lemon roasted salmon, let it cool down. Place the leftover salmon in an airtight container. This keeps it fresh. Store it in the fridge for up to three days. If you want to enjoy it later, do not wait too long. The sooner you store it, the better it tastes when you reheat. You can freeze honey lemon salmon if you have extra. Wrap each piece tightly in plastic wrap. Then, place them in a freezer-safe bag. Squeeze out the air before sealing. Label the bag with the date. You can freeze it for up to three months. When you're ready to eat it, thaw it overnight in the fridge. To reheat salmon, the oven works best. Preheat the oven to 275°F (135°C). Place the salmon on a baking sheet. Cover it with foil to prevent drying. Heat for about 15 minutes or until warm. You can also use a microwave. Put it on a plate and cover it with a microwave-safe lid. Heat for 30 seconds at a time until warm. Enjoy your meal again! For the full recipe, check back to our earlier section. You can tell salmon is done when it looks opaque. The flesh should flake easily with a fork. Use a meat thermometer if you want to be sure. The internal temp should reach 145°F (63°C). If you cut into the fish, it should look moist and tender. Overcooked salmon can be dry, so check it closely. Yes, you can use frozen salmon for honey lemon roasted salmon. Just make sure to thaw it first. Place the salmon in the fridge overnight or run it under cold water. Once thawed, pat it dry with a paper towel. Then, follow the recipe as usual. Cooking from frozen may require a few extra minutes. Honey lemon roasted salmon pairs well with many sides. Here are some ideas: - Steamed broccoli - Roasted asparagus - Quinoa salad - Garlic mashed potatoes - Lemon rice - Mixed greens with vinaigrette These sides add color and nutrition to your meal. You can mix and match based on your taste. Enjoy trying out different combinations! For the full recipe, check out the section above. This blog post covered how to make honey lemon roasted salmon. We explored key ingredients, including essential and optional items. I shared step-by-step cooking instructions and tips to avoid mistakes. You also learned about variations and how to store salmon. Try these methods to create simple and tasty meals. With practice, you'll impress yourself and others with your cooking skills. Enjoy your journey to making delicious honey lemon salmon!](https://goldendishy.com/wp-content/uploads/2025/07/988a6f99-fc0c-4e25-b6bc-fd8b1dc60d33-768x768.webp)
. In this post, we covered essential ingredients for cornbread, substitutions, and tips for fresh picks. I shared step-by-step instructions to ensure your cornbread turns out great. We discussed ways to perfect texture, enhance flavor, and explore different variations. Proper storage and reheating tips help keep your cornbread fresh for later. Remember, cornbread can be sweet or savory, so choose what you love. Get creative and enjoy the process! Your next batch will be delicious and fun to make.](https://goldendishy.com/wp-content/uploads/2025/07/3215032b-f688-44a5-9882-4fc644314e18-768x768.webp)