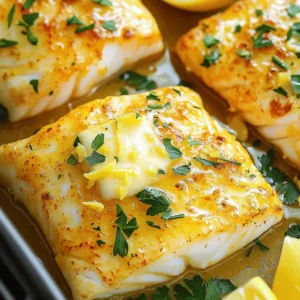
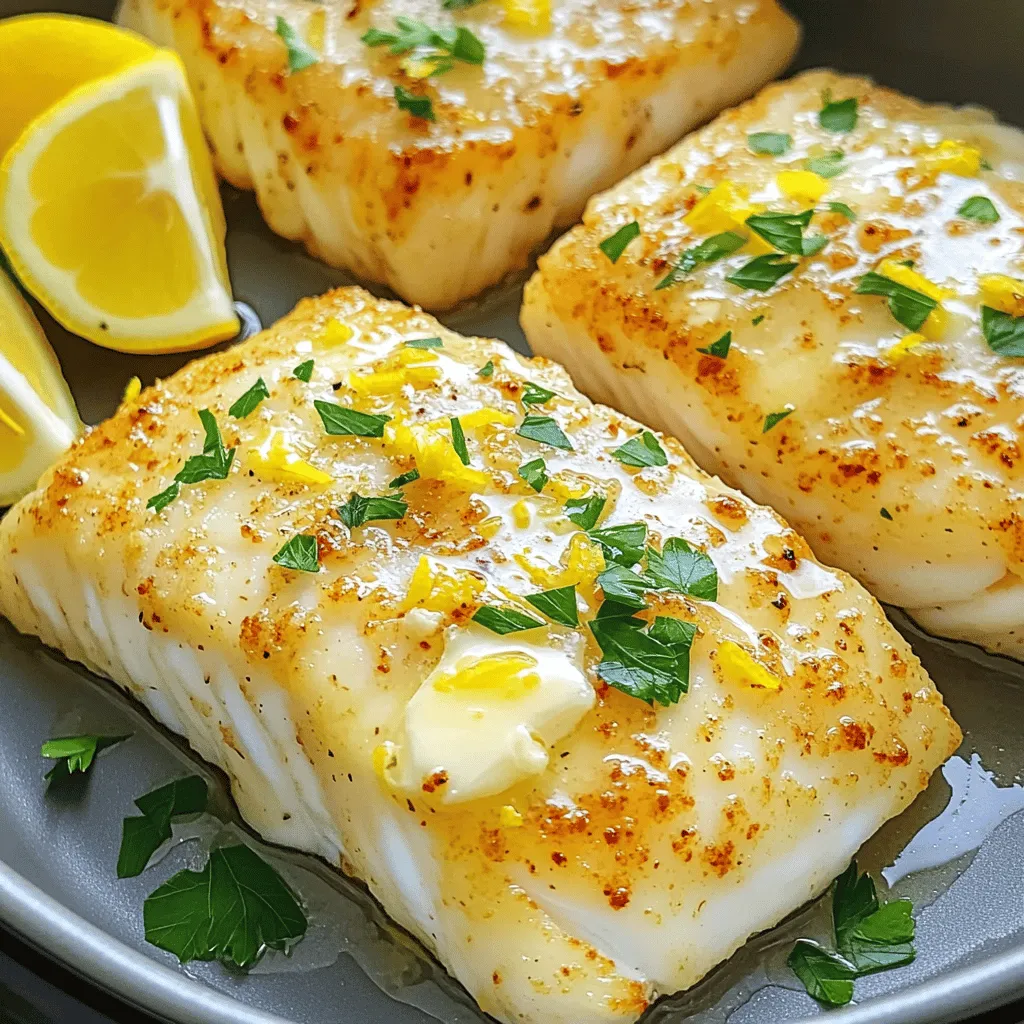
Air Fryer Lemon Garlic Butter Cod Quick and Simple Recipe

Are you ready to amp up your dinner game? This Air Fryer Lemon Garlic Butter Cod recipe is quick and packs a flavor punch! With just a few simple ingredients, you can create a dish that impresses family and friends alike. We’ll guide you through easy steps to achieve juicy cod with a perfect crispy finish. Let’s dive in and get cooking!
Ingredients
List of Ingredients
– 4 cod fillets (approximately 6 oz each)
– 3 tablespoons unsalted butter, melted
– 3 cloves garlic, minced finely
– 1 lemon (zested and juiced)
– 1 teaspoon dried oregano
– 1 teaspoon paprika
– Salt and freshly cracked pepper to taste
– Fresh parsley, chopped (for garnish)
– Lemon wedges (for serving)
You need fresh cod fillets for this recipe. Each fillet should weigh around 6 ounces. This size ensures even cooking and a nice texture.
Unsalted butter plays a key role in this dish. It adds richness and helps the fish stay moist. The butter also binds the flavors in the marinade.
Garlic gives this meal a great flavor boost. Minced garlic releases a strong, savory taste that pairs well with cod.
Lemon zest and juice add brightness. The zest gives a strong lemon flavor, while the juice brings in a nice acidity. Together, they wake up the fish’s taste.
Dried oregano adds a hint of earthiness. It complements the lemon and garlic well. Paprika brings warmth and a slight smokiness, making the dish even more appealing.
Don’t forget to season with salt and pepper. This enhances all the flavors in the dish.
For garnish, use fresh parsley. It adds a pop of color and freshness. Lemon wedges make a great serving suggestion. They let you add more lemon flavor as you eat.
Each ingredient plays a part in creating a delicious and vibrant dish. Enjoy every bite of your air fryer lemon garlic butter cod!
Step-by-Step Instructions
Marinating the Cod
1. Start by mixing the marinade. In a small bowl, combine:
– 3 tablespoons unsalted butter, melted
– 3 cloves garlic, minced finely
– Zest and juice of 1 lemon
– 1 teaspoon dried oregano
– 1 teaspoon paprika
– Salt and freshly cracked pepper to taste.
Whisk these ingredients together until they blend well. You want a vibrant mix that smells great.
2. Next, take your cod fillets. Pat them dry with a paper towel. This step helps the marinade stick better. Place the dried fillets in a shallow dish. Pour the marinade over them. Make sure each fillet is coated well. Let them marinate for 15-20 minutes. This wait helps the flavors soak in.
Prepping the Air Fryer
1. While the cod marinates, preheat your air fryer to 390°F (200°C). Do this for about 3-5 minutes. A hot air fryer cooks the fish evenly.
2. Lightly spray the air fryer basket with cooking spray. This step prevents sticking. After that, carefully place the marinated cod fillets in the basket. Make sure they don’t overlap. Spacing helps them cook nicely.
Cooking Process
1. Now, air fry the cod for 8-10 minutes. Keep an eye on it. The fish is done when it flakes easily with a fork and is opaque throughout. If your fillets are thicker, you might need to adjust the time.
2. When cooked, use tongs to remove the cod from the air fryer. Let them rest for a minute. This rest time enhances the flavors.
3. Plate the cod fillets and garnish with chopped parsley. Serve with lemon wedges. Your guests can squeeze fresh lemon juice over the cod for extra flavor. Enjoy your delicious meal!
Tips & Tricks
Ensuring Perfect Texture
To get the best texture for your cod, start by drying the fillets. Use a paper towel to gently pat them dry. This helps the marinade stick better and gives a nice crisp when cooking. For that perfect crunch, make sure your air fryer is preheated. This step helps the fish cook evenly and creates a delightful crust.
Flavors Enhancements
You can boost the flavor of your dish with more herbs. Try adding thyme or dill for a fresh twist. If you love heat, a pinch of red pepper flakes can make it pop. To enhance your marinade, let it sit for a few minutes before using it. This allows the flavors to blend and develop a richer taste.
Cooking Adjustments
Cooking times can vary based on the thickness of your cod fillets. If your fillets are thicker, add a minute or two to the cooking time. Keep an eye on them to avoid overcooking. Cod is done when it flakes easily with a fork. If you overcook it, it may become dry. To prevent this, use a meat thermometer. Aim for an internal temperature of 145°F (63°C) for perfectly cooked fish.
Variations
Alternative Cooking Methods
You can bake cod in the oven if you don’t have an air fryer. Preheat your oven to 400°F (200°C). Place the marinated cod on a baking sheet and cook for 12-15 minutes. This method gives a lovely, tender fish.
Broiling is another option for a different texture. Set your broiler to high and place the cod on a broiler pan. Broil for about 5-7 minutes. This will create a nice char on top while keeping the inside moist.
Ingredient Substitutions
If you can’t find cod, use other fish like tilapia or haddock. These options also work well with the marinade. They will absorb the flavors just like cod.
You can switch the herbs or sauces too. Try dill instead of oregano for a fresh twist. You can also use soy sauce for a different flavor profile. Just adjust the salt since soy sauce can be salty.
Flavor Twists
Want some heat? Add chili flakes to your marinade. This will give your cod a spicy kick that many will enjoy.
You can also try citrus variations. Use orange or lime zest and juice instead of lemon. These fruits add a unique taste that brightens up the dish.
Storage Info
Storing Leftovers
To keep your cooked cod fresh, store it in the fridge. Let it cool down first. Then, place it in an airtight container. This will help keep the flavor and texture. Use glass or plastic containers with tight lids. You can also wrap the cod tightly in plastic wrap. Store it for up to three days.
Reheating Instructions
Reheating cod can be tricky. You want it warm, not dry. The best way is to use the air fryer. Set it to 350°F (175°C). Place the cod in for about 5 minutes. Check it often to avoid overcooking. You can also use a microwave. Heat it in short bursts of 30 seconds. This helps keep the cod moist.
Freezing Tips
You can freeze cod, but there are rules. For uncooked cod, wrap it tightly in plastic wrap. Then place it in a freezer bag. You can freeze it for up to three months. For cooked cod, let it cool and then do the same. To thaw, move it to the fridge overnight. For quick thawing, place it in a bowl of cold water. Change the water every 30 minutes until it’s thawed.
FAQs
How long do you cook cod in an air fryer?
You cook cod in an air fryer for 8-10 minutes at 390°F (200°C). The cod is done when it flakes easily with a fork and looks opaque. Cooking time may change based on how thick your fillets are. Always check early to avoid overcooking.
Can I marinate cod overnight?
You can marinate cod overnight, but it might get too salty. I suggest marinating for 15-20 minutes for the best taste. This allows the flavors to soak in without overpowering the fish. If you want to marinate longer, use less salt.
What should I serve with air fryer lemon garlic butter cod?
I recommend serving your cod with a light salad or steamed veggies. Quinoa or rice also pairs well. These sides balance the rich flavors of the cod. Fresh lemon wedges make a great addition, too!
Now you have all the steps to create a delicious air fryer lemon garlic butter cod. We covered the key ingredients, from cod fillets to herbs and spices. You learned how to marinate and cook the cod for a crispy, tasty meal. We also shared tips for perfect texture and alternative cooking methods.
Remember, whether you serve it with lemon wedges or enjoy it solo, this dish is easy and tasty. With these methods, cooking cod becomes simple. Enjoy your cooking and share this recipe with others!