Sweet Chili Pineapple Meatballs Flavorful and Easy Recipe

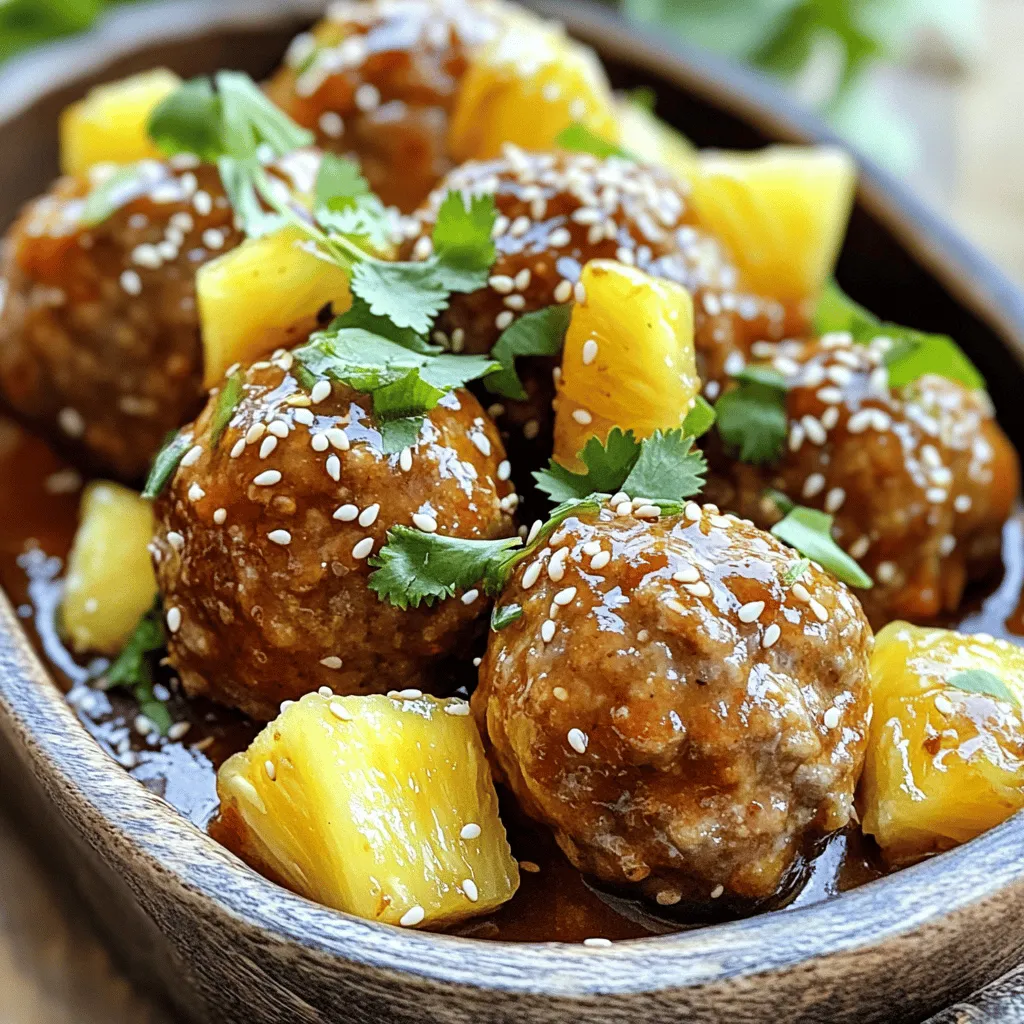
Looking for a fun and tasty dish? Try my Sweet Chili Pineapple Meatballs! This easy recipe combines tender meatballs with a sweet and spicy sauce. Perfect for parties or weeknight dinners, these meatballs will impress your family and friends. In just a few simple steps, you’ll create a meal that bursts with flavor. Ready to spice up your cooking? Let’s get started!
Ingredients
Main Ingredients
– 1 lb ground chicken or turkey
– 1/2 cup bread crumbs
– 1/4 cup grated Parmesan cheese
– 1/4 cup finely chopped green onions (scallions)
– 1 large egg
In this dish, the ground chicken or turkey forms the base of the meatballs. Using chicken or turkey keeps it light. The bread crumbs give the meatballs a nice texture. Parmesan cheese adds a savory flavor that enhances each bite. The green onions bring freshness, while the egg binds everything together.
Flavor Enhancers
– 1 teaspoon garlic powder
– 1 teaspoon ginger powder
– Salt and pepper to taste
Garlic powder gives a warm, savory flavor. Ginger powder adds a hint of spice. Salt and pepper balance the taste. These simple flavor enhancers make the meatballs pop. They are key to making each bite delicious.
Sauce Components
– 1/2 cup sweet chili sauce
– 2 tablespoons soy sauce
– 1 cup pineapple chunks
The sweet chili sauce provides a tangy sweetness. Soy sauce brings in umami and depth. Pineapple chunks add a burst of juicy flavor. Mixing these together creates a sauce that coats the meatballs perfectly. The sauce is a sweet and savory delight that pairs well with the meatballs.
Step-by-Step Instructions
Preheating the Oven
Set your oven temperature to 400°F (200°C). This step is key. A hot oven helps meatballs cook well and get that nice golden color.
Preparing the Meatball Mixture
In a large bowl, combine 1 lb of ground chicken or turkey with 1/2 cup of bread crumbs, 1/4 cup of grated Parmesan cheese, and 1/4 cup of finely chopped green onions. Add 1 large egg, 1 teaspoon of garlic powder, and 1 teaspoon of ginger powder. Season with salt and pepper to taste. Mix everything gently. Be careful not to over-mix. Over-mixing can make your meatballs tough.
Baking and Coating The Meatballs
Shape the mixture into small meatballs, about 1 inch wide. Wet your hands with water to prevent sticking. Place them on a baking sheet lined with parchment paper. Bake the meatballs in the oven for 15-20 minutes. They need to be golden brown and reach an internal temperature of 165°F (74°C).
While they bake, prepare the sauce. In a medium saucepan, mix 1/2 cup of sweet chili sauce and 2 tablespoons of soy sauce over medium heat. Add 1 cup of pineapple chunks. Stir occasionally as it warms. Let it simmer for 3-5 minutes until the sauce thickens.
Once the meatballs are done, add them to the saucepan. Gently stir to coat each meatball in the sauce. Serve them warm. Enjoy the sweet and spicy flavors!
Tips & Tricks
Cooking Tips
– Checking for doneness with a meat thermometer: Use a meat thermometer to ensure your meatballs are safe to eat. Insert it into the center of a meatball. You want it to read 165°F (74°C). This will confirm they are cooked through and juicy.
– Avoiding over-mixing the meatball mixture: Mix the meatball ingredients just until combined. If you mix too much, the meatballs can become tough. Gently combine everything for a soft, tender bite.
Presentation Tips
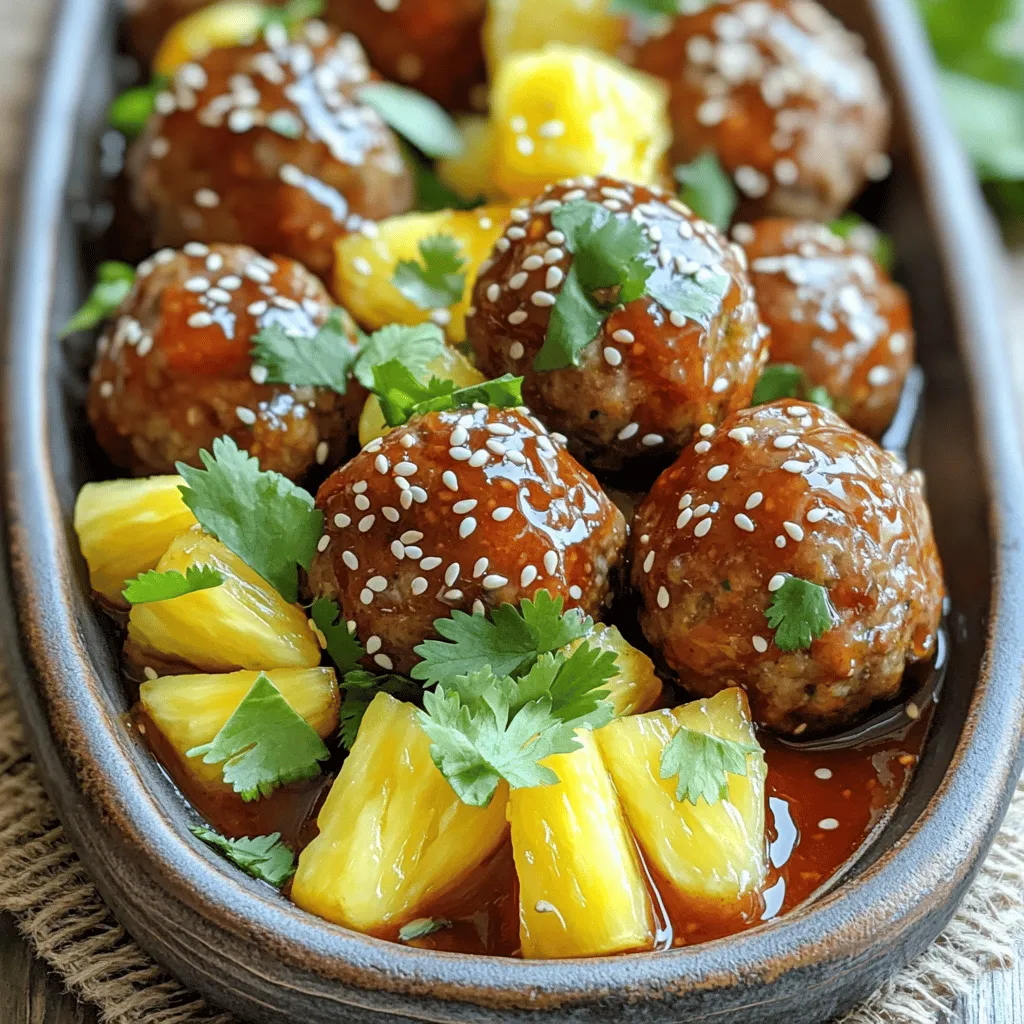
– Garnishing with sesame seeds and fresh cilantro: After cooking, sprinkle sesame seeds on top. Then, add fresh cilantro for color. This makes your dish look vibrant and appealing.
– Serving suggestions with toothpicks: Serve your meatballs on a large platter. Provide toothpicks for easy grabbing. This makes them perfect for parties or gatherings.
Sauce Variations
– Adapting sauce with different chili sauces: Feel free to switch up the sweet chili sauce. Use a spicy chili sauce for more heat. You can also try a garlic chili sauce for a different flavor.
– Adding additional fruits for a twist: Experiment by adding fruits like mango or bell peppers to the sauce. This can give your meatballs a unique taste and fresh texture.

Variations
Alternate Protein Options
You can switch the ground chicken or turkey for ground beef. Beef adds a hearty flavor. If you want a lighter meal, try plant-based meat. Brands like Beyond Meat work well in this recipe. You can also mix meats for a unique taste. Combining beef and chicken gives a nice balance of flavors.
Gluten-Free Options
If you need a gluten-free meal, use gluten-free bread crumbs. These crumbs are easy to find in stores. You can also use almond flour instead of bread crumbs. Almond flour keeps the meatballs moist and gives them a nice texture.
Flavor Infusions
To make the meatballs spicier, add sriracha or red pepper flakes. Start small, then taste as you go. If you like fresh herbs, try adding cilantro or basil. These herbs brighten the dish and add a fresh touch. Feel free to experiment with spices to match your taste!
Storage Info
Refrigeration
To store leftover meatballs, let them cool first. Place them in an airtight container. This helps keep them fresh and tasty. You can store them in the fridge for up to three days. If you’re ready to eat, just reheat them in the oven or microwave.
Freezing Instructions
If you want to freeze the meatballs, first let them cool completely. Then, place them on a baking sheet. Make sure they are not touching each other. Freeze them for about 1 hour. Once frozen, transfer the meatballs to a freezer-safe bag. Remove excess air and seal tightly. To reheat, thaw in the fridge overnight. Warm them in the oven or microwave until hot.
Storage Duration
In the fridge, the meatballs last up to three days. In the freezer, they can stay fresh for about three months. Always check for any signs of spoilage before eating. This way, you enjoy your sweet chili pineapple meatballs at their best!
FAQs
Can I use a different type of meat for the meatballs?
Yes, you can use other meats! Ground beef or pork works well. If you prefer, try ground lamb or even plant-based meat. Each option brings a unique taste. Just keep in mind that cooking times may vary slightly. The key is to ensure your meatballs reach the right internal temperature of 165°F (74°C).
What can I serve with Sweet Chili Pineapple Meatballs?
These meatballs pair great with rice or noodles. You can also serve them with a fresh salad. For a fun twist, try them in sliders with mini buns. If you want extra crunch, add some crispy veggies on the side. These options enhance the meal and add balance to the flavors.
How can I make this recipe spicier?
To add more heat, mix in sriracha or red pepper flakes. You can also use a spicier chili sauce instead of sweet chili sauce. For even more flavor, add minced jalapeños or habaneros. Start with small amounts, then taste as you go. This way, you can find the perfect spice level for your taste.
In summary, this blog covers making sweet chili pineapple meatballs from scratch. We discussed main ingredients like ground chicken, flavor enhancers, and sauce components. I shared step-by-step instructions for preparation and baking, along with essential tips for cooking and presentation. You can easily adapt this recipe for different proteins or dietary needs. Remember, storage is key for leftovers. You can enjoy these meatballs fresh, frozen, or even spicy. Dive in and create a tasty treat that everyone can love!


![To make teriyaki chicken lettuce wraps, you need a few key ingredients. These create the rich flavors and fresh textures. Here’s what you’ll need: - 1 lb (450g) boneless, skinless chicken breast, finely diced - 1 tablespoon canola oil - 1/2 cup bell pepper, finely chopped (choose red or yellow for sweetness) - 1/2 cup carrot, grated (for a touch of crunch) - 3 green onions, beautifully sliced - 2 cloves garlic, minced (for aromatic depth) - 1/4 cup low-sodium soy sauce (to control saltiness) - 2 tablespoons honey (for a hint of natural sweetness) - 1 tablespoon rice vinegar (to balance flavors) - 1 teaspoon sesame oil (for a nutty aroma) - 1 teaspoon fresh ginger, grated (adds a zesty kick) - 1 head of butter lettuce or iceberg lettuce, with leaves gently separated These ingredients come together to create a joyful, tasty meal. Garnishes can elevate your dish. While not required, they add flair and flavor. Here are some great options: - Sesame seeds (for garnish, optional but recommended) - Fresh cilantro or parsley, for garnish (optional) Adding these garnishes can make your wraps look and taste even better. Lettuce is key for wraps. It holds the filling perfectly. Here are tips to choose the best lettuce: - Look for crisp, fresh leaves. Avoid any wilting or browning. - Butter lettuce has a soft, pliable texture, perfect for wrapping. - Iceberg lettuce offers a nice crunch but can be thicker. Choose what you like best for your teriyaki chicken lettuce wraps. To start, gather your ingredients. You need: - 1 lb boneless, skinless chicken breast, finely diced - 1 tablespoon canola oil - 1/2 cup bell pepper, finely chopped - 1/2 cup carrot, grated - 3 green onions, beautifully sliced - 2 cloves garlic, minced - 1/4 cup low-sodium soy sauce - 2 tablespoons honey - 1 tablespoon rice vinegar - 1 teaspoon sesame oil - 1 teaspoon fresh ginger, grated - 1 head of butter or iceberg lettuce, leaves separated - Sesame seeds and fresh herbs for garnish Make sure your chicken is chopped small. This helps it cook evenly. Chop the bell pepper finely for sweetness and color. Grate the carrot for crunch. Slice the green onions thin. Mince the garlic and grate the ginger to release their flavors. Heat the canola oil in a large skillet over medium heat. Wait until the oil shimmers. Add the diced chicken and cook it for 5-7 minutes. Stir often until the chicken is brown and fully cooked. Then, add the minced garlic, grated ginger, and chopped bell pepper. Sauté this mixture for 2-3 minutes. The bell pepper should soften and blend with the chicken. In a small bowl, whisk together the soy sauce, honey, rice vinegar, and sesame oil. When well combined, pour this sauce into the skillet. Now, gently fold in the grated carrots and sliced green onions. Cook for another 2-3 minutes. This helps the sauce coat everything and thicken slightly. Remove the skillet from heat. Let the teriyaki chicken cool for a few minutes. This resting time allows the flavors to meld beautifully. To serve, take a lettuce leaf and place a generous spoonful of the teriyaki chicken mixture in the center. This creates your wrap. For added flavor, sprinkle sesame seeds and fresh herbs on top. Serve the wraps right away. Encourage everyone to wrap them up and enjoy the fresh, vibrant flavors. For the full details on making this dish, check out the Full Recipe. For juicy chicken, choose fresh chicken breast. Cut it into small, even pieces. This helps it cook evenly. Heat your skillet before adding oil. Use medium heat to avoid burning. Stir the chicken often. This keeps it from sticking and ensures even cooking. Add garlic and ginger early. This builds a great flavor base. Cook until the chicken is completely brown and firm. To wrap your lettuce, use large, whole leaves. Butter or iceberg lettuce works best. Place a spoonful of chicken in the center. Fold the sides in first, then roll it up. This keeps the filling secure. Make sure the wrap is tight but not too tight. You want it to hold together without falling apart. Arrange your wraps on a platter. Add extra garnishes like sesame seeds for a beautiful look. You can change the flavor of your wraps easily. Add extra veggies like cucumbers or radishes. They give a nice crunch. For a spicy kick, include sliced jalapeños or sriracha sauce. If you like nuts, add chopped peanuts or cashews. You can also switch the protein. Try ground turkey or tofu for a new taste. Mix and match to find your favorite flavor combo. For the complete recipe, check out the [Full Recipe]. {{image_4}} You can switch up the protein in your wraps. If you like beef, use ground beef or diced steak. For a lighter choice, try shrimp or fish, like salmon. If you prefer turkey, ground turkey works well too. Each protein brings its own flavor and texture. Just adjust the cooking time to ensure everything cooks through. To make these wraps vegetarian or vegan, use tofu or tempeh. Both options absorb flavors well. Press and cube the tofu before cooking to remove extra moisture. For a tasty twist, you can use cooked lentils or chickpeas. These options give a hearty bite while keeping your meal plant-based. Add fun flavors to your wraps! You can mix in crushed peanuts or cashews for crunch. Fresh herbs like basil or mint can add a fresh taste. Spice lovers may enjoy a dash of sriracha or chili flakes for heat. You can also add diced pineapple or mango for a sweet twist. These enhancements make your wraps even more exciting! For the complete recipe, check the [Full Recipe]. After enjoying your teriyaki chicken lettuce wraps, you may have leftovers. To store them, place the wraps in an airtight container. Keep the chicken mixture and lettuce leaves separate. This helps keep the lettuce crisp and fresh. Store in the fridge for up to three days. When you're ready to enjoy your leftovers, simply reheat the chicken mixture. Use a skillet over medium heat. Stir until heated through, about 5 minutes. Avoid microwaving the lettuce, as it may become soggy. Assemble the wraps just before eating for the best taste. Meal prepping makes weeknight cooking easy. You can prepare the chicken mixture ahead and store it in the fridge. Use the Full Recipe to guide your prep. To save time, chop vegetables on the weekend. This way, you have everything ready to go when you need a quick dinner. Enjoy your healthy wraps any night! To make the sauce, start with low-sodium soy sauce for a savory base. Add honey for sweetness and rice vinegar for a tangy kick. Then, mix in sesame oil for a nutty aroma. Combine these in a bowl and whisk until smooth. This sauce balances flavors, making your wraps burst with taste. Yes, you can make this dish ahead of time. Prepare the teriyaki chicken mixture and store it in an airtight container. Keep it in the fridge for up to three days. When ready to eat, reheat the mixture in a skillet over medium heat. Serve it with fresh lettuce leaves for a quick meal. Pair your lettuce wraps with some light side dishes. Here are a few great options: - Steamed jasmine rice for a filling side. - Edamame sprinkled with sea salt for a healthy snack. - A simple cucumber salad for a refreshing crunch. - Miso soup for warmth and depth. These sides complement the flavors of the wraps beautifully. For the full recipe, check out [Full Recipe]. Teriyaki chicken lettuce wraps are fun and tasty. We covered key ingredients, cooking steps, and tips to make them juicy. You learned how to customize and store your wraps for busy nights. This dish fits many diets with easy variations and great sides. Enjoy trying new flavors and sharing with friends. You now have all the tools to create delicious wraps that anyone can love. Keep experimenting and have fun in the kitchen!](https://goldendishy.com/wp-content/uploads/2025/06/72f6a023-630c-4819-9e2f-2135bf5b7418-768x768.webp)

![Fresh corn is the star of this salad. Use about 3 cups of corn kernels, which equals around 4 ears of corn. To get the best flavor, choose corn that is sweet and crisp. You can also use frozen corn, but fresh offers a better taste and texture. This salad needs vibrant veggies for color and crunch: - 1 cup cherry tomatoes, halved - 1 red bell pepper, diced - 1/2 red onion, finely chopped - 1 jalapeño pepper, minced (remove seeds for less heat) - 1/4 cup fresh cilantro, chopped These veggies add freshness and a mix of flavors. The tomatoes bring sweetness, while the jalapeño offers a nice kick. The dressing ties everything together. Here’s what you need: - 1/4 cup freshly squeezed lime juice (about 2 limes) - 2 tablespoons extra virgin olive oil - 1 teaspoon ground cumin - Salt and black pepper to taste This zesty dressing balances the sweet corn and veggies. The lime juice adds brightness, while cumin gives depth. Check out the [Full Recipe] for detailed instructions on making this delicious Zesty Corn Salad! To start, you need fresh corn. If you have fresh corn, fill a large pot with water. Bring it to a rolling boil. Once it boils, add the corn cobs and blanch them for about 3 minutes. After that, take them out and let them cool. When cool, cut the kernels off the cobs with a sharp knife. If you want to use frozen corn, just thaw it and drain any extra liquid. In a big mixing bowl, combine the corn kernels with cherry tomatoes, red bell pepper, and red onion. Make sure to mix them well. This way, you spread the flavors evenly throughout the salad. Take a small mixing bowl to prepare the dressing. Whisk together freshly squeezed lime juice, olive oil, ground cumin, and some salt and black pepper. Mix until all the ingredients blend together well. This zesty dressing will bring everything to life. Now, drizzle the dressing over your mixed vegetables. Gently toss everything together so that all the ingredients get coated in the dressing. This step is key for flavor. Taste the salad and adjust the seasoning if needed. If you want more zing, add more lime juice or salt. For the best flavor, let the salad sit for at least 15 minutes before serving. This wait helps the flavors mix well. You can find the full recipe for Zesty Corn Salad with a Kick! to guide you through the steps. To enhance the taste of your zesty corn salad, let it rest. After mixing, cover it and chill for at least 15 minutes. This time allows the flavors to blend. The lime juice and spices soak into the corn and veggies. You will notice a big difference in taste. If you have more time, letting it sit for an hour is even better. You can swap some ingredients based on your taste. Don’t have fresh corn? Use canned or frozen corn instead. If you want a milder flavor, skip the jalapeño or use a bell pepper. You can also replace cilantro with parsley or green onions if you prefer. For a tangy twist, try lemon juice instead of lime juice. Get creative with what you have on hand! A good-looking salad makes it more fun to eat. Serve your corn salad in a bright bowl. Top it with extra cilantro leaves for color. Add lime wedges on the side for a fresh touch. For a fun idea, layer the salad in mason jars. This not only looks nice but makes serving easy. Plus, it’s perfect for picnics or gatherings. Check out the Full Recipe for more ideas to impress your guests! {{image_4}} You can add protein to your zesty corn salad for more flavor and nutrition. Grilled chicken or shrimp works great. You can also use black beans for a plant-based option. Just rinse and drain a can of beans. Mix them in with the veggies for a hearty meal. Feel free to play with the veggies. You can use cucumbers for a cool crunch. Avocado adds creaminess and healthy fats. Try adding radishes for a peppery bite, or corn peppers for more heat. Any colorful veggie will brighten your dish and add taste. Switch up the dressing to keep things fresh. Try adding honey for sweetness or garlic for a kick. A splash of balsamic vinegar can bring a lovely tang. If you're feeling adventurous, mix in some salsa or a dash of hot sauce for extra zest. Explore the full recipe for more ideas! You can store Zesty Corn Salad in the fridge. Place it in an airtight container. This keeps the flavors fresh and vibrant. Make sure to eat it within three to five days. If you notice any changes in smell or color, it’s best to toss it out. You can freeze this salad, but it’s not ideal. Freezing changes the texture of the corn and veggies. If you want to freeze it, pack it tightly in a freezer-safe container. It can last up to three months. When you’re ready to eat it, thaw it in the fridge overnight. Reheating is not recommended for Zesty Corn Salad. It’s best enjoyed cold or at room temperature. If you must warm it, do so gently in a pan over low heat. Avoid overheating to keep the veggies crisp and fresh. For a quick fix, serve it on top of warm grains or proteins for a tasty twist. Yes, you can use frozen corn in this recipe. Just thaw the corn and drain any extra liquid. Frozen corn saves time, and it still tastes great. It’s a good option if fresh corn is not available. Try it out for a quick fix! The Zesty Corn Salad can last about 3 to 5 days in the fridge. Make sure to store it in an airtight container. If the salad starts to look watery, give it a quick stir. It’s best to eat it fresh, but leftovers make a tasty snack. This salad pairs well with many dishes. You can serve it with grilled meats, tacos, or fish. It also makes a great side for barbecues or picnics. Try it alongside some tortilla chips for a fun twist! Yes, Zesty Corn Salad is gluten-free! All the ingredients are naturally free of gluten. You can enjoy it safely if you have gluten intolerance. This salad is a light and tasty choice for everyone. This blog post covered the key ingredients, steps, tips, and variations for Zesty Corn Salad. You can use fresh corn, mix in your favorite vegetables, and create a tasty dressing. Remember to store it properly for the best flavor. Feel free to experiment with ingredients to suit your taste. Whether you add protein or unique dressings, enjoy this salad your way. Make it a staple for meals or gatherings. Embrace the freshness and flavor of this salad, and get creative!](https://goldendishy.com/wp-content/uploads/2025/06/9c485b94-0626-453a-9168-3540dee7db81-768x768.webp)

![- 2 medium zucchinis, grated - 1 cup feta cheese, crumbled - 1/2 cup all-purpose flour - 1 teaspoon salt - 1/2 teaspoon black pepper - 1/2 teaspoon garlic powder - 1/2 cup fresh dill, chopped - 1/2 cup green onions, finely chopped - 2 large eggs - Olive oil, for frying To make Greek zucchini fritters, you need fresh and simple ingredients. Start with two medium zucchinis. Grate them finely and set them aside. This step is crucial because zucchini holds a lot of water. Next, grab a cup of feta cheese. Crumble it into small pieces to add a salty, creamy punch. You will also need half a cup of all-purpose flour. This helps bind the fritters together. For seasoning, use one teaspoon of salt, half a teaspoon of black pepper, and half a teaspoon of garlic powder. This mixture will give your fritters a nice flavor. Don’t forget the herbs! A half cup of fresh dill and a half cup of finely chopped green onions add freshness. Finally, you need two large eggs to hold everything together. For frying, have olive oil on hand. These ingredients come together to create a dish that is tasty and simple. For the full recipe, check the detailed instructions. First, grate the zucchinis into a large bowl. Sprinkle 1 teaspoon of salt over the grated zucchini. Let it rest for about 10 minutes. This step helps pull out moisture from the zucchini, which is key for great fritters. After 10 minutes, take a clean kitchen towel. Wrap the zucchini and squeeze it gently. Remove as much liquid as you can. This makes the fritters crispier. In another bowl, mix the squeezed zucchini with crumbled feta cheese, chopped dill, and finely chopped green onions. Add the flour, eggs, black pepper, and garlic powder. Stir everything well until you have a smooth batter. Now, heat about 1/4 inch of olive oil in a skillet over medium heat. The oil should be hot enough that a small drop of batter sizzles when added. Using a spoon, drop spoonfuls of the batter into the hot oil. Flatten each fritter slightly with the back of the spoon. Be careful not to overcrowd the pan; fry in batches if needed. Cook for about 3-4 minutes on each side. You want them to be golden brown and crispy. Once done, place the fritters on a plate lined with paper towels to soak up extra oil. Serve them warm. For extra flavor, top with more crumbled feta and a dollop of Greek yogurt or tzatziki sauce. Enjoy your tasty Greek Zucchini Fritters! For the full recipe, check [Full Recipe]. To make great Greek zucchini fritters, start by squeezing out excess moisture from the grated zucchini. After salting, let the zucchini sit for ten minutes. This helps draw out the water. Next, use a clean towel to squeeze the zucchini until it feels dry. If you skip this step, the fritters might turn out soggy. Adjust cooking time for crispiness. Fry the fritters for three to four minutes on each side. If your fritters are not crispy, try increasing the heat slightly. But be careful! Too high a heat can burn them. Garnishing can elevate your fritters. Try crumbled feta cheese on top. Fresh dill adds a nice touch too. A dollop of Greek yogurt or tzatziki sauce pairs perfectly. These add creaminess and flavor. For side dishes, think about serving a light salad. A fresh cucumber salad or a simple tomato salad works well. These sides balance the rich flavors of the fritters. Using the right frying pan is key. A non-stick skillet helps with even cooking. It also makes flipping the fritters easier. For shaping and flipping, have a spatula handy. A spoon works well for dropping the batter into the oil. If you want uniform fritters, use an ice cream scoop. This helps you get the same size every time. For the full recipe, check out the details above. Enjoy your cooking! {{image_4}} You can switch up the cheese in your fritters. Goat cheese adds a tangy flavor that pairs well with zucchini. If you want a milder taste, use mozzarella. Fresh herbs can also change the taste. Adding parsley gives a fresh touch, while mint adds a sweet note. Experiment with both for a unique twist! You can bake your fritters instead of frying them. This method cuts down the oil and keeps them light. Preheat your oven to 400°F (200°C). Place the fritters on a baking sheet and lightly spray them with oil. Bake for around 20 minutes, flipping halfway for an even cook. If you own an air fryer, use it for a crispier finish. Set your air fryer to 375°F (190°C). Cook the fritters in a single layer for about 10 minutes. Shake the basket halfway through to ensure they cook evenly. Serve your fritters on a bed of fresh salad. This adds crunch and freshness to your meal. You can top them with diced tomatoes, cucumber, and a drizzle of olive oil. Pair your fritters with different dipping sauces. Tzatziki is a classic choice, but you can try a spicy yogurt dip or a sweet chili sauce. These sauces will elevate the flavors and make your dish even more enjoyable. For the full recipe, check out the complete guide on Greek Zucchini Fritters! To store your Greek zucchini fritters, first let them cool completely. Place them in an airtight container. This keeps them fresh and tasty. Refrigerate the fritters for up to three days. If you want to keep them longer, freezing is a great option. To reheat your fritters, use an oven or skillet. Preheat your oven to 350°F (175°C). Place the fritters on a baking sheet for about 10 minutes. This will keep them crispy. If you use a skillet, add a bit of olive oil. Heat on medium until they are warm and crispy. Avoid microwaving, as this can make them soggy. You can freeze the fritters before or after cooking. To freeze before cooking, shape the fritters and place them on a baking sheet. Freeze them for about an hour. Then, transfer them to a freezer bag. To freeze after cooking, let them cool completely first. Then, store them in an airtight container. For thawing, place them in the fridge overnight. Reheat them in the oven or skillet for best results. Enjoy your Greek zucchini fritters any time! For the complete recipe, check the Full Recipe. To keep your zucchini fritters from falling apart, you must remove excess moisture. Grate the zucchinis and sprinkle them with salt. Let them rest for about 10 minutes. This helps draw out water. Afterward, use a clean towel to squeeze out the liquid. The drier the zucchini, the better the fritters will hold together. Next, bind the mixture well. Use enough flour and eggs to hold everything together. The flour acts as a glue, while the eggs provide structure. If your batter feels too loose, add a bit more flour until it thickens. Yes, you can make the batter ahead of time. Store it in the fridge for up to two hours. This way, you save time when you are ready to fry. Just remember that fresh batter is best for frying. If you wait too long, the zucchini may release more moisture. Give the batter a quick stir before cooking. Greek zucchini fritters are great with several sides. You can serve them with Greek yogurt or tzatziki sauce. These dips add a cool and creamy contrast. A simple salad with tomatoes and cucumbers pairs well too. For a heartier meal, try serving them with grilled chicken or lamb. To make gluten-free zucchini fritters, swap the all-purpose flour for a gluten-free flour blend. You can also use almond flour or chickpea flour. These options work well and provide a nice flavor. Just keep in mind that different flours absorb moisture differently. You may need to adjust the amount based on your chosen flour. Start with the same amount and tweak as needed for the right batter consistency. For the best results, follow the Full Recipe for guidance. In this article, we explored making delicious Greek zucchini fritters. You learned about key ingredients, preparation steps, and helpful tips. I also shared variations to suit your taste and how to store leftovers. These fritters are easy to make and can be adjusted for different diets. Enjoy the tasty result and impress your family or friends. Happy cooking!](https://goldendishy.com/wp-content/uploads/2025/07/cb7a2661-c5f6-4b7c-b480-ad49d75e704d-768x768.webp)