Buffalo Ranch Chicken Casserole Hearty Comfort Meal
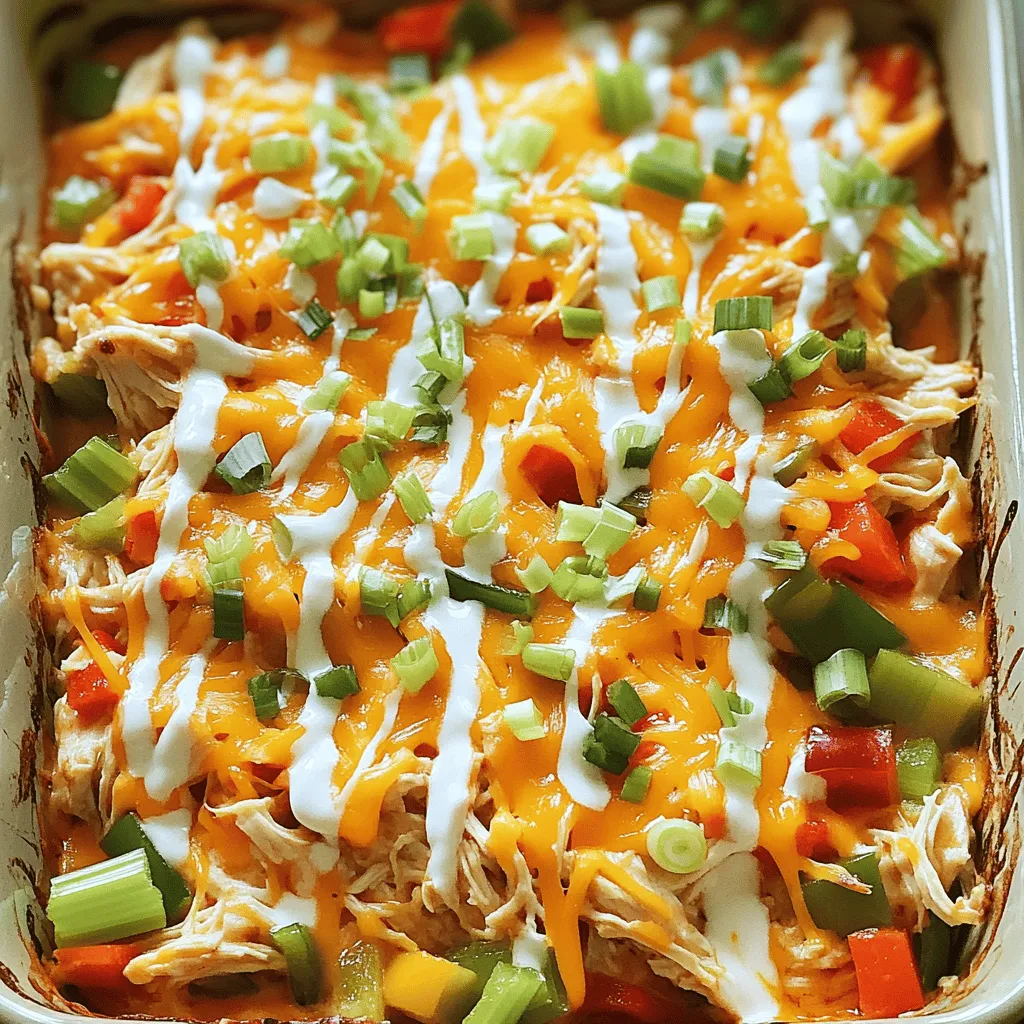
Craving a dish that feels like a warm hug? You’re in the right place! Our Buffalo Ranch Chicken Casserole is the ultimate comfort meal, packed with bold flavors and satisfying ingredients. In just one pot, you’ll combine tender chicken, zesty buffalo sauce, and creamy ranch, all layered over pasta. Ready to dive into this hearty recipe that’s perfect for any occasion? Let’s get cooking!
Ingredients
Main Ingredients
– 2 cups cooked chicken, shredded
– 1 cup bold buffalo sauce
– 1 cup creamy ranch dressing
– 2 cups cooked pasta (penne or rotini)
Additional Ingredients
– 1 cup shredded sharp cheddar cheese
– 1 cup diced celery
– 1 cup diced bell peppers
– ½ cup green onions, finely chopped
Seasonings and Oils
– 1 teaspoon garlic powder
– ½ teaspoon salt
– ½ teaspoon black pepper
– 1 tablespoon olive oil (for drizzling)
Gathering the right ingredients is key. You need cooked chicken for protein. Shredded chicken mixes well with other flavors. The buffalo sauce gives it a spicy kick. Ranch dressing adds creaminess and coolness. Choose cooked pasta like penne or rotini for good texture.
Next, add some crunch with celery. Diced bell peppers bring color and sweetness. Green onions add a fresh touch and great flavor. For the cheesy goodness, use sharp cheddar cheese. It melts beautifully and tastes great.
Don’t forget the seasonings. Garlic powder enhances the dish. A little salt and pepper boost the taste. A drizzle of olive oil helps the cheese brown nicely. This mix of ingredients creates a hearty meal you’ll love to share.
Step-by-Step Instructions
Preparation Steps
– Preheat the oven to 350°F (175°C).
– In a large bowl, mix the shredded chicken, buffalo sauce, ranch dressing, and cooked pasta.
Layering the Casserole
– Lightly grease a 9×13 inch baking dish with non-stick spray or olive oil.
– Spread half of the chicken mixture evenly in the dish. Sprinkle half of the cheddar cheese on top.
Baking Instructions
– Cover the casserole with foil and bake for 25 minutes.
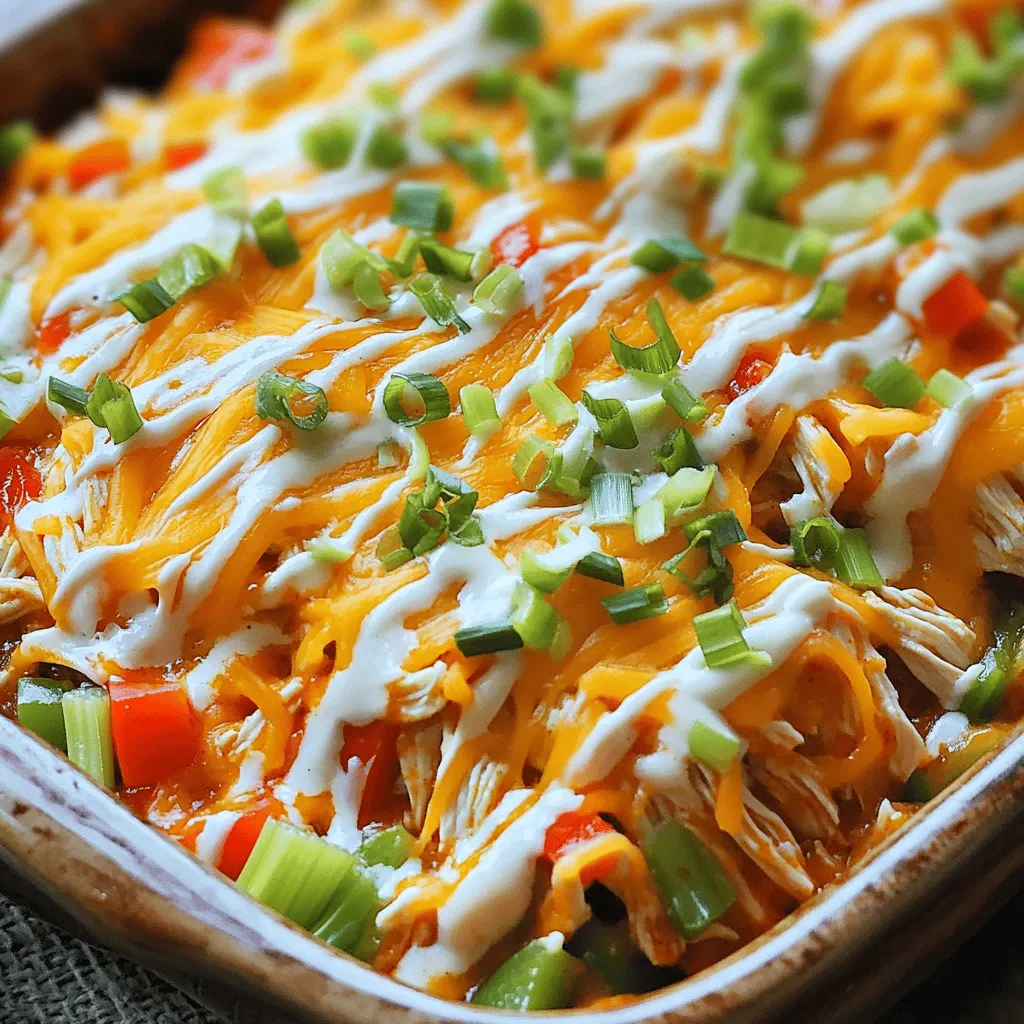
– Remove the foil and bake for another 10-15 minutes. The cheese should be bubbly and golden brown.
– Let it cool for 5 minutes before serving. Garnish with chopped green onions and a drizzle of ranch dressing.
Tips & Tricks
Cooking Tips
– Ensure chicken is shredded thoroughly for even distribution. This helps each bite taste great.
– Adjust buffalo sauce for desired spice level. Start with less if you prefer mild flavors.
Serving Suggestions
– Pair with a fresh salad or vegetables. A crisp side adds color and crunch.
– Serve with extra ranch dressing on the side. This gives a creamy dip for each bite.
Presentation Tips
– Use a large, colorful serving dish to enhance visual appeal. Bright colors make your meal inviting.
– Garnish with additional green onions for freshness. This adds a pop of green and flavor.
Variations
Ingredient Swaps
You can make this dish easier by using shredded rotisserie chicken. It saves time and still tastes great. You can also change the pasta type. Fusilli or ziti works well and adds a fun twist.
Flavor Additions
To boost the taste, add other veggies like spinach or corn. They add color and nutrition. You can also spice it up with paprika or cayenne. A little heat can make the dish even better.
Dietary Adjustments
If you want a gluten-free meal, use gluten-free pasta. It cooks just like regular pasta. For a vegan option, try dairy-free cheese instead of regular cheese. This way, everyone can enjoy the casserole.
Storage Info
Short-Term Storage
Store your leftover Buffalo Ranch Chicken Casserole in an airtight container. Keep it in the refrigerator. It tastes best when eaten within 3-4 days. This keeps the flavors fresh and tasty.
Long-Term Storage
For longer storage, freeze portions of the casserole. Use freezer-safe containers to prevent freezer burn. You can keep it in the freezer for up to 3 months. When you’re ready to enjoy it again, thaw it in the refrigerator. This method helps maintain the dish’s texture.
Reheating Instructions
To reheat, place the casserole in the oven at 350°F. Heat it until it’s warmed through, about 15-20 minutes. If you’re in a hurry, use the microwave. Just cover it to keep moisture in. This way, your casserole stays delicious and juicy.
FAQs
How to make buffalo ranch chicken casserole more spicy?
You can easily spice up your buffalo ranch chicken casserole. Simply add extra buffalo sauce to the mixture. You can also mix in chopped jalapeños for a kick. This way, you control the heat level. I love the extra flavor these ingredients bring.
Can I make buffalo ranch chicken casserole ahead of time?
Yes, you can prepare the buffalo ranch chicken casserole ahead of time. Just assemble it and place it in the fridge. When you are ready to bake it, remember to add extra time if it is cold. This makes it perfect for busy days.
What can I serve with buffalo ranch chicken casserole?
This dish pairs well with several sides. A fresh garden salad complements the casserole nicely. You could also serve it with garlic bread for a tasty touch. Roasted vegetables add color and nutrition to your meal.
This recipe combines shredded chicken, buffalo sauce, and creamy ranch dressing for a tasty dish. You can add vegetables and cheese for more flavor. I shared tips for perfecting your casserole and suggested variations to fit your taste. Remember, you can store leftovers for future meals, so don’t hesitate to make a big batch. Enjoy your cooking, and keep experimenting to find what you love best!


![- 2 large eggplants - 1 cup ricotta cheese - 1 cup grated mozzarella cheese, plus extra for topping - 1/2 cup grated Parmesan cheese - 1 large egg - 2 cups marinara sauce - 1 teaspoon dried oregano - 1 teaspoon garlic powder - Salt and pepper - Fresh basil leaves - 2 tablespoons olive oil For this dish, you need two large eggplants. Slice them lengthwise into 1/4-inch thick pieces. This thickness helps them cook well and roll easily. For the cheese filling, combine 1 cup of ricotta, 1 cup of grated mozzarella, and 1/2 cup of grated Parmesan. Add one large egg to bind the filling. The egg helps to keep the filling together when you roll it. When selecting eggplants, look for ones that feel heavy for their size. They should have smooth, shiny skin. Avoid any with blemishes or wrinkles. Fresh cheese gives the best taste, so choose high-quality ricotta and mozzarella. Use 2 cups of marinara sauce for a rich flavor. You can use store-bought or homemade. It adds moisture and taste to the dish. Dried oregano and garlic powder enhance the flavor; adjust them to suit your taste. This recipe serves four, making it perfect for a family dinner or a small gathering. Enjoy the process and feel free to add your unique twist! For the full recipe, check out the detailed instructions. To start, slice the eggplants. Cut them lengthwise into 1/4-inch thick slices. This helps them cook evenly. Next, arrange the slices on a baking sheet in a single layer. Brush both sides with olive oil. Sprinkle salt and pepper on top. Bake them in a preheated oven at 375°F (190°C) for about 20 minutes. Remember to flip the slices halfway through. They should be tender and lightly caramelized. While the eggplant bakes, prepare the cheese filling. In a large bowl, mix together the ricotta cheese, grated mozzarella, and grated Parmesan. Add the egg, dried oregano, garlic powder, and a pinch of salt and pepper. Stir until the mixture is smooth and creamy. This blend gives a rich flavor and a great texture. Once your eggplant slices cool, it’s time to roll them. Spread a thin layer of marinara sauce at the bottom of a 9x13-inch baking dish. Take one eggplant slice and place about 2 tablespoons of the cheese filling at one end. Carefully roll it up tightly and place it seam-side down in the dish. Repeat this for all the slices. After placing all the rollatini in the dish, pour the remaining marinara sauce on top. Finish with extra grated mozzarella cheese for a gooey finish. Cover with foil and bake for 25 minutes. Then, remove the foil and bake for an additional 10 minutes until the cheese is bubbly and golden. For more details, check the Full Recipe. To keep your eggplant from becoming soggy, salt it first. Here’s how: - Slice the eggplants and lay them flat. - Sprinkle salt on both sides of the slices. - Let them sit for about 30 minutes. - Rinse off the salt and pat them dry. This draws out excess moisture, making them firmer when cooked. For flavor enhancement, try adding herbs. Fresh basil and oregano pair well. You can also mix in some red pepper flakes for a hint of spice. Another tip is to use high-quality olive oil. It adds depth to the dish and a rich taste. When serving, you have options. Serve the rollatini straight from the baking dish for a rustic feel. For a fancier touch, place them on individual plates. Drizzle some extra marinara sauce around the plate for color. Garnishing makes a big difference. Add fresh basil leaves on top for a pop of green. Consider a sprinkle of extra grated cheese as well. It makes the dish look appealing and inviting. This recipe not only tastes great but also looks beautiful. Enjoy making your Eggplant Rollatini with these simple tips! For the full recipe, check out the instructions above. {{image_4}} You can swap out cheeses in this dish. If you want a lighter option, try cottage cheese instead of ricotta. For a plant-based twist, use cashew cheese or tofu. Both choices work well in the filling. You can also add more veggies to your rollatini. Spinach, zucchini, or mushrooms can mix nicely with the cheese. This not only adds flavor but also boosts nutrition. Feel free to get creative with your fillings! Making this dish gluten-free is easy. Just ensure your marinara sauce is gluten-free. Most are, but check the label to be sure. You can also use gluten-free breadcrumbs if you want a crunch on top. For a vegetarian option, stick with the original recipe. If you want a vegan version, replace the egg and cheese. You can use a flax egg and a vegan cheese blend instead. Both will give you that creamy texture without dairy! [Full Recipe] has all you need to create this delightful dish. To keep your eggplant rollatini fresh, store leftovers in an airtight container. Refrigerate them if you plan to eat them in a few days. They will stay good for about 3 to 5 days in the fridge. If you want to keep them longer, freezing is a great option. Wrap each rollatini in foil or plastic wrap and place them in a freezer-safe bag. They can last up to 3 months in the freezer. When you’re ready to enjoy your leftovers, reheat them gently. The best way is to use the oven. Preheat it to 350°F (175°C). Place the rollatini in a baking dish, cover with foil, and heat for about 20 minutes. This helps keep the cheese soft and the eggplant moist. Avoid reheating in the microwave if you can. It can dry out the rollatini. If you must use the microwave, cover them with a damp paper towel. This adds moisture and helps prevent dryness. Enjoy your meal just as tasty as the first time! What can I use instead of ricotta cheese? You can use cottage cheese or vegan cream cheese. Both give a creamy texture. For a dairy-free option, try tofu blended with a bit of lemon juice. This will mimic the flavor and texture of ricotta. How do I know when eggplant is cooked properly? Eggplant is done when it feels soft and tender. Use a fork to check; it should pierce easily. The edges may brown slightly, which adds flavor. Keep an eye on it to avoid overcooking. Can this recipe be made low-carb? Yes! You can swap eggplant for zucchini or use a low-carb cheese mix. Using fewer eggplant slices per roll can also help keep the carbs low. Adjust the sauce to fit your diet. What is the nutritional value of Eggplant Rollatini? Eggplant Rollatini is low in calories and rich in fiber. It provides protein from cheese and essential vitamins from eggplant. Each serving typically has around 250 calories, depending on ingredients used. What to serve with Eggplant Rollatini? Pair it with a fresh salad or garlic bread for a full meal. A side of steamed veggies also complements the dish well. You can drizzle extra marinara sauce on the plate for added flavor. Can it be made ahead of time? Absolutely! You can prepare the rollatini and store them in the fridge. Just cover it well. When you’re ready to eat, bake it straight from the fridge, adding a few extra minutes to the cooking time. For the full recipe, check the section above. In this post, we explored how to make a delicious eggplant rollatini. We covered key ingredients, helpful preparation tips, and specific cooking techniques. You learned how to assemble and present your dish beautifully. We also discussed alternatives to fit different diets and storage methods for leftovers. Eggplant rollatini is both tasty and flexible. With these steps, you can customize it to your taste. Enjoy making this dish for friends or family!](https://goldendishy.com/wp-content/uploads/2025/07/27d7144c-a390-4303-99e3-b84864a0b33f-768x768.webp)
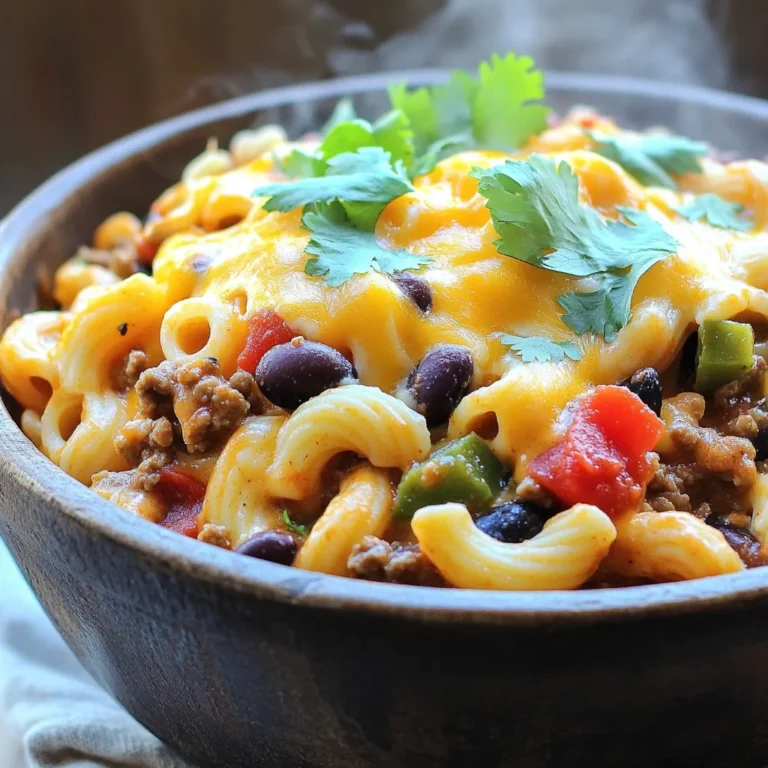
![To make Easy Chicken Tortilla Soup, gather these key ingredients: - 2 tablespoons olive oil - 1 medium onion, finely diced - 2 cloves garlic, minced - 1 bell pepper (any color), finely diced - 2 medium tomatoes, diced - 4 cups low-sodium chicken broth - 1 teaspoon ground cumin - 1 teaspoon chili powder - 1 teaspoon smoked paprika - 1 pound cooked chicken breast, shredded - 1 can (15 oz) black beans, thoroughly rinsed and drained - 1 cup corn (fresh or frozen) - Salt and freshly ground black pepper, to taste These ingredients create a rich flavor base for your soup. The spices, like cumin and chili powder, add warmth. Using low-sodium broth helps control salt levels. For a delightful finish, consider adding these garnishes: - Tortilla chips, for garnish and added crunch - Fresh cilantro, roughly chopped, for garnish - 1 ripe avocado, diced, for garnish - Lime wedges, for serving These garnishes enhance the soup's look and taste. The crunch of tortilla chips contrasts nicely with the tender soup. A squeeze of lime adds a zesty touch. To prepare this soup, have these tools on hand: - A large pot - A sharp knife - A cutting board - A measuring spoon - A ladle for serving Having the right tools makes cooking easier. A large pot holds all the ingredients while they cook together. A sharp knife and cutting board help you chop veggies quickly. For the full recipe, check out the [Full Recipe]. Gather your ingredients before you start. This makes cooking easier and faster. You will need: - 2 tablespoons olive oil - 1 medium onion, finely diced - 2 cloves garlic, minced - 1 bell pepper (any color), finely diced - 2 medium tomatoes, diced - 4 cups low-sodium chicken broth - 1 teaspoon ground cumin - 1 teaspoon chili powder - 1 teaspoon smoked paprika - 1 pound cooked chicken breast, shredded - 1 can (15 oz) black beans, thoroughly rinsed and drained - 1 cup corn (fresh or frozen) - Salt and freshly ground black pepper, to taste - Tortilla chips, for garnish and added crunch - Fresh cilantro, roughly chopped, for garnish - 1 ripe avocado, diced, for garnish - Lime wedges, for serving 1. Heat the olive oil in a large pot over medium heat. 2. Add the diced onion and sauté for about 3-4 minutes until it turns soft. 3. Stir in the minced garlic and diced bell pepper. Cook these for 2 more minutes. 4. Now, add diced tomatoes, chicken broth, cumin, chili powder, smoked paprika, and shredded chicken. Mix well. 5. Raise the heat until it boils, then reduce it and let it simmer for 15 minutes. 6. After simmering, stir in the black beans and corn. Heat for another 5-7 minutes. 7. Taste and season with salt and pepper as needed. Adjust spices if you want more heat. Ladle the hot soup into bowls. Top with crumbled tortilla chips for crunch. Add diced avocado and fresh cilantro for color and flavor. Serve with lime wedges on the side. Squeeze lime juice over the soup before eating for a zesty kick! For the full recipe, check the section above. Enjoy your tasty chicken tortilla soup! To make your chicken tortilla soup taste amazing, focus on fresh ingredients. Use ripe tomatoes and fresh herbs. They add a burst of flavor. Toast your spices in the olive oil to release their aromas. This small step can boost the taste of your soup. Consider adding a splash of lime juice for brightness. It really makes a difference! If you like heat, add more chili powder or a diced jalapeño. For milder soup, use less spice. Remember to taste as you cook. You can add more spice later if needed. Also, consider serving hot sauce on the side. This way, everyone can adjust the heat to their liking. To speed up cooking, use pre-cooked chicken. Shredded rotisserie chicken works well. It saves time and adds flavor. Chop your veggies small for quicker cooking. Use a sharp knife for safety and ease. Lastly, keep your broth warm before adding it to the pot. This helps your soup come together faster. For the full recipe, check out the earlier section. {{image_4}} You can easily make a vegetarian version of chicken tortilla soup. Swap out the chicken for hearty vegetables. Use black beans for protein and fiber. Sweet corn adds a nice crunch. You can also add diced zucchini or bell peppers for more flavor. Use vegetable broth instead of chicken broth. This keeps the soup light yet filling. Top it with tortilla chips, avocado, and cilantro for the best taste. This version is perfect for a healthy meal. If you love heat, then spicy chicken tortilla soup is for you. Start with the original recipe and add more spices. Include diced jalapeños or serrano peppers for a kick. You can also add some cayenne pepper or hot sauce to the pot. Adjust the spice level to your liking. Serve it with sour cream to cool down the heat. This soup is sure to warm you up on a chilly night. For a creamy twist, turn your chicken tortilla soup into a creamy delight. After cooking the soup, stir in some heavy cream or sour cream. This gives the soup a rich and smooth texture. You can also blend a portion of the soup for extra creaminess. Just blend it in a blender and stir it back in. This version is comforting and perfect for those who enjoy a velvety finish. Don't forget to garnish with tortilla chips and avocado for a crunchy contrast. For the full recipe, check out the details above! After making Easy Chicken Tortilla Soup, allow it to cool. Use an airtight container. Store the soup in the fridge for up to three days. Make sure to keep it covered to preserve flavor. When you're ready to enjoy leftovers, pour the soup into a pot. Heat it over medium heat until warm. Stir it often to prevent sticking. You can also use the microwave. Place the soup in a bowl and cover it loosely. Heat for about 2-3 minutes, stirring halfway. Always check the temperature before eating. If you want to save some soup for later, freezing is perfect. Let the soup cool completely. Pour it into freezer-safe bags or containers. Leave some space for the soup to expand. Seal tightly and label with the date. You can freeze it for up to three months. When you want to eat it, thaw it overnight in the fridge before reheating. This method helps keep all the flavors intact. Enjoy the full recipe and indulge in this delightful dish! I recommend using cooked chicken breast for this soup. It stays tender and juicy. You can use leftover rotisserie chicken or poach chicken breasts to save time. Shredded chicken blends well with the soup flavors. Yes, you can make this soup in a slow cooker. Start by sautéing the onion and garlic in a pan. Then add all the ingredients to the slow cooker. Set it on low for 6-8 hours or high for 3-4 hours. This method lets the flavors meld nicely. Chicken Tortilla Soup stays fresh for about 3-4 days in the refrigerator. Store it in an airtight container. Make sure it cools before you put it in the fridge. If you want it to last longer, consider freezing it. You can find the Full Recipe for more details on storage. This blog post covered everything you need for easy chicken tortilla soup. We explored essential ingredients, tools, and garnishes. You learned the clear steps for prep and cooking, plus tips for flavor and spice. Variations let you customize the soup to your taste. Lastly, we discussed how to store and reheat leftovers. Now, you can enjoy this tasty meal any time. Get creative with flavors and make it your own!](https://goldendishy.com/wp-content/uploads/2025/06/e0a7fe5b-d8f8-4d99-83cb-06f3f9771105-768x768.webp)