
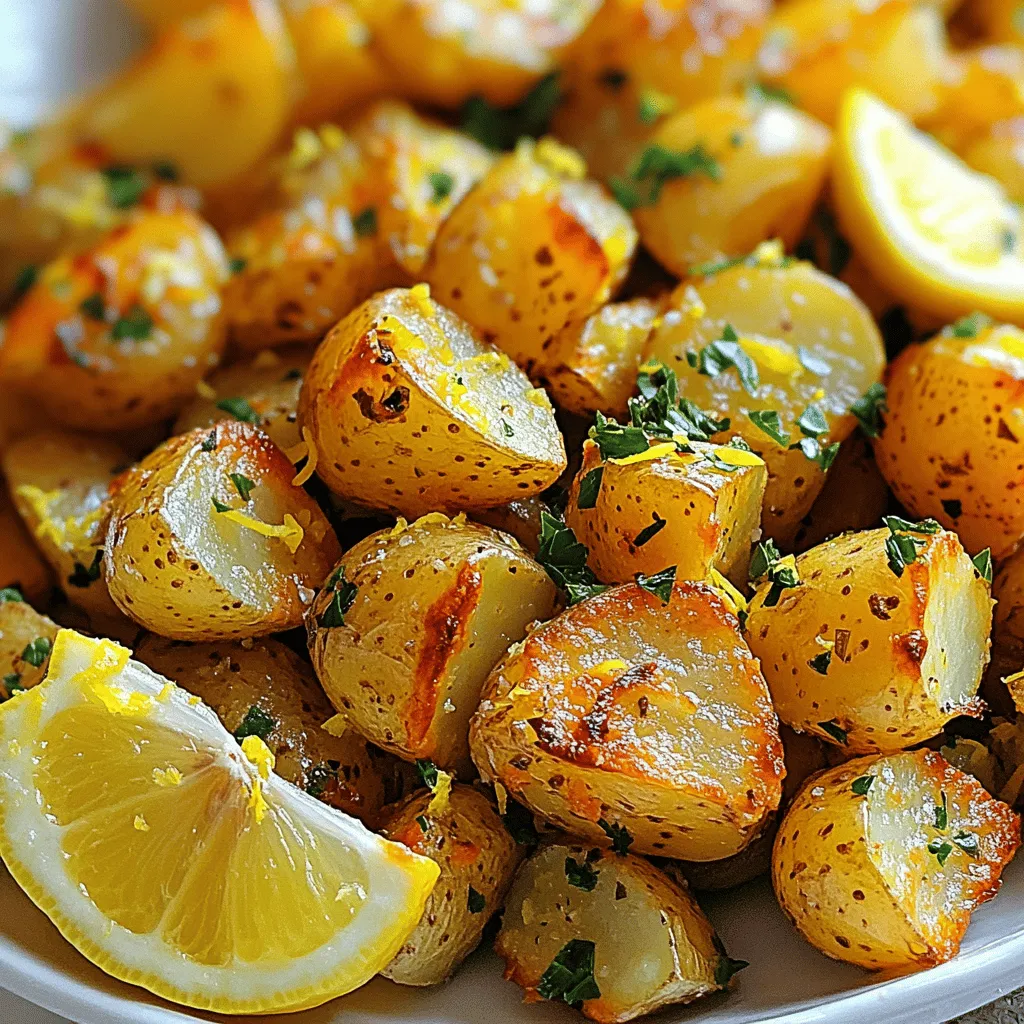
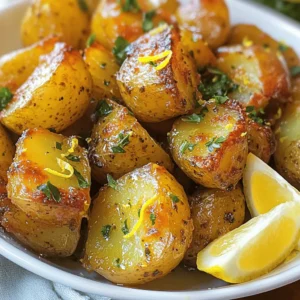
Greek Lemon Potatoes Flavorful and Easy Recipe

If you’re craving a dish that bursts with flavor and is easy to make, you’ve come to the right place. Greek lemon potatoes are simple yet delicious, perfect for any meal. With just a few fresh ingredients like baby potatoes, garlic, and juicy lemons, you can whip up a tasty side dish that impresses. Let’s dive into this easy recipe and bring vibrant Greek flavors to your kitchen!
Ingredients
Main Ingredients List
– 2 pounds baby potatoes, halved or quartered
– 1/4 cup extra virgin olive oil
– 4 cloves garlic, finely minced
– Juice and zest of 2 large, juicy lemons
– 1 teaspoon dried oregano, preferably Greek
– 1 teaspoon dried thyme
– 1 teaspoon sea salt
– 1/2 teaspoon freshly ground black pepper
– Fresh parsley, chopped (for garnish)
– Lemon wedges (for serving)
Greek lemon potatoes are simple yet full of flavor. You start with baby potatoes. They should be small and tender. Halve or quarter them for even cooking. Next, you need extra virgin olive oil. This oil gives the dish richness. The garlic adds a nice kick. Use fresh garlic for the best taste.
Fresh lemons are a must. The juice and zest brighten the dish. Dried oregano and thyme bring in that classic Greek taste. Sea salt and black pepper enhance all the flavors.
For garnish, use fresh parsley. It adds a pop of color and freshness. Lemon wedges are perfect for serving. You can squeeze them over the potatoes before eating.
These ingredients work together to make a tasty side dish. Each bite is a burst of flavor.
Step-by-Step Instructions
Preheating the Oven
Start by preheating your oven to 400°F (200°C). This heat helps the potatoes get crispy and golden. A hot oven makes a big difference in cooking.
Preparing the Potato Mixture
In a large mixing bowl, add 2 pounds of baby potatoes. Cut them in half or quarters to help them cook faster. Pour in 1/4 cup of extra virgin olive oil. Add 4 cloves of finely minced garlic, the juice and zest of 2 large lemons, 1 teaspoon of dried oregano, 1 teaspoon of dried thyme, 1 teaspoon of sea salt, and 1/2 teaspoon of freshly ground black pepper. Toss everything together gently. Make sure each potato piece is well coated in this zesty mix.
Arranging for Roasting
Grab a large baking sheet and spread the seasoned potatoes in a single layer. Avoid overcrowding, as this can make them steam instead of roast. This step is key for achieving that nice crispy texture.
Roasting the Potatoes
Now, place the baking sheet in your preheated oven. Roast the potatoes for about 30 to 35 minutes. Halfway through, stir them to ensure even cooking. They should be golden brown and tender when you poke them with a fork.
Final Touches and Serving
Once done, take the potatoes out and let them rest for a few minutes. Taste one to see if it needs more salt or pepper. Adjust if needed. Transfer the warm potatoes to a serving dish and sprinkle with freshly chopped parsley. Serve with lemon wedges on the side for a fresh squeeze of citrus right before eating. Enjoy your delicious Greek lemon potatoes!
Tips & Tricks
Achieving Perfectly Crispy Potatoes
To get crispy Greek lemon potatoes, start with baby potatoes. They have a great taste and texture. Cut them into halves or quarters for even cooking. Use extra virgin olive oil to coat the potatoes well. The oil helps them crisp up nicely. Spread the potatoes in a single layer on the baking sheet. This way, they roast evenly. Stir them halfway through cooking for even browning.
Flavor Enhancements
Lemon juice and zest add bright flavor to these potatoes. Fresh garlic brings a tasty kick. Dried oregano and thyme give a nice herbal touch. Feel free to add more herbs if you like! You can also sprinkle some paprika for heat. A dash of fresh lemon juice right before serving brightens the dish even more.
Common Mistakes to Avoid
One common mistake is overcrowding the baking sheet. If too many potatoes are close together, they steam instead of roast. Always place them in a single layer. Another mistake is not seasoning enough. Be sure to taste and adjust the seasoning before serving. Lastly, don’t skip the resting time after roasting. This helps keep the potatoes tender and juicy.
Variations
Herb Variations
You can change the herbs in Greek lemon potatoes for extra flavor. Rosemary and basil work great. Simply swap the oregano or thyme with these herbs. Both bring a nice twist. Fresh herbs add brightness. If you love a strong taste, try fresh rosemary. It pairs well with lemon.
Adding Vegetables
Mix in veggies for more color and taste. Bell peppers and onions can be great choices. Chop them up and toss them with the potatoes. They will roast nicely together. You can also add carrots or zucchini. This adds nutrition and makes the dish more colorful.
Different Cooking Methods
You can cook Greek lemon potatoes in different ways. An air fryer gives you crispy potatoes in less time. Just toss them in the air fryer for about 20 minutes. Stir them halfway for even cooking. You can also boil the potatoes first, then roast them. This method makes them soft inside and crispy outside. Choose the method you like best!
Storage Info
How to Store Leftover Greek Lemon Potatoes
To store your Greek lemon potatoes, let them cool first. Once they are cool, place them in an airtight container. You can keep them in the fridge for up to three days. If you want to keep them longer, consider freezing them. Just make sure to use a freezer-safe container or bag.
Reheating Instructions
When you’re ready to enjoy your leftovers, preheat your oven to 350°F (175°C). Spread the potatoes on a baking sheet. Heat them for about 15–20 minutes until they are warm and crispy. You can also use a microwave. Just heat them for 1–2 minutes, but they may not be as crispy.
Shelf Life and Freezing Tips
Greek lemon potatoes last about three days in the fridge. For freezing, they can last for up to three months. To freeze, portion them out into smaller bags. Label each bag with the date. When you want to eat them, thaw them in the fridge overnight before reheating.
FAQs
What Type of Potatoes are Best for Greek Lemon Potatoes?
I prefer using baby potatoes. They are small, tender, and cook evenly. Their thin skin adds a nice texture. You can use red or yellow baby potatoes for great results.
Can I Make This Recipe Vegan?
Yes, this recipe is already vegan! Just use vegetable broth instead of chicken broth if you choose to add more flavor. The garlic and lemon provide plenty of taste on their own.
How Can I Make Greek Lemon Potatoes Spicier?
To add spice, try including red pepper flakes or cayenne pepper. You can mix a pinch into the potato mixture. Start small, then taste and adjust as needed.
Can I Use Fresh Herbs Instead of Dried?
Absolutely! Fresh herbs will add a vibrant flavor. Use about three times more fresh herbs than dried. For example, use three teaspoons of fresh oregano instead of one teaspoon of dried.
What Should I Serve with Greek Lemon Potatoes?
These potatoes pair well with grilled meats, fish, or a fresh salad. They also make a great side for Mediterranean dishes like gyros or souvlaki.
How Long do Greek Lemon Potatoes Last in the Fridge?
Greek lemon potatoes can last about three to five days in the fridge. Store them in an airtight container to keep them fresh. Reheat in the oven or microwave when ready to eat.
Greek lemon potatoes are easy and fun to make. You learned about key ingredients, step-by-step instructions, and helpful tips. Variations let you get creative, while storage info ensures you enjoy leftovers later. Remember, using fresh herbs and trying different cooking methods can enhance your dish. Enjoy making the best Greek lemon potatoes and impress your family and friends. Get ready to savor the crispy texture and zesty taste!

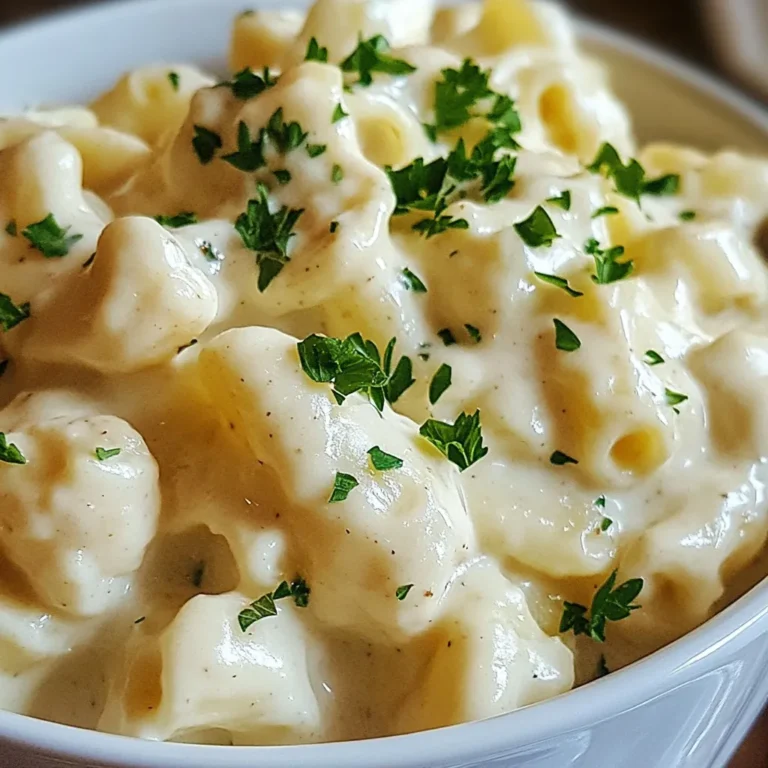


![To make this tasty dish, gather these main items: - 1 large head of cauliflower, cut into bite-sized florets - 5 cloves of garlic, skins left on - 3 tablespoons extra virgin olive oil, divided - 1/4 cup unsweetened almond milk (or your preferred milk) - 2 tablespoons butter (or a vegan alternative) - Salt and freshly ground black pepper, to taste These ingredients form the base of the mash. The cauliflower gives the dish its creamy texture. Roasting the garlic adds a rich flavor. You can change the recipe to suit your taste. Here are some ideas: - Swap almond milk for regular milk or cream for a richer flavor. - Use ghee instead of butter for a unique twist. - Add a pinch of nutmeg for warmth. - Incorporate herbs like thyme or rosemary for added depth. These options let you make the dish your own. Feel free to get creative! Garnishing makes the dish look appealing. Here are some great choices: - Fresh chives, finely chopped, for a pop of color - A drizzle of extra virgin olive oil for richness - A sprinkle of smoked paprika for a touch of spice These garnishes enhance the flavor and presentation. They make your Roasted Garlic Cauliflower Mash shine on the table. For the full recipe, check the earlier section. To start, I preheat my oven to 400°F (200°C). This temperature works best for roasting. Next, I take one large head of cauliflower and cut it into bite-sized florets. I love using fresh cauliflower for the best flavor. On a baking sheet, I place the florets and five unpeeled cloves of garlic. Then, I drizzle two tablespoons of extra virgin olive oil over them. I sprinkle salt and black pepper generously, then toss everything together. It helps the veggies get well-coated. I spread the cauliflower and garlic in a single layer. Now, I roast them for 25 to 30 minutes. Halfway through, I gently toss them to ensure they cook evenly. I look for a nice golden brown color and tender texture when they are done. Once roasted, I let the garlic cool for a few minutes before handling it. After cooling, I squeeze the softened garlic out of its skin. I put it into a large mixing bowl with the roasted cauliflower. Then, I add a quarter cup of unsweetened almond milk, two tablespoons of butter, and the last tablespoon of olive oil. I grab a hand mixer or an immersion blender to blend the mix. I blend until it turns smooth and creamy. If I want a chunkier mash, I blend just until combined. I make sure not to overmix, as it can change the texture. Once blended, I taste the mash. If it needs more flavor, I adjust with extra salt and pepper. I love a well-seasoned mash! Now, I transfer the cauliflower mash to a serving bowl. For a fun finishing touch, I sprinkle freshly chopped chives on top. This adds color and a nice flavor. To make it look fancy, I might drizzle a bit of olive oil on top. This mash is now ready to impress! Enjoy this easy and tasty dish from the [Full Recipe]. To make the best roasted garlic cauliflower mash, follow these tips. First, use a large head of cauliflower. This gives you enough to work with. Cut the florets into even sizes. This helps them cook at the same rate. Roasting adds flavor, so don’t rush it. Allow the cauliflower to become tender and golden. When blending, don’t overmix. A few pulses will give you a nice texture. If you want it creamier, add a splash more milk. Always taste as you go. Adjust salt and pepper to your liking for the best flavor. Having the right tools makes cooking easier. Here’s what I recommend: - Baking sheet for roasting - Large mixing bowl for combining ingredients - Immersion blender or hand mixer for smoothness - Measuring cups and spoons for precise amounts - Knife and cutting board for prep These tools help you work efficiently and make the process enjoyable. Watch out for these common mistakes. First, don’t skip the roasting step. Raw cauliflower will not have the same rich taste. Second, avoid using too much liquid. It can make your mash watery. If you prefer a thicker mash, add less almond milk. Finally, remember to season well. Under-seasoning can leave your mash bland. Always taste your dish before serving. This way, you ensure it is full of flavor. For the full recipe, check the details above. Enjoy making your roasted garlic cauliflower mash! {{image_4}} You can easily make this dish dairy-free. Use almond milk or coconut milk instead of regular milk. For a buttery flavor, swap butter for vegan butter or olive oil. This keeps the mash creamy and rich without dairy. Adding flavors can elevate your mash. Fresh herbs like thyme or rosemary add a lovely touch. You can also sprinkle in garlic powder for extra garlic flavor. If you enjoy cheese, mix in some grated Parmesan for a savory kick. Get creative with how you serve this mash! Use it as a base for grilled chicken or fish. You can also serve it as a side dish with roasted vegetables. Try topping it with sautéed mushrooms or crispy bacon bits for added flavor and texture. After enjoying your roasted garlic cauliflower mash, let it cool. Place it in an airtight container. Store it in the fridge for up to 4 days. This keeps the flavor fresh and the texture nice. If you have more leftovers, freezing is a great option. Put the mash in a freezer-safe bag or container. Make sure to remove excess air. It will last for about 3 months. Label the container with the date so you can keep track. When you're ready to enjoy the mash again, reheat it gently. You can use the microwave or a stovetop. If it seems dry, add a splash of almond milk or butter. Stir it well as you heat it. This keeps it creamy and delicious. Yes, you can make Roasted Garlic Cauliflower Mash ahead of time. Prepare the mash, then let it cool. Store it in an airtight container in the fridge for up to three days. When you’re ready to eat, simply reheat it on the stove or in the microwave. You may need to add a splash of milk to bring back the creamy texture. Yes, cauliflower mash is a low-carb alternative to mashed potatoes. A cup of cooked cauliflower has about 5 grams of carbs, while a cup of mashed potatoes has around 35 grams. This makes cauliflower mash a great choice if you want to cut carbs but still enjoy a creamy side dish. Roasted Garlic Cauliflower Mash pairs well with many dishes. You can serve it with roasted chicken, grilled steak, or pan-seared fish. It also complements sautéed vegetables or a fresh salad. For a hearty meal, try it with a rich mushroom gravy or a savory sauce. The mash's creamy texture and garlic flavor enhance any main dish beautifully. Roasted Garlic Cauliflower Mash is simple and tasty. We covered its key ingredients, from cauliflower to garlic. You can customize it with optional ingredients and garnishes for more flavor. The step-by-step instructions ensure a smooth texture every time. You now have tips to avoid common mistakes. Variations allow for dairy-free or unique flavors. Storing is easy, and leftovers can even be frozen. This mash is a great low-carb option. Try it with your favorite dishes for a perfect side.](https://goldendishy.com/wp-content/uploads/2025/07/e8f9d6da-9905-472e-90b5-76f2ba9b0789-768x768.webp)