Raspberry Swirl Cheesecake Delightfully Creamy Dessert
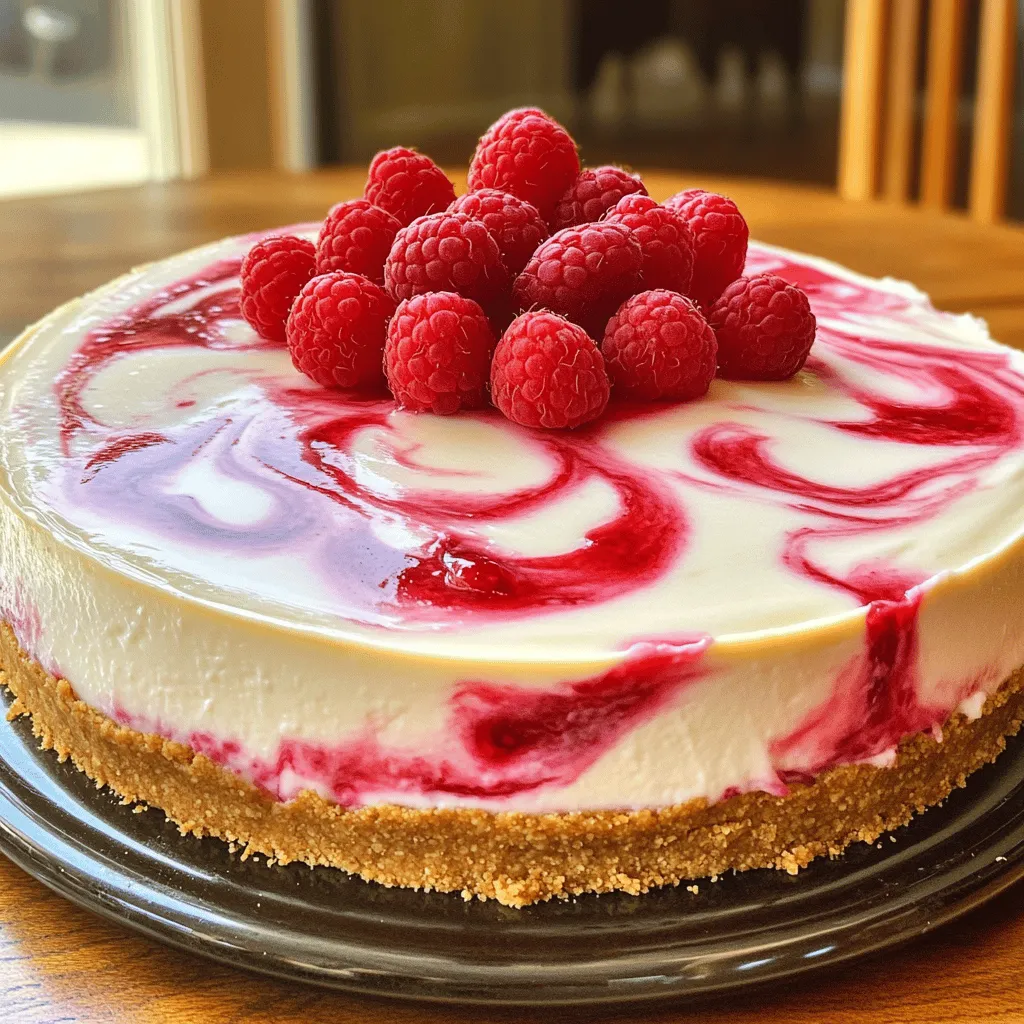
If you crave a dessert that is both rich and fruity, look no further! This Raspberry Swirl Cheesecake is delightfully creamy and bursting with flavor. I will guide you through each step to create this stunning treat, perfect for any occasion. With simple ingredients and easy techniques, you’ll impress your friends and family. Let’s dive into the world of cheesecake and make something truly special together!
Ingredients
Detailed Ingredient List
– 1 ½ cups graham cracker crumbs
– ½ cup unsalted butter, melted
– 1 tablespoon granulated sugar
– 16 oz cream cheese, softened
– 1 cup granulated sugar
– 1 teaspoon pure vanilla extract
– 3 large eggs, at room temperature
– 1 cup sour cream, at room temperature
– 1 cup fresh raspberries
– 3 tablespoons raspberry jam
The ingredients for this cheesecake are simple yet essential for great flavor. The graham cracker crumbs form a crunchy base. I love using unsalted butter for a richer taste. It helps bind the crust well. The granulated sugar in the crust adds a hint of sweetness.
Cream cheese is the star of this dessert. It gives that creamy texture we all crave. Room temperature cream cheese mixes in easily, so always plan ahead. Adding sour cream makes it even creamier and adds tang.
Fresh raspberries bring a burst of fruity flavor. You can also use raspberry jam to enhance the taste. It creates a beautiful swirl in the cheesecake. Each bite will be a mix of sweet and tart.
Ingredient Substitutions
– Alternative crust options: Oreo crumbs, almond flour
– Dairy-free cream cheese alternatives
If you want to switch up the crust, try Oreo crumbs for a chocolatey twist. Almond flour is another good choice for a gluten-free option. For a dairy-free cheesecake, look for cream cheese made from nuts or soy.
Freshness and Quality Tips
– Choosing the best raspberries
– Importance of room temperature ingredients
When picking raspberries, look for bright color and firmness. Avoid berries that are mushy or dull. Freshness matters for the best flavor.
Using room temperature ingredients is key. Cold eggs or cream cheese can lead to lumps. Let them sit out for about an hour before you start. This small step will make your cheesecake smooth and creamy.
Step-by-Step Instructions
Prepping the Crust
To make the graham cracker crust, start with 1 ½ cups of graham cracker crumbs. Add ½ cup of melted unsalted butter and 1 tablespoon of granulated sugar. Mix well until it looks like wet sand. Press this mixture into the bottom of a 9-inch springform pan. This gives you a sturdy base. Bake it at 325°F for 10 minutes. This step makes the crust firm and tasty.
Creating the Cheesecake Filling
For a smooth cheesecake filling, use room temperature ingredients. Start with 16 oz of softened cream cheese in a large bowl. Beat it with an electric mixer on medium speed until creamy. Gradually add in 1 cup of granulated sugar and mix until smooth. Next, add 1 teaspoon of pure vanilla extract. Then, add 3 large eggs, one at a time. Mix on low speed after each egg to blend well. Finally, fold in 1 cup of room temperature sour cream until combined. This will give your cheesecake a rich and creamy texture.
Swirling the Raspberry Mixture
To make the raspberry swirl, mash 1 cup of fresh raspberries with 3 tablespoons of raspberry jam in a small bowl. Use a fork to create a chunky sauce. Once your cheesecake batter is in the pan, dollop the raspberry mixture on top. Then, take a knife or toothpick and gently swirl the raspberry sauce through the cheesecake. This creates a beautiful marbled effect. Be careful not to over-swish; you want to see the red and white.
Baking and Cooling
Bake the cheesecake for 50-60 minutes at 325°F. Look for a slight jiggle in the center. This means it is done. After baking, turn off the oven. Crack the oven door open and let the cheesecake cool for about 1 hour. This slow cooling helps prevent cracks. Afterward, refrigerate the cheesecake for at least 4 hours, or overnight. This ensures it sets perfectly. When ready to serve, run a knife around the edge before taking off the springform pan. Enjoy your perfectly creamy Raspberry Swirl Cheesecake!
Tips & Tricks
Achieving the Perfect Cheesecake Texture
To get a creamy cheesecake, mix the cream cheese on medium speed. This helps avoid lumps. Take your time when adding eggs. Add them one at a time. Each egg should mix in well before adding the next. After mixing, fold in sour cream gently. This keeps the batter smooth.
Cooling your cheesecake is key. Once baked, turn off the oven. Crack the oven door and let it cool slowly. This helps prevent cracks on the surface.
Troubleshooting Common Issues
If your cheesecake cracks, don’t worry! You can fix it. Cover the crack with fresh raspberry sauce. It adds flavor and looks nice. If the cheesecake is too sweet, add a pinch of salt. This can balance the sweetness. You can also mix in a bit of lemon juice for a fresh taste.
Serving Suggestions
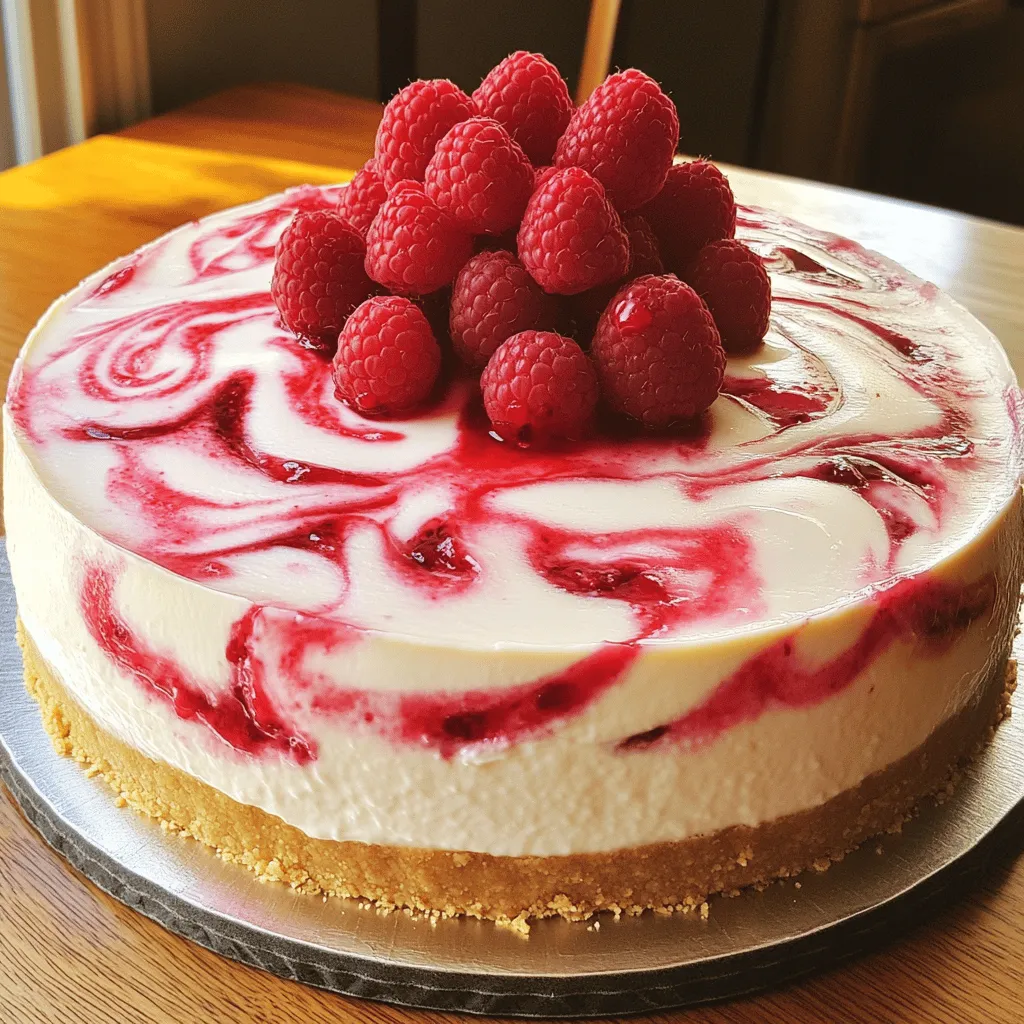
Raspberry swirl cheesecake shines when served cold. Top slices with fresh raspberries for color and taste. You can also drizzle extra raspberry sauce on top.
Pair this dessert with coffee or dessert wines. These drinks enhance the cheesecake’s rich flavors. For a fun twist, serve it with whipped cream or ice cream. This adds extra creaminess and joy to each bite.
Variations
Flavor Combinations
You can use many fruits for the swirl. Try strawberries or blueberries for a new taste. Both fruits add sweet and tart notes, just like raspberries. If you love chocolate, add cocoa powder to the batter. You can also swirl in melted chocolate for a rich twist.
Dessert Presentation Ideas
The look of your cheesecake matters. Try garnishing with fresh fruit or mint leaves. You can also add a drizzle of raspberry sauce on top. For a fun twist, serve mini cheesecakes in jars. This way, everyone gets their own treat!
Dietary Adjustments
Want a low-carb cheesecake? Use almond flour for the crust instead of graham crackers. You can sweeten it with a low-carb sweetener like erythritol. If you need it gluten-free, use gluten-free graham crackers or nuts for the crust. These swaps make the dessert fit various diets.
Storage Info
Proper Storage Techniques
To keep your Raspberry Swirl Cheesecake fresh, use an airtight container. Glass or plastic containers work well. Make sure the cheesecake is completely cooled before storing. If you don’t have a container, wrap the cheesecake tightly in plastic wrap. This helps seal in moisture and flavor.
Freezing Instructions
You can freeze your cheesecake for later enjoyment. First, let it cool completely. Then, wrap it in plastic wrap. Make sure it is snug. Next, place it in a freezer-safe container. This will prevent freezer burn. To thaw, move the cheesecake to the fridge for about 6 hours. This keeps the texture creamy and smooth.
Shelf Life and Safety Tips
In the fridge, your cheesecake lasts about 5 to 7 days. Always check for signs of spoilage. Look for any changes in smell or color. If you see mold, throw it away. Keeping it covered helps maintain its freshness, so you can enjoy every slice.
FAQs
How long does it take to make Raspberry Swirl Cheesecake?
Making Raspberry Swirl Cheesecake takes about 20 minutes of prep time. After that, you need to bake it for 50-60 minutes. Once it bakes, let it cool in the oven for 1 hour. Finally, refrigerate it for at least 4 hours, but overnight is best. Altogether, it takes around 6 hours to enjoy this creamy dessert.
Can I use frozen raspberries for this recipe?
Yes, you can use frozen raspberries. However, they may change the texture a bit. Fresh raspberries give a firmer bite and vibrant flavor. If you use frozen raspberries, thaw and drain them first. This helps prevent excess water in the cheesecake. The taste will still be good, but fresh is best for that perfect swirl.
What is the best way to serve leftovers?
Store leftovers in an airtight container in the fridge. If you want to serve it warm, gently reheat individual pieces in the microwave. Heat them for about 10-15 seconds. You can also enjoy it cold, right out of the fridge. Either way, it remains a tasty treat!
How can I make a mini version of this cheesecake?
To make a mini version, use a smaller springform pan, like 6 inches. Divide the ingredients by half, but keep the same steps. Bake for about 30-40 minutes instead. Check for doneness by looking for a slight jiggle in the center. This mini treat is perfect for smaller gatherings!
This blog post covered how to make delicious Raspberry Swirl Cheesecake. We explored key ingredients, detailed instructions, and handy tips. You learned about crust choices, mixing techniques, and how to avoid cracks. Flavor variations and storage tips help you enjoy your cheesecake longer.
In the end, with the right steps and care, you can create a cheesecake that impresses everyone. Enjoy your baking adventure!

![To make Cherry Cheesecake Dip, gather these simple ingredients: - 8 oz cream cheese, softened - 1/2 cup powdered sugar - 1 teaspoon pure vanilla extract - 1/4 cup sour cream - 1 cup cherry pie filling or fresh cherries - 1/2 teaspoon freshly squeezed lemon juice - Graham crackers or vanilla wafers - Fresh cherries for garnish These items come together to create a rich and creamy dip. The cream cheese gives it a smooth texture. The powdered sugar adds sweetness. The vanilla extract brings warmth and flavor. Sour cream adds a nice tang. You can use cherry pie filling for ease or fresh cherries for freshness. Lemon juice brightens the taste. Graham crackers or vanilla wafers make perfect dippers. Fresh cherries on top make it look beautiful. If you want to see how to put this all together, check the Full Recipe. 1. Beat the cream cheese until smooth. Start with 8 oz of softened cream cheese in a large bowl. Use an electric mixer on medium speed. Beat for about 2-3 minutes. You want it creamy and smooth. 2. Mix in powdered sugar gradually. Take 1/2 cup of sifted powdered sugar. Slowly add it to the bowl while mixing on low speed. Keep mixing until there are no lumps. This step adds sweetness. 3. Add vanilla extract and sour cream. Measure 1 teaspoon of vanilla extract and 1/4 cup of sour cream. Mix them in on medium speed. Blend until fluffy, about 1 minute. This gives a nice flavor and creaminess. 1. Fold in cherry pie filling and lemon juice. Use 1 cup of cherry pie filling. You can also use fresh cherries if you prefer. Add 1/2 teaspoon of fresh lemon juice. Gently fold these into the mixture with a spatula. Be careful not to over-stir; you want to keep some cherry chunks. 2. Spoon mixture into serving bowl. Take a decorative bowl and carefully spoon the dip mixture into it. Make it look nice! This is where the magic happens. 1. Chill in the refrigerator. Cover the bowl with plastic wrap. Place it in the fridge for at least 30 minutes. This lets the flavors come together. 2. Prepare accompaniments for dipping. While the dip chills, get your dippers ready. Use graham crackers or vanilla wafers. These pair perfectly with the creamy dip. When you serve, it will look and taste wonderful! For the complete recipe, check [Full Recipe]. Softened cream cheese is key to a smooth dip. It blends easily and avoids lumps. To get it just right, leave the cream cheese out for about an hour. You want it soft, not melted. When adding powdered sugar, do it slowly. Sprinkle it in while mixing. This helps it mix well. If you add it all at once, you may get clumps. A fine sift can help too, ensuring smoothness. You can add extra flavors to make this dip special. Try a splash of almond extract or a bit of cocoa powder. These can give the dip a different twist. If you want it sweeter, taste as you mix. You can add more sugar if you like. Just remember that the cherry pie filling adds some sweetness too. Serve your dip in a fun bowl to catch the eye. You can use a bright plate for contrast. This makes it stand out at parties. For garnish, top the dip with fresh cherries. They look great and taste amazing! You can also add a sprinkle of crushed graham crackers on top for crunch. Serve with a mix of graham crackers and vanilla wafers for a tasty dipper combo. For the full recipe, check out the Cherry Cheesecake Dip Delight. {{image_4}} You can switch up the fruit in this dip. Instead of cherries, try blueberries or strawberries. They add a fresh taste and a fun color. You can also mix in other pie fillings. Peach or apple pie filling works well too. Each fruit gives the dip a unique flavor. Experiment and find your favorite! Want to try something new? Create a chocolate cheesecake dip. Use cream cheese and mix in cocoa powder and chocolate chips. It’s rich and sweet. You can also make a peanut butter cheesecake dip. Just blend in creamy peanut butter for a nutty twist. Both options are sure to please your guests. If you need gluten-free options, use gluten-free graham crackers. They taste great and keep the dip crunchy. For vegan variations, swap the cream cheese for vegan cream cheese. You can also use maple syrup instead of powdered sugar. These changes make the dip suitable for more diets. Enjoy every bite without worry! Cherry cheesecake dip can last up to 3 days in the fridge. To keep it fresh, store it in an airtight container. This will prevent the dip from drying out and help it stay creamy. Make sure the container is sealed tight before placing it in the fridge. Can you freeze cherry cheesecake dip? Yes, you can! Freezing helps you save leftovers for later. To freeze it, place the dip in a freezer-safe container. Leave some space at the top, as the dip may expand when frozen. When you want to enjoy it again, thaw the dip in the fridge overnight. Avoid microwaving it, as this can change the texture. After thawing, stir it gently to bring back the creamy consistency. Enjoy your cherry cheesecake dip anytime! You can make this dip without cream cheese by using Greek yogurt or cottage cheese. Both options give a creamy texture. For a sweeter taste, add a bit more powdered sugar. You can also blend in ricotta cheese for a slight twist. These substitutes keep the dip light and flavorful. Yes, fresh cherries work great! They add a bright, juicy flavor. Chopping them finely keeps the texture nice. You might want to add a bit of sugar to balance the tartness. This change can make your dip taste fresh and vibrant. For the best dipping experience, try graham crackers, vanilla wafers, or fresh fruit slices. You can also use pretzels for a salty twist. Present your dip in a colorful bowl and surround it with your dippers. Add fresh cherries on top for a fun touch. This makes your dish look inviting and tasty. This blog post covered the easy steps to make cherry cheesecake dip. We started with the ingredients, then moved on to making, chilling, and serving the dip. I shared helpful tips for great texture and flavor. You can also explore fun variations like using other fruits or dips. Finally, we discussed storing your delicious creation. This dip is perfect for gatherings or a family treat. Enjoy making it and tasting the joy it brings!](https://goldendishy.com/wp-content/uploads/2025/06/2157293b-a45d-439f-9bc7-da334d1e6e82-768x768.webp)