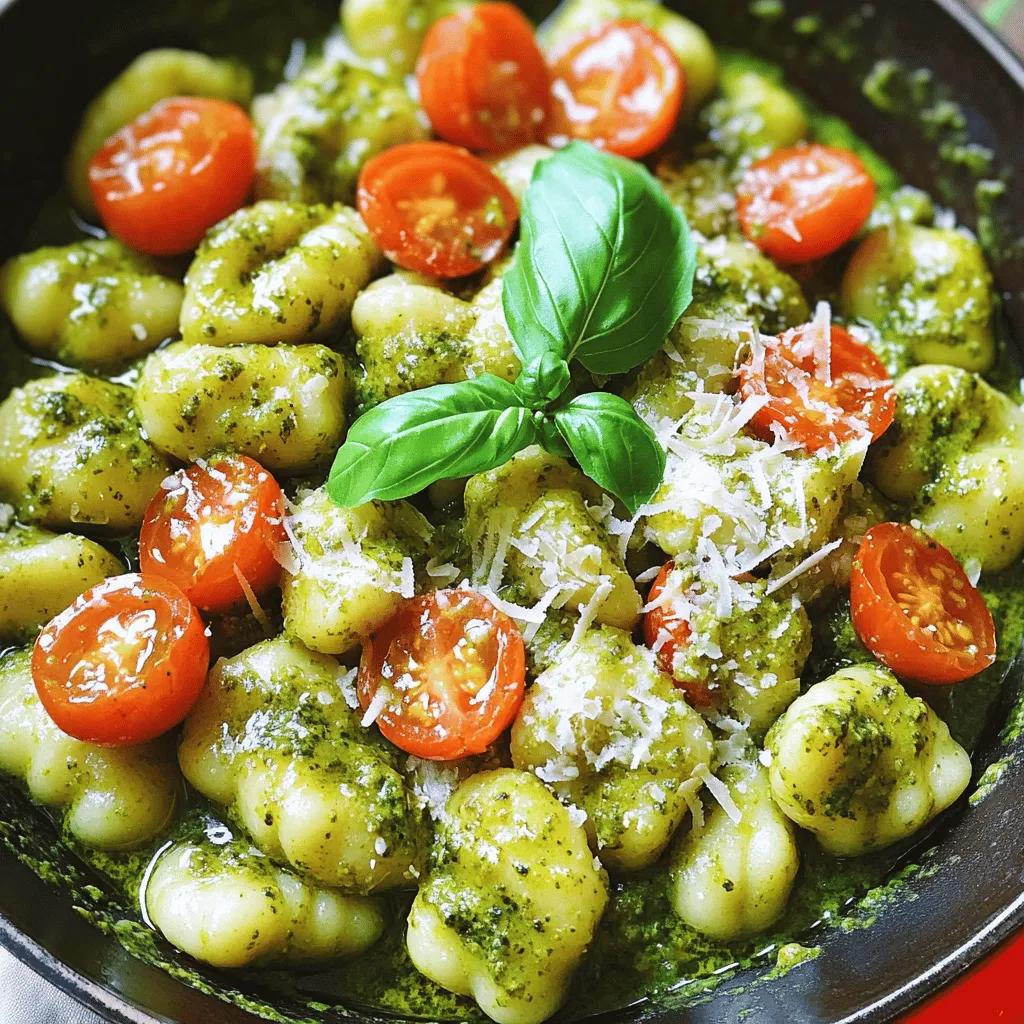
Creamy Pesto Gnocchi Flavorful Easy Dinner Dish

Are you ready to elevate your dinner game? Creamy Pesto Gnocchi is a quick and tasty dish that you can whip up in no time. This recipe mixes soft, pillowy gnocchi with a rich and creamy pesto sauce. It’s simple enough for a weeknight meal yet fancy enough for guests. Join me as we dive into all the delicious details and tips to make this flavorful dish shine!
Ingredients
Main Ingredients for Creamy Pesto Gnocchi
To make this dish, you need simple and fresh ingredients. Here’s what you will use:
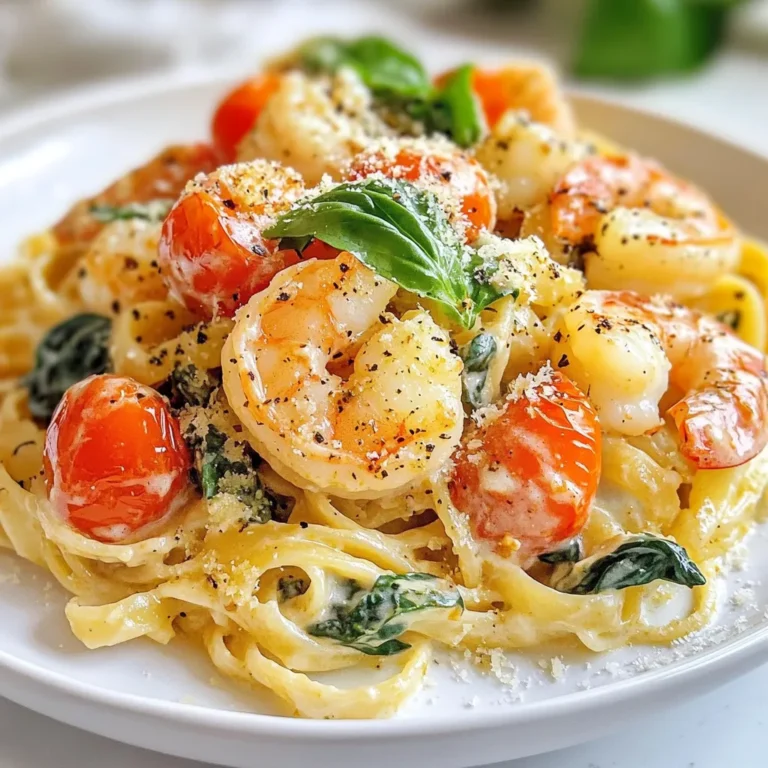
– 1 package (16 oz) potato gnocchi
– 1 cup fresh basil pesto
– 1 cup heavy cream
– 1 cup cherry tomatoes, halved
– ½ cup grated Parmesan cheese, plus extra for serving
– 2 cloves garlic, finely minced
– 2 tablespoons extra virgin olive oil
– Sea salt and freshly cracked black pepper, to taste
– Fresh basil leaves, for garnish
These ingredients blend well to create a rich and creamy sauce. The gnocchi adds a soft texture, while the pesto brings great flavor.
Substitutions and Alternatives
You can easily switch some ingredients for a different taste. Try these options:
– Swap potato gnocchi for cauliflower gnocchi for a lighter version.
– Use homemade pesto for a fresh touch.
– Replace heavy cream with coconut cream for a dairy-free option.
– Choose sun-dried tomatoes instead of cherry tomatoes for a bolder flavor.
These alternatives let you customize your meal based on what you have at home.
Nutritional Information per Serving
Each serving of creamy pesto gnocchi offers balanced nutrition. Here’s a quick breakdown:
– Calories: Approximately 450
– Protein: 12g
– Fat: 30g
– Carbohydrates: 35g
– Fiber: 2g
This dish is rich in flavor and provides a satisfying meal. It balances carbs and fats well, making it a fulfilling choice for dinner.
Step-by-Step Instructions
Preparing the Gnocchi
To start, bring a large pot of salted water to a boil. This adds flavor to the gnocchi. Once the water is boiling, add the potato gnocchi. Cook them according to the package instructions. The gnocchi are done when they float to the top, usually in about 2-3 minutes. When cooked, drain them and set aside.
Making the Creamy Pesto Sauce
In a large skillet, heat 2 tablespoons of extra virgin olive oil over medium heat. Wait until the oil shimmers. Then, add 2 cloves of finely minced garlic. Sauté the garlic for about 1 minute. It should smell good but not brown. Next, add 1 cup of cherry tomatoes, halved. Cook for another 2-3 minutes until the tomatoes soften. This step brings out their juices.
Now, lower the heat and pour in 1 cup of heavy cream. Stir it well and let it simmer gently for about 2 minutes. After that, mix in 1 cup of fresh basil pesto and ½ cup of grated Parmesan cheese. Stir until you have a smooth and creamy sauce. Season with sea salt and freshly cracked black pepper to taste.
Combining Gnocchi and Sauce
Carefully fold the cooked gnocchi into the creamy pesto sauce. Make sure each piece is well coated. Stir gently to combine everything. Let the gnocchi heat through for another 2-3 minutes. Stir occasionally to ensure even heating. When everything is hot, remove the skillet from the heat. Serve the gnocchi in wide, shallow bowls. Garnish with fresh basil leaves and extra Parmesan cheese if you like. Enjoy your creamy pesto gnocchi!
Tips & Tricks
Best Practices for Perfect Gnocchi
To cook gnocchi just right, follow these tips. Use a large pot for boiling water. Add a good amount of salt. When gnocchi float, they are done. This takes about 2-3 minutes. Be careful not to overcook them. Overcooked gnocchi can turn mushy and lose their charm.
How to Choose Quality Pesto
Quality pesto makes a big difference in taste. Look for fresh basil pesto with simple ingredients. Check for bright green color and a rich aroma. If you can, buy it from local markets. Homemade pesto is also a great choice. Use fresh basil, good olive oil, and garlic for the best flavor.
Serving Suggestions and Presentation Tips
To make your dish pop, serve it in wide, shallow bowls. This allows the colorful cherry tomatoes and fresh basil to shine. Drizzle some olive oil on top for extra richness. For a bit of crunch, sprinkle more grated Parmesan cheese on each serving. This adds a nice touch and enhances the dish.

Variations
Alternate Sauces and Add-Ins
You can change the sauce to mix things up. Try using alfredo sauce instead of creamy pesto. The creamy texture will still shine. You can also add sun-dried tomatoes for a sweet twist. For a spicy kick, mix in some red pepper flakes. If you’re feeling adventurous, consider a roasted red pepper sauce. Each option brings a new flavor to the dish.
Vegetarian and Vegan Options
This dish is easy to adapt for different diets. To make it vegetarian, just skip the Parmesan or use a vegetarian version. For a vegan dish, use plant-based gnocchi and substitute the cream with coconut cream. You can also use nutritional yeast for a cheesy flavor without dairy. Fresh basil pesto can be made vegan by replacing cheese with cashews or almond butter.
Flavor Enhancements
Want to take your creamy pesto gnocchi to the next level? Try adding fresh lemon juice for brightness. A sprinkle of lemon zest can also add a fresh aroma. Another great idea is to fold in some spinach or kale for extra greens. You can also mix in roasted garlic for a deep flavor. These small tweaks can create a more vibrant and delicious meal.
Storage Info
How to Properly Store Leftovers
To store your creamy pesto gnocchi, let it cool first. Place it in an airtight container. Keep it in the fridge for up to three days. The sauce may thicken, but it will still taste great. Always label the container with the date.
Reheating Instructions
When you’re ready to eat, reheat the gnocchi gently. You can use a skillet over low heat. Add a splash of cream or water to loosen the sauce. Stir often until it’s hot. You can also microwave it for about 1-2 minutes. Cover it to keep moisture in.
Freezing Tips for Gnocchi
If you want to freeze your gnocchi, do it before cooking. Place the raw gnocchi on a baking sheet. Freeze them until solid, then transfer to a freezer bag. This way, they last for up to two months. When ready to use, cook directly from frozen. Just add a couple of extra minutes to the cooking time.
FAQs
What is the best type of gnocchi to use?
The best type of gnocchi to use is potato gnocchi. It has a soft, fluffy texture that pairs well with creamy sauces. You can find it in most grocery stores. Look for fresh or frozen options. Fresh gnocchi cooks quickly and tastes great. Frozen gnocchi is handy for meal prep and lasts longer. Either way, gnocchi adds a wonderful base to your creamy pesto dish.
Can I make homemade pesto for this recipe?
Yes, you can make homemade pesto for this recipe. Fresh pesto boosts flavor and freshness. To make it, blend fresh basil, garlic, pine nuts, Parmesan cheese, and olive oil. Use a food processor for the best results. Adjust the ingredients to match your taste. Homemade pesto can also be stored in the fridge for a week. It’s a fun way to personalize your creamy pesto gnocchi.
How long does creamy pesto gnocchi last in the fridge?
Creamy pesto gnocchi lasts about 3 days in the fridge. Store it in an airtight container to keep it fresh. If you need to save it longer, consider freezing it. Reheat gently on the stove or microwave before serving. Be careful not to overcook it again. This way, you can enjoy your flavorful dish anytime!
In this post, you learned how to make creamy pesto gnocchi. We covered the key ingredients and helpful steps for cooking. I shared tips for perfect gnocchi and serving ideas. You also saw how to store leftovers and variations you can try.
Remember, this dish is easy to make and full of flavor. Enjoy your cooking adventure!
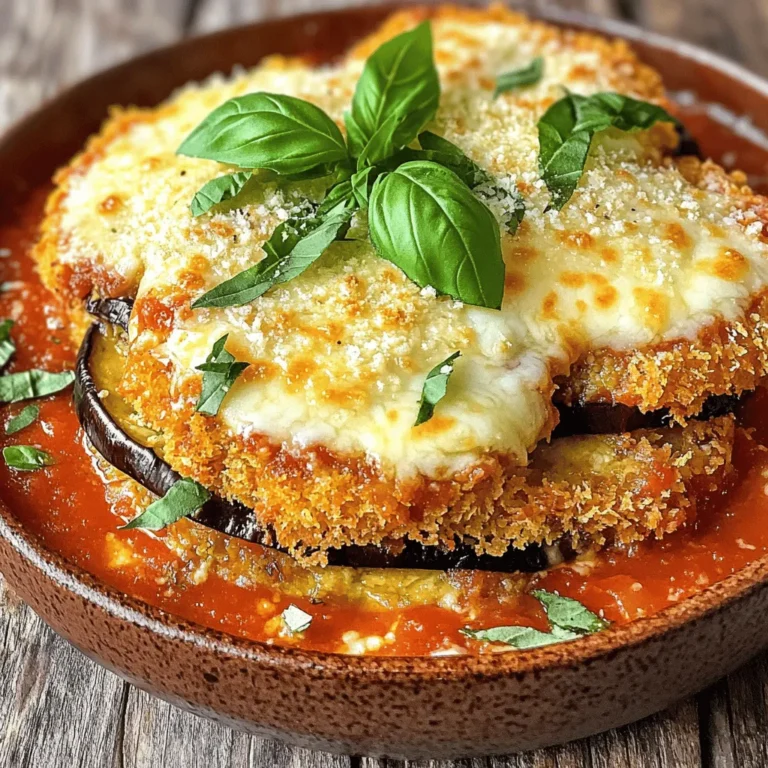

. Enjoy your cooking! Choosing the right chickpeas You can use canned chickpeas for ease. Just make sure to drain and rinse them well. This removes extra salt and makes them taste fresher. If you prefer, soak dried chickpeas overnight. This gives a firmer texture. Cook them until soft before adding to your stew. Spice adjustments and substitutions Spices are key to Moroccan flavors. If you want more kick, add cayenne pepper. For a different taste, swap smoked paprika for regular paprika. You can also try turmeric for a vibrant color and health boost. Feel free to adjust the salt and pepper to your liking. Cooking time adjustments for texture Cooking time affects the stew's texture. For softer vegetables, simmer longer. If you like a crunch, reduce the cooking time. Always check the stew as it cooks. This way, you can get the perfect blend of soft chickpeas and tender veggies. For the full recipe, check the details above. {{image_4}} To make Moroccan chickpea stew your own, you can swap some ingredients. Here are a few ideas: - Adding other vegetables: Sweet potatoes lend a nice sweetness. You can also try adding kale for a nutritious boost. - Using different beans or legumes: Kidney beans or lentils can replace chickpeas if you want a change. - Modifying spices to suit taste preferences: If you love heat, consider adding cayenne pepper. Or, reduce spice for a milder flavor. These swaps keep the stew fresh and exciting while fitting your taste. Pairing this warm stew with the right sides enhances the meal. Here are some great options: - Recommended sides: Crusty bread or warm pita is perfect for scooping. You can also serve it with fluffy rice for a hearty meal. - Pairing with beverages: A light-bodied red wine or herbal tea complements the flavors well. For a refreshing choice, try mint lemonade. These suggestions add to the experience, making each bite even more enjoyable. To keep your Moroccan Chickpea Stew fresh, follow these steps: - Refrigeration tips: Place the stew in an airtight container. It will last in the fridge for up to 4 days. Ensure it cools down before sealing the container to avoid condensation. - Freezing instructions: If you want to freeze it, use freezer-safe containers. The stew can stay good for 3 months in the freezer. Just leave some space at the top, as it may expand when frozen. When it's time to enjoy your stew again, reheating is key. - Best methods for reheating the stew: The best way is on the stove. Pour the stew into a pot and heat it over medium heat. Stir it often to ensure even heating. You can also use the microwave. Heat in a microwave-safe bowl, covering it loosely. Heat in short bursts and stir between to prevent hot spots. - Avoiding loss of texture and flavor: To keep the stew's texture, add a splash of vegetable broth or water during reheating. This helps maintain moisture. Always taste and adjust seasoning after reheating, as flavors can mellow. For the full recipe, you can refer to the earlier section. Can I make this stew in a slow cooker? Yes, you can! Start by sautéing the onion and garlic in a pan. Then, transfer them to your slow cooker. Add all the other ingredients, except the spinach and lemon. Cook on low for about 6-8 hours or high for 3-4 hours. Add spinach before serving. How can I make it spicier? To add heat, use fresh chili peppers or red pepper flakes. You can also add a dash of cayenne pepper. Start with a small amount and adjust to your taste. Is it possible to make this stew ahead of time? Absolutely! This stew tastes even better the next day. Make it ahead and store it in the fridge for up to three days. Reheat before serving to enjoy the rich flavors. Can I substitute fresh herbs for dried? Yes, you can! Use three times more fresh herbs than dried. So, if a recipe calls for one teaspoon of dried, use three teaspoons of fresh. Fresh herbs will add a vibrant flavor. What is the nutritional information for Moroccan Chickpea Stew? This stew is packed with nutrients! A serving typically contains about 250 calories, 10 grams of protein, and 8 grams of fiber. It’s a great source of vitamins from the veggies and chickpeas. For the full recipe, check out the detailed steps above. This article covered a tasty Moroccan Chickpea Stew. I shared the main ingredients, cooking steps, and helpful tips to perfect your dish. You can swap ingredients or adjust spices for your liking. Remember to store and reheat leftovers properly. This stew is not just healthy; it’s also fun to make. Enjoy sharing it with family and friends. Embrace exploring flavors and making this dish your own. Cooking can be easy and enjoyable.](https://goldendishy.com/wp-content/uploads/2025/06/4667d82b-b7b2-4094-8ffc-7c6a096b6e6d-768x768.webp)


![For this recipe, you need key ingredients to make the salmon shine. Here’s what to gather: - 4 salmon fillets (approximately 6 oz each) - 2 tablespoons Sriracha sauce - 3 tablespoons honey - 1 tablespoon soy sauce - 2 cloves garlic, finely minced - 1 tablespoon fresh ginger, finely grated - 2 tablespoons olive oil - Salt and freshly ground black pepper, to taste These main ingredients create a sweet and spicy glaze that makes the salmon pop. Seasoning is crucial in cooking. It helps to enhance the natural flavors of the fish. Use these simple items: - Salt - Freshly ground black pepper Make sure to season both sides of the salmon. This step adds depth to every bite. Garnishes make your dish look great and add extra flavor. For this salmon recipe, you will need: - 1 tablespoon sesame seeds - 2 green onions, thinly sliced Sprinkling these on top gives the meal a beautiful finish. The sesame seeds add crunch, while green onions bring freshness. To see the full details for cooking, check the [Full Recipe]. To make the glaze, grab a medium bowl. Combine 2 tablespoons of Sriracha sauce, 3 tablespoons of honey, and 1 tablespoon of soy sauce. Add 2 minced garlic cloves and 1 tablespoon of freshly grated ginger. Whisk these together until the mixture is smooth. This sweet and spicy glaze will add the perfect flavor to your salmon. Set this aside for later use. Next, take 4 salmon fillets and dry them with a paper towel. This step helps the skin get crispy. Now, sprinkle salt and pepper on both sides of each fillet. Make sure to cover every inch. This simple seasoning enhances the natural taste of the fish. Now, heat 2 tablespoons of olive oil in a large skillet over medium-high heat. Once the oil shimmers, carefully place the salmon fillets in the skillet, skin-side down. Sear them for about 4-5 minutes until the skin turns golden and crispy. Once that happens, gently flip the fillets over. Lower the heat to medium and pour the glaze over the salmon. Cook for another 4-5 minutes, basting the salmon occasionally with the glaze. When it is cooked through and caramelized, remove the fillets from the skillet. Enjoy every bite of this flavorful salmon dish! For the full recipe, check out the details above! To get that perfect crispy skin, start with dry salmon. Use a paper towel to pat it well. This removes extra moisture, which helps the skin crisp nicely. Heat your skillet until it shimmers before adding the salmon. Place the fillets skin-side down and don’t move them for the first few minutes. This helps create a nice golden crust. Sear for about 4-5 minutes, then flip gently to finish cooking. If you like a milder glaze, reduce the Sriracha amount. Start with 1 tablespoon instead of 2. You can also add extra honey to balance the heat. For spice lovers, add more Sriracha or a pinch of cayenne pepper. Taste the glaze before pouring it on the salmon. This way, you can adjust it to your liking. Using the right tools makes cooking easier. Here’s what I recommend: - Large skillet for searing - Mixing bowl for the glaze - Whisk for blending ingredients - Paper towels for drying salmon - Spatula for flipping fillets These tools help you create a delicious Sriracha honey glazed salmon from the [Full Recipe]. {{image_4}} You can switch up the Sriracha honey glaze if you want. Try a sweet soy glaze instead. Mix soy sauce, brown sugar, and ginger for a tasty alternative. You can also use teriyaki sauce for a different flavor. It adds a rich, savory taste that pairs well with salmon. Another option is a citrus glaze. Mix orange juice and honey for a bright, zesty twist. While salmon shines in this recipe, other fish work too. Try using trout, which has a similar flavor and texture. Mahi-mahi also holds up well to grilling and glazing. Cod is another great option, as it absorbs flavors nicely. Each fish brings its own unique taste, so feel free to experiment. Toppings can elevate your dish further. Try adding sliced avocados for creaminess. Chopped cilantro or parsley adds a fresh touch. You can also sprinkle crushed peanuts or cashews for crunch. For a spicy kick, add sliced jalapeños. These toppings can make your meal even more fun and flavorful. Enjoy customizing your Sriracha honey glazed salmon with these ideas! Store your leftover salmon in an airtight container. Make sure to let it cool first. Place a piece of parchment paper between layers if stacking. This keeps the fish from sticking together. Refrigerate the salmon for up to three days. If you plan to keep it longer, freezing is a better option. To reheat, use the oven for the best taste. Preheat to 350°F (175°C). Place the salmon on a baking sheet and cover it with foil. Heat for about 10 to 15 minutes. This keeps the salmon moist and tasty. You can also use the microwave. Heat it in short bursts of 30 seconds. Check often to avoid overcooking. If you want to freeze your salmon, do it right after cooking. Wrap each piece tightly in plastic wrap. Then, place them in a freezer bag. Remove as much air as you can before sealing. You can freeze it for up to three months. When ready to eat, thaw it in the fridge overnight before reheating. For more ideas, check out the Full Recipe. You can tell if the salmon is cooked when it flakes easily with a fork. The flesh should be opaque and no longer translucent. A good rule is to cook it for about 4-5 minutes per side, depending on thickness. Use a food thermometer if you want to be precise. The internal temperature should reach 145°F (63°C). Cooking it just right keeps it moist and tasty. Yes, you can prepare the glaze ahead of time. Just store it in the fridge in an airtight container. This makes cooking easier later. However, I recommend cooking the salmon fresh. This keeps it juicy and full of flavor. If you must, you can cook the salmon and store it in the fridge for up to 2 days. For a full meal, pair the salmon with fluffy jasmine rice or quinoa. Steamed broccoli or snap peas add color and crunch. You can also serve it with a fresh salad for a light touch. If you want something more filling, try roasted potatoes or sweet potatoes. These sides balance the bold flavors of the salmon well. Check out the Full Recipe for more details! This blog post shared key details about making Sriracha Honey Glazed Salmon. You learned what ingredients to use, including seasoning and garnishes. I outlined simple steps to prepare the glaze, season the fish, and achieve that perfect sear. Plus, you found helpful tips for crispy skin and spice adjustments. I also covered variations for sauces and fish, along with storage options for leftovers. Savor this dish and share it with others. Enjoy your cooking!](https://goldendishy.com/wp-content/uploads/2025/07/1e0cb0f2-d69e-43b4-ab0e-316143d411f1-768x768.webp)
![- Bell Peppers: I like using large bell peppers. You can choose any color you like: red, yellow, or green. They all taste great! Make sure they are firm and fresh. Each pepper should hold the stuffing well. - Ground Chicken and Dairy: Ground chicken adds a light flavor. It cooks quickly and blends well with other ingredients. Pair it with shredded cheddar cheese for a creamy touch. The cheese melts beautifully, making the dish extra yummy. - Enhancing Ingredients: I always add cooked rice to the mix. It gives the dish a nice texture. Black beans are great too; they add protein and fiber. Corn brings sweetness and color. Together, these ingredients create a hearty filling. - Essential Spices: Be sure to use chili powder, ground cumin, garlic powder, and onion powder. These spices pack flavor into the filling. A sprinkle of salt and pepper brings everything together. - Optional Garnishes: Fresh cilantro adds a burst of flavor. It makes the dish look more vibrant. You can also use a dollop of sour cream for creaminess. - Recommended Sides: Serve the stuffed peppers with a simple salad. A side of rice or quinoa pairs well too. You can also add some tortilla chips for crunch. - Display Ideas: For a beautiful presentation, place each stuffed pepper on a plate. Drizzle a bit of olive oil on top for shine. Add some chopped cilantro for color. This makes the meal look as good as it tastes! For the complete recipe, check out the Full Recipe. 1. Preheat your oven to 375°F (190°C). This step is key for even cooking. 2. Grab four large bell peppers. Cut off the tops and remove the seeds. Rinse the insides to clean them well. 3. Lightly coat the outside of each pepper with olive oil. Stand them upright in a 9x13 inch baking dish. 1. Heat a skillet over medium heat. Add 1 pound of ground chicken to the pan. 2. Cook the chicken for 5-7 minutes. Stir and break it apart until it turns brown. 3. Once cooked, mix in 1 cup of cooked rice, 1 cup of rinsed black beans, and 1 cup of corn. 4. Add 3/4 cup of shredded cheddar cheese, 1 teaspoon of chili powder, 1 teaspoon of cumin, 1 teaspoon of garlic powder, and 1/2 teaspoon of onion powder. Season with salt and pepper to taste. Stir for 2-3 minutes. 1. Generously fill each bell pepper with the chicken and cheese mixture. Pack it well. 2. Sprinkle the remaining 1/4 cup of cheese on top of the stuffed peppers. 3. Cover the dish with aluminum foil to trap steam. Bake in the preheated oven for 30 minutes. 4. After 30 minutes, remove the foil. Continue baking for 10-15 minutes, until the cheese is bubbly and golden. 5. Check if the peppers are tender by piercing them with a fork. 6. Allow them to cool for a few minutes after baking. Optionally, garnish with fresh cilantro for extra flavor. For the complete recipe, check out the [Full Recipe]. What are common mistakes to avoid? One mistake is overcooking the chicken. Cook it just until it's brown. If you use too much salt, it can ruin the flavor. Taste your mixture before stuffing the peppers. How can you ensure even cooking? Make sure all your peppers are the same size. This will help them cook at the same rate. Cover them with foil for part of the baking time. This keeps the heat in and helps them cook through. What are some suggestions for adding extra flavor? Try adding diced tomatoes or jalapeños for a kick. You can also mix in some spices like paprika or cayenne pepper. Fresh herbs like parsley or basil can brighten the dish. What are some ingredient swaps for dietary preferences? For a lower-carb option, replace rice with cauliflower rice. Use ground turkey or tofu for a different protein. You can also swap cheddar cheese for a dairy-free cheese for a vegan option. What cooking methods can you use? You can air fry the stuffed peppers for a crispy texture. Just set the air fryer to 375°F and cook them for about 15-20 minutes. Grilling is another fun method. Just wrap the peppers in foil and place them on the grill. How do you maintain moisture in stuffed peppers? Add a splash of chicken broth to the bottom of the baking dish. This creates steam as they cook. Avoid overstuffing the peppers; too much filling can lead to dryness. For the full recipe, check out the recipe section above. {{image_4}} You can change the ground chicken in your stuffed peppers. Use ground turkey or beef instead. These meats add different flavors and textures. If you want a vegetarian option, try using quinoa or lentils. These ingredients pack a protein punch and keep the dish hearty. For a vegan twist, use a mix of beans and mushrooms. They add a nice texture and flavor. You can also use tofu crumbles, which absorb spices well. This makes your meal rich and filling while keeping it plant-based. You can spice up your stuffed peppers with different flavors. Why not try a Mexican twist? Add taco seasoning or jalapeños for heat. A dash of lime juice brightens the dish. If you love Italian flavors, mix in some Italian herbs like oregano or basil. You could also add marinara sauce to the filling. This creates a rich and comforting taste. Want a twist? Try adding olives, capers, or feta cheese. These ingredients bring unique textures and flavors. They turn a simple meal into something exciting. For those needing gluten-free meals, this recipe is easy to adapt. Use rice instead of breadcrumbs for filling. Always check labels on canned items like beans and corn. They should be gluten-free. If you follow a low-carb diet, you can swap rice for cauliflower rice. This keeps the dish light and low in carbs. You can also skip the beans to reduce carbs even more. These variations help everyone enjoy this tasty meal. No matter your diet, you can find a way to enjoy chicken and cheese stuffed peppers. After you make your chicken and cheese stuffed peppers, let them cool down. This helps keep them fresh. Store them in an airtight container. They will stay good in the fridge for about 3 to 4 days. If you have leftovers, try to eat them within this time. To reheat, place them in the oven or microwave until warm. If you want to keep your stuffed peppers for a longer time, freezing is a great option. First, let them cool completely. Wrap each pepper tightly with plastic wrap. Then, put them in a freezer bag or container. This helps avoid freezer burn. They can last up to 3 months in the freezer. When you're ready to eat, take them out and thaw in the fridge overnight. Reheat them in the oven at 375°F until hot. This will keep the flavors and textures intact. Meal prepping can save time on busy weeknights. You can prepare the filling ahead of time. Cook the chicken and mix in the rice, beans, and spices. Store this mixture in the fridge for 2 to 3 days. When you're ready, stuff the peppers and bake them. For batch cooking, consider making a double recipe. Freeze half for later. This way, you have a tasty meal ready whenever you need it. How do you know when stuffed peppers are done? You can tell when stuffed peppers are done by checking the peppers and cheese. The peppers should be tender and the cheese melted and bubbly. If you pierce a pepper with a fork, it should feel soft but not mushy. Can you prepare them in advance? Yes, you can prepare stuffed peppers in advance. Just stuff them and store them in the fridge. Bake them when you're ready to eat. This makes for a quick and easy family meal. Can I use frozen peppers? Yes, you can use frozen peppers. Just thaw them before stuffing. They may cook faster, so keep an eye on them while baking. What to do if I don't have certain ingredients? If you lack certain ingredients, feel free to swap them out. For example, use quinoa instead of rice or a different type of cheese. Get creative based on what you have! Can stuffed peppers be made on the stovetop? Yes, you can make stuffed peppers on the stovetop. Just steam them in a skillet with a little water. Cover with a lid and cook until tender. How to adjust heating times for different ovens? Oven temperatures can vary. If your oven runs hot, check the peppers a few minutes early. If it runs cool, you may need to add a few extra minutes. Always trust your instincts! We covered the best way to make stuffed peppers. You learned about key ingredients like bell peppers, ground chicken, and spices. You also discovered tips for cooking and storing them. There are many ways to adjust the recipe for different diets and tastes. Incorporating these ideas will make your dish delicious. Get creative with flavors and toppings. With practice, you'll master this easy meal for any occasion. Enjoy your cooking journey!](https://goldendishy.com/wp-content/uploads/2025/06/69b5c483-258e-4498-8701-d043fb5fc497-768x768.webp)