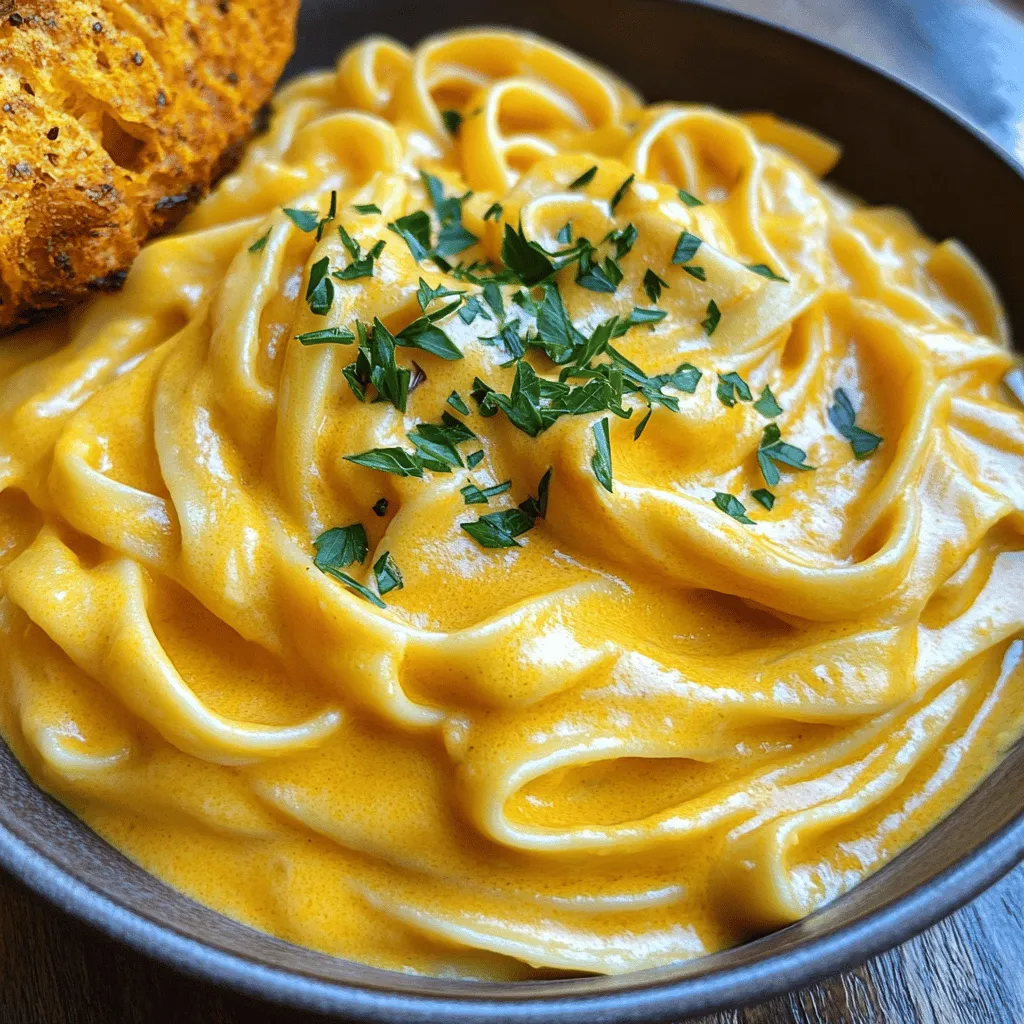
Vegan Pumpkin Alfredo Comforting and Creamy Dish

Do you crave a warm, creamy meal that’s also vegan? This Vegan Pumpkin Alfredo delivers comfort food vibes without the dairy. In this article, I’ll guide you through easy ingredients and steps, so you can make a dish that’s rich in flavor and perfect for cozy nights. Let’s dive into this delicious recipe that blends pumpkin and cashews for an unforgettable taste! Your taste buds will thank you.
Ingredients
When you make Vegan Pumpkin Alfredo, the right ingredients can make your dish shine. Here’s what you need:
– 1 cup pumpkin puree (canned or homemade)
– 1 cup raw cashews (soaked in water for a minimum of 2 hours)
– 1 cup vegetable broth (low-sodium preferred)
– 2 tablespoons nutritional yeast
– 2 cloves garlic, finely minced
– 1 teaspoon onion powder
– ½ teaspoon freshly grated nutmeg
– Salt and black pepper to taste
– 1 tablespoon olive oil
– 12 oz fettuccine (or your favorite pasta variety)
– Fresh parsley, finely chopped (for garnish)
Each ingredient plays a key role. The pumpkin adds a rich flavor and color. Cashews create creaminess. Nutritional yeast gives a cheesy taste without dairy. Garlic and onion powder enhance the overall depth. Nutmeg adds warmth and spice.
I always opt for low-sodium vegetable broth to keep the dish healthy. You can easily find pumpkin puree in stores, but making it at home is simple and fresh. Soaking cashews helps them blend smoothly into a creamy sauce.
This combination makes a comforting meal that feels indulgent but is still plant-based.
Step-by-Step Instructions
Cooking the Pasta
– Bring salted water to a boil in a large pot.
– Add the fettuccine and cook according to package instructions, usually 8-10 minutes.
– Drain the pasta and set it aside. Reserve a little pasta water if you want.
Making the Cashew Sauce
– In your blender, add soaked cashews, pumpkin puree, vegetable broth, nutritional yeast, minced garlic, onion powder, nutmeg, and a pinch of salt and pepper.
– Blend until smooth and creamy. If the sauce is too thick, add more vegetable broth gradually.
Heating the Sauce
– In a medium saucepan, warm olive oil over medium heat.
– Carefully pour in the blended sauce and let it simmer for 3-5 minutes. Stir it gently to avoid sticking.
Combining Pasta and Sauce
– Add the drained fettuccine to the saucepan with the sauce.
– Toss the pasta with the sauce using tongs or a spoon. Cook together for another 1-2 minutes until warm.
Follow these steps closely, and you’ll create a delightful vegan pumpkin Alfredo that warms your heart and stomach.
Tips & Tricks
Perfecting the Sauce Texture
To adjust the thickness of your vegan pumpkin Alfredo, start with the right balance. If your sauce is too thick, add a splash of vegetable broth. Blend the mixture again until it reaches your desired creaminess. For added depth, try seasoning with a pinch of salt and a dash of black pepper. Nutritional yeast enhances the flavor, giving it a cheesy taste.
Serving Suggestions
Garnishing your dish is key to an inviting plate. Fresh parsley adds a burst of color and a hint of freshness. You can also sprinkle extra nutritional yeast for that cheesy touch. Pair this dish with crispy garlic bread for a perfect side. A simple salad with a light vinaigrette would also complement the meal well.
Cooking Tools Needed
You will need a few essential tools for this recipe. A high-speed blender is crucial for making the cashew sauce smooth. A large pot is necessary for cooking the fettuccine. A medium saucepan will help heat the sauce evenly. Tongs or a spoon will aid in tossing the pasta with the sauce. Having these tools ready will make your cooking experience smooth and fun.
Variations
Alternative Pastas
You can switch up your pasta for this dish. If you want a gluten-free option, try brown rice or quinoa pasta. These options taste great and keep the meal light. You can also use whole wheat pasta for added fiber. If you prefer something different, try spiralized zucchini or spaghetti squash for a fresh twist.
Flavor Enhancements
To make your dish even better, add some fresh veggies. Spinach or mushrooms blend well with the creamy sauce. They add nutrients and color to your plate. You can also try spices like smoked paprika or crushed red pepper for heat. Fresh herbs like basil or thyme can brighten the flavor, too.
Sauce Substitutions
If you want to mix things up, consider using different dairy-free milks. Almond milk or oat milk can change the taste while keeping it creamy. You might also try using different purees. Butternut squash or cauliflower can create a unique flavor. This will give you a fun and varied meal every time you cook!
Storage Info
Storing Leftovers
To keep your vegan pumpkin Alfredo fresh, place leftovers in an airtight container. Store it in the fridge for up to three days. Make sure it cools down before sealing to avoid moisture buildup. If you want to freeze the sauce, pour it into freezer-safe bags or containers. Leave some space at the top for expansion. This method helps preserve flavor and texture. The sauce can last up to three months in the freezer.
Reheating Instructions
When it’s time to enjoy your leftovers, reheat gently. The best way is to use a saucepan over low heat. Stir frequently to keep the sauce creamy. If it thickens, add a splash of vegetable broth until it reaches your desired texture. You can also microwave it. Use a microwave-safe bowl and heat in short bursts, stirring in between. This method helps maintain the sauce’s rich flavor.
Shelf Life
In the fridge, your vegan pumpkin Alfredo stays fresh for about three days. In the freezer, it can last up to three months. For best taste and quality, consume within these time frames. Always check for any off smells or changes in texture before eating. Enjoy your delicious dish while it’s at its best!
FAQs
Can I make this recipe nut-free?
Yes, you can! If you want to avoid cashews, try using silken tofu. It blends smoothly and gives a creamy texture. You could also use sunflower seeds. Just soak them in water for a few hours before blending. Another option is to use cooked white beans. They add creaminess without the nuts.
How can I make the sauce creamier?
To make your sauce richer, try adding a splash of coconut milk. This will boost the creaminess. You can also blend in a bit of vegan cream cheese. If you want more flavor, mix in some sautéed onions or mushrooms. These will add depth and richness to your sauce.
Is this meal suitable for meal prep?
Absolutely! This dish is great for meal prep. You can cook the pasta and sauce ahead of time. Just store them separately in airtight containers. When you’re ready to eat, reheat them together in a pan. This method keeps the pasta fresh and avoids sogginess.
What can I use instead of pumpkin puree?
If you can’t find pumpkin puree, sweet potato works well. It has a similar taste and texture. Butternut squash is another good option. Cook and mash it before adding to the sauce. Carrot puree can also give a sweet, earthy flavor. These alternatives keep your dish tasty and still creamy.
This recipe offers a simple yet tasty way to enjoy pasta. Using pumpkin and cashews, you get a creamy sauce full of flavor. Remember to adjust the seasoning and consistency to your liking. Experiment with different vegetables or pasta for variety. Don’t forget to store leftovers properly for future meals. Enjoy this warm dish any day of the week, knowing it’s nutritious and satisfying. Happy cooking!


![To make a tasty Chicken Zoodle Soup, gather these fresh ingredients: - 2 medium zucchinis, spiralized into noodles (zoodles) - 1 pound boneless, skinless chicken breast, diced into bite-sized pieces - 4 cups low-sodium chicken broth - 1 medium onion, finely chopped - 2 cloves garlic, minced - 2 medium carrots, peeled and sliced into thin rounds - 1 celery stalk, diced into small pieces - 1 teaspoon dried thyme - 1 teaspoon dried oregano - 1 tablespoon extra virgin olive oil - Salt and freshly ground black pepper to taste - Fresh parsley, finely chopped (for garnish) You can also add optional toppings like grated cheese or a squeeze of lemon for extra flavor. Using fresh herbs adds a bright touch to your bowl. Each ingredient plays a role, from the chicken's protein to the zoodles' crunch. For the full recipe, check out the detailed steps to create this comforting dish. To make Chicken Zoodle Soup, start by preparing your zoodles. You can use a spiralizer to turn the zucchinis into long, thin noodles. If you don’t have a spiralizer, a vegetable peeler works too. Just slice the zucchini into thin strips. Next, chop your vegetables. Finely chop the onion and mince the garlic. Peel the carrots and slice them into thin rounds. Finally, dice the celery into small pieces. This will help the veggies cook evenly. Now, it’s time to cook the chicken and vegetables. In a large pot, heat one tablespoon of extra virgin olive oil over medium heat. When hot, add the chopped onion and minced garlic. Stir for about 2 minutes until they smell great. Then, add the sliced carrots and diced celery. Cook for 5 to 7 minutes until they soften. After the veggies soften, add the diced chicken to the pot. Sprinkle in one teaspoon each of dried thyme and oregano, along with salt and pepper to taste. Cook for another 5 to 7 minutes until the chicken is no longer pink. Then, pour in the low-sodium chicken broth. Turn the heat up to bring it to a boil. Once it boils, lower the heat and let it simmer for about 10 minutes. This allows all the flavors to blend well. Now comes the fun part! When your soup has simmered, it’s time to add the zoodles. Stir them into the broth and cook for an additional 3 to 5 minutes. You want them tender but still a bit firm, so check them often. After cooking, taste the soup. If it needs more flavor, add more salt or pepper to your liking. Finally, ladle the hot soup into bowls. Use fresh parsley to garnish each bowl for a pop of color. This step adds a fresh touch to your comforting meal. For the full recipe, make sure to check out the complete instructions. Enjoy your delicious Chicken Zoodle Soup! - How to make the best zoodles Start with firm zucchinis. Use a spiralizer to cut them into thin noodles. This gives the best texture. Avoid wet zucchinis; they can turn soggy. If needed, salt the zoodles and let them sit for 15 minutes to draw out moisture. Rinse and pat them dry before cooking. - Perfecting the soup flavor Use low-sodium chicken broth for a balanced taste. Fresh herbs like thyme and oregano add depth. Sauté your onions and garlic well to build a strong base flavor. Taste the soup as it cooks, adjusting salt and pepper for the perfect bite. - Avoiding mushy zucchini noodles Add zoodles towards the end of cooking. They only need 3 to 5 minutes to soften. Overcooking makes them mushy and less appealing. Keep them slightly firm for the best texture in your soup. - Ideal serving dishes Use warm, deep bowls to enhance the cozy feel of your soup. The depth keeps the soup hot longer. If you like, serve with a side of crusty bread or a light salad. - Accompaniments like bread or salad Crusty bread pairs well with this soup. It’s perfect for dipping. A fresh side salad can add crunch and flavor to your meal. Choose greens like spinach or arugula for a nice contrast. - Garnishing techniques for presentation Finish your soup with a sprinkle of fresh parsley. This adds color and freshness. A slice of lemon on the side can brighten the flavors, too. For a fun twist, add a few chili flakes for heat. For the complete method, check out the Full Recipe. {{image_4}} You can switch up the chicken for many options. Try turkey, tofu, or chickpeas for a plant-based meal. Each brings its own taste and texture to the soup. For those who want low-carb or dairy-free options, use vegetable broth instead of chicken broth. You can also replace the chicken with cauliflower or mushrooms. These choices keep the soup hearty and tasty. Want to add more veggies? Toss in spinach, bell peppers, or green beans. They add color and crunch to your bowl. To add spice and kick, consider cayenne pepper or red pepper flakes. Just a pinch can warm up your soup without being too hot. Herbs can change the flavor based on the season. In winter, use rosemary or sage. In summer, fresh basil and cilantro brighten the dish. You can also incorporate noodles or pasta for a different twist. Whole wheat pasta or rice noodles work well. They make the soup even more filling. For the full recipe, check out the details above. Enjoy experimenting with your Chicken Zoodle Soup! To keep your Chicken Zoodle Soup fresh, store it in the fridge. Use an airtight container. Make sure the soup cools first. This helps prevent condensation. You can freeze the soup if you want to store it longer. Use freezer-safe bags or containers. Leave some space at the top for expansion. To reheat, warm it on the stove over low heat. Stir often to avoid burning. You can also use the microwave. Heat in short bursts, stirring in between. In the fridge, your soup lasts about three to four days. If you freeze it, it can last up to three months. Just remember to label the containers with the date. Look for signs of spoilage. If the soup smells sour or has mold, it’s time to toss it. Always trust your senses; they guide you well. What are zoodles and how can they be made? Zoodles are zucchini noodles. You can make them by spiralizing zucchinis. Use a spiralizer or a peeler for thin strips. They are a great, low-carb alternative to pasta. Can I make Chicken Zoodle Soup ahead of time? Yes, you can make the soup ahead. Store it in the fridge for up to three days. Just add the zoodles when you're ready to eat. This keeps them fresh and firm. How do I prevent zoodles from becoming soggy? To keep zoodles from getting soggy, add them at the end of cooking. Only cook them for a few minutes. This way, they stay crisp and tasty. Can I use rotisserie chicken for this recipe? Absolutely! Rotisserie chicken saves time. Just shred or cube the chicken and add it to the soup. It adds a nice flavor boost, too. Is it possible to make this in a slow cooker? Yes, you can use a slow cooker. Cook the chicken and veggies on low for 4-6 hours. Add zoodles in the last 15 minutes to keep them tender. How do I make the soup gluten-free? To make the soup gluten-free, use gluten-free chicken broth. Ensure all added spices are also gluten-free. This way, everyone can enjoy your delicious Chicken Zoodle Soup. For a full recipe, check out the [Full Recipe]. You now have a clear guide to making Chicken Zoodle Soup. We covered the key ingredients, preparation steps, and cooking instructions. I shared useful tips to keep your zoodles from turning mushy and ways to enhance the flavor. Remember, you can customize your soup with ingredient swaps to fit your needs. Store leftovers properly to enjoy later. Cooking doesn’t have to be complicated. Experiment and have fun with this recipe. Your kitchen can be a place of creativity and health. Enjoy your tasty, homemade soup!](https://goldendishy.com/wp-content/uploads/2025/06/e4db2e18-4a3d-4a81-8032-e96fb997d624-768x768.webp)