Lemon Garlic Asparagus Flavorful and Easy Recipe
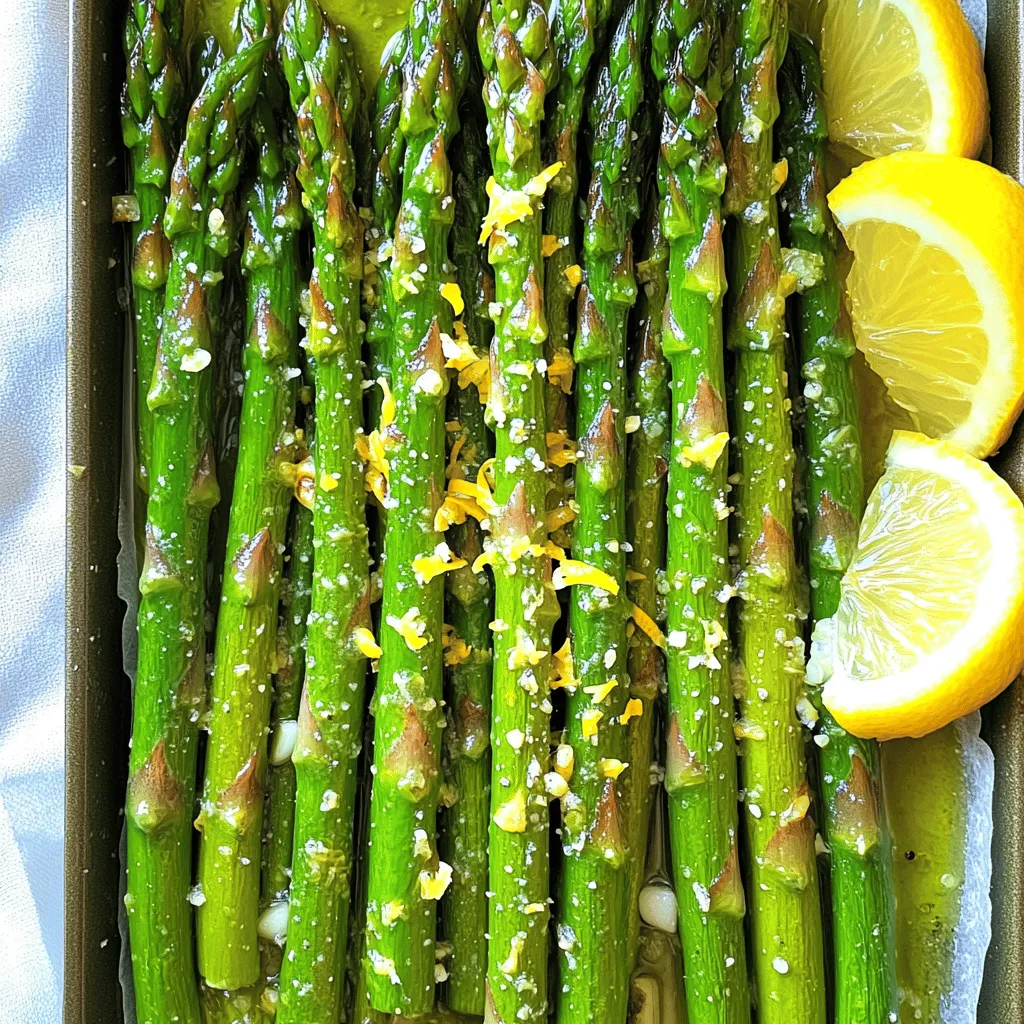
Looking for a simple side dish to excite your taste buds? This Lemon Garlic Asparagus recipe combines fresh flavors with easy steps. You will love how vibrant lemon and garlic enhance the natural taste of asparagus. Whether you’re an experienced cook or just starting, I’ll guide you through each step. So, grab your ingredients, and let’s dive into this flavorful dish that’s sure to impress!
Ingredients
Overview of Ingredients
Lemon garlic asparagus uses simple, fresh ingredients. Each plays a key role in flavor. Here’s what you need for this tasty dish:
– 1 pound fresh asparagus, trimmed and ends snapped off
– 3 tablespoons extra virgin olive oil
– 4 cloves garlic, finely minced
– Zest of 1 medium lemon
– 2 tablespoons freshly squeezed lemon juice
– 1 teaspoon crushed red pepper flakes (optional for heat)
– Sea salt and freshly cracked black pepper to taste
– 2 tablespoons freshly grated Parmesan cheese (optional for a savory finish)
– Lemon wedges for a zesty serving suggestion
Specific Ingredient Details
1. Fresh Asparagus: Choose firm, green spears. They should snap easily when bent. This means they are fresh and full of flavor.
2. Extra Virgin Olive Oil: This oil adds richness and helps the asparagus roast well. It also enhances the garlic flavor.
3. Garlic: Use fresh garlic for the best taste. It gives a strong, savory punch to the dish.
4. Lemon: The zest and juice brighten the flavors. It balances the richness of the olive oil and adds freshness.
5. Crushed Red Pepper Flakes: If you like heat, this adds a nice kick. Adjust the amount to your taste.
6. Sea Salt and Black Pepper: These seasonings bring out all the flavors. Use them to taste for the best result.
7. Parmesan Cheese: This is optional, but it gives a savory finish. It melts slightly on the warm asparagus.
8. Lemon Wedges: Serve these on the side for extra brightness. A squeeze of fresh lemon juice adds a final touch.
Optional Additions
You can customize this dish with some fun extras. Consider adding:
– Cherry Tomatoes: They add sweetness and a pop of color.
– Balsamic Vinegar: A drizzle can give depth and sweetness.
– Nuts: Chopped almonds or pine nuts add crunch and nutrition.
– Herbs: Fresh basil or parsley can brighten the dish further.
Step-by-Step Instructions
Preparation Steps
Start by gathering all your ingredients. You need 1 pound of fresh asparagus, 3 tablespoons of olive oil, 4 cloves of garlic, lemon zest, lemon juice, red pepper flakes, salt, pepper, and Parmesan cheese if desired. Trim the asparagus by snapping off the tough ends. This helps keep the texture tender and fresh. Preheat your oven to 425°F (220°C) while you prepare.
Cooking Techniques
In a large bowl, toss the asparagus with olive oil. Make sure each spear is coated well. Next, add the minced garlic, lemon zest, and lemon juice. If you like some heat, sprinkle in the crushed red pepper flakes. Season with salt and pepper to taste. Mix everything well so the flavors blend. Spread the asparagus on a lined baking sheet in a single layer. This helps them roast evenly. Bake for 12 to 15 minutes. Keep an eye on them to ensure they stay crunchy.
Tips for Monitoring Cooking Time
Check the asparagus around the 10-minute mark. Look for a slight browning on the tips. They should be tender but not mushy. If you want, add Parmesan cheese right after taking them out of the oven. The heat will melt it nicely. For serving, arrange the asparagus on a platter and add lemon wedges for a fresh squeeze right before eating.
Tips & Tricks
How to Achieve the Perfect Roast
To get the best roast, start with fresh asparagus. Look for bright green, firm spears. Trim the ends to ensure even cooking. Coat them well with olive oil and seasonings. Spread them out in a single layer on your baking sheet. This allows hot air to circulate freely. Roasting at 425°F makes them tender and crisp. Keep an eye on them as they roast. You want them tender but still crunchy.
Enhancing Flavor Profiles
Lemon and garlic work together to boost flavor. Use fresh garlic for the best taste. Zest the lemon before juicing it; this adds a bright note. For some heat, add crushed red pepper flakes. You can also sprinkle Parmesan cheese on top. This adds a savory twist to your dish. If you want a twist, try adding fresh herbs like thyme or dill.
Serving Suggestions
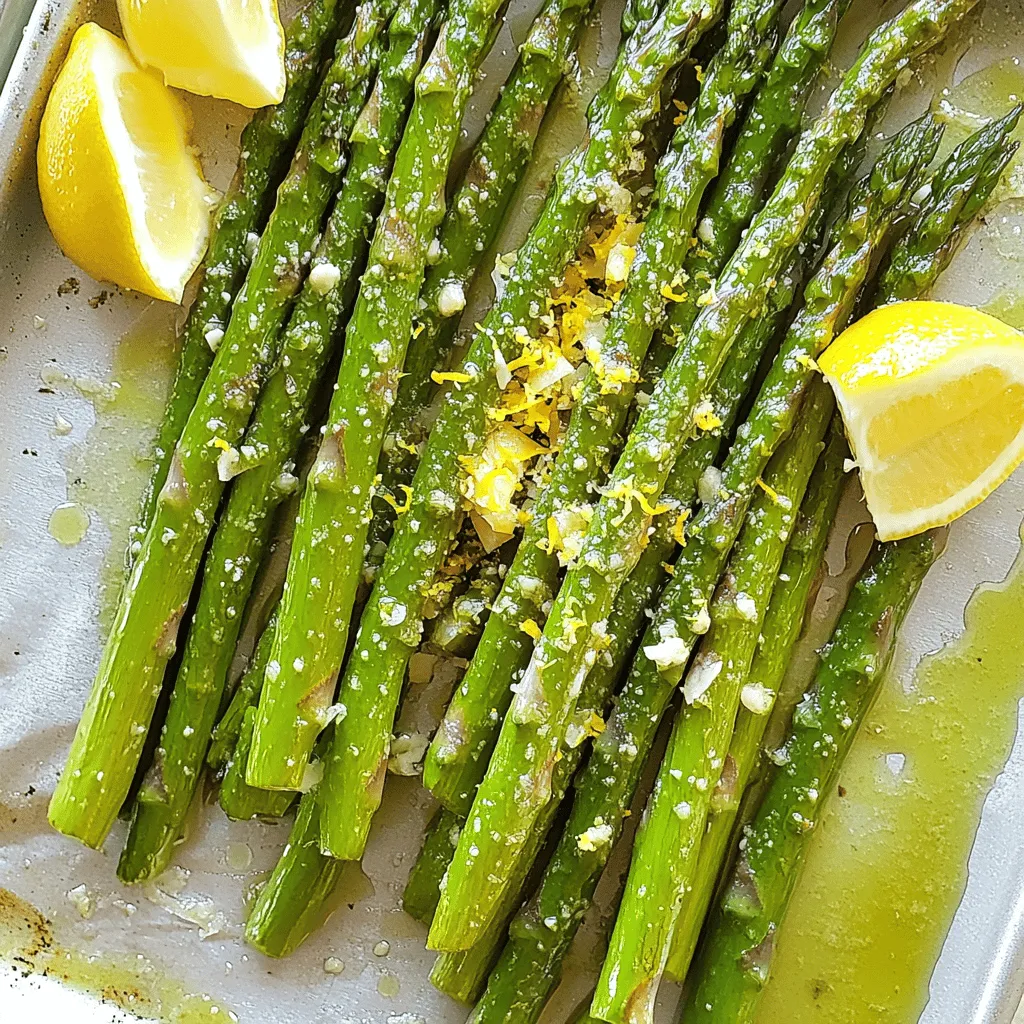
Serve lemon garlic asparagus on a nice platter. Drizzle any leftover oil over the top for shine. Garnish with extra lemon wedges for a pop of color. This dish pairs well with grilled fish or chicken. It also works great as a side for pasta dishes. Enjoy this zesty asparagus warm, or let it cool for a refreshing salad.
Variations
Alternative Ingredients to Consider
You can swap asparagus for other veggies. Try green beans, broccoli, or zucchini. These vegetables work well with the lemon and garlic flavors. If you want a different taste, use sesame oil instead of olive oil. You can also add herbs like thyme or rosemary for a twist.
Different Cooking Methods
Roasting is the most common method, but you can grill asparagus too. Grilling gives it a smoky flavor. Simply toss the asparagus with oil and seasonings, then grill for 5-7 minutes. You can also steam the asparagus for a lighter dish. Just steam for about 4-5 minutes until tender.
Seasonal Adaptations
In spring, fresh asparagus shines best. You can enjoy it with fresh lemon. In summer, add cherry tomatoes or bell peppers for color and taste. Fall is great for adding a sprinkle of nuts, like almonds or walnuts. Winter? Try pairing it with hearty grains like quinoa or farro for a warm meal.
Storage Info
Best Practices for Storing Leftovers
After enjoying your lemon garlic asparagus, store any leftovers properly. Place the asparagus in an airtight container. This keeps the flavor fresh. You can also wrap it tightly with plastic wrap. Make sure it is sealed well to avoid moisture. Store the container in the fridge. It helps to keep the asparagus crisp.
Reheating Instructions
To reheat your lemon garlic asparagus, use the oven for the best results. Preheat your oven to 350°F (175°C). Spread the asparagus on a baking sheet, and drizzle a bit of olive oil on top. Heat for about 10 minutes, or until warm. You can also use the microwave. Place the asparagus in a microwave-safe dish. Cover it with a damp paper towel and heat for 1-2 minutes.
Shelf Life of Prepared Lemon Garlic Asparagus
Prepared lemon garlic asparagus lasts about 3 to 5 days in the fridge. Keep an eye on its look and smell. If it appears slimy or has an off odor, it’s best to throw it away. Always trust your senses to judge freshness. For longer storage, consider freezing it. In the freezer, it can last up to 3 months. Just remember to blanch it first for the best taste!
FAQs
What can I serve with Lemon Garlic Asparagus?
You can pair Lemon Garlic Asparagus with many dishes. It goes well with grilled chicken or fish. You can also serve it alongside a hearty steak. For a vegetarian option, try it with quinoa or rice. Lemon Garlic Asparagus adds a fresh touch to any meal. You can also toss it in a salad for added crunch.
Can I make Lemon Garlic Asparagus in advance?
Yes, you can make Lemon Garlic Asparagus ahead of time. Roast the asparagus and let it cool. Then store it in the fridge for up to three days. When you’re ready to eat, just reheat it in the oven. This keeps the flavor and crunch intact. You can even serve it cold in a salad for a quick meal.
How do I clean and prepare asparagus?
To clean asparagus, start by rinsing it under cold water. This removes dirt and sand. Next, snap off the tough ends of each spear. Simply bend the asparagus until it snaps. This point is where the tender part begins. If you want, you can peel the lower part of the stem for a more delicate bite. Now your asparagus is ready for cooking!
In this blog post, we explored the key ingredients for lemon garlic asparagus. We discussed specific details and optional additions that enhance flavor. Next, we walked through each step, from preparation to cooking techniques with handy tips.
Finally, I shared ways to achieve the perfect roast, variations to try, and best practices for storing leftovers. Remember, whether you serve it fresh or reheat it later, lemon garlic asparagus can delight your taste buds. Enjoy cooking and experimenting with this vibrant dish!


![- 2 cups cooked chicken breast, shredded - 1 ripe avocado, mashed until smooth - 1/4 cup smooth Greek yogurt - 1 tablespoon freshly squeezed lemon juice - 1/4 cup red onion, finely chopped - 1/2 cup cherry tomatoes, halved - 1/4 cup celery, finely diced - 1/4 teaspoon garlic powder - Salt and freshly ground black pepper to taste - Fresh cilantro or parsley, chopped, for garnish The ingredients in creamy avocado chicken salad make it tasty and healthy. The chicken provides protein, while avocado adds healthy fats. Greek yogurt makes it creamy without extra calories. Fresh veggies like tomatoes and celery give a nice crunch. Using fresh ingredients is key. This brings out the best flavors. You can adjust the amounts based on what you like. For example, add more tomatoes if you love them. Don’t forget the seasoning! Salt and pepper enhance the taste. Fresh herbs like cilantro or parsley top it off perfectly. They add color and flavor. I recommend checking the full recipe for detailed steps. Enjoy making this delicious dish! - Combine mashed avocado, Greek yogurt, and lemon juice in a bowl. - Mix until smooth using a fork or whisk. To make the creamy dressing, start with a ripe avocado. Mash it in a bowl until it is smooth. Next, add 1/4 cup of Greek yogurt. This adds creaminess and protein. Then, squeeze in 1 tablespoon of lemon juice. This will brighten the flavor. Mix these three ingredients well with a fork or whisk. You want a creamy and smooth texture. This creamy dressing is the base of your salad and full of healthy fats. - Add shredded chicken to the avocado mixture. - Stir thoroughly to coat the chicken evenly. Now it’s time to add in the chicken. Use 2 cups of cooked chicken breast, shredded. You can use leftover chicken or rotisserie chicken for ease. Add the chicken to the creamy dressing. Stir well so every piece of chicken is coated. This adds protein and makes the salad filling. The creamy dressing brings all the flavors together. - Gently fold in red onion, cherry tomatoes, and celery. - Season with garlic powder, salt, and black pepper to taste. Next, let’s add some crunch and color. Gently fold in 1/4 cup of finely chopped red onion, 1/2 cup of halved cherry tomatoes, and 1/4 cup of diced celery. These veggies add freshness and texture. Now, season your salad. Add a pinch of garlic powder, salt, and freshly ground black pepper. Taste it and adjust the seasoning as needed. Mix gently so you don’t break the veggies. Now, your creamy avocado chicken salad is ready to serve! Check out the Full Recipe for more details. - Look for avocados that yield slightly to pressure. - Check the color; ripe avocados usually have a darker skin. Selecting the perfect avocado is key for your creamy avocado chicken salad. When you gently press the avocado, it should give a bit. This tells you it is ripe and ready to use. A darker skin tone often means ripeness, but don't rely on color alone. Always feel for that slight softness! - Use rotisserie chicken for convenience. - Ensure chicken is fully cooked; internal temperature should reach 165°F (75°C). Cooking the chicken can take time, but using rotisserie chicken saves you effort. It offers great flavor and saves cooking time. If you cook your own chicken, make sure to check the internal temperature. It needs to reach 165°F (75°C) to be safe to eat. - Serve in individual bowls, atop lettuce leaves, or in a wrap. - Consider a lemon wedge on the side for added flavor. Serving your salad can be fun! You can use individual bowls or place it on crisp lettuce leaves. If you want a wrap, that works too. A lemon wedge on the side brightens the meal and adds a zesty kick. For the full experience, try the [Full Recipe]. Enjoy your tasty and healthy choice! {{image_4}} You can make your creamy avocado chicken salad even better by adding fruits. Diced apples or grapes bring a nice sweetness. They also add a nice crunch. If you want a tropical twist, try adding mango. Its juicy flavor blends well with creamy avocado. Not in the mood for chicken? You can easily swap it out. Canned tuna or chickpeas work well for a vegetarian option. Both of these options add protein and flavor. If you love seafood, consider using grilled shrimp. It adds a fresh, light taste to the salad. Want to spice things up? Adding spices can really boost the flavor. Try cumin or smoked paprika for a warm kick. If you like heat, toss in some jalapeños. These will give your salad a spicy edge that keeps it exciting. Feel free to get creative with your mix-ins! Each variation gives you a new twist on this delicious dish. Check out the Full Recipe for more ideas. Store your creamy avocado chicken salad in an airtight container in the refrigerator. It will stay fresh for up to 2 days. I suggest enjoying it right after you make it. However, if you keep the ingredients separate, it can last a little longer. This way, you keep the textures nice. Do not freeze the salad. Avocado gets mushy when frozen. If you want to prepare ahead, consider freezing the chicken on its own. This will keep it fresh and ready for your salad. Prep your ingredients ahead of time. Store them separately to mix later. This salad is a great option for busy weeks. You can have a tasty meal ready in minutes! For the full recipe, check out the detailed instructions above. Typically lasts for about 2 days when stored properly. I recommend using an airtight container. This helps keep your salad fresh and tasty. After two days, the avocado may brown and lose its creamy texture. Yes, but it’s best to combine the ingredients just before serving to maintain freshness. If you prepare it early, store the salad components separately. This way, the avocado stays bright and creamy. Great with whole-grain bread, crackers, or a side of fruit. I love serving it on toast for a hearty lunch. Pairing it with fresh fruit offers a nice, sweet contrast. You can also use it as a filling in wraps for a tasty twist. For the full recipe, check out the detailed steps above. This creamy avocado chicken salad is easy to make and full of flavor. We covered the main ingredients, steps, and tips to perfect it. You learned how to mix chicken with creamy dressing and fresh veggies. Remember to store leftovers properly for the best taste. Enjoy this salad as a quick meal or snack. Feel free to customize with your favorite ingredients. With these simple tips, you can create a dish that is both healthy and delicious.](https://goldendishy.com/wp-content/uploads/2025/06/50306de2-9119-4a0c-8cb7-3da0c4c0a2a4-768x768.webp)
. This link will guide you through all the steps to create this delightful dish. Garlic Parmesan roasted carrots are simple and tasty. You learned about essential ingredients, step-by-step cooking, and helpful tips. We covered variations, storage tips, and common questions. These carrots make a great side dish or even a main course. You can adjust the flavors as you like. Enjoy your cooking adventure and share your roasted carrot experience with others!](https://goldendishy.com/wp-content/uploads/2025/07/2b5541b4-7c05-48ff-a2b1-13aee86f691d-768x768.webp)
