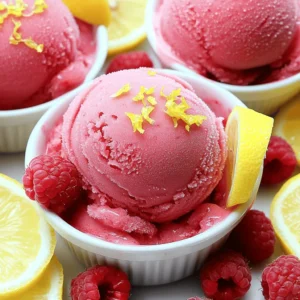
Raspberry Lemonade Sorbet Refreshing Summer Treat

Summer is here, and what better way to cool off than with a refreshing Raspberry Lemonade Sorbet? This bright, tangy treat combines the sweet taste of fresh raspberries with zesty lemon for a burst of flavor. You’ll love how easy it is to make and serve, plus your guests will be asking for more. Let’s dive into this simple recipe that will become your favorite summer delight!
Ingredients
Main Ingredients for Raspberry Lemonade Sorbet
To make Raspberry Lemonade Sorbet, gather these ingredients:
– 2 cups fresh raspberries
– 1 cup freshly squeezed lemon juice (about 4-5 lemons)
– 1 cup granulated sugar
– 1 cup water
– Zest of 2 lemons
– Pinch of salt
These ingredients create a tasty and bright flavor. Fresh raspberries give a sweet and tart base. The lemon juice adds a zesty kick. Granulated sugar balances the tartness, while water helps blend it all.
The lemon zest adds depth and a fragrant touch to the sorbet. A pinch of salt boosts the flavors. Together, these ingredients create a refreshing treat for summer.
Optional Garnishes
To make your sorbet even better, consider these optional garnishes:
– Fresh mint sprigs
– Lemon slices
– Additional raspberries
Fresh mint sprigs add a nice pop of color and flavor. Lemon slices can brighten up your serving dish. A few extra raspberries on top look lovely and give more taste. These small touches make your sorbet look and taste even more special.Enjoy making this cool treat!
Step-by-Step Instructions
How to Create Simple Syrup
– Combine water and sugar: In a small pot, mix 1 cup of water with 1 cup of sugar.
– Heat until dissolved and clear: Cook this mixture over medium heat. Stir it until the sugar disappears.
– Cool to room temperature: Once clear, take it off the heat and let it cool.
Blending the Sorbet Base
– Add raspberries, lemon juice, zest, and salt to blender: In your blender, put 2 cups of fresh raspberries, 1 cup of lemon juice, lemon zest from 2 lemons, and a pinch of salt.
– Blend until smooth: Blend until the mix is silky and smooth. Use a spatula to scrape down the sides if needed.
Straining the Mixture
– Use a fine-mesh sieve to strain: Place a fine-mesh sieve over a bowl. Pour in the blended mix.
– Press mixture to extract liquid: With a spatula, press the mix down. This gets all the flavorful juice, leaving seeds behind.
Combining All Ingredients
– Mix simple syrup with strained raspberry blend: Pour your cooled simple syrup into the bowl with the raspberry juice. Stir them well together.
Freezing Techniques
– Using shallow dish vs. ice cream maker: If using a shallow dish, spread the mix evenly. If you have an ice cream maker, pour in the mix and churn until soft.
– Stirring technique for a smooth texture: For shallow dishes, freeze for 1 hour. Stir with a fork every 30 minutes for 3-4 hours. This keeps it smooth.
Serving the Sorbet
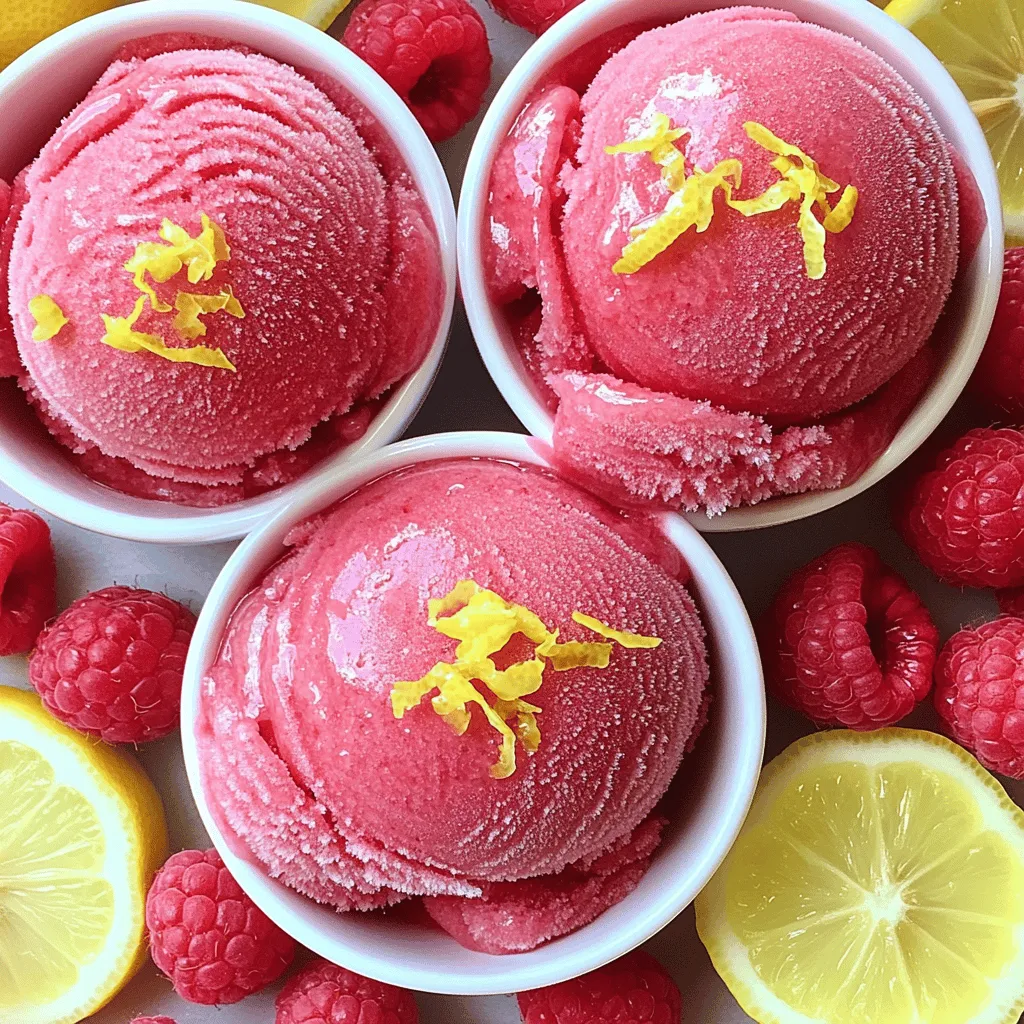
– Scoop and serve in chilled bowls: When ready, scoop the sorbet into chilled bowls.
– Presentation tips: Add fresh raspberries and mint leaves on top for a pretty touch.
Follow these steps to craft a delightful Raspberry Lemonade Sorbet.
Tips & Tricks
Achieving the Best Texture
Straining the raspberry mixture is key. It helps remove seeds, giving a smooth feel. I often use a fine-mesh sieve for this step. Press the mixture with a spatula to extract as much liquid as possible.
Stirring is also important! After freezing, ice crystals can form. I recommend stirring the sorbet every 30 minutes. This keeps it smooth and creamy.
Flavor Variations
You can add other fruits for a twist! Try strawberries or blueberries for a mixed berry sorbet. Altering sweetness is easy too. If you like it sweeter, add more sugar. For less sweetness, reduce it.
Common Mistakes to Avoid
One big mistake is not cooling your simple syrup. If it’s warm, it can affect the sorbet’s texture. Let it cool to room temperature before mixing.
Over-churning in your ice cream maker is another pitfall. Stop when it reaches a soft-serve texture. Churning too long can lead to icy results.

Variations
Different Fruit Combinations
You can change the flavor of your raspberry lemonade sorbet by using other fruits. Mixed berry sorbet is a great option. Combine raspberries with strawberries and blueberries for a sweet mix. You can also try using blackberries for a deeper flavor.
Citrus blends are fun, too! Adding orange or lime juice makes a zesty twist. Mix lemon with a bit of lime for a refreshing taste. Each fruit adds its unique flavor and makes your sorbet fun and fresh.
Vegan and Low-Sugar Options
Making this sorbet vegan is easy. You can substitute sweeteners like agave syrup or maple syrup for granulated sugar. This change keeps the sweetness while making it plant-based.
You can also use coconut water instead of simple syrup. It adds a tropical touch and cuts sugar. Coconut water gives your sorbet a light and refreshing feel, perfect for hot days.
Alcoholic Infusion Ideas
For adults, adding a splash of vodka or rum elevates your sorbet. This gives it a fun twist for parties or gatherings. Just mix in a tablespoon or two with the raspberry blend.
You can also create a sorbet cocktail. Serve your sorbet in a glass with some sparkling water or lemonade. This drink is sure to impress guests and make your summer even more enjoyable.
Storage Info
Proper Freezing Techniques
To keep your sorbet fresh, use airtight containers. Glass or plastic containers work well. Make sure they seal tightly to keep out air. Air can cause freezer burn, which ruins the texture. To avoid freezer burn, cover the sorbet with plastic wrap before sealing. This extra layer helps keep the moisture in.
How Long Does Sorbet Last?
Homemade sorbet lasts about 1 to 2 weeks in the freezer. After that, it may lose flavor and texture. Signs of spoilage include freezer burn and changes in color. If your sorbet becomes hard or icy, it’s best to toss it. Always check for any odd smells or changes before serving.
Thawing and Serving Tips
To enjoy your sorbet again, soften it before serving. Take it out of the freezer and let it sit for about 5 to 10 minutes. This makes it easier to scoop. Serve the sorbet at a temperature just below freezing for the best taste. Enjoy it in chilled bowls for a refreshing treat!
FAQs
What is the best way to make Raspberry Lemonade Sorbet?
To make Raspberry Lemonade Sorbet, start with fresh ingredients. Use ripe raspberries for the best flavor. Freshly squeezed lemon juice adds brightness. Combine these in a blender with sugar and water. This gives you a tasty base. Strain the mixture to remove seeds. This helps achieve a smooth texture. Freeze the mixture in a shallow dish. Stir every 30 minutes to avoid ice crystals.
Can I use frozen raspberries instead of fresh?
Yes, you can use frozen raspberries. They work well, but they change the texture. Frozen raspberries can make the sorbet a bit icier. You might also lose some of the fresh taste. If you use frozen berries, let them thaw a bit. This helps them blend smoothly.
How do I prevent my sorbet from becoming too icy?
To keep your sorbet creamy, you can use a few tricks. First, make sure to stir it often while freezing. This breaks up any ice crystals. You can also add a bit of alcohol. A splash of vodka or rum helps keep it soft. Another tip is to not over-churn if you use an ice cream maker.
Where can I buy Raspberry Lemonade Sorbet?
You can find Raspberry Lemonade Sorbet in many stores. Look in the freezer section of local supermarkets. Some brands to check are Häagen-Dazs and Talenti. Local ice cream shops may also sell it. You can ask for homemade varieties if you want something special.
Is it possible to make sorbet without an ice cream maker?
Yes, you can make sorbet without an ice cream maker. Use a shallow dish to freeze the mixture. Stir it every 30 minutes until firm. This method works well and is easy. Just be patient, and you’ll get a great sorbet!
Raspberry lemonade sorbet is simple and fun to make. You learned about the main ingredients like fresh raspberries and lemon juice. I shared easy steps to create the perfect sorbet, from making simple syrup to freezing techniques. You discovered tips to avoid mistakes and experiment with flavors. Remember to store your sorbet well for the best taste. Making this treat is a delightful way to enjoy summer’s flavors. You now have everything you need to impress friends and family with your homemade sorbet. Enjoy your delicious creation!


![To make the Easy Lemon Raspberry Loaf, you need a few simple ingredients. Here’s the list you will use: - 1 ¾ cups all-purpose flour - 1 cup granulated sugar - ½ cup unsalted butter - 2 large eggs - 1 teaspoon pure vanilla extract - 1 tablespoon fresh lemon zest - ½ cup freshly squeezed lemon juice - 1 teaspoon baking powder - ½ teaspoon baking soda - ¼ teaspoon fine sea salt - 1 cup fresh raspberries - Powdered sugar for dusting (optional) These ingredients help create a moist and zesty loaf. The lemon zest and juice add bright flavor. Fresh raspberries give you sweet bursts in every bite. Use unsalted butter to control the saltiness. It’s best to use fresh raspberries, but frozen will work too. Make sure to measure everything carefully. Baking is all about balance. Each ingredient plays a role in the final taste and texture. If you want to learn more about the steps to make this treat, check out the Full Recipe. - Setting the Temperature First, set your oven to 350°F (175°C). This step is crucial for even baking. - Preparing the Loaf Pan Grease a 9x5-inch loaf pan. You can also line it with parchment paper. This helps the loaf come out easily after baking. - Method of Mixing In a large bowl, combine softened butter and granulated sugar. Use a hand mixer or stand mixer to beat them together. - Desired Consistency Mix until the blend is light and fluffy. This should take about 3-4 minutes. The mixture should look pale and creamy. - Adding Eggs One at a Time Add the eggs one by one. Mix well after each egg to ensure they are fully blended. - Mixing Techniques After adding the eggs, stir in the vanilla extract and lemon zest. Mix gently but thoroughly to keep the batter smooth. - Combining Flour and Leavening Agents In another bowl, whisk together flour, baking powder, baking soda, and salt. This ensures even distribution of leavening agents. - Proper Mixing Technique Gradually add the dry mix to the wet mixture, alternating with lemon juice. Start and end with the dry ingredients. Mix gently, and don’t overmix. - Techniques to Preserve Raspberry Shape Carefully fold in the raspberries. Use a spatula to gently mix. This keeps the raspberries intact. - Ensuring Even Distribution Make sure the raspberries are evenly spread throughout the batter. This enhances the flavor in every slice. - Baking Time and Techniques for Doneness Pour the batter into the loaf pan. Bake for 55-60 minutes. To check doneness, insert a toothpick into the center of the loaf. It should come out clean. - Cooling Tips for Best Texture Once done, let the loaf cool in the pan for 10-15 minutes. Then, transfer it to a wire rack to cool completely. This helps achieve a perfect texture. Feel free to check the Full Recipe for more details! To make the best lemon raspberry loaf, avoid overmixing. Mixing too much can make the loaf dense. When you combine wet and dry ingredients, mix just until you see no flour. To check for doneness, insert a toothpick into the center. If it comes out clean or with a few crumbs, your loaf is ready. If not, bake a little longer. If the top is browning too fast, cover it with foil halfway through. Measuring ingredients incorrectly can lead to issues. Always use dry measuring cups for flour and sugar. Spoon the flour into the cup, then level it off with a knife. This keeps the correct ratio. Adjust baking time if you use a dark pan. Dark pans can cook faster, so start checking for doneness a few minutes early. Fresh lemon juice makes a big difference. Squeeze the lemons right before you use them. This keeps the juice bright and zesty. You can also add extras like nuts or spices. Chopped walnuts or a touch of cinnamon can add great depth. For a sweet twist, consider a lemon glaze on top for extra shine. {{image_4}} You can switch out raspberries for other fruits. Blueberries make a great choice. They add a sweet touch and look pretty too. Strawberries can also work well. Just chop them into smaller pieces. If you like seasonal fruits, use what is fresh. In summer, try peaches or cherries. In fall, apples or pears can add a nice twist. Each fruit brings its own flavor and charm to the loaf. If you need a gluten-free loaf, don’t worry. You can use almond flour or coconut flour. Both work great as substitutes. Just remember, the texture may change a bit. You might need to adjust the liquid too. Gluten-free flours absorb more moisture. Adding an extra egg or some yogurt can help keep it moist and fluffy. Want to jazz up your loaf? Adding nuts can give it a nice crunch. Chopped walnuts or pecans are perfect. Just fold them in gently with the raspberries. You can also add spices for warmth. Cinnamon or nutmeg can enhance the flavor. For a sweet finish, create a lemon glaze. Mix powdered sugar with lemon juice. Drizzle this over the cooled loaf for a zesty touch. These variations keep your lemon raspberry loaf exciting and fun! For the full recipe, check out the details provided earlier. Room Temperature Storage Store your lemon raspberry loaf at room temperature. Use an airtight container to keep it fresh. This will help it stay moist and tasty. It can last for up to three days this way. Refrigeration Guidelines If you want to keep it longer, put the loaf in the fridge. Wrap it tightly in plastic wrap or foil. This will keep it from drying out. It can last up to one week in the fridge. How to Freeze the Loaf Freezing the lemon raspberry loaf is easy. Wait until it cools completely. Then, wrap it in plastic wrap and foil. This protects it from freezer burn. You can freeze it for up to three months. Thawing Tips To thaw, take it out of the freezer. Leave it in the fridge overnight. If you want it warm, slice and heat it in the microwave for a few seconds. Freshness Indicators Check for signs of spoilage. Look for mold or a change in smell. If the loaf feels dry or hard, it’s time to toss it. Maximum Storage Duration In total, the loaf can last up to one week in the fridge or three months in the freezer. Proper storage helps maintain its delicious flavor and texture. To keep the loaf moist, use a few key ingredients. Butter adds fat and moisture. Eggs also help with texture. Additionally, use fresh lemon juice for tang and juiciness. Baking techniques matter too. Do not overmix the batter. This keeps air in the loaf. Bake at the right temperature and check for doneness with a toothpick. A little moist crumb is perfect! Yes, you can use frozen raspberries! Just make sure to thaw them first. Drain any extra juice to avoid a soggy loaf. Using frozen fruit may change the texture. Fresh raspberries give a firmer bite. However, frozen raspberries still add great flavor and color. You can substitute lemon juice with lime or orange juice. Lime juice adds a tart zing. Orange juice gives a sweeter flavor. Keep in mind that this changes the flavor profile. The loaf will taste different but still delicious! This loaf pairs well with tea or coffee. The bright lemon flavor complements hot drinks nicely. For a fun twist, serve it with whipped cream. Fresh berries on the side add a lovely touch too. For the full recipe, feel free to check the [Full Recipe]. You now know how to make a delicious Lemon Raspberry Loaf. We covered key ingredients, step-by-step instructions, and helpful tips for success. Remember, watch your mixing and baking time to avoid mistakes. Try different fruits or flavors to put your spin on it. Store it properly to keep it fresh. Whether for breakfast or dessert, this loaf will please everyone. Enjoy your baking adventure and the tasty treats you create!](https://goldendishy.com/wp-content/uploads/2025/07/5ff44623-bcfe-47fa-965b-01d738fc2f08-768x768.webp)
![To make healthy peanut butter oat bars, you need a few key items: - 2 cups rolled oats - 1/2 cup natural peanut butter - 1/4 cup honey or maple syrup - 1/4 cup unsweetened applesauce - 1/2 cup mixed nuts (almonds, walnuts, cashews), roughly chopped - 1/4 cup dark chocolate chips (optional) - 1/2 teaspoon ground cinnamon - 1/4 teaspoon sea salt These ingredients work together to create a tasty and nutritious snack. The oats provide fiber, while the peanut butter adds protein and healthy fats. Honey or maple syrup gives sweetness, and applesauce keeps the bars moist. You can easily change your bars by adding extra flavors or textures. Here are some fun options: - Dried fruits (like cranberries or raisins) - Seeds (like chia or flaxseed) - Protein powder for an extra boost - Coconut flakes for added flavor Feel free to mix and match these add-ins to suit your taste. These oat bars pack a nutritious punch. Here’s a quick look at what you’ll get: - Calories: About 150 per bar - Protein: Around 5g, thanks to the peanut butter and nuts - Fiber: Approximately 3g from the oats and nuts - Healthy Fats: Includes unsaturated fats from the peanut butter and nuts These bars not only taste great but also fuel your body. With their balanced nutrition, they make a perfect snack or breakfast option. For the complete recipe, check the Full Recipe link. Start by preheating your oven to 350°F (175°C). This step ensures even baking. Next, grab an 8x8-inch baking pan. Line it with parchment paper, letting some paper hang over the edges. This makes it easy to lift the bars out later. In a large mixing bowl, combine 2 cups of rolled oats, 1/2 teaspoon of ground cinnamon, and 1/4 teaspoon of sea salt. Stir well until the dry ingredients are mixed evenly. This mix creates a solid base for your bars. In a separate bowl, blend together 1/2 cup of natural peanut butter, 1/4 cup of honey or maple syrup, and 1/4 cup of unsweetened applesauce. Mix vigorously until the mixture is smooth. Pour this wet mixture into the bowl with the dry ingredients. Stir thoroughly, ensuring all the oats are coated. Now, it’s time for the fun part! Fold in 1/2 cup of roughly chopped mixed nuts and 1/4 cup of dark chocolate chips, if you want a sweet touch. Make sure to distribute these extras evenly throughout the batter. Spoon the mixture into your prepared baking pan. Use a spatula or your hands to press the mixture down firmly. This ensures the bars hold their shape while baking. Bake in the preheated oven for 20-25 minutes. Look for a lovely golden brown color on the edges. Once done, remove the pan from the oven. Let it cool for about 10 minutes. Use the parchment paper to lift the bars from the pan and place them on a wire rack. Allow them to cool completely before cutting into your desired size. You can store any leftovers in an airtight container to keep them fresh. Enjoy these tasty treats as a snack or a quick breakfast! For the complete recipe, see the Full Recipe section. To get the best texture for your peanut butter oat bars, use rolled oats. They stay chewy and hold together well. If you want a softer bar, add a bit more applesauce. For crunch, add more nuts. Press the mixture firmly into the pan. This helps the bars hold their shape when baked. Store your bars in an airtight container. This keeps them fresh and moist. You can also layer parchment paper between bars to prevent sticking. If you want to keep them longer, freeze them. They freeze well for up to three months. Just wrap them tightly in plastic wrap before placing them in a freezer bag. These bars make a great snack or breakfast. Cut them into small squares for easy grabbing. Pair them with yogurt or fruit for a balanced meal. You can also drizzle some honey on top for added sweetness. Feel free to explore the [Full Recipe] for more ideas on how to enjoy these delicious treats! {{image_4}} You can change up the nuts in your oat bars. Use almonds, walnuts, or cashews. If you like seeds, try adding pumpkin seeds or sunflower seeds. These options add crunch and healthy fats. Mix and match to find your favorite combination. If you want a different sweet taste, try maple syrup instead of honey. You can also use agave nectar for a milder flavor. For a low-calorie option, consider stevia or monk fruit sweetener. Each sweetener changes the taste just a little. Adding fruits and spices can make your bars pop with flavor. Try mashed bananas or dried fruits like cranberries or apricots. For spices, add a pinch of nutmeg or ginger for warmth. You can even fold in some cocoa powder for a chocolatey twist. These small changes can make your bars exciting and unique. To keep your healthy peanut butter oat bars fresh, store them in an airtight container. This helps to lock in moisture and flavor. You can keep them at room temperature for up to a week. If you want them to last longer, consider refrigerating them. The cool air helps maintain their taste and texture. Freezing is a great way to extend the life of your oat bars. Wrap each bar tightly in plastic wrap. Then place them in a freezer-safe bag or container. You can freeze the bars for up to three months. When you're ready to enjoy them, just take out a bar and let it thaw on the counter. If you prefer warm bars, you can reheat them. Simply place a bar in the microwave for about 15-20 seconds. This warms them up nicely and brings back their fresh-baked taste. If you stored them in the fridge, let them sit at room temperature for a few minutes before warming to avoid cold centers. For more details, check out the Full Recipe. Yes, you can swap peanut butter for almond, cashew, or sunbutter. Each nut butter brings its own flavor. Almond butter gives a creamy texture, while cashew butter is milder. Sunbutter is a great option for nut allergies. Just make sure to choose a natural nut butter without added sugars or oils. These oat bars last about one week at room temperature. Keep them in an airtight container. For longer storage, they can stay fresh in the fridge for about two weeks. If you want to enjoy them later, freeze the bars. They can last up to three months in the freezer. Just thaw them when you are ready to eat. Yes, this recipe is gluten-free if you use certified gluten-free oats. Most rolled oats are naturally gluten-free. However, some brands may process oats with gluten-containing grains. Always check the label before buying. This way, you can enjoy your oat bars without worry. Yes, you can skip added sugars. Use ripe bananas instead of honey or maple syrup. Applesauce also adds natural sweetness. You can add a bit more applesauce if you want a sweeter taste. This keeps the oat bars healthy and tasty without extra sugar. You now have a complete guide to making healthy peanut butter oat bars. We covered essential ingredients and fun add-ins to suit your taste. Step-by-step instructions ensure your bars come out perfectly every time. I shared tips for the best texture and storage methods to keep them fresh. You can also explore different variations for added flavor. These oat bars are easy to make, fun to customize, and nutritious. Enjoy your delicious, homemade snacks!](https://goldendishy.com/wp-content/uploads/2025/07/83a658d4-f414-4ba0-9f79-92aafa211a05-768x768.webp)


