Creamy Tuscan White Bean Soup Flavorful Comfort Bowl
![To make this Creamy Tuscan White Bean Soup, gather these simple ingredients: - 2 cans (15 oz each) white beans (such as cannellini or navy beans), rinsed and drained - 1 tablespoon olive oil - 1 medium onion, finely diced - 2 cloves garlic, minced - 3 cups vegetable broth - 1 cup fresh spinach, roughly chopped - 1 cup full-fat coconut milk (for richer creaminess) - 1 teaspoon Italian seasoning blend - 1/2 teaspoon red pepper flakes (adjust based on your spice preference) - Salt and freshly ground black pepper, to taste - Fresh basil leaves, for garnish You can easily adapt this soup for different diets. Here are some options: - Use gluten-free vegetable broth if you need a gluten-free version. - Swap the coconut milk for almond milk for a lighter base. - If you are avoiding beans, try using lentils instead. - For added protein, consider adding cooked chicken or turkey. While fresh ingredients often taste best, canned ingredients save time. Here’s a breakdown: - Canned White Beans: Convenient and ready to use. Rinse them to remove excess sodium. - Fresh Spinach: Fresh spinach adds a vibrant color and flavor. - Fresh Garlic and Onion: These provide a strong base for your soup. Fresh is always best here. - Vegetable Broth: You can use homemade broth for more flavor or store-bought for quick prep. Using a mix of fresh and canned ingredients helps create a creamy and satisfying soup with less effort. For the full recipe, check it out above! 1. Sauté Aromatics: Start by heating olive oil in a large pot over medium heat. Once the oil is hot, add the diced onion. Sauté for about 5 to 7 minutes until the onion is soft and clear. 2. Add Garlic: Next, stir in minced garlic. Cook it for 1 minute. This will make the kitchen smell amazing. 3. Combine Main Ingredients: Now, add the rinsed white beans, vegetable broth, Italian seasoning, and red pepper flakes. Stir everything well and bring it to a gentle simmer. 4. Simmer for Flavor: Once the soup simmers, reduce the heat to low. Let it cook for about 15 minutes. This helps all the flavors blend nicely. 5. Blend for Creaminess: After 15 minutes, use an immersion blender to blend the soup until it's smooth. If you don’t have one, pour half into a regular blender, blend it, and return it to the pot. 6. Incorporate Coconut Milk: Pour in the full-fat coconut milk and stir to mix well. Then, add chopped spinach. Let it simmer for another 5 minutes until the spinach is tender. 7. Season to Taste: Taste the soup and add salt and black pepper as you like. 8. Serve and Garnish: Scoop the hot soup into bowls. Top with fresh basil leaves for extra flavor. - Prep Time: 10 minutes - Total Cooking Time: 30 minutes - Servings: 4-6 - Large pot - Immersion blender or regular blender - Wooden spoon for stirring - Measuring cups and spoons - Knife and cutting board for chopping With these steps, you can create a tasty and creamy Tuscan white bean soup. For the full recipe, check out the ingredients and instructions above. Enjoy making this warm comfort bowl! To make your soup creamy, use full-fat coconut milk. This adds a rich texture. Blend the soup well for smoothness. An immersion blender works best for this task. If you prefer, transfer half the soup to a regular blender. This method gives a nice blend of creaminess and beans. Add fresh herbs like basil at the end for bright flavor. A squeeze of lemon juice can also enhance taste. If you like it spicy, add more red pepper flakes. A good sprinkle of salt helps all the flavors pop. Consider using homemade vegetable broth for deeper taste. Don't rush the sautéing of the onions. This step builds the base flavor. Avoid blending the soup too early; let it simmer first. This helps flavors meld together. Always taste the soup before serving and adjust seasoning. Too little salt can make it bland. Lastly, don’t skip the fresh basil garnish. It adds color and flavor to each bowl. For the complete process, check out the Full Recipe. {{image_4}} You can easily switch ingredients in this soup to change its taste. Instead of white beans, try chickpeas or lentils. Both give a nice texture. For a richer flavor, add smoked paprika or sun-dried tomatoes. You can also swap coconut milk with heavy cream or cashew cream for a different creaminess. This soup is already vegan and gluten-free. Just ensure all ingredients are certified gluten-free. If you want to add protein, toss in some cooked quinoa or diced tofu. Both keep the soup hearty while sticking to your dietary needs. Get creative with your soup! Add roasted vegetables like carrots or zucchini for extra flavor. Top each bowl with crunchy croutons or toasted nuts for a nice contrast. You can even drizzle some balsamic glaze on top for a sweet touch. For a fresh kick, sprinkle some lemon zest before serving. Explore these ideas to make your creamy Tuscan white bean soup a personal favorite! For the full recipe, check out the [Full Recipe]. After making your Creamy Tuscan White Bean Soup, let it cool down. Once cooled, store it in an airtight container. Glass containers work great for this. Keep it in the fridge for up to 4 days. Make sure to label it with the date. This helps you keep track of freshness. When you’re ready to enjoy the soup again, pour it into a pot. Heat it on medium until it’s warm. Stir it often to prevent sticking. You can also use a microwave. Place the soup in a safe bowl and heat for 1-2 minutes. Stir and check the heat. This ensures even warming. Want to save some for later? You can freeze the soup! Use freezer-safe bags or containers. Leave some space at the top for expansion. The soup can last up to 3 months in the freezer. When you want to eat it, thaw it in the fridge overnight. Then, reheat it as described above. Enjoy your tasty meal whenever you want! For the full details of making this soup, check the Full Recipe. The best way to blend the soup is with an immersion blender. It makes blending easy and quick. Just blend until it’s smooth. If you don’t have one, use a regular blender. Pour half the soup into the blender, blend it, and return it to the pot. Yes, you can use dried beans. You will need to soak them first. Soak the dried beans overnight in water. Then, cook them until they are soft. This will take more time than using canned beans. Once cooked, follow the same steps in the recipe. To make the soup spicier, add more red pepper flakes. Start with an extra 1/4 teaspoon. You can also add hot sauce or diced jalapeños. Stir them in while the soup simmers. Taste as you go to find your perfect heat level. Enjoy experimenting with the spice! In this blog post, we looked at how to make Creamy Tuscan White Bean Soup. We covered ingredients, including options for diets like vegan and gluten-free. I explained step-by-step cooking, along with tips for the best creaminess and flavor. We also discussed storage and answered common questions. Making soup can be fun and easy. Try the variations and enjoy each bowl. You can impress yourself and others with this recipe. It’s a warm dish full of flavor and comfort.](https://goldendishy.com/wp-content/uploads/2025/07/ec110289-7482-4578-8259-8912d7aded83.webp)
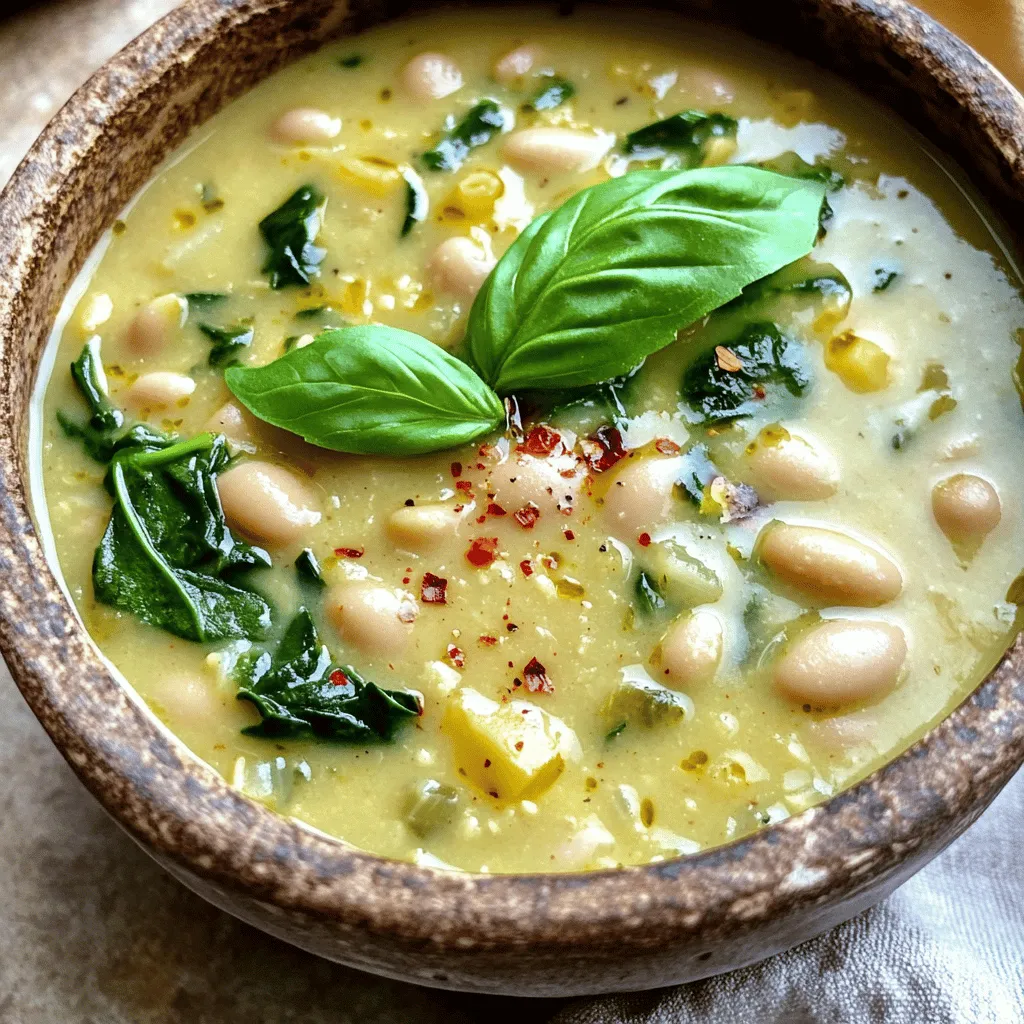
If you crave a warm, satisfying meal, look no further than my Creamy Tuscan White Bean Soup. This dish brings rich flavors and cozy comfort to your table. With simple steps and fresh ingredients, you can whip up a bowl full of goodness. Whether you need a quick weeknight dinner or a soothing lunch, this soup has got you covered. Let’s dive into making this delightful comfort bowl together!
Ingredients
Full Ingredient List for Creamy Tuscan White Bean Soup
To make this Creamy Tuscan White Bean Soup, gather these simple ingredients:
– 2 cans (15 oz each) white beans (such as cannellini or navy beans), rinsed and drained
– 1 tablespoon olive oil
– 1 medium onion, finely diced
– 2 cloves garlic, minced
– 3 cups vegetable broth
– 1 cup fresh spinach, roughly chopped
– 1 cup full-fat coconut milk (for richer creaminess)
– 1 teaspoon Italian seasoning blend
– 1/2 teaspoon red pepper flakes (adjust based on your spice preference)
– Salt and freshly ground black pepper, to taste
– Fresh basil leaves, for garnish
Alternative Ingredients for Dietary Preferences
You can easily adapt this soup for different diets. Here are some options:
– Use gluten-free vegetable broth if you need a gluten-free version.
– Swap the coconut milk for almond milk for a lighter base.
– If you are avoiding beans, try using lentils instead.
– For added protein, consider adding cooked chicken or turkey.
Fresh vs. Canned Ingredients
While fresh ingredients often taste best, canned ingredients save time. Here’s a breakdown:
– Canned White Beans: Convenient and ready to use. Rinse them to remove excess sodium.
– Fresh Spinach: Fresh spinach adds a vibrant color and flavor.
– Fresh Garlic and Onion: These provide a strong base for your soup. Fresh is always best here.
– Vegetable Broth: You can use homemade broth for more flavor or store-bought for quick prep.
Using a mix of fresh and canned ingredients helps create a creamy and satisfying soup with less effort.
Step-by-Step Instructions
Detailed Cooking Steps for Preparation
1. Sauté Aromatics: Start by heating olive oil in a large pot over medium heat. Once the oil is hot, add the diced onion. Sauté for about 5 to 7 minutes until the onion is soft and clear.
2. Add Garlic: Next, stir in minced garlic. Cook it for 1 minute. This will make the kitchen smell amazing.
3. Combine Main Ingredients: Now, add the rinsed white beans, vegetable broth, Italian seasoning, and red pepper flakes. Stir everything well and bring it to a gentle simmer.
4. Simmer for Flavor: Once the soup simmers, reduce the heat to low. Let it cook for about 15 minutes. This helps all the flavors blend nicely.
5. Blend for Creaminess: After 15 minutes, use an immersion blender to blend the soup until it’s smooth. If you don’t have one, pour half into a regular blender, blend it, and return it to the pot.
6. Incorporate Coconut Milk: Pour in the full-fat coconut milk and stir to mix well. Then, add chopped spinach. Let it simmer for another 5 minutes until the spinach is tender.
7. Season to Taste: Taste the soup and add salt and black pepper as you like.
8. Serve and Garnish: Scoop the hot soup into bowls. Top with fresh basil leaves for extra flavor.
Time Breakdown: Prep and Cook Times
– Prep Time: 10 minutes
– Total Cooking Time: 30 minutes
– Servings: 4-6
Equipment Needed for Successful Soup Making
– Large pot
– Immersion blender or regular blender
– Wooden spoon for stirring
– Measuring cups and spoons
– Knife and cutting board for chopping
With these steps, you can create a tasty and creamy Tuscan white bean soup.Enjoy making this warm comfort bowl!
Tips & Tricks
Best Practices for Achieving Creaminess
To make your soup creamy, use full-fat coconut milk. This adds a rich texture. Blend the soup well for smoothness. An immersion blender works best for this task. If you prefer, transfer half the soup to a regular blender. This method gives a nice blend of creaminess and beans.
Flavor Boosting Techniques
Add fresh herbs like basil at the end for bright flavor. A squeeze of lemon juice can also enhance taste. If you like it spicy, add more red pepper flakes. A good sprinkle of salt helps all the flavors pop. Consider using homemade vegetable broth for deeper taste.
Common Mistakes to Avoid
Don’t rush the sautéing of the onions. This step builds the base flavor. Avoid blending the soup too early; let it simmer first. This helps flavors meld together. Always taste the soup before serving and adjust seasoning. Too little salt can make it bland. Lastly, don’t skip the fresh basil garnish. It adds color and flavor to each bowl.
Variations
Ingredient Swaps for Different Flavors
You can easily switch ingredients in this soup to change its taste. Instead of white beans, try chickpeas or lentils. Both give a nice texture. For a richer flavor, add smoked paprika or sun-dried tomatoes. You can also swap coconut milk with heavy cream or cashew cream for a different creaminess.
Vegan and Gluten-Free Options
This soup is already vegan and gluten-free. Just ensure all ingredients are certified gluten-free. If you want to add protein, toss in some cooked quinoa or diced tofu. Both keep the soup hearty while sticking to your dietary needs.
Creative Add-ins and Toppings
Get creative with your soup! Add roasted vegetables like carrots or zucchini for extra flavor. Top each bowl with crunchy croutons or toasted nuts for a nice contrast. You can even drizzle some balsamic glaze on top for a sweet touch. For a fresh kick, sprinkle some lemon zest before serving. Explore these ideas to make your creamy Tuscan white bean soup a personal favorite!
Storage Info
Proper Storage Techniques
After making your Creamy Tuscan White Bean Soup, let it cool down. Once cooled, store it in an airtight container. Glass containers work great for this. Keep it in the fridge for up to 4 days. Make sure to label it with the date. This helps you keep track of freshness.
Reheating Instructions
When you’re ready to enjoy the soup again, pour it into a pot. Heat it on medium until it’s warm. Stir it often to prevent sticking. You can also use a microwave. Place the soup in a safe bowl and heat for 1-2 minutes. Stir and check the heat. This ensures even warming.
Freezing for Later Use
Want to save some for later? You can freeze the soup! Use freezer-safe bags or containers. Leave some space at the top for expansion. The soup can last up to 3 months in the freezer. When you want to eat it, thaw it in the fridge overnight. Then, reheat it as described above. Enjoy your tasty meal whenever you want!
FAQs
What is the best way to blend the soup?
The best way to blend the soup is with an immersion blender. It makes blending easy and quick. Just blend until it’s smooth. If you don’t have one, use a regular blender. Pour half the soup into the blender, blend it, and return it to the pot.
Can I use dried beans instead of canned?
Yes, you can use dried beans. You will need to soak them first. Soak the dried beans overnight in water. Then, cook them until they are soft. This will take more time than using canned beans. Once cooked, follow the same steps in the recipe.
How can I make this soup spicier?
To make the soup spicier, add more red pepper flakes. Start with an extra 1/4 teaspoon. You can also add hot sauce or diced jalapeños. Stir them in while the soup simmers. Taste as you go to find your perfect heat level. Enjoy experimenting with the spice!
In this blog post, we looked at how to make Creamy Tuscan White Bean Soup. We covered ingredients, including options for diets like vegan and gluten-free. I explained step-by-step cooking, along with tips for the best creaminess and flavor. We also discussed storage and answered common questions.
Making soup can be fun and easy. Try the variations and enjoy each bowl. You can impress yourself and others with this recipe. It’s a warm dish full of flavor and comfort.
![To make this Creamy Tuscan White Bean Soup, gather these simple ingredients: - 2 cans (15 oz each) white beans (such as cannellini or navy beans), rinsed and drained - 1 tablespoon olive oil - 1 medium onion, finely diced - 2 cloves garlic, minced - 3 cups vegetable broth - 1 cup fresh spinach, roughly chopped - 1 cup full-fat coconut milk (for richer creaminess) - 1 teaspoon Italian seasoning blend - 1/2 teaspoon red pepper flakes (adjust based on your spice preference) - Salt and freshly ground black pepper, to taste - Fresh basil leaves, for garnish You can easily adapt this soup for different diets. Here are some options: - Use gluten-free vegetable broth if you need a gluten-free version. - Swap the coconut milk for almond milk for a lighter base. - If you are avoiding beans, try using lentils instead. - For added protein, consider adding cooked chicken or turkey. While fresh ingredients often taste best, canned ingredients save time. Here’s a breakdown: - Canned White Beans: Convenient and ready to use. Rinse them to remove excess sodium. - Fresh Spinach: Fresh spinach adds a vibrant color and flavor. - Fresh Garlic and Onion: These provide a strong base for your soup. Fresh is always best here. - Vegetable Broth: You can use homemade broth for more flavor or store-bought for quick prep. Using a mix of fresh and canned ingredients helps create a creamy and satisfying soup with less effort. For the full recipe, check it out above! 1. Sauté Aromatics: Start by heating olive oil in a large pot over medium heat. Once the oil is hot, add the diced onion. Sauté for about 5 to 7 minutes until the onion is soft and clear. 2. Add Garlic: Next, stir in minced garlic. Cook it for 1 minute. This will make the kitchen smell amazing. 3. Combine Main Ingredients: Now, add the rinsed white beans, vegetable broth, Italian seasoning, and red pepper flakes. Stir everything well and bring it to a gentle simmer. 4. Simmer for Flavor: Once the soup simmers, reduce the heat to low. Let it cook for about 15 minutes. This helps all the flavors blend nicely. 5. Blend for Creaminess: After 15 minutes, use an immersion blender to blend the soup until it's smooth. If you don’t have one, pour half into a regular blender, blend it, and return it to the pot. 6. Incorporate Coconut Milk: Pour in the full-fat coconut milk and stir to mix well. Then, add chopped spinach. Let it simmer for another 5 minutes until the spinach is tender. 7. Season to Taste: Taste the soup and add salt and black pepper as you like. 8. Serve and Garnish: Scoop the hot soup into bowls. Top with fresh basil leaves for extra flavor. - Prep Time: 10 minutes - Total Cooking Time: 30 minutes - Servings: 4-6 - Large pot - Immersion blender or regular blender - Wooden spoon for stirring - Measuring cups and spoons - Knife and cutting board for chopping With these steps, you can create a tasty and creamy Tuscan white bean soup. For the full recipe, check out the ingredients and instructions above. Enjoy making this warm comfort bowl! To make your soup creamy, use full-fat coconut milk. This adds a rich texture. Blend the soup well for smoothness. An immersion blender works best for this task. If you prefer, transfer half the soup to a regular blender. This method gives a nice blend of creaminess and beans. Add fresh herbs like basil at the end for bright flavor. A squeeze of lemon juice can also enhance taste. If you like it spicy, add more red pepper flakes. A good sprinkle of salt helps all the flavors pop. Consider using homemade vegetable broth for deeper taste. Don't rush the sautéing of the onions. This step builds the base flavor. Avoid blending the soup too early; let it simmer first. This helps flavors meld together. Always taste the soup before serving and adjust seasoning. Too little salt can make it bland. Lastly, don’t skip the fresh basil garnish. It adds color and flavor to each bowl. For the complete process, check out the Full Recipe. {{image_4}} You can easily switch ingredients in this soup to change its taste. Instead of white beans, try chickpeas or lentils. Both give a nice texture. For a richer flavor, add smoked paprika or sun-dried tomatoes. You can also swap coconut milk with heavy cream or cashew cream for a different creaminess. This soup is already vegan and gluten-free. Just ensure all ingredients are certified gluten-free. If you want to add protein, toss in some cooked quinoa or diced tofu. Both keep the soup hearty while sticking to your dietary needs. Get creative with your soup! Add roasted vegetables like carrots or zucchini for extra flavor. Top each bowl with crunchy croutons or toasted nuts for a nice contrast. You can even drizzle some balsamic glaze on top for a sweet touch. For a fresh kick, sprinkle some lemon zest before serving. Explore these ideas to make your creamy Tuscan white bean soup a personal favorite! For the full recipe, check out the [Full Recipe]. After making your Creamy Tuscan White Bean Soup, let it cool down. Once cooled, store it in an airtight container. Glass containers work great for this. Keep it in the fridge for up to 4 days. Make sure to label it with the date. This helps you keep track of freshness. When you’re ready to enjoy the soup again, pour it into a pot. Heat it on medium until it’s warm. Stir it often to prevent sticking. You can also use a microwave. Place the soup in a safe bowl and heat for 1-2 minutes. Stir and check the heat. This ensures even warming. Want to save some for later? You can freeze the soup! Use freezer-safe bags or containers. Leave some space at the top for expansion. The soup can last up to 3 months in the freezer. When you want to eat it, thaw it in the fridge overnight. Then, reheat it as described above. Enjoy your tasty meal whenever you want! For the full details of making this soup, check the Full Recipe. The best way to blend the soup is with an immersion blender. It makes blending easy and quick. Just blend until it’s smooth. If you don’t have one, use a regular blender. Pour half the soup into the blender, blend it, and return it to the pot. Yes, you can use dried beans. You will need to soak them first. Soak the dried beans overnight in water. Then, cook them until they are soft. This will take more time than using canned beans. Once cooked, follow the same steps in the recipe. To make the soup spicier, add more red pepper flakes. Start with an extra 1/4 teaspoon. You can also add hot sauce or diced jalapeños. Stir them in while the soup simmers. Taste as you go to find your perfect heat level. Enjoy experimenting with the spice! In this blog post, we looked at how to make Creamy Tuscan White Bean Soup. We covered ingredients, including options for diets like vegan and gluten-free. I explained step-by-step cooking, along with tips for the best creaminess and flavor. We also discussed storage and answered common questions. Making soup can be fun and easy. Try the variations and enjoy each bowl. You can impress yourself and others with this recipe. It’s a warm dish full of flavor and comfort.](https://goldendishy.com/wp-content/uploads/2025/07/ec110289-7482-4578-8259-8912d7aded83-300x300.webp)

![- 2 chicken breasts, sliced into thin strips - 1 ripe, juicy mango, diced into small cubes - 1 red bell pepper, sliced into thin strips - 1 yellow bell pepper, sliced into thin strips - 1 cup snap peas, trimmed - 2 cloves garlic, finely minced - 1 tablespoon fresh ginger, grated - 3 tablespoons soy sauce (low sodium recommended) - 1 tablespoon honey (or maple syrup for a vegan option) - 1 tablespoon olive oil or sesame oil - Fresh cilantro leaves for garnish - Cooked jasmine rice or your choice of rice (for serving) The magic of Mango Chicken Stir Fry comes from simple, fresh ingredients. Chicken breasts form the base, bringing protein to your meal. The ripe mango adds sweetness. Bell peppers bring color and crunch. Snap peas give that crisp bite. Aromatics like garlic and ginger add depth. Soy sauce gives a savory touch, while honey balances it out with sweetness. For extra richness, use olive or sesame oil. Fresh cilantro adds a burst of flavor. Jasmine rice makes the perfect bed for this dish. Check out the Full Recipe to gather everything you need! To start, take your chicken breasts and slice them into thin strips. Aim for even cuts so they cook uniformly. Once sliced, season the chicken with salt and pepper. This simple step adds great flavor to the dish. Now, let’s heat the oil. In a large skillet or wok, pour in your olive oil. Set the heat to medium-high and wait until the oil shimmers. This means it’s ready for cooking. Next, add the sliced chicken to the hot pan. Cook the chicken for about 5-7 minutes. Stir frequently to ensure it browns nicely and cooks all the way through. After cooking, remove the chicken from the pan and set it aside on a plate. In the same pan, it’s time for aromatics. Add minced garlic and grated ginger. Sauté these for about 30 seconds. The smell will be amazing, but be careful not to burn them! Now, let’s add the vibrant vegetables. Toss in your sliced red and yellow bell peppers along with the snap peas. Stir-fry them for about 3-4 minutes. You want them tender but still crisp. Return the cooked chicken to the pan. Gently fold in the diced mango to mix everything together. The sweet mango will balance the savory chicken perfectly. Next, let’s make the sauce. In a small bowl, whisk together soy sauce and honey. Pour this mixture over your chicken and veggies. Stir well to coat everything evenly. Let it cook together for an additional 2 minutes. This allows all the flavors to meld. Once done, remove the stir-fry from the heat. It’s now ready to serve. Enjoy your Mango Chicken Stir Fry over cooked jasmine rice. Don’t forget to garnish with fresh cilantro for that extra pop of flavor! For the full recipe, check out the details above. To get the best results, pay close attention to your heat. Use high heat to sear the chicken and veggies. This helps keep the food juicy and full of flavor. If your pan isn't hot enough, the chicken will steam instead of sear. Avoid overcooking your vegetables. Cook them just until they are bright and crisp. This usually takes about 3-4 minutes. If you let them cook too long, they will lose their crunch and color. To add more depth, try spices like cumin or paprika. These can give your dish a unique twist. You can also add a pinch of red pepper flakes for heat. If you want a different sauce, consider teriyaki or sweet chili sauce. These can add a different layer of flavor that pairs well with mango. When serving, place your stir-fry over a bed of fluffy jasmine rice. This adds a nice base and absorbs the sauce. For garnishing, sprinkle fresh cilantro on top. You can also add lime wedges on the side. This adds color and a zesty kick. For the complete experience, check out the Full Recipe. Enjoy your cooking! {{image_4}} You can easily make this dish vegetarian. Use tofu instead of chicken. Firm tofu works best. Press it to remove excess water. Cut it into cubes and sauté until golden. For sauce, you can swap honey with maple syrup. This keeps it vegan-friendly. You might also try tamari instead of soy sauce. It’s gluten-free and tastes great. If you want more protein, shrimp or beef are great choices. For shrimp, cook them for about 3-4 minutes. The shrimp turn pink when done. If you use beef, slice it thinly. Cook it for about 5-7 minutes. Always check it’s fully cooked. You can use flank steak or sirloin for the best flavor. You can switch out fruits and veggies based on the season. In summer, try peaches or pineapple for a juicy twist. Winter calls for hearty vegetables like carrots or broccoli. Adding seasonal greens like kale or spinach boosts nutrition too. Get creative with what you have. This keeps your Mango Chicken Stir Fry fresh and exciting. For the full recipe, check above! To keep your Mango Chicken Stir Fry fresh, store leftovers in an airtight container. Let the stir-fry cool before sealing. It stays good for up to three days in the fridge. Always label your container with the date. This helps you keep track of freshness. When you want to enjoy your stir-fry again, reheat it carefully. You can use a microwave or a skillet. If using a microwave, heat in short bursts. Stir between heating to ensure even warmth. If using a skillet, add a splash of water to keep it moist. Always make sure it reaches a safe temperature of 165°F (74°C) before eating. You can freeze Mango Chicken Stir Fry if you want to store it longer. Place it in a freezer-safe container and leave some space for expansion. It can last up to three months in the freezer. To thaw, move it to the fridge overnight. For reheating, use a skillet or microwave, just like before. This method helps maintain the flavors and textures well. Check the [Full Recipe] for more details on making this dish. Mango Chicken Stir Fry lasts about 3 to 4 days in the fridge. Store it in an airtight container to keep it fresh. Make sure to cool it down before putting it in the fridge. This helps keep the texture and flavor. Yes, you can use frozen mango in this recipe. Frozen mango works well when fresh mango is not available. Just thaw the mango before adding it to the stir-fry. This will help it blend well with the other ingredients. Fresh mango offers a firmer texture and brighter flavor, but frozen is a great alternative. You can serve this dish with jasmine rice, quinoa, or even noodles. These sides soak up all the tasty sauce. You can also add a simple salad on the side. A cucumber salad or a green bean salad pairs nicely with the stir-fry. Yes, the recipe can be made gluten-free. Use tamari or coconut aminos instead of soy sauce. These options give a similar taste without gluten. Always check the labels to ensure there are no hidden gluten ingredients. This blog post covered everything you need to make a tasty Mango Chicken Stir Fry. We explored key ingredients like chicken, mango, and veggies. I provided step-by-step instructions to help you cook with confidence. You learned tips for perfecting the dish, plus variations to keep things fresh. In short, this recipe is fun and easy to customize. Get creative in the kitchen and enjoy your stir-fry!](https://goldendishy.com/wp-content/uploads/2025/06/67704695-6c72-4914-a503-47315e3cdcd3-768x768.webp)
. It includes detailed steps and all the ingredients needed for this dish. Enjoy your cooking! We explored the best ingredients for Garlic Herb Roasted Potatoes and detailed how to prepare them. I shared step-by-step instructions and helpful tips for perfect roasting. We also discussed variations to keep your dishes exciting and how to store leftovers effectively. Remember, the right techniques can make your roasted potatoes shine. With practice, you can impress friends and family with your cooking. Enjoy your culinary adventure!](https://goldendishy.com/wp-content/uploads/2025/06/ecc3322d-c379-4f60-a513-14af97ee26fb-768x768.webp)