
Zucchini Corn Fritters Tasty and Easy Recipe
![To make delicious zucchini corn fritters, gather these fresh ingredients: - Zucchini: 2 medium, grated - Corn: 1 cup, kernels (fresh or frozen) - Flour: 1/2 cup, all-purpose - Cornmeal: 1/4 cup - Eggs: 2 large, beaten - Green Onions: 1/4 cup, finely chopped - Baking Powder: 1/2 teaspoon - Spices: 1 teaspoon chili powder, 1/2 teaspoon garlic powder - Seasoning: Salt and pepper to taste - Olive Oil: For frying - Optional Garnish: Sour cream or yogurt for serving Each ingredient plays a key role in creating the perfect fritters. The zucchini adds moisture and flavor, while corn gives a sweet crunch. Flour and cornmeal provide structure, keeping the fritters together. Eggs bind everything, making them light and fluffy. The spices add warmth and depth. Using fresh corn enhances the taste, but frozen works too. Green onions bring brightness and a mild onion flavor. Baking powder helps them rise, making them airy. Season with salt and pepper to balance the flavors. You can serve these fritters with a dollop of sour cream or yogurt for creaminess. This simple combination of ingredients creates a dish that is tasty, fun, and easy to make. For the full recipe, check out the details above. First, you need to grate the zucchinis. Use a box grater or a food processor for this task. Next, place the grated zucchini into a clean kitchen towel. Gather the ends of the towel and squeeze firmly. This step removes extra moisture. Dry zucchini helps the fritters hold together. If they are too wet, the fritters will be soggy. In a spacious mixing bowl, combine the flour, cornmeal, baking powder, chili powder, garlic powder, salt, and pepper. Use a whisk to blend the dry ingredients well. This ensures that the spices mix evenly. A good mix adds flavor to every bite. Now, add the squeezed zucchini, corn kernels, and chopped green onions to the dry mix. Pour in the beaten eggs. Stir everything together gently. You want the mixture to be thick but still smooth. This right consistency is key for frying. Heat a large skillet over medium heat. Add enough olive oil to cover the bottom by about 1/4 inch. To check if the oil is ready, drop a small spoonful of batter into it. If it sizzles, the oil is hot. Carefully drop heaping tablespoons of the batter into the hot oil. Flatten them slightly with the back of the spoon. Fry the fritters for 3-4 minutes on each side. They should turn golden brown and crispy. Once the fritters are cooked, use a slotted spoon to move them to a plate lined with paper towels. This helps drain excess oil, making them lighter. For a great presentation, stack the fritters on a colorful platter. Add a small bowl of sour cream on the side. You can sprinkle more chopped green onions on top for extra flair. For the full recipe, you can refer to the earlier section. To get the best texture, start by balancing moisture. Squeeze the grated zucchini well. This step is key. Too much water makes soggy fritters. Use a clean kitchen towel to help. After squeezing, you should see less liquid in the bowl. Next, adjust the flour and cornmeal ratios. If your batter feels too wet, add more flour. If it’s too dry, a little more cornmeal helps. Play around with these amounts until you find the perfect mix. A thick but smooth batter works best. Want to kick up the flavor? Try adding spices like cumin or paprika. Fresh herbs like cilantro or parsley also add a nice touch. You can even mix in some grated cheese. Feta or cheddar works great! These little changes can make your fritters feel new and exciting. You can also combine different ingredients for a twist. How about adding diced bell peppers or jalapeños? They can bring extra crunch and heat. Be creative and experiment with flavors you enjoy. When frying, the oil temperature is very important. Heat the oil over medium heat. If it’s too hot, the outside burns before the inside cooks. If it’s too low, your fritters soak up oil and become greasy. A small drop of batter should sizzle immediately when it hits the oil. Avoid overcrowding your skillet. Fry in batches. If you put too many fritters in at once, they won’t cook evenly. Leave space around each fritter so they get crispy. This way, you enjoy that golden-brown crunch with every bite. For the full recipe, check out the detailed steps above. {{image_4}} You can easily swap ingredients in your zucchini corn fritters. If you want to replace eggs, try flaxseed or applesauce. Just mix one tablespoon of ground flaxseed with three tablespoons of water. Let it sit for a few minutes to thicken, then add it to your batter. Applesauce works well too. Use 1/4 cup of unsweetened applesauce instead of eggs. For a gluten-free version, consider using almond flour or chickpea flour. Almond flour keeps the fritters light and nutty. Chickpea flour adds a nice flavor and helps bind the fritters. Both options make your dish safe for gluten-sensitive friends. You can also change up your fritters with seasonal veggies. Add bell peppers for a sweet crunch or spinach for a pop of color. Both will enhance the flavor and nutrition of your fritters. Try using different types of cheese, too. Feta adds a tangy kick, while cheddar gives a rich, creamy taste. When it comes to dipping sauces, think outside the box! A zesty yogurt dip with lemon and herbs pairs nicely with the fritters. You can also serve them with a spicy salsa or a creamy avocado dip. For creative serving ideas, stack the fritters high on a colorful platter. They make a great appetizer or snack. Add a small bowl of your favorite dip for guests to enjoy. Whether it's a party or a family meal, these fritters are sure to impress! For the full recipe, check out the ingredients and steps provided above. To keep your zucchini corn fritters fresh, store them in an airtight container. Place parchment paper between layers to prevent sticking. Refrigerate them right after they cool down. They stay good for about 3 to 4 days. If you notice any water or moisture in the container, change the paper to keep them crispy. For the best results, reheat fritters in a skillet on medium heat. This method helps them regain their crispiness. Add a little olive oil to the pan and place the fritters in it. Heat for about 2 to 3 minutes on each side. Avoid using the microwave, as it can make them soggy and lose that delightful crunch. To freeze fritters, let them cool completely first. Lay them out in a single layer on a baking sheet. Freeze until solid, then transfer them to a zip-top bag. They can last in the freezer for up to 2 months. When you’re ready to enjoy, thaw them in the fridge overnight before reheating in a skillet. This method keeps them tasty and crispy. To keep your fritters intact, proper binding is key. Always squeeze out extra moisture from the grated zucchini. This step helps your fritters hold together better. You can also add more flour if the batter seems too wet. Heat plays a big role as well. Make sure your oil is hot enough before adding the fritters. If the oil is cold, the fritters will absorb too much oil and may break apart. Fry them for about 3-4 minutes per side until golden brown. Yes, you can make zucchini corn fritters ahead of time. Prepare the batter and store it in the fridge for up to one day. Cover it tightly to keep it fresh. For storage, place cooked fritters in an airtight container. They will last for about three days in the fridge. When you are ready to eat, reheat them in a skillet. This keeps them crispy and tasty. These fritters pair well with many sides. A fresh salad adds crunch and color. You can also serve them with a yogurt dip or a tangy salsa. For drinks, consider a light beer or lemonade. They complement the flavors nicely. You can even enjoy them with a glass of refreshing iced tea. For the complete recipe, check the [Full Recipe]. To make delicious zucchini corn fritters, start with great ingredients and careful preparation. Grate zucchini and squeeze out moisture for a perfect texture. Mix the dry ingredients evenly, then combine everything for a tasty batter. Fry them in hot oil until golden brown, and drain on paper towels. Remember to get creative with variations and enjoy them with dips. By following these tips, you can impress friends and family with your cooking skills. Enjoy every bite of these delightful fritters!](https://goldendishy.com/wp-content/uploads/2025/07/84c05464-2612-47b3-960d-4590890a85a0.webp)
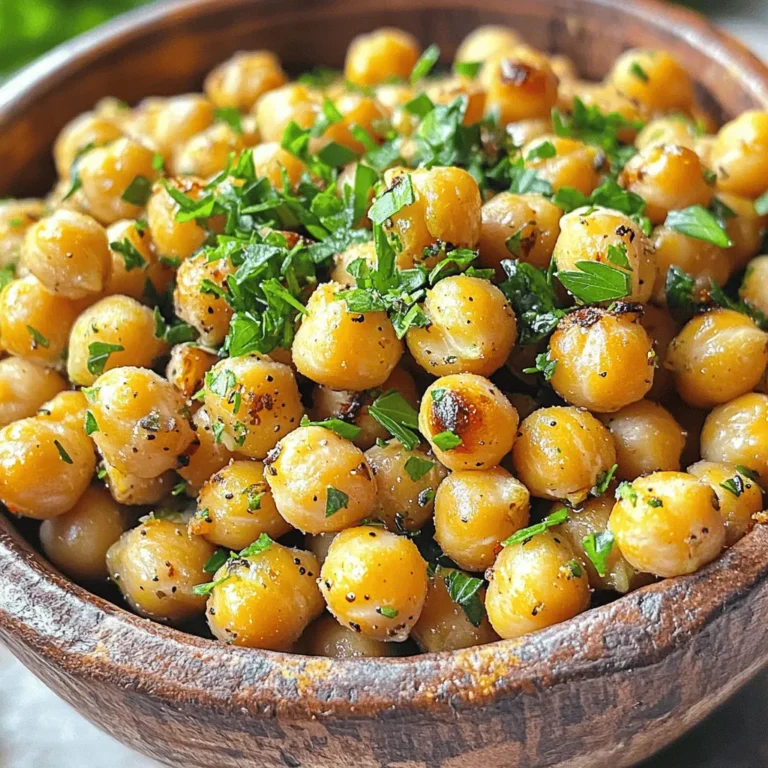
If you’re craving a snack that’s both tasty and easy to make, look no further! These Zucchini Corn Fritters pack a delicious punch with fresh veggies and simple ingredients. They’re perfect for a quick appetizer or a light meal. In this post, I’ll share everything you need to create crispy, golden fritters that will impress your family and friends. Let’s dive into this simple and satisfying recipe!
Ingredients
To make delicious zucchini corn fritters, gather these fresh ingredients:
– Zucchini: 2 medium, grated
– Corn: 1 cup, kernels (fresh or frozen)
– Flour: 1/2 cup, all-purpose
– Cornmeal: 1/4 cup
– Eggs: 2 large, beaten
– Green Onions: 1/4 cup, finely chopped
– Baking Powder: 1/2 teaspoon
– Spices: 1 teaspoon chili powder, 1/2 teaspoon garlic powder
– Seasoning: Salt and pepper to taste
– Olive Oil: For frying
– Optional Garnish: Sour cream or yogurt for serving
Each ingredient plays a key role in creating the perfect fritters. The zucchini adds moisture and flavor, while corn gives a sweet crunch. Flour and cornmeal provide structure, keeping the fritters together. Eggs bind everything, making them light and fluffy. The spices add warmth and depth.
Using fresh corn enhances the taste, but frozen works too. Green onions bring brightness and a mild onion flavor. Baking powder helps them rise, making them airy. Season with salt and pepper to balance the flavors.
You can serve these fritters with a dollop of sour cream or yogurt for creaminess. This simple combination of ingredients creates a dish that is tasty, fun, and easy to make.
Step-by-Step Instructions
Preparation of Zucchini
First, you need to grate the zucchinis. Use a box grater or a food processor for this task. Next, place the grated zucchini into a clean kitchen towel. Gather the ends of the towel and squeeze firmly. This step removes extra moisture. Dry zucchini helps the fritters hold together. If they are too wet, the fritters will be soggy.
Mixing Dry Ingredients
In a spacious mixing bowl, combine the flour, cornmeal, baking powder, chili powder, garlic powder, salt, and pepper. Use a whisk to blend the dry ingredients well. This ensures that the spices mix evenly. A good mix adds flavor to every bite.
Combining All Ingredients
Now, add the squeezed zucchini, corn kernels, and chopped green onions to the dry mix. Pour in the beaten eggs. Stir everything together gently. You want the mixture to be thick but still smooth. This right consistency is key for frying.
Cooking the Fritters
Heat a large skillet over medium heat. Add enough olive oil to cover the bottom by about 1/4 inch. To check if the oil is ready, drop a small spoonful of batter into it. If it sizzles, the oil is hot. Carefully drop heaping tablespoons of the batter into the hot oil. Flatten them slightly with the back of the spoon. Fry the fritters for 3-4 minutes on each side. They should turn golden brown and crispy.
Draining and Serving
Once the fritters are cooked, use a slotted spoon to move them to a plate lined with paper towels. This helps drain excess oil, making them lighter. For a great presentation, stack the fritters on a colorful platter. Add a small bowl of sour cream on the side. You can sprinkle more chopped green onions on top for extra flair.
Tips & Tricks
Perfecting the Fritter Texture
To get the best texture, start by balancing moisture. Squeeze the grated zucchini well. This step is key. Too much water makes soggy fritters. Use a clean kitchen towel to help. After squeezing, you should see less liquid in the bowl.
Next, adjust the flour and cornmeal ratios. If your batter feels too wet, add more flour. If it’s too dry, a little more cornmeal helps. Play around with these amounts until you find the perfect mix. A thick but smooth batter works best.
Flavor Enhancements
Want to kick up the flavor? Try adding spices like cumin or paprika. Fresh herbs like cilantro or parsley also add a nice touch. You can even mix in some grated cheese. Feta or cheddar works great! These little changes can make your fritters feel new and exciting.
You can also combine different ingredients for a twist. How about adding diced bell peppers or jalapeños? They can bring extra crunch and heat. Be creative and experiment with flavors you enjoy.
Cooking Tips
When frying, the oil temperature is very important. Heat the oil over medium heat. If it’s too hot, the outside burns before the inside cooks. If it’s too low, your fritters soak up oil and become greasy. A small drop of batter should sizzle immediately when it hits the oil.
Avoid overcrowding your skillet. Fry in batches. If you put too many fritters in at once, they won’t cook evenly. Leave space around each fritter so they get crispy. This way, you enjoy that golden-brown crunch with every bite.

Variations
Ingredient Substitutions
You can easily swap ingredients in your zucchini corn fritters. If you want to replace eggs, try flaxseed or applesauce. Just mix one tablespoon of ground flaxseed with three tablespoons of water. Let it sit for a few minutes to thicken, then add it to your batter. Applesauce works well too. Use 1/4 cup of unsweetened applesauce instead of eggs.
For a gluten-free version, consider using almond flour or chickpea flour. Almond flour keeps the fritters light and nutty. Chickpea flour adds a nice flavor and helps bind the fritters. Both options make your dish safe for gluten-sensitive friends.
Seasonal Variations
You can also change up your fritters with seasonal veggies. Add bell peppers for a sweet crunch or spinach for a pop of color. Both will enhance the flavor and nutrition of your fritters. Try using different types of cheese, too. Feta adds a tangy kick, while cheddar gives a rich, creamy taste.
Serving Suggestions
When it comes to dipping sauces, think outside the box! A zesty yogurt dip with lemon and herbs pairs nicely with the fritters. You can also serve them with a spicy salsa or a creamy avocado dip.
For creative serving ideas, stack the fritters high on a colorful platter. They make a great appetizer or snack. Add a small bowl of your favorite dip for guests to enjoy. Whether it’s a party or a family meal, these fritters are sure to impress!
Storage Info
Storing Leftovers
To keep your zucchini corn fritters fresh, store them in an airtight container. Place parchment paper between layers to prevent sticking. Refrigerate them right after they cool down. They stay good for about 3 to 4 days. If you notice any water or moisture in the container, change the paper to keep them crispy.
Reheating Instructions
For the best results, reheat fritters in a skillet on medium heat. This method helps them regain their crispiness. Add a little olive oil to the pan and place the fritters in it. Heat for about 2 to 3 minutes on each side. Avoid using the microwave, as it can make them soggy and lose that delightful crunch.
Freezing Fritters
To freeze fritters, let them cool completely first. Lay them out in a single layer on a baking sheet. Freeze until solid, then transfer them to a zip-top bag. They can last in the freezer for up to 2 months. When you’re ready to enjoy, thaw them in the fridge overnight before reheating in a skillet. This method keeps them tasty and crispy.
FAQs
How do I prevent my zucchini corn fritters from falling apart?
To keep your fritters intact, proper binding is key. Always squeeze out extra moisture from the grated zucchini. This step helps your fritters hold together better. You can also add more flour if the batter seems too wet.
Heat plays a big role as well. Make sure your oil is hot enough before adding the fritters. If the oil is cold, the fritters will absorb too much oil and may break apart. Fry them for about 3-4 minutes per side until golden brown.
Can I make these fritters ahead of time?
Yes, you can make zucchini corn fritters ahead of time. Prepare the batter and store it in the fridge for up to one day. Cover it tightly to keep it fresh.
For storage, place cooked fritters in an airtight container. They will last for about three days in the fridge. When you are ready to eat, reheat them in a skillet. This keeps them crispy and tasty.
What can I serve with zucchini corn fritters?
These fritters pair well with many sides. A fresh salad adds crunch and color. You can also serve them with a yogurt dip or a tangy salsa.
For drinks, consider a light beer or lemonade. They complement the flavors nicely. You can even enjoy them with a glass of refreshing iced tea.
To make delicious zucchini corn fritters, start with great ingredients and careful preparation. Grate zucchini and squeeze out moisture for a perfect texture. Mix the dry ingredients evenly, then combine everything for a tasty batter. Fry them in hot oil until golden brown, and drain on paper towels. Remember to get creative with variations and enjoy them with dips. By following these tips, you can impress friends and family with your cooking skills. Enjoy every bite of these delightful fritters!
![To make delicious zucchini corn fritters, gather these fresh ingredients: - Zucchini: 2 medium, grated - Corn: 1 cup, kernels (fresh or frozen) - Flour: 1/2 cup, all-purpose - Cornmeal: 1/4 cup - Eggs: 2 large, beaten - Green Onions: 1/4 cup, finely chopped - Baking Powder: 1/2 teaspoon - Spices: 1 teaspoon chili powder, 1/2 teaspoon garlic powder - Seasoning: Salt and pepper to taste - Olive Oil: For frying - Optional Garnish: Sour cream or yogurt for serving Each ingredient plays a key role in creating the perfect fritters. The zucchini adds moisture and flavor, while corn gives a sweet crunch. Flour and cornmeal provide structure, keeping the fritters together. Eggs bind everything, making them light and fluffy. The spices add warmth and depth. Using fresh corn enhances the taste, but frozen works too. Green onions bring brightness and a mild onion flavor. Baking powder helps them rise, making them airy. Season with salt and pepper to balance the flavors. You can serve these fritters with a dollop of sour cream or yogurt for creaminess. This simple combination of ingredients creates a dish that is tasty, fun, and easy to make. For the full recipe, check out the details above. First, you need to grate the zucchinis. Use a box grater or a food processor for this task. Next, place the grated zucchini into a clean kitchen towel. Gather the ends of the towel and squeeze firmly. This step removes extra moisture. Dry zucchini helps the fritters hold together. If they are too wet, the fritters will be soggy. In a spacious mixing bowl, combine the flour, cornmeal, baking powder, chili powder, garlic powder, salt, and pepper. Use a whisk to blend the dry ingredients well. This ensures that the spices mix evenly. A good mix adds flavor to every bite. Now, add the squeezed zucchini, corn kernels, and chopped green onions to the dry mix. Pour in the beaten eggs. Stir everything together gently. You want the mixture to be thick but still smooth. This right consistency is key for frying. Heat a large skillet over medium heat. Add enough olive oil to cover the bottom by about 1/4 inch. To check if the oil is ready, drop a small spoonful of batter into it. If it sizzles, the oil is hot. Carefully drop heaping tablespoons of the batter into the hot oil. Flatten them slightly with the back of the spoon. Fry the fritters for 3-4 minutes on each side. They should turn golden brown and crispy. Once the fritters are cooked, use a slotted spoon to move them to a plate lined with paper towels. This helps drain excess oil, making them lighter. For a great presentation, stack the fritters on a colorful platter. Add a small bowl of sour cream on the side. You can sprinkle more chopped green onions on top for extra flair. For the full recipe, you can refer to the earlier section. To get the best texture, start by balancing moisture. Squeeze the grated zucchini well. This step is key. Too much water makes soggy fritters. Use a clean kitchen towel to help. After squeezing, you should see less liquid in the bowl. Next, adjust the flour and cornmeal ratios. If your batter feels too wet, add more flour. If it’s too dry, a little more cornmeal helps. Play around with these amounts until you find the perfect mix. A thick but smooth batter works best. Want to kick up the flavor? Try adding spices like cumin or paprika. Fresh herbs like cilantro or parsley also add a nice touch. You can even mix in some grated cheese. Feta or cheddar works great! These little changes can make your fritters feel new and exciting. You can also combine different ingredients for a twist. How about adding diced bell peppers or jalapeños? They can bring extra crunch and heat. Be creative and experiment with flavors you enjoy. When frying, the oil temperature is very important. Heat the oil over medium heat. If it’s too hot, the outside burns before the inside cooks. If it’s too low, your fritters soak up oil and become greasy. A small drop of batter should sizzle immediately when it hits the oil. Avoid overcrowding your skillet. Fry in batches. If you put too many fritters in at once, they won’t cook evenly. Leave space around each fritter so they get crispy. This way, you enjoy that golden-brown crunch with every bite. For the full recipe, check out the detailed steps above. {{image_4}} You can easily swap ingredients in your zucchini corn fritters. If you want to replace eggs, try flaxseed or applesauce. Just mix one tablespoon of ground flaxseed with three tablespoons of water. Let it sit for a few minutes to thicken, then add it to your batter. Applesauce works well too. Use 1/4 cup of unsweetened applesauce instead of eggs. For a gluten-free version, consider using almond flour or chickpea flour. Almond flour keeps the fritters light and nutty. Chickpea flour adds a nice flavor and helps bind the fritters. Both options make your dish safe for gluten-sensitive friends. You can also change up your fritters with seasonal veggies. Add bell peppers for a sweet crunch or spinach for a pop of color. Both will enhance the flavor and nutrition of your fritters. Try using different types of cheese, too. Feta adds a tangy kick, while cheddar gives a rich, creamy taste. When it comes to dipping sauces, think outside the box! A zesty yogurt dip with lemon and herbs pairs nicely with the fritters. You can also serve them with a spicy salsa or a creamy avocado dip. For creative serving ideas, stack the fritters high on a colorful platter. They make a great appetizer or snack. Add a small bowl of your favorite dip for guests to enjoy. Whether it's a party or a family meal, these fritters are sure to impress! For the full recipe, check out the ingredients and steps provided above. To keep your zucchini corn fritters fresh, store them in an airtight container. Place parchment paper between layers to prevent sticking. Refrigerate them right after they cool down. They stay good for about 3 to 4 days. If you notice any water or moisture in the container, change the paper to keep them crispy. For the best results, reheat fritters in a skillet on medium heat. This method helps them regain their crispiness. Add a little olive oil to the pan and place the fritters in it. Heat for about 2 to 3 minutes on each side. Avoid using the microwave, as it can make them soggy and lose that delightful crunch. To freeze fritters, let them cool completely first. Lay them out in a single layer on a baking sheet. Freeze until solid, then transfer them to a zip-top bag. They can last in the freezer for up to 2 months. When you’re ready to enjoy, thaw them in the fridge overnight before reheating in a skillet. This method keeps them tasty and crispy. To keep your fritters intact, proper binding is key. Always squeeze out extra moisture from the grated zucchini. This step helps your fritters hold together better. You can also add more flour if the batter seems too wet. Heat plays a big role as well. Make sure your oil is hot enough before adding the fritters. If the oil is cold, the fritters will absorb too much oil and may break apart. Fry them for about 3-4 minutes per side until golden brown. Yes, you can make zucchini corn fritters ahead of time. Prepare the batter and store it in the fridge for up to one day. Cover it tightly to keep it fresh. For storage, place cooked fritters in an airtight container. They will last for about three days in the fridge. When you are ready to eat, reheat them in a skillet. This keeps them crispy and tasty. These fritters pair well with many sides. A fresh salad adds crunch and color. You can also serve them with a yogurt dip or a tangy salsa. For drinks, consider a light beer or lemonade. They complement the flavors nicely. You can even enjoy them with a glass of refreshing iced tea. For the complete recipe, check the [Full Recipe]. To make delicious zucchini corn fritters, start with great ingredients and careful preparation. Grate zucchini and squeeze out moisture for a perfect texture. Mix the dry ingredients evenly, then combine everything for a tasty batter. Fry them in hot oil until golden brown, and drain on paper towels. Remember to get creative with variations and enjoy them with dips. By following these tips, you can impress friends and family with your cooking skills. Enjoy every bite of these delightful fritters!](https://goldendishy.com/wp-content/uploads/2025/07/84c05464-2612-47b3-960d-4590890a85a0-300x300.webp)


![For a delightful Easy Cucumber Slaw, you need simple, fresh ingredients. Here’s what you will gather: - Cucumbers - Carrot - Red bell pepper - Green onions - Fresh cilantro - Dressing components: - Rice vinegar - Honey or maple syrup - Sesame oil - Soy sauce - Seasoning: - Salt - Pepper - Sesame seeds This vibrant mix of veggies adds color and crunch. The dressing ties everything together with its sweet and tangy flavor. Each ingredient plays a role in making this slaw both refreshing and satisfying. You can find the full recipe for preparation details. Enjoy making this easy side dish that complements any meal! To start, gather your fresh veggies. You need 2 large cucumbers, 1 medium carrot, 1 red bell pepper, and 3 green onions. First, slice the cucumbers into thin rounds. Next, julienne the carrot into thin strips. Then, slice the red bell pepper into strips. Finally, chop the green onions into small pieces. Place all the veggies in a large mixing bowl. Next, let’s make the dressing. In a small bowl, combine 1/4 cup of rice vinegar, 1 tablespoon of honey or maple syrup, 1 tablespoon of sesame oil, and 1 teaspoon of soy sauce. Whisk this mixture until it is smooth and well combined. This dressing will add a delightful flavor to your slaw. Now it’s time to put everything together. Pour the dressing over the mixed vegetables in the large bowl. Toss gently to coat all the veggies evenly. Add 1/4 cup of freshly chopped cilantro and season with salt and freshly cracked pepper to taste. Mix it all again with gentle motions. Let the slaw sit for at least 10 minutes. This resting time helps the flavors blend nicely. Just before serving, sprinkle sesame seeds on top for extra crunch. Enjoy your Easy Cucumber Slaw! For the full recipe, please check the link. Letting the slaw sit is key. After you mix the veggies and dressing, rest it for at least 10 minutes. This time helps the flavors blend. The cucumbers soften just a bit, making every bite tasty. The longer you wait, the better the slaw tastes. You can even let it sit for up to 30 minutes if you want a stronger flavor. Presentation makes a big difference. Serve the slaw in a bright, shallow bowl. This way, the colors of the veggies shine. Add a few sprigs of cilantro on top. This adds extra green and freshness. You can also serve the slaw with a side of lime wedges. This gives guests a chance to add a zesty kick. Want to boost the taste? Consider adding lime juice. Just a squeeze before serving brightens the whole dish. You could also add sliced jalapeños for some heat. If you like crunch, try adding chopped nuts like peanuts or cashews. For a sweet twist, mix in some diced mango or pineapple. These small changes can make your Easy Cucumber Slaw unique and exciting. {{image_4}} You can mix in many other vegetables for added crunch and flavor. Try adding shredded cabbage for a nice texture. Radishes also bring a peppery bite that pairs well with cucumbers. You might enjoy diced tomatoes, which can add some juiciness. You can swap in green bell peppers for a milder taste. Even thinly sliced snap peas can add a fun pop! Feel free to experiment based on what you have at home. The dressing can change the whole vibe of the slaw. For a creamier option, mix in some Greek yogurt or mayo. You can also try a zesty citrus dressing with lime or lemon juice. If you want a spicy kick, add some chili paste or Sriracha. A sesame peanut dressing can give a rich, nutty flavor. By changing the dressings, you can create a new dish each time! If you're vegan, simply use maple syrup instead of honey. This slaw is already gluten-free if you choose gluten-free soy sauce. You can also leave out the soy sauce for a fresh taste. If you want a low-carb version, try using spiralized zucchini instead of cucumbers. These options make this slaw friendly for many diets, so everyone can enjoy it! To keep your Easy Cucumber Slaw fresh, store it in an airtight container. This keeps moisture out and prevents sogginess. If you have leftover slaw, ensure it cools to room temperature first. Once cooled, seal it tightly and place it in the fridge. I recommend eating it within three days for the best taste. For the best quality, consume the slaw within three days. After that, the cucumbers can become too soft. If you notice any signs of spoilage, like an off smell or sliminess, it’s best to throw it away. The quicker you eat it, the fresher it will taste. You don’t need to reheat cucumber slaw. It’s best enjoyed cold. If you want to freshen it up after storage, add a little more dressing or a splash of vinegar. This will revive the flavors and keep it crisp. Enjoy it straight from the fridge for a refreshing bite! For the full recipe, check out the [Full Recipe]. For the best slaw, I recommend using English cucumbers. They are long and slender, with thin skin and few seeds. Their taste is mild and crisp, which makes them perfect for salads. You can also use Persian cucumbers. They are smaller, crunchy, and sweet. Avoid regular garden cucumbers, as they can be bitter and watery. The right cucumber gives your slaw a fresh flavor. Yes, you can prep your cucumber slaw the night before. Just cut the cucumbers and other veggies, and store them in an airtight container. Keep the dressing separate until you are ready to serve. Mixing them right before serving keeps the veggies crisp and fresh. This way, you save time and still get great taste. Cucumber slaw can last about 2 to 3 days in the fridge. To keep it fresh, store it in an airtight container. As time passes, the cucumbers may release water. If that happens, just drain the excess liquid before serving. Always check for any off smells or changes before eating. Enjoy your slaw while it’s still at its best! This blog post covered the key ingredients and steps to make a fresh cucumber slaw. I shared tips for storage, serving, and variations that keep it tasty. Remember that resting the slaw boosts its flavor. Whether you use different veggies or dressings, make it your own. Storing leftovers properly helps maintain freshness. Enjoy your slaw as a side dish or snack. It’s easy, fun, and delicious! Happy cooking!](https://goldendishy.com/wp-content/uploads/2025/07/45f43f4c-bd14-4cdb-930e-3d5f55452c18-768x768.webp)

![- 4 medium-sized beets - 4 cups mixed greens - 1/2 cup goat cheese - 1/4 cup walnuts - 1/4 cup dried cranberries or pomegranate seeds - 1/4 cup extra virgin olive oil - 2 tablespoons balsamic vinegar - 1 teaspoon honey - Salt and pepper - Fresh parsley for garnish The ingredients in this salad make it a real treat. The beets bring a sweet earthiness. They roast beautifully, turning soft and tender. Mixed greens add a fresh crunch. Goat cheese offers creamy tanginess. Walnuts give a nice crunch and healthy fats. Dried cranberries or pomegranate seeds add a pop of sweetness. This salad is not just tasty; it is also healthy. Each serving has about: - Calories: 350 - Fats: 25g - Proteins: 8g - Carbohydrates: 30g By using wholesome ingredients, you create a dish that nourishes as well as delights. This salad contains common allergens: - Dairy (goat cheese) - Nuts (walnuts) Always check for allergies before serving. You can easily swap goat cheese and walnuts for alternatives if needed. To start, heat your oven to 400°F (200°C). Wrap each beet in aluminum foil. Make sure they are sealed tight so they steam well. Place the wrapped beets on a baking sheet. This will catch any drips. Roast the beets for about 45 minutes to 1 hour. They should be tender when pierced with a fork. Once done, take them out and let them cool. When they are cool enough, peel off the skins. You might want to wear gloves to keep your hands clean. For the dressing, gather these ingredients: - 1/4 cup extra virgin olive oil - 2 tablespoons balsamic vinegar - 1 teaspoon honey - Salt and pepper to taste In a small bowl, whisk the olive oil, balsamic vinegar, honey, and a pinch of salt and pepper. Taste it to see if you like the balance of flavors. Adjust the seasoning if needed. This dressing will add a nice tangy kick to your salad. Now it's time to put everything together. Slice the cooled beets into wedges or rounds. In a large bowl, combine the mixed greens, sliced beets, toasted walnuts, and dried cranberries or pomegranate seeds. Toss them gently to mix evenly. Drizzle some of the dressing over the salad and toss again, so all ingredients are coated. For presentation, transfer the salad to a nice serving platter or divide it into individual plates. Crumble the goat cheese over the top for a creamy texture. Drizzle a bit more dressing over the cheese. If you like, add fresh parsley for color and flavor. Follow the [Full Recipe] for detailed steps and measurements. Remember, a beautiful salad is always a joy to eat! Choosing the right beets Select firm, smooth beets. Look for small to medium sizes, as they roast better. Avoid any that feel soft or have spots. How to tell when beets are done Beets are ready when a fork easily pierces them. Depending on size, this takes 45 minutes to 1 hour at 400°F. Let them cool before peeling. Substitutions for balsamic vinegar If you want a twist, use red wine vinegar or apple cider vinegar. Both add a tasty zing without losing the salad's charm. Adding herbs to the dressing Fresh herbs like thyme or basil brighten the dressing. Chop them finely and mix in for added flavor. A little goes a long way. Ideal accompaniments This salad pairs well with crusty bread or a light soup. These sides enhance the meal without overpowering the main dish. Pairing with proteins for a meal Add grilled chicken or shrimp for a hearty option. If you're vegetarian, consider roasted chickpeas or tofu. Both options make it filling and delicious. For the full recipe, check out the [Full Recipe]. {{image_4}} You can make your salad heartier by adding proteins. Grilled chicken or shrimp works well. Simply cook the protein and slice it. Top your salad with it for extra flavor. If you want a vegetarian option, use tofu. Cube the tofu and sauté it until golden. This adds protein and a nice texture. Incorporating seasonal fruits or veggies can elevate your salad. In spring, try fresh strawberries or asparagus. In the fall, add diced apples or roasted squash. These ingredients not only taste great but also add color. Consider swapping nuts for crunch. Almonds, pecans, or sunflower seeds are all tasty options. For a vegan version, simply replace goat cheese. Use cashew cream or a vegan cheese. These alternatives still give you that creamy texture. You can also experiment with dressings. A lemon vinaigrette or tahini dressing adds a new twist. Both options keep the salad fresh while staying plant-based. For the full recipe, check out the complete guide above! To store leftovers, place the salad in an airtight container. This keeps it fresh and prevents the greens from wilting. You can add a paper towel to absorb excess moisture. Store it in the fridge for up to three days. Keep the dressing separate until serving. This helps maintain the salad's crunch. You cannot freeze the whole salad. Freezing changes the texture of the greens, making them mushy. However, you can freeze roasted beets. Place them in a freezer-safe bag and squeeze out the air. They will stay fresh for about three months. Thaw them in the fridge before using. Beets last about one to two weeks in the fridge. Keep them unpeeled in a cool, dark place. Mixed greens should be used within five days for best taste. Goat cheese stays fresh for about one week once opened. Keep it tightly wrapped to avoid drying out. Roasting beets is simple and rewarding. Here’s how: 1. Preheat your oven to 400°F (200°C). 2. Scrub each beet clean and trim off the tops and bottoms. 3. Wrap each beet in aluminum foil. This keeps them moist. 4. Place the wrapped beets on a baking sheet. 5. Roast for 45 minutes to 1 hour. They are done when a fork easily pierces them. 6. Let them cool, then peel off the skins. Wear gloves to avoid staining your hands. Roasting beets brings out their natural sweetness. It makes them tender and full of flavor. You can use them in salads, sandwiches, or as a side dish. You can get a head start on this salad! Here are some tips: - Roast the beets a day early. Store them in the fridge. They will stay fresh. - Prepare the dressing ahead of time. Keep it in a jar. Shake before use. - Wash and dry the mixed greens. Store them in a container with a paper towel to absorb moisture. Assemble the salad just before serving. This keeps it crisp and fresh. If you need an alternative to goat cheese, here are some creamy options: - Feta cheese adds a salty flavor and crumbly texture. - Cream cheese is soft and rich, perfect for spreading. - Ricotta cheese is light and fluffy, giving a mild taste. These substitutes work well in the salad. Choose one that you like best! For the full recipe, check out the Roasted Beet and Goat Cheese Salad. This blog shared a tasty beet salad recipe, from ingredients to storage tips. You learned how to roast beets and mix a great dressing. I also provided variations to suit different diets, plus storage advice. Keep experimenting with ingredients and enjoy the colorful flavors. Simple changes can make each meal unique. This salad is not just healthy; it's fun and versatile. Enjoy your cooking journey and impress your family and friends with this easy dish!](https://goldendishy.com/wp-content/uploads/2025/06/47a93f65-23b8-4270-bc0e-899490eb93a9-768x768.webp)