Viral Cinnamon Roll Pancakes Delightfully Sweet Treat
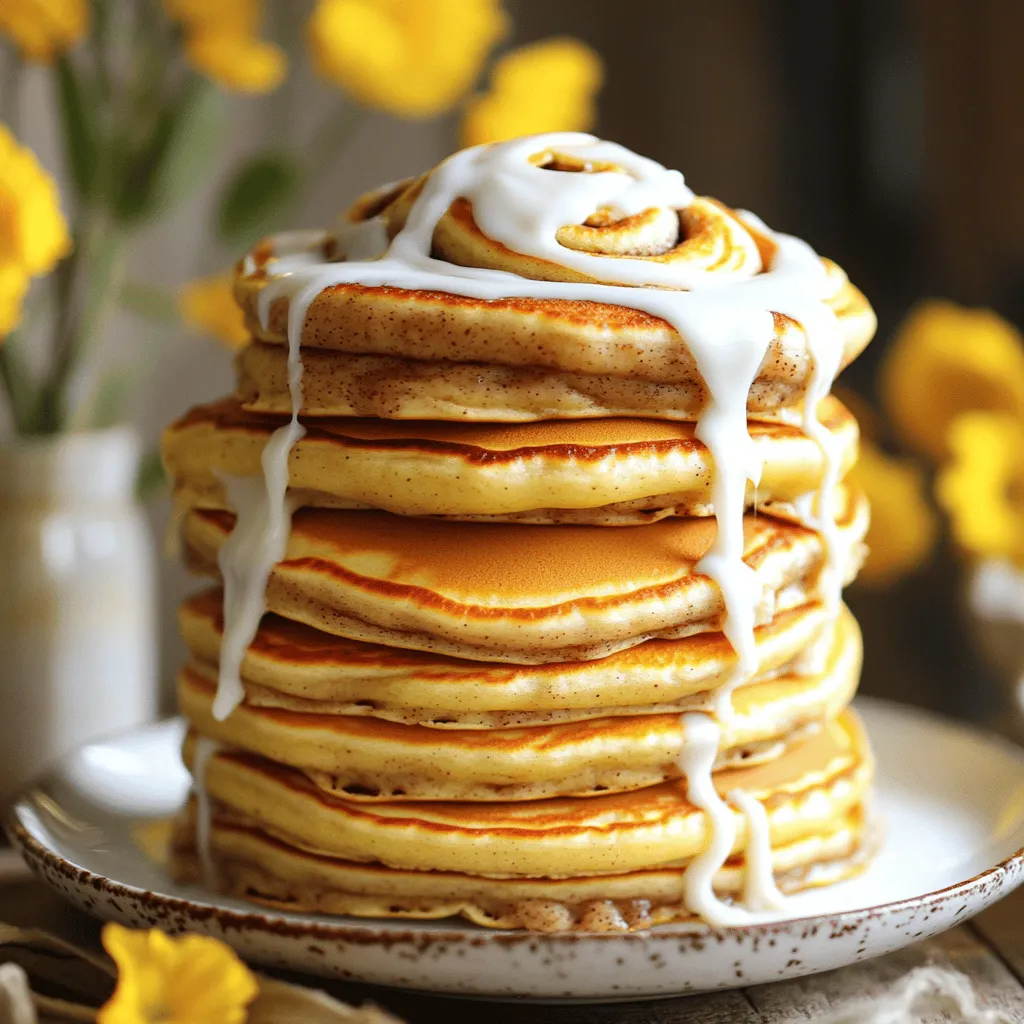
Ready to elevate your breakfast game? These Viral Cinnamon Roll Pancakes are a sweet delight you won’t want to miss! With a light, fluffy texture and a creamy glaze, they take classic pancakes to a whole new level. I’ll walk you through the simple ingredients and steps to make this delicious treat. Get ready to impress your family and friends with these unforgettable pancakes! Let’s dive in!
Ingredients
Main Ingredients List
– 1 cup all-purpose flour
– 2 tablespoons granulated sugar
– 1 tablespoon baking powder
– 1/2 teaspoon salt
– 1 cup whole milk
– 1 large egg
– 2 tablespoons melted unsalted butter
– 1 teaspoon pure vanilla extract
To make these pancakes, you need a few key ingredients. The flour gives them structure. Sugar adds sweetness. Baking powder makes them rise. Salt enhances flavor. Whole milk keeps them moist. The egg binds everything together. Melted butter adds richness, and vanilla gives a lovely aroma.
Cinnamon Swirl Ingredients
– 1/4 cup packed brown sugar
– 1 tablespoon ground cinnamon
– 2 tablespoons melted unsalted butter
The cinnamon swirl is what makes these pancakes special. Brown sugar adds a deep sweetness. Ground cinnamon gives that classic cinnamon roll taste. Melted butter helps blend these ingredients into a smooth paste.
Cream Cheese Glaze Ingredients
– 4 oz cream cheese, softened at room temperature
– 1 cup powdered sugar
– 2 tablespoons whole milk
– 1/2 teaspoon pure vanilla extract
The cream cheese glaze is the perfect finish. Softened cream cheese gives it a creamy base. Powdered sugar adds sweetness without graininess. Whole milk helps achieve the right consistency. Vanilla enhances the flavor and ties everything together.
Step-by-Step Instructions
Preparing the Cinnamon Swirl
First, you need to create the cinnamon swirl. In a small bowl, mix together 1/4 cup of brown sugar, 1 tablespoon of ground cinnamon, and 2 tablespoons of melted butter. Stir these ingredients until they form a smooth paste. This will add a rich flavor to your pancakes. Set this mixture aside for later use.
Making the Pancake Batter
Now, let’s make the pancake batter. In a large mixing bowl, add 1 cup of all-purpose flour, 2 tablespoons of granulated sugar, 1 tablespoon of baking powder, and 1/2 teaspoon of salt. Whisk these dry ingredients together until they are well mixed. In another bowl, whisk 1 cup of whole milk, 1 large egg, 2 tablespoons of melted butter, and 1 teaspoon of vanilla extract until smooth. Pour the wet ingredients into the dry ingredients. Gently stir until just combined. Remember, it’s okay if the batter is a little lumpy.
Cooking the Pancakes
Next, heat a non-stick skillet over medium heat. Lightly grease the skillet with butter or cooking spray. Using a 1/4 cup measuring cup, pour the batter onto the skillet for each pancake. Before the edges set, take a small spoon and swirl the prepared cinnamon mixture over the top of each pancake in a circular pattern. Cook for 2-3 minutes, or until you see bubbles forming and the edges appear firm.
Carefully flip each pancake over and continue cooking for 1-2 minutes until they turn golden brown. Repeat this process with the remaining batter and cinnamon mixture.
Preparing the Cream Cheese Glaze
While the pancakes cook, let’s prepare the cream cheese glaze. In a medium bowl, combine 4 oz of softened cream cheese, 1 cup of powdered sugar, 2 tablespoons of whole milk, and 1/2 teaspoon of vanilla extract. Whisk this mixture until it becomes smooth and creamy.
Final Assembly and Serving Suggestions
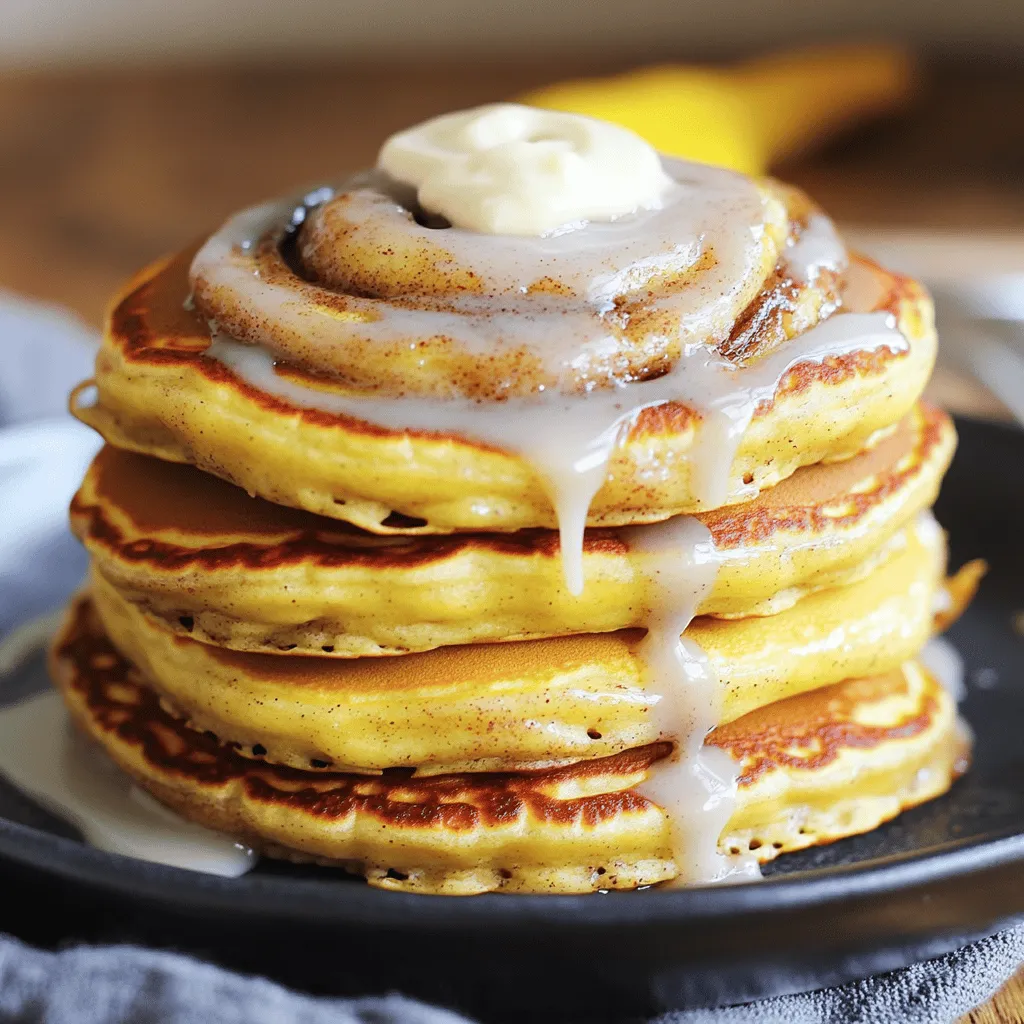
Once the pancakes are ready, stack them high on a serving plate. Drizzle the creamy glaze generously over the top. Let it cascade down the sides for a beautiful presentation. Enjoy the delightful flavor of cinnamon and cream cheese in every bite! For a fun touch, you can garnish with a sprinkle of cinnamon or caramelized apple slices.
Tips & Tricks
Perfecting Pancake Texture
To get the best pancakes, avoid overmixing the batter. Mix just until you see no dry flour. Some lumps are okay. This keeps your pancakes fluffy.
For the right cooking temperature, set your skillet to medium heat. If the pan is too hot, pancakes burn on the outside. If it’s too cool, they won’t cook well. A drop of water should sizzle when the pan is ready.
Cinnamon Swirl Techniques
Creating even swirls makes your pancakes look nice. Use a small spoon to spread the cinnamon mix. Start in the center and swirl outwards. This helps create a pretty pattern.
For the perfect cinnamon mixture, ensure it’s thick but not runny. If it’s too thin, it won’t hold its shape. If it’s too thick, it won’t mix well. Aim for a creamy paste that easily spreads.
Glaze Consistency Adjustments
You may want to adjust the cream cheese glaze. If it’s too thick, add a splash of milk. Mix well until it’s smooth. If it’s too thin, add a bit more powdered sugar. This way, you get the right drizzle for your pancakes.
Variations
Flavor Add-ins
You can take these pancakes to a new level by adding fun mix-ins. Chocolate chips add a sweet twist. Just fold in about 1/2 cup to your batter. For a nutty flavor, try adding chopped walnuts or pecans. They give a nice crunch.
Fruits can make your pancakes even better! Sliced bananas or fresh blueberries work great. Just sprinkle them on the batter before flipping. This adds flavor and makes your pancakes colorful.
Dietary Modifications
You can make these pancakes fit your diet. If you need gluten-free options, use a gluten-free flour mix. It will still taste great!
For those who follow a vegan diet, swap the egg for a flax egg. Mix 1 tablespoon of flaxseed meal with 2.5 tablespoons of water. Let it sit for a few minutes to thicken. Use plant-based milk like almond or oat milk in your batter. For the glaze, you can use a vegan cream cheese alternative.
Serving Suggestions
These pancakes shine when you serve them right. Fresh fruit like strawberries or raspberries on the side adds color. A dollop of whipped cream makes them feel special.
You can also serve these pancakes with breakfast meats. Crispy bacon or sausage pairs well with the sweet flavor. Mixing sweet and savory makes your meal satisfying. Enjoy your delicious creation!
Storage Info
Storing Leftover Pancakes
To keep your leftover pancakes fresh, place them in the fridge. Use a sealed container or a zip-top bag. This helps prevent them from drying out. Make sure to layer parchment paper between pancakes to avoid sticking.
Reheating Tips
For the best taste, reheat pancakes in the oven. Preheat it to 350°F (175°C). Lay the pancakes on a baking sheet, cover with foil, and heat for about 10 minutes. You can also use a microwave. Place a pancake on a microwave-safe plate and cover with a damp paper towel. Heat for 20-30 seconds. This keeps them soft and moist.
Freezing Pancakes
To freeze pancakes, let them cool completely first. Stack them with parchment paper in between. Place the stack in a freezer bag. Squeeze out as much air as you can before sealing. When you’re ready to eat, take them out and let them thaw in the fridge overnight. You can also reheat them straight from the freezer using the oven or microwave. Enjoy your pancakes any time!
FAQs
What makes these pancakes viral?
These pancakes went viral due to their fun look and sweet flavor. People love the idea of cinnamon rolls and pancakes together. They are easy to make and share on social media. The swirl of cinnamon and cream cheese glaze catches the eye. Many food lovers enjoy posting their creations online. This mix of taste and appearance drives their popularity.
Can I make these pancakes in advance?
Yes, you can make these pancakes ahead of time. Cooked pancakes store well in the fridge. Place them in an airtight container for up to three days. You can also freeze them for longer storage. Just remember to separate each pancake with parchment paper. This prevents them from sticking together. When you’re ready to eat, just reheat them in a toaster or microwave.
How do I know when the pancakes are done?
To check if the pancakes are done, look for bubbles on the surface. When the edges look firm, that’s a good sign too. Gently lift one pancake to see if it’s golden brown. If it is, flip it over and cook the other side. It should take about 2-3 minutes per side.
Can I use a different type of milk?
Yes, you can use different types of milk. Almond milk, oat milk, and soy milk work well. These options suit those who are lactose intolerant. Just make sure to choose unsweetened versions for best results. The flavor will still be delicious with these substitutes.
What toppings pair well with cinnamon roll pancakes?
Many toppings go well with cinnamon roll pancakes.”
This blog post shared a simple recipe for delicious cinnamon roll pancakes. You learned how to prepare the batter, swirl the cinnamon mix, and make a creamy glaze. I also offered tips on cooking and variations to suit your taste.
Remember, the key is to balance textures and flavors. Enjoy experimenting with add-ins and toppings. Make these pancakes today, and impress everyone with your tasty treats!

![- 2 cups fresh blueberries, rinsed and drained - 2 cups ripe peaches, diced (approximately 3 medium-sized peaches) - 1 tablespoon freshly squeezed lemon juice - 1/2 cup granulated sugar (adjust based on your sweetness preference) - 1 tablespoon cornstarch - 1 teaspoon pure vanilla extract - 1 1/2 cups rolled oats - 1 cup all-purpose flour - 1/2 cup packed brown sugar - 1/2 teaspoon baking powder - 1/4 teaspoon fine salt - 1/2 cup unsalted butter, melted and slightly cooled - 1 teaspoon ground cinnamon (optional, for added warmth) These simple ingredients create a tasty balance of sweet and tart flavors. The fresh blueberries and ripe peaches shine in each bite. You can change the sugar to fit your taste. I often add a bit more if the fruit is not very sweet. I love using oats for texture; they give a nice chewiness. This recipe is so flexible. You can swap out fruit or adjust flavors based on what you have at home. For example, try adding a pinch of nutmeg for a warm spice twist. This recipe takes only 15 minutes to prepare. It bakes in about 30 to 35 minutes. You will get about 12 bars from this batch, perfect for sharing with friends or family. If you want the full recipe, check the section below. - Preheat your oven to 350°F (175°C). - Grease a 9x13-inch baking dish or line it with parchment paper. - In a medium mixing bowl, combine 2 cups of fresh blueberries, 2 cups of diced peaches, 1 tablespoon of lemon juice, 1/2 cup of granulated sugar, 1 tablespoon of cornstarch, and 1 teaspoon of vanilla extract. - Gently mix the ingredients until the fruit is coated. Let it sit for a few minutes to enhance the flavor. - In a large mixing bowl, whisk together 1 1/2 cups of rolled oats, 1 cup of all-purpose flour, 1/2 cup of brown sugar, 1/2 teaspoon of baking powder, 1/4 teaspoon of salt, and 1 teaspoon of cinnamon if desired. - This mixture will give your bars that perfect crumb texture. - Pour 1/2 cup of melted butter into the dry mixture and stir until it looks like coarse crumbs. - Reserve about 1 cup of this crumb mixture for later. - Press the remaining crumb mixture into the bottom of your greased dish to form the crust. - Spread the fruit mixture evenly over the crust, then sprinkle the reserved crumbs on top. - Bake in your preheated oven for about 30-35 minutes. - Look for golden brown color and bubbling filling to know it's done. - Once baked, let the bars cool on a wire rack for 15-20 minutes before slicing into squares. - This cooling time helps the bars set well for easy serving. Enjoy making these Blueberry Peach Crumble Bars with the [Full Recipe]. - Check for doneness by ensuring the filling is bubbling and the top is golden brown. - Letting the bars cool completely aids in easier slicing. This step prevents squishing the filling and keeps the layers intact. - Use frozen blueberries or peaches if fresh ones are unavailable. Frozen fruit works well and saves time. - Substitute brown sugar with coconut sugar for a healthier option. Coconut sugar adds a nice depth to the flavor. - Serve warm or at room temperature. This allows the flavors to shine. - Pair with vanilla ice cream or whipped cream. This adds a creamy texture that balances the tartness of the fruit. For an extra touch, garnish with fresh blueberries or peach slices. You can find the Full Recipe above for detailed instructions on making these delightful bars! {{image_4}} You can mix things up with different fruits. For a fresh twist, switch blueberries and peaches for raspberries and apples. The tartness of raspberries pairs well with sweet apples. You can also try plums or cherries. Both add their unique flavors and keep the bars fun and exciting. Want to make these bars gluten-free? No problem! Just replace all-purpose flour with a gluten-free flour blend. Many good mixes are available at stores. Also, ensure that your oats are certified gluten-free. This small change lets everyone enjoy this tasty dessert. For a vegan version, swap unsalted butter for coconut oil or vegan butter. Both options work well and keep the bars rich and tasty. If your recipe includes eggs, you can use flax eggs instead. To make a flax egg, mix one tablespoon of ground flaxseed with two and a half tablespoons of water. Let it sit for five minutes. This creates a great egg substitute that still binds everything together. Store your Blueberry Peach Crumble Bars in an airtight container. They stay fresh at room temperature for up to 3 days. This makes them great for quick snacks or dessert. To keep them longer, refrigerate the bars. They will stay fresh for up to a week. For even longer storage, you can freeze the bars. Wrap them tightly in plastic wrap or aluminum foil. They can be frozen for up to 3 months. When you're ready to enjoy your frozen bars, reheating is easy. Simply pop them in the microwave for a few seconds. You can also warm them in the oven at 350°F (175°C). This brings back their delicious taste and texture. For the full recipe and tips, check out the detailed instructions above. Enjoy your tasty treat! Yes, you can make these bars a day in advance. Just store them in the fridge. This helps the flavors blend nicely. Look for bubbling filling and a golden brown topping. This shows they are ready to eat. Yes, you can add chopped nuts like almonds or walnuts. They give the bars extra crunch and flavor. I love pairing them with a scoop of ice cream or yogurt. It makes a delicious treat. Store them in an airtight container at room temperature. You can also refrigerate them for up to a week. - Blueberry Peach Crumble Bars 🫐 To make these delicious Blueberry Peach Crumble Bars, you need simple, fresh ingredients. Here’s what you will need: - 2 cups fresh blueberries, rinsed and drained - 2 cups ripe peaches, diced (approximately 3 medium-sized peaches) - 1 tablespoon freshly squeezed lemon juice - 1/2 cup granulated sugar (adjust based on your sweetness preference) - 1 tablespoon cornstarch - 1 teaspoon pure vanilla extract - 1 1/2 cups rolled oats - 1 cup all-purpose flour - 1/2 cup packed brown sugar - 1/2 teaspoon baking powder - 1/4 teaspoon fine salt - 1/2 cup unsalted butter, melted and slightly cooled - 1 teaspoon ground cinnamon (optional, for added warmth) These ingredients come together to create a wonderful balance of sweet and tart flavors. The fresh blueberries and peaches mix well with the lemon juice. This adds a nice zing to the bars. The sugar and cornstarch help create a thick, juicy filling. The crumble topping is a blend of oats, flour, and sugars. It gives the bars a crunchy texture that pairs perfectly with the soft fruit layer. The butter adds richness, while the cinnamon gives a warm, cozy vibe to each bite. If you want to try this recipe, check the Full Recipe for step-by-step instructions. You'll love making and sharing these bars! These Blueberry Peach Crumble Bars are easy to make and full of flavor. You learned about the key ingredients, simple steps, and different variations. Remember, you can swap fruits or adjust sweetness to fit your taste. Store leftovers in a container for later. Enjoy these bars warm or with ice cream for a tasty treat. Happy baking!](https://goldendishy.com/wp-content/uploads/2025/06/77e155cd-d820-4acd-a50c-b849e6ba2e1e-768x768.webp)
