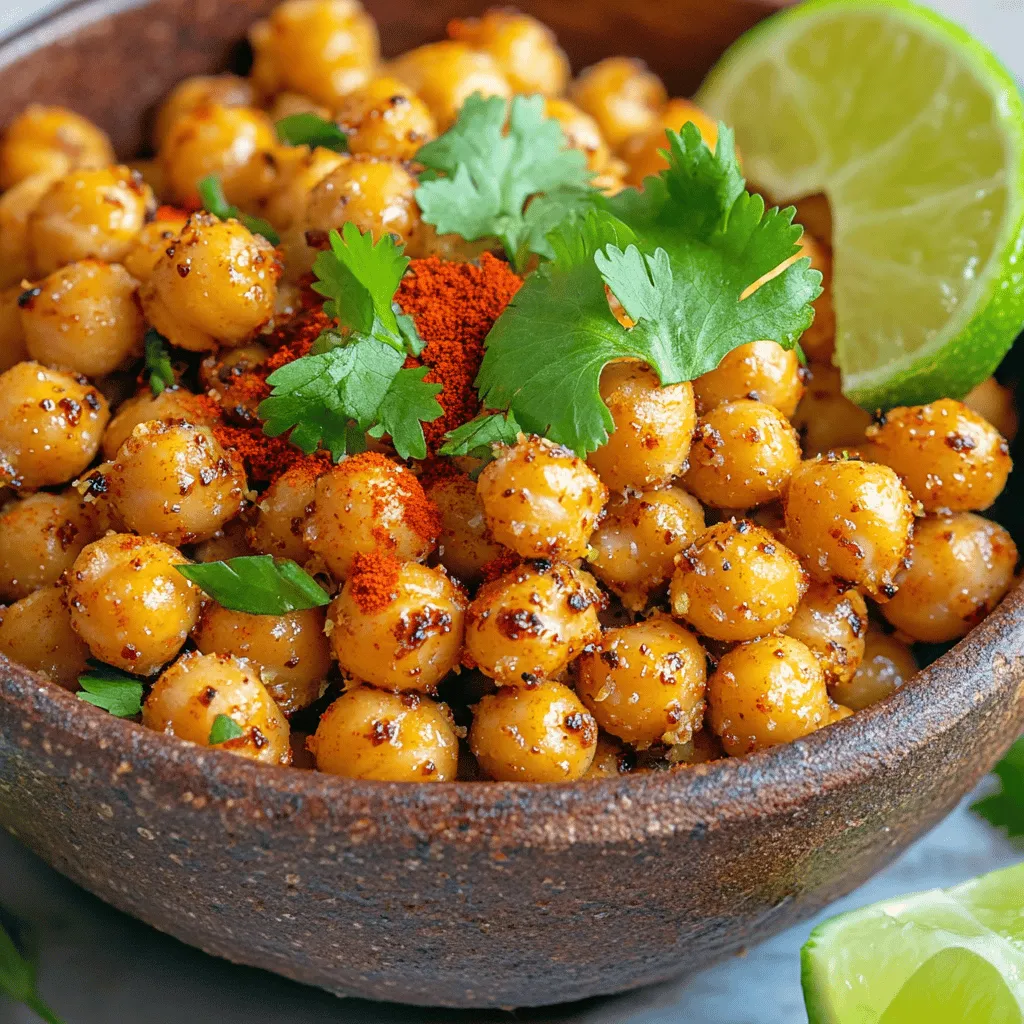
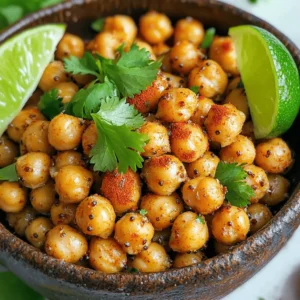
Chili Lime Roasted Chickpeas Flavorful Snack Idea
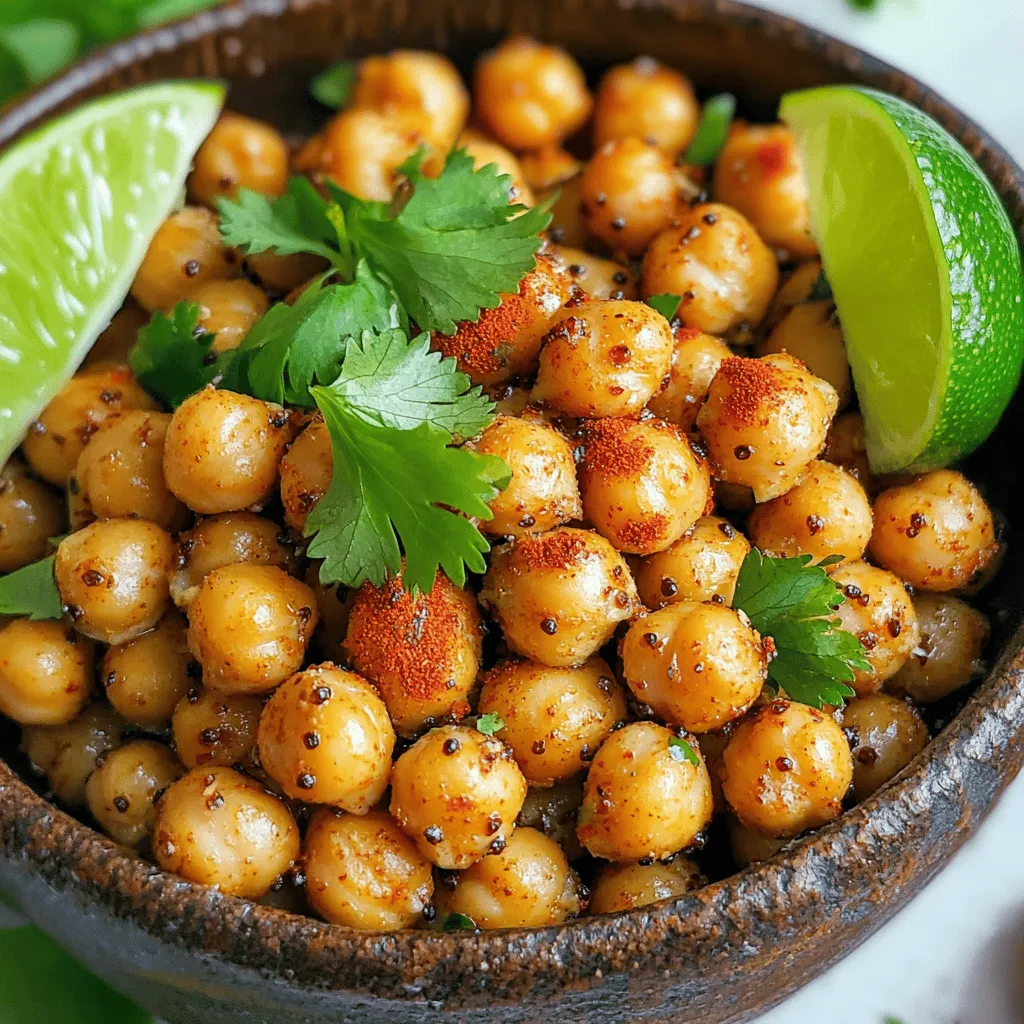
Looking for a tasty snack that’s both crunchy and healthy? Try my Chili Lime Roasted Chickpeas! They’re quick to make and packed with flavor. In just 30 minutes, you’ll have a zesty treat perfect for munching or adding to your meals. Plus, these chickpeas are great for customizing with different spices. Let’s dive into this easy recipe and spice up your snacking game!
Ingredients
Main Ingredients for Chili Lime Roasted Chickpeas
– 1 can (15 oz) chickpeas, drained and rinsed
– 2 tablespoons olive oil
– 1 teaspoon chili powder
– 1 teaspoon smoked paprika
– 1/2 teaspoon ground cumin
– 1/2 teaspoon garlic powder
– Zest of 1 lime
– Juice of 1 lime
– Salt and freshly cracked black pepper to taste
– Fresh cilantro, finely chopped (for garnish)
To make Chili Lime Roasted Chickpeas, gather all your ingredients first. The chickpeas are the star of this dish. They are packed with protein and fiber. Using canned chickpeas saves time. Just make sure to drain and rinse them well.
Next, the olive oil is a must. It helps the spices stick and adds flavor. The spices are key here. Chili powder gives heat, while smoked paprika adds depth. Ground cumin brings warmth, and garlic powder packs a punch.
Then, we add fresh ingredients. Lime zest and juice balance the spice with a bright, tangy taste. Salt and pepper enhance all the flavors. Finally, fresh cilantro adds a pop of color and freshness.
Step-by-Step Instructions
Preparing the Oven and Chickpeas
– Preheat the oven to 400°F (200°C).
– Dry the chickpeas thoroughly with a kitchen towel.
First, I set my oven to 400°F (200°C). This temperature helps the chickpeas become crispy. While the oven heats, I spread the rinsed chickpeas on a clean kitchen towel. I pat them dry gently with another towel. This step helps remove moisture. Dry chickpeas roast better and turn crispier.
Seasoning the Chickpeas
– Combine chickpeas with olive oil and spices.
– Toss until evenly coated.
Next, I grab a large bowl. I pour in the dried chickpeas and add 2 tablespoons of olive oil. Then, I sprinkle in 1 teaspoon of chili powder, 1 teaspoon of smoked paprika, and 1/2 teaspoon of ground cumin. I also add 1/2 teaspoon of garlic powder, lime zest, and lime juice. I mix everything well with my hands. Each chickpea should be coated in spices and oil. This mix gives them bold flavor.
Roasting the Chickpeas
– Arrange seasoned chickpeas on the baking sheet.
– Roast for 25-30 minutes, stirring halfway.
Now, I take a baking sheet and line it with parchment paper. This step stops the chickpeas from sticking. I spread the seasoned chickpeas out in a single layer. It’s important not to crowd them. I place the sheet in the oven and set a timer for 25-30 minutes. Halfway through, I stir the chickpeas to ensure they roast evenly. I check on them often to avoid burning. Once they turn golden brown, I pull them out. Enjoy these tasty snacks warm or let them cool.
Tips & Tricks
Achieving Maximum Crispiness
To get your chickpeas crispy, start by drying them well. After rinsing, spread them on a clean towel. Pat them dry gently with another towel. This step is key. If they are wet, they will steam instead of roast.
Next, roast at the right temperature. Preheat your oven to 400°F (200°C). This hot setting helps them crisp up nicely. Spread the chickpeas in a single layer on the baking sheet. Avoid overcrowding them. Give them space to breathe while roasting.
Adjusting Seasonings
You can enhance the flavors of your chickpeas easily. If you love lime, add more lime juice or zest. You can also try extra spices. A pinch of cayenne pepper gives them a nice kick.
Before serving, taste the chickpeas. Adjust the seasoning if needed. Add a bit more salt, pepper, or lime juice. This simple step makes a big difference in flavor. Enjoy your tasty snack!
Variations
Flavor Additions
You can change the flavor of your roasted chickpeas easily. Try adding cayenne for heat. It gives a nice kick that many love. Curry powder is another fun option. It adds a warm, earthy taste.
If you want a cheesy flavor, sprinkle in some nutritional yeast. This adds a rich taste without using dairy. You can mix and match spices to find your favorite combo. Don’t be afraid to experiment!
Serving Suggestions
Chili lime roasted chickpeas make a great topping for salads and bowls. They add crunch and flavor to fresh greens or grain bowls. You can also use them as a snack. Serve them with dips like hummus or guacamole.
Another fun idea? Toss them in a wrap or sandwich. They give a nice crunch and add protein. You can also mix them into soups for added texture. The options are endless, so get creative!
Storage Info
Storing Leftovers
To keep your roasted chickpeas crispy, store them in an airtight container. Place a paper towel inside to absorb moisture. This helps maintain their crunch. You can store them at room temperature for up to three days. If you want them to last longer, consider refrigerating them. They may lose some crispiness in the fridge.
Reheating Tips
When you’re ready to enjoy the leftovers, reheating is key. Use an oven to bring back their crunch. Preheat your oven to 350°F (175°C). Spread the chickpeas on a baking sheet and heat for about 10 minutes. This method keeps them crispy.
You can also add a sprinkle of lime juice or chili powder when reheating. This boosts the flavor and brings back that fresh taste.
FAQs
Can I use dried chickpeas instead of canned?
Yes, you can use dried chickpeas. First, soak them overnight in water. This helps them soften. After soaking, drain and rinse the chickpeas. Next, cook them in boiling water for 1 to 1.5 hours. Test them until they’re tender. You will need about 1.5 cups of cooked chickpeas for this recipe. Using dried chickpeas gives a fresh taste, but it does take more time.
How can I make these chickpeas spicier?
To add more heat, try these tips:
– Add cayenne pepper or crushed red pepper flakes.
– Increase the amount of chili powder in the mix.
– Mix in some diced jalapeños before roasting.
– Serve with a spicy dipping sauce for extra flavor.
These options help you customize the heat level to your taste.
What are the nutritional benefits of roasted chickpeas?
Roasted chickpeas are a healthy snack choice. They are high in protein, which helps build muscles. They also contain fiber, which aids digestion. Each serving gives you vitamins and minerals like iron and magnesium. Plus, they are low in calories and fat. This makes them a smart option for snacking. Enjoy them guilt-free while getting great nutrition.
Chili lime roasted chickpeas are quick and fun to make. You learned about the main ingredients, step-by-step instructions, and tips for the best results. These snacks are not just tasty; they’re also healthy. You can mix up the flavors and serve them in many ways. Store leftovers properly to keep them crispy. Roasting chickpeas adds crunch to salads or bowls. Experiment with spices to find your favorite flavor. Enjoy your cooking adventure with these simple, nutritious snacks!
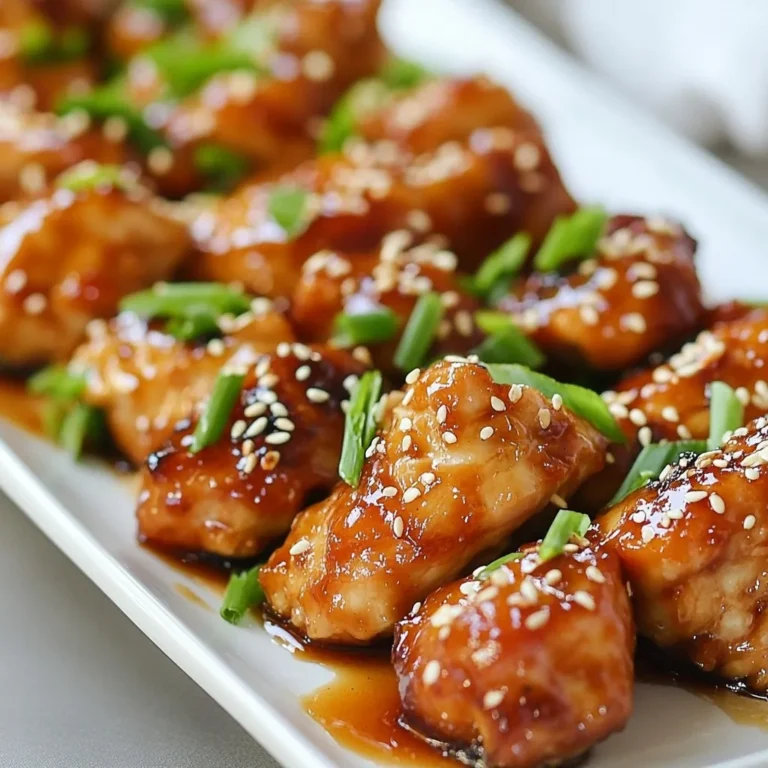
![- 2 cups shredded cooked chicken - 1 (8 oz) package of cream cheese - 1/2 cup buffalo sauce - 1/2 cup ranch dressing For buffalo chicken dip, the main ingredients create a creamy and rich base. Shredded cooked chicken gives it that hearty texture. You can use rotisserie chicken to save time. Cream cheese adds smoothness, while buffalo sauce brings the heat. Ranch dressing balances the flavors and adds a nice creaminess. - 1/2 cup crumbled blue cheese - 1 green onion for garnish - Tortilla chips or celery sticks for serving Optional ingredients enhance the dip. Crumbled blue cheese adds a bold taste that many love. It pairs well with the spicy buffalo flavor. A sprinkle of green onion on top looks great and adds freshness. For serving, I recommend crunchy tortilla chips or crisp celery sticks. They both complement the dip's rich and creamy texture. Always remember to adjust the buffalo sauce to match your spice preference. You can find the full recipe in the section above for more detailed steps! 1. First, preheat your oven to 350°F (175°C). This helps the dip cook evenly. 2. In a large bowl, combine the shredded chicken, cream cheese, buffalo sauce, and ranch dressing. Mix until smooth. 1. Now, gently fold in the shredded cheddar cheese and blue cheese, if you use it. This adds great flavor and creaminess. 2. Next, transfer the chicken mixture to a baking dish. Spread it evenly with a spatula. 3. Bake the dip for 20-25 minutes. Look for bubbling edges and a slightly golden top. 1. When your dip is done, take it out and garnish with sliced green onions. This adds freshness. 2. Serve it warm with tortilla chips or celery sticks. Enjoy this creamy and flavorful delight! For the full recipe, check out the details above. Adjusting buffalo sauce is key for your dip. If you love heat, add more buffalo sauce. If you prefer mild dishes, use less. Start small and taste as you go. You can always add more but can’t take it out. If you want a cream cheese alternative, try Greek yogurt. It gives a nice tang and cuts some fat. You can also use vegan cream cheese for a plant-based option. This keeps the dip creamy without dairy. To get the perfect crust, bake your dip until it’s bubbly and golden. This usually takes about 20-25 minutes at 350°F. You want the edges to have a light brown color. This shows the dip is ready and adds flavor. For a crispy top, use a broiler after baking. Set your oven to broil and watch closely. Just a few minutes under the broiler can give your dip a nice crunch. Be careful not to burn it! When serving at parties, focus on presentation. Put the dip in the center of a colorful platter. Surround it with chips and celery sticks. This makes it look inviting and fun. For drinks, consider pairing it with light beers or sparkling water. The lightness balances the richness of the dip. You can also serve it with a side of fresh veggies for a nice crunch. {{image_4}} You can make buffalo chicken dip healthier with just a few swaps. - Low-fat cream cheese options: Use low-fat cream cheese. It cuts fat and calories but keeps the creaminess. - Using Greek yogurt instead of ranch dressing: Greek yogurt adds a tangy taste and protein. It's a great way to lower calories while keeping it creamy. You might want to kick up the flavor in your dip. - Additions like diced jalapeños or hot peppers: These add heat and a fresh taste. Adjust to your spice level. - Incorporating other cheeses for unique flavors: Try mixing in mozzarella or gouda. Each cheese adds its own twist to the dip's flavor. Change how you serve your buffalo chicken dip for fun. - Buffalo chicken dip stuffed in peppers: Hollow out mini bell peppers and fill them with the dip. Bake until warm for a tasty bite. - Spinach and buffalo chicken dip combo: Mix in fresh spinach. It adds color and nutrition, making the dip even better. For the complete recipe, check out the [Full Recipe]. To keep buffalo chicken dip fresh, place it in an airtight container. This helps prevent it from drying out. Store the dip in the fridge for up to five days. You may notice the flavors deepen as it sits. Just be sure to cover it well to avoid any fridge odors. You can freeze buffalo chicken dip for longer storage. First, let the dip cool completely. Then, transfer it to a freezer-safe container. Press plastic wrap directly on the dip before sealing. It can last for up to three months in the freezer. When you're ready to enjoy it, thaw it in the fridge overnight. You have two great options to reheat buffalo chicken dip: the oven or microwave. If using the oven, preheat it to 350°F (175°C). Place the dip in an oven-safe dish and heat for about 20 minutes. Stir halfway through for even warming. If you choose the microwave, heat in 30-second intervals. This prevents hot spots and keeps the dip creamy. To maintain texture, avoid overheating. Let the dip sit for a minute after reheating. This helps the flavors come back together. Enjoy your dip warm with chips or celery sticks! Yes, you can make buffalo chicken dip ahead of time. To prepare in advance, follow these steps: - Mix the ingredients: Combine the shredded chicken, cream cheese, buffalo sauce, and ranch dressing. - Store it: Place the mixture in a baking dish, cover it with plastic wrap, and put it in the fridge. - Bake when ready: When you are ready to serve, take it out and bake it at 350°F for 20-25 minutes. This way, you save time and enjoy a warm dip at your gathering. If you want to swap ranch dressing, here are some great options: - Blue cheese dressing: This adds a tangy flavor that works well. - Greek yogurt: Use plain Greek yogurt for a healthier twist. - Caesar dressing: This offers a different but tasty flavor profile. Feel free to experiment with your favorite dressings! To kick up the spice level, try these ideas: - Extra buffalo sauce: Add more buffalo sauce to your mix. - Diced jalapeños: Mix in fresh or pickled jalapeños for heat. - Hot sauce: Drizzle hot sauce on top before serving for an extra kick. Adjust the spice to match your taste, and enjoy the heat! Buffalo chicken dip can be gluten-free, but check your ingredients. Here’s what to know: - Buffalo sauce: Most brands are gluten-free, but confirm by reading the label. - Ranch dressing: Look for gluten-free options if using store-bought. - Dipping options: Use gluten-free tortilla chips or fresh veggies for dipping. With careful choices, everyone can enjoy this dip! You now know how to make buffalo chicken dip from scratch. We covered key ingredients like chicken, cream cheese, and buffalo sauce. I shared step-by-step instructions to get delicious results. You learned tips for adjustments and variations to suit your taste. Remember, this dip is versatile; you can customize it for any gathering. Enjoy experimenting with flavors and serving styles. Your next snack night will be a hit!](https://goldendishy.com/wp-content/uploads/2025/07/99cdad4a-7337-4a60-a9b0-2f79e024797e-768x768.webp)
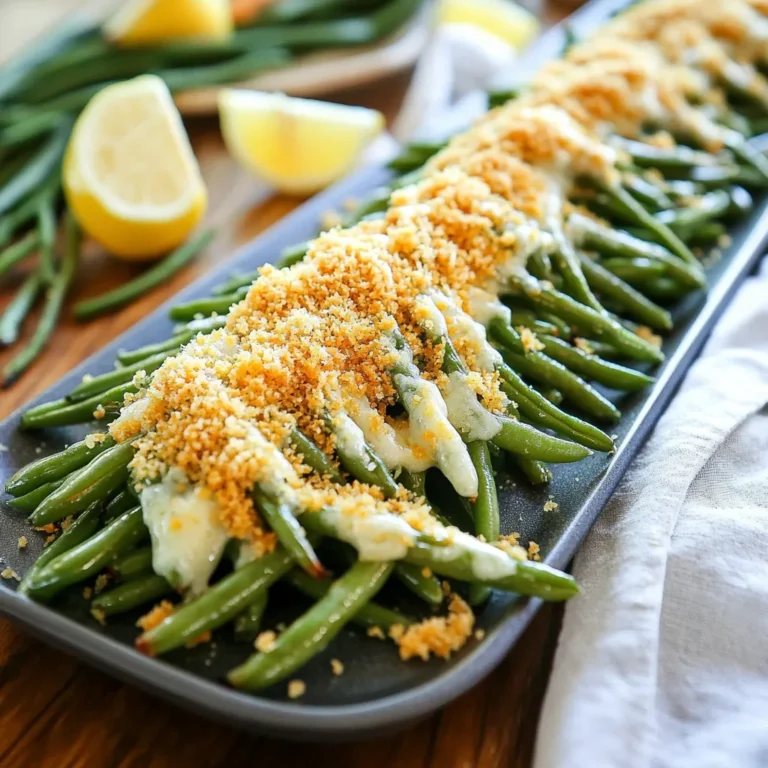
![To make delicious zucchini corn fritters, gather these fresh ingredients: - Zucchini: 2 medium, grated - Corn: 1 cup, kernels (fresh or frozen) - Flour: 1/2 cup, all-purpose - Cornmeal: 1/4 cup - Eggs: 2 large, beaten - Green Onions: 1/4 cup, finely chopped - Baking Powder: 1/2 teaspoon - Spices: 1 teaspoon chili powder, 1/2 teaspoon garlic powder - Seasoning: Salt and pepper to taste - Olive Oil: For frying - Optional Garnish: Sour cream or yogurt for serving Each ingredient plays a key role in creating the perfect fritters. The zucchini adds moisture and flavor, while corn gives a sweet crunch. Flour and cornmeal provide structure, keeping the fritters together. Eggs bind everything, making them light and fluffy. The spices add warmth and depth. Using fresh corn enhances the taste, but frozen works too. Green onions bring brightness and a mild onion flavor. Baking powder helps them rise, making them airy. Season with salt and pepper to balance the flavors. You can serve these fritters with a dollop of sour cream or yogurt for creaminess. This simple combination of ingredients creates a dish that is tasty, fun, and easy to make. For the full recipe, check out the details above. First, you need to grate the zucchinis. Use a box grater or a food processor for this task. Next, place the grated zucchini into a clean kitchen towel. Gather the ends of the towel and squeeze firmly. This step removes extra moisture. Dry zucchini helps the fritters hold together. If they are too wet, the fritters will be soggy. In a spacious mixing bowl, combine the flour, cornmeal, baking powder, chili powder, garlic powder, salt, and pepper. Use a whisk to blend the dry ingredients well. This ensures that the spices mix evenly. A good mix adds flavor to every bite. Now, add the squeezed zucchini, corn kernels, and chopped green onions to the dry mix. Pour in the beaten eggs. Stir everything together gently. You want the mixture to be thick but still smooth. This right consistency is key for frying. Heat a large skillet over medium heat. Add enough olive oil to cover the bottom by about 1/4 inch. To check if the oil is ready, drop a small spoonful of batter into it. If it sizzles, the oil is hot. Carefully drop heaping tablespoons of the batter into the hot oil. Flatten them slightly with the back of the spoon. Fry the fritters for 3-4 minutes on each side. They should turn golden brown and crispy. Once the fritters are cooked, use a slotted spoon to move them to a plate lined with paper towels. This helps drain excess oil, making them lighter. For a great presentation, stack the fritters on a colorful platter. Add a small bowl of sour cream on the side. You can sprinkle more chopped green onions on top for extra flair. For the full recipe, you can refer to the earlier section. To get the best texture, start by balancing moisture. Squeeze the grated zucchini well. This step is key. Too much water makes soggy fritters. Use a clean kitchen towel to help. After squeezing, you should see less liquid in the bowl. Next, adjust the flour and cornmeal ratios. If your batter feels too wet, add more flour. If it’s too dry, a little more cornmeal helps. Play around with these amounts until you find the perfect mix. A thick but smooth batter works best. Want to kick up the flavor? Try adding spices like cumin or paprika. Fresh herbs like cilantro or parsley also add a nice touch. You can even mix in some grated cheese. Feta or cheddar works great! These little changes can make your fritters feel new and exciting. You can also combine different ingredients for a twist. How about adding diced bell peppers or jalapeños? They can bring extra crunch and heat. Be creative and experiment with flavors you enjoy. When frying, the oil temperature is very important. Heat the oil over medium heat. If it’s too hot, the outside burns before the inside cooks. If it’s too low, your fritters soak up oil and become greasy. A small drop of batter should sizzle immediately when it hits the oil. Avoid overcrowding your skillet. Fry in batches. If you put too many fritters in at once, they won’t cook evenly. Leave space around each fritter so they get crispy. This way, you enjoy that golden-brown crunch with every bite. For the full recipe, check out the detailed steps above. {{image_4}} You can easily swap ingredients in your zucchini corn fritters. If you want to replace eggs, try flaxseed or applesauce. Just mix one tablespoon of ground flaxseed with three tablespoons of water. Let it sit for a few minutes to thicken, then add it to your batter. Applesauce works well too. Use 1/4 cup of unsweetened applesauce instead of eggs. For a gluten-free version, consider using almond flour or chickpea flour. Almond flour keeps the fritters light and nutty. Chickpea flour adds a nice flavor and helps bind the fritters. Both options make your dish safe for gluten-sensitive friends. You can also change up your fritters with seasonal veggies. Add bell peppers for a sweet crunch or spinach for a pop of color. Both will enhance the flavor and nutrition of your fritters. Try using different types of cheese, too. Feta adds a tangy kick, while cheddar gives a rich, creamy taste. When it comes to dipping sauces, think outside the box! A zesty yogurt dip with lemon and herbs pairs nicely with the fritters. You can also serve them with a spicy salsa or a creamy avocado dip. For creative serving ideas, stack the fritters high on a colorful platter. They make a great appetizer or snack. Add a small bowl of your favorite dip for guests to enjoy. Whether it's a party or a family meal, these fritters are sure to impress! For the full recipe, check out the ingredients and steps provided above. To keep your zucchini corn fritters fresh, store them in an airtight container. Place parchment paper between layers to prevent sticking. Refrigerate them right after they cool down. They stay good for about 3 to 4 days. If you notice any water or moisture in the container, change the paper to keep them crispy. For the best results, reheat fritters in a skillet on medium heat. This method helps them regain their crispiness. Add a little olive oil to the pan and place the fritters in it. Heat for about 2 to 3 minutes on each side. Avoid using the microwave, as it can make them soggy and lose that delightful crunch. To freeze fritters, let them cool completely first. Lay them out in a single layer on a baking sheet. Freeze until solid, then transfer them to a zip-top bag. They can last in the freezer for up to 2 months. When you’re ready to enjoy, thaw them in the fridge overnight before reheating in a skillet. This method keeps them tasty and crispy. To keep your fritters intact, proper binding is key. Always squeeze out extra moisture from the grated zucchini. This step helps your fritters hold together better. You can also add more flour if the batter seems too wet. Heat plays a big role as well. Make sure your oil is hot enough before adding the fritters. If the oil is cold, the fritters will absorb too much oil and may break apart. Fry them for about 3-4 minutes per side until golden brown. Yes, you can make zucchini corn fritters ahead of time. Prepare the batter and store it in the fridge for up to one day. Cover it tightly to keep it fresh. For storage, place cooked fritters in an airtight container. They will last for about three days in the fridge. When you are ready to eat, reheat them in a skillet. This keeps them crispy and tasty. These fritters pair well with many sides. A fresh salad adds crunch and color. You can also serve them with a yogurt dip or a tangy salsa. For drinks, consider a light beer or lemonade. They complement the flavors nicely. You can even enjoy them with a glass of refreshing iced tea. For the complete recipe, check the [Full Recipe]. To make delicious zucchini corn fritters, start with great ingredients and careful preparation. Grate zucchini and squeeze out moisture for a perfect texture. Mix the dry ingredients evenly, then combine everything for a tasty batter. Fry them in hot oil until golden brown, and drain on paper towels. Remember to get creative with variations and enjoy them with dips. By following these tips, you can impress friends and family with your cooking skills. Enjoy every bite of these delightful fritters!](https://goldendishy.com/wp-content/uploads/2025/07/84c05464-2612-47b3-960d-4590890a85a0-768x768.webp)