
Zesty Lemon Chickpea Salad Fresh and Flavorful Dish
![- 1 can (15 oz) chickpeas, thoroughly drained and rinsed - 1 large cucumber, diced into bite-sized pieces - 1 cup cherry tomatoes, halved for a burst of flavor - 1 red bell pepper, diced for sweetness and crunch - 1 small red onion, finely chopped for subtle sharpness - 1/4 cup fresh parsley, roughly chopped for a fresh aroma - 1/4 cup feta cheese, crumbled (optional; adds creaminess) - Juice of 2 fresh lemons, providing that zesty kick - 3 tablespoons extra-virgin olive oil for richness - 1 teaspoon Dijon mustard for a hint of tang - 1 teaspoon honey (or maple syrup for a vegan option) to balance flavors - Salt and freshly ground black pepper to taste This salad is packed with nutrients. It has about 200 calories per serving. You get protein from chickpeas, fiber from veggies, and healthy fats from olive oil. Plus, it provides vitamins A and C. This makes it not just tasty, but also good for you. Start by gathering a large mixing bowl. Add the chickpeas, diced cucumber, halved cherry tomatoes, red bell pepper, red onion, and parsley. Mix these fresh ingredients well. You want each piece to shine in your salad. If you enjoy cheese, sprinkle in the crumbled feta for a creamy touch. This adds a nice contrast to the crunch of the veggies. For the dressing, take a smaller bowl. Whisk together the lemon juice and olive oil. This forms the base of your zesty dressing. Next, add the Dijon mustard and honey. These ingredients give a perfect balance of flavor. Season with salt and black pepper. Whisk until the mixture looks smooth and well combined. Now it’s time to bring everything together. Drizzle the dressing over your salad mix. Use a spatula or wooden spoon to toss gently. You want all the ingredients to be evenly coated without mashing them. If you added feta, do a light toss to keep the cheese intact. Taste your salad and adjust the seasoning if needed. Cover it and let it chill in the fridge for at least 30 minutes. This helps the flavors meld beautifully. For the full recipe, you can refer back to the recipe card. To make your Zesty Lemon Chickpea Salad shine, focus on seasoning. Start with salt and pepper. Taste as you go. You may want more lemon juice for tang. If you like a sweeter flavor, drizzle more honey. For different dressings, try balsamic vinegar or apple cider vinegar. You can also mix in tahini for creaminess. Each option gives a new twist to the salad. Serving your salad well makes it more enticing. Use a large, colorful bowl for a rustic look. Add fresh parsley on top for a pop of green. You can even place lemon wedges around the bowl for a bright touch. If you want individual servings, use clear cups. This way, the layers show off the bright colors. A light drizzle of olive oil on each cup adds elegance. Prepping this salad in advance is easy. Make it a few hours before serving. The flavors develop more when they sit. For best results, chill the salad for at least 30 minutes. This helps the flavors mix well. You can store leftovers in the fridge for up to three days. Just keep the dressing separate if you want it fresh. For the full experience, check out the Full Recipe. {{image_4}} You can make this salad even better by adding veggies. Try adding avocados. They bring creaminess and healthy fats. Carrots can add a nice crunch. You can also toss in diced mango or apple. These fruits add sweetness and a fun twist. Want to make this salad heartier? Add some protein! Grilled chicken works great for meat lovers. Shrimp is a tasty option too. For a plant-based choice, use tofu. It soaks up flavors well and adds nutrition. Switch up the dressing for a new taste! Try using different vinegars, like balsamic or apple cider. You can also squeeze in more citrus juice for extra zing. For a creamier touch, mix in yogurt or tahini. Both add richness and make the salad more filling. Check out the [Full Recipe] to see how these variations can fit into your meal! Store your Zesty Lemon Chickpea Salad in a sealed container. This keeps it fresh and tasty. It lasts about 3 to 5 days in the fridge. Make sure to check for any signs of spoilage before eating. Freezing this salad is not ideal. The vegetables may lose their crunch. If you want to freeze it, consider freezing just the chickpeas. Place them in an airtight bag. When you want to use them, thaw overnight in the fridge. Leftover salad is great for new meals! You can add it to wraps for a quick lunch. Toss it in grain bowls for added flavor. Or, layer it in sandwiches for a fresh twist. You can even mix it into soups for a hearty touch. Enjoy creating new dishes with your leftover salad! For the full recipe, refer to the [Full Recipe]. Yes, you can make this salad ahead of time. In fact, it often tastes better after chilling. The flavors mix well when you let it sit. I suggest making it a few hours before serving. Just cover it with plastic wrap and place it in the fridge. This way, the lemon juice and olive oil soak into the chickpeas and veggies. You will enjoy a zesty and bright flavor profile! Yes, this salad is gluten-free. Chickpeas, fresh veggies, and the dressing contain no gluten. If you want to check other ingredients, always read the labels. Most items are safe, but it’s best to confirm. This makes the salad a great option for those with gluten sensitivities. You can serve it to everyone without worry! If you can’t eat chickpeas, no problem! You can use other beans like black beans or kidney beans. These will add protein and texture. Another option is to use cooked quinoa or lentils. These alternatives keep the salad hearty and filling. Each will bring a unique taste, so feel free to explore. Get creative based on what you have! This blog post provided a clear guide to making a Zesty Lemon Chickpea Salad. We covered the key ingredients, from fresh veggies to the zesty dressing. You learned how to prepare, dress, and assemble the salad for the best flavor. I shared tips for meal prep, variations to try, and how to store leftovers. Remember, this salad is not just easy to make; it’s also packed with nutrients. Enjoy your creation, explore the variations, and make it your own!](https://goldendishy.com/wp-content/uploads/2025/07/e89bc11c-d040-4055-8bd2-d62839faab5f.webp)
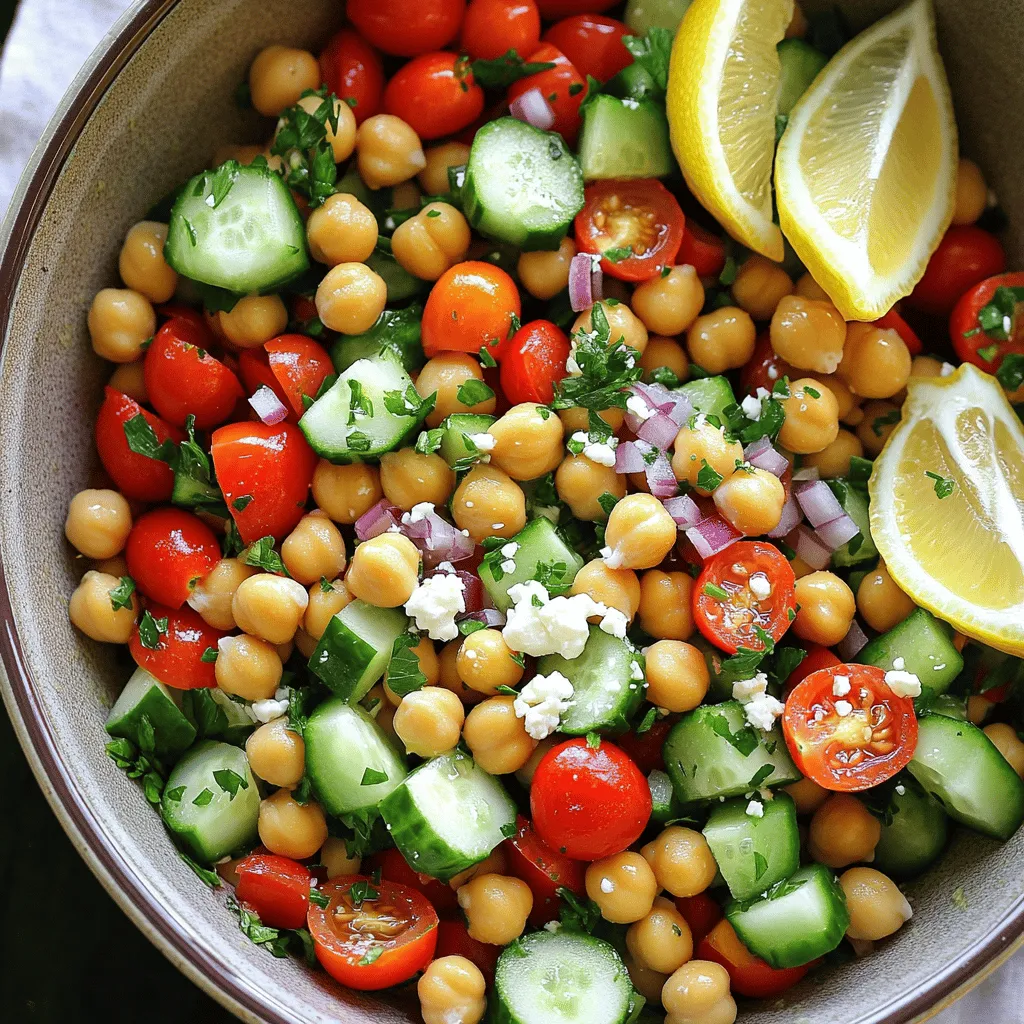
Are you ready to brighten your meals with a burst of flavor? My Zesty Lemon Chickpea Salad is a perfect blend of fresh veggies and a tangy dressing, making it both healthy and delicious. With simple ingredients like chickpeas, cucumbers, and cherry tomatoes, you can create a vibrant dish in no time. Join me as I share step-by-step instructions, tips for perfection, and fun variations to enjoy!
Ingredients
Main Ingredients
– 1 can (15 oz) chickpeas, thoroughly drained and rinsed
– 1 large cucumber, diced into bite-sized pieces
– 1 cup cherry tomatoes, halved for a burst of flavor
– 1 red bell pepper, diced for sweetness and crunch
– 1 small red onion, finely chopped for subtle sharpness
– 1/4 cup fresh parsley, roughly chopped for a fresh aroma
– 1/4 cup feta cheese, crumbled (optional; adds creaminess)
Dressing Components
– Juice of 2 fresh lemons, providing that zesty kick
– 3 tablespoons extra-virgin olive oil for richness
– 1 teaspoon Dijon mustard for a hint of tang
– 1 teaspoon honey (or maple syrup for a vegan option) to balance flavors
– Salt and freshly ground black pepper to taste
Nutritional Information
This salad is packed with nutrients. It has about 200 calories per serving. You get protein from chickpeas, fiber from veggies, and healthy fats from olive oil. Plus, it provides vitamins A and C. This makes it not just tasty, but also good for you.
Step-by-Step Instructions
Preparing the Salad
Start by gathering a large mixing bowl. Add the chickpeas, diced cucumber, halved cherry tomatoes, red bell pepper, red onion, and parsley. Mix these fresh ingredients well. You want each piece to shine in your salad. If you enjoy cheese, sprinkle in the crumbled feta for a creamy touch. This adds a nice contrast to the crunch of the veggies.
Making the Dressing
For the dressing, take a smaller bowl. Whisk together the lemon juice and olive oil. This forms the base of your zesty dressing. Next, add the Dijon mustard and honey. These ingredients give a perfect balance of flavor. Season with salt and black pepper. Whisk until the mixture looks smooth and well combined.
Assembling the Dish
Now it’s time to bring everything together. Drizzle the dressing over your salad mix. Use a spatula or wooden spoon to toss gently. You want all the ingredients to be evenly coated without mashing them. If you added feta, do a light toss to keep the cheese intact. Taste your salad and adjust the seasoning if needed. Cover it and let it chill in the fridge for at least 30 minutes. This helps the flavors meld beautifully.
Tips & Tricks
Perfecting the Flavor
To make your Zesty Lemon Chickpea Salad shine, focus on seasoning. Start with salt and pepper. Taste as you go. You may want more lemon juice for tang. If you like a sweeter flavor, drizzle more honey.
For different dressings, try balsamic vinegar or apple cider vinegar. You can also mix in tahini for creaminess. Each option gives a new twist to the salad.
Presentation Ideas
Serving your salad well makes it more enticing. Use a large, colorful bowl for a rustic look. Add fresh parsley on top for a pop of green. You can even place lemon wedges around the bowl for a bright touch.
If you want individual servings, use clear cups. This way, the layers show off the bright colors. A light drizzle of olive oil on each cup adds elegance.
Meal Prep Advice
Prepping this salad in advance is easy. Make it a few hours before serving. The flavors develop more when they sit.
For best results, chill the salad for at least 30 minutes. This helps the flavors mix well. You can store leftovers in the fridge for up to three days. Just keep the dressing separate if you want it fresh.
Variations
Veggie Additions
You can make this salad even better by adding veggies. Try adding avocados. They bring creaminess and healthy fats. Carrots can add a nice crunch. You can also toss in diced mango or apple. These fruits add sweetness and a fun twist.
Protein Boosts
Want to make this salad heartier? Add some protein! Grilled chicken works great for meat lovers. Shrimp is a tasty option too. For a plant-based choice, use tofu. It soaks up flavors well and adds nutrition.
Dressing Alternatives
Switch up the dressing for a new taste! Try using different vinegars, like balsamic or apple cider. You can also squeeze in more citrus juice for extra zing. For a creamier touch, mix in yogurt or tahini. Both add richness and make the salad more filling.
Storage Info
Refrigeration Tips
Store your Zesty Lemon Chickpea Salad in a sealed container. This keeps it fresh and tasty. It lasts about 3 to 5 days in the fridge. Make sure to check for any signs of spoilage before eating.
Freezing Guidelines
Freezing this salad is not ideal. The vegetables may lose their crunch. If you want to freeze it, consider freezing just the chickpeas. Place them in an airtight bag. When you want to use them, thaw overnight in the fridge.
Reusing Leftovers
Leftover salad is great for new meals! You can add it to wraps for a quick lunch. Toss it in grain bowls for added flavor. Or, layer it in sandwiches for a fresh twist. You can even mix it into soups for a hearty touch. Enjoy creating new dishes with your leftover salad!
FAQs
Can I make Zesty Lemon Chickpea Salad ahead of time?
Yes, you can make this salad ahead of time. In fact, it often tastes better after chilling. The flavors mix well when you let it sit. I suggest making it a few hours before serving. Just cover it with plastic wrap and place it in the fridge. This way, the lemon juice and olive oil soak into the chickpeas and veggies. You will enjoy a zesty and bright flavor profile!
Is this salad gluten-free?
Yes, this salad is gluten-free. Chickpeas, fresh veggies, and the dressing contain no gluten. If you want to check other ingredients, always read the labels. Most items are safe, but it’s best to confirm. This makes the salad a great option for those with gluten sensitivities. You can serve it to everyone without worry!
What can I substitute for chickpeas?
If you can’t eat chickpeas, no problem! You can use other beans like black beans or kidney beans. These will add protein and texture. Another option is to use cooked quinoa or lentils. These alternatives keep the salad hearty and filling. Each will bring a unique taste, so feel free to explore. Get creative based on what you have!
This blog post provided a clear guide to making a Zesty Lemon Chickpea Salad. We covered the key ingredients, from fresh veggies to the zesty dressing. You learned how to prepare, dress, and assemble the salad for the best flavor.
I shared tips for meal prep, variations to try, and how to store leftovers. Remember, this salad is not just easy to make; it’s also packed with nutrients. Enjoy your creation, explore the variations, and make it your own!
![- 1 can (15 oz) chickpeas, thoroughly drained and rinsed - 1 large cucumber, diced into bite-sized pieces - 1 cup cherry tomatoes, halved for a burst of flavor - 1 red bell pepper, diced for sweetness and crunch - 1 small red onion, finely chopped for subtle sharpness - 1/4 cup fresh parsley, roughly chopped for a fresh aroma - 1/4 cup feta cheese, crumbled (optional; adds creaminess) - Juice of 2 fresh lemons, providing that zesty kick - 3 tablespoons extra-virgin olive oil for richness - 1 teaspoon Dijon mustard for a hint of tang - 1 teaspoon honey (or maple syrup for a vegan option) to balance flavors - Salt and freshly ground black pepper to taste This salad is packed with nutrients. It has about 200 calories per serving. You get protein from chickpeas, fiber from veggies, and healthy fats from olive oil. Plus, it provides vitamins A and C. This makes it not just tasty, but also good for you. Start by gathering a large mixing bowl. Add the chickpeas, diced cucumber, halved cherry tomatoes, red bell pepper, red onion, and parsley. Mix these fresh ingredients well. You want each piece to shine in your salad. If you enjoy cheese, sprinkle in the crumbled feta for a creamy touch. This adds a nice contrast to the crunch of the veggies. For the dressing, take a smaller bowl. Whisk together the lemon juice and olive oil. This forms the base of your zesty dressing. Next, add the Dijon mustard and honey. These ingredients give a perfect balance of flavor. Season with salt and black pepper. Whisk until the mixture looks smooth and well combined. Now it’s time to bring everything together. Drizzle the dressing over your salad mix. Use a spatula or wooden spoon to toss gently. You want all the ingredients to be evenly coated without mashing them. If you added feta, do a light toss to keep the cheese intact. Taste your salad and adjust the seasoning if needed. Cover it and let it chill in the fridge for at least 30 minutes. This helps the flavors meld beautifully. For the full recipe, you can refer back to the recipe card. To make your Zesty Lemon Chickpea Salad shine, focus on seasoning. Start with salt and pepper. Taste as you go. You may want more lemon juice for tang. If you like a sweeter flavor, drizzle more honey. For different dressings, try balsamic vinegar or apple cider vinegar. You can also mix in tahini for creaminess. Each option gives a new twist to the salad. Serving your salad well makes it more enticing. Use a large, colorful bowl for a rustic look. Add fresh parsley on top for a pop of green. You can even place lemon wedges around the bowl for a bright touch. If you want individual servings, use clear cups. This way, the layers show off the bright colors. A light drizzle of olive oil on each cup adds elegance. Prepping this salad in advance is easy. Make it a few hours before serving. The flavors develop more when they sit. For best results, chill the salad for at least 30 minutes. This helps the flavors mix well. You can store leftovers in the fridge for up to three days. Just keep the dressing separate if you want it fresh. For the full experience, check out the Full Recipe. {{image_4}} You can make this salad even better by adding veggies. Try adding avocados. They bring creaminess and healthy fats. Carrots can add a nice crunch. You can also toss in diced mango or apple. These fruits add sweetness and a fun twist. Want to make this salad heartier? Add some protein! Grilled chicken works great for meat lovers. Shrimp is a tasty option too. For a plant-based choice, use tofu. It soaks up flavors well and adds nutrition. Switch up the dressing for a new taste! Try using different vinegars, like balsamic or apple cider. You can also squeeze in more citrus juice for extra zing. For a creamier touch, mix in yogurt or tahini. Both add richness and make the salad more filling. Check out the [Full Recipe] to see how these variations can fit into your meal! Store your Zesty Lemon Chickpea Salad in a sealed container. This keeps it fresh and tasty. It lasts about 3 to 5 days in the fridge. Make sure to check for any signs of spoilage before eating. Freezing this salad is not ideal. The vegetables may lose their crunch. If you want to freeze it, consider freezing just the chickpeas. Place them in an airtight bag. When you want to use them, thaw overnight in the fridge. Leftover salad is great for new meals! You can add it to wraps for a quick lunch. Toss it in grain bowls for added flavor. Or, layer it in sandwiches for a fresh twist. You can even mix it into soups for a hearty touch. Enjoy creating new dishes with your leftover salad! For the full recipe, refer to the [Full Recipe]. Yes, you can make this salad ahead of time. In fact, it often tastes better after chilling. The flavors mix well when you let it sit. I suggest making it a few hours before serving. Just cover it with plastic wrap and place it in the fridge. This way, the lemon juice and olive oil soak into the chickpeas and veggies. You will enjoy a zesty and bright flavor profile! Yes, this salad is gluten-free. Chickpeas, fresh veggies, and the dressing contain no gluten. If you want to check other ingredients, always read the labels. Most items are safe, but it’s best to confirm. This makes the salad a great option for those with gluten sensitivities. You can serve it to everyone without worry! If you can’t eat chickpeas, no problem! You can use other beans like black beans or kidney beans. These will add protein and texture. Another option is to use cooked quinoa or lentils. These alternatives keep the salad hearty and filling. Each will bring a unique taste, so feel free to explore. Get creative based on what you have! This blog post provided a clear guide to making a Zesty Lemon Chickpea Salad. We covered the key ingredients, from fresh veggies to the zesty dressing. You learned how to prepare, dress, and assemble the salad for the best flavor. I shared tips for meal prep, variations to try, and how to store leftovers. Remember, this salad is not just easy to make; it’s also packed with nutrients. Enjoy your creation, explore the variations, and make it your own!](https://goldendishy.com/wp-content/uploads/2025/07/e89bc11c-d040-4055-8bd2-d62839faab5f-300x300.webp)
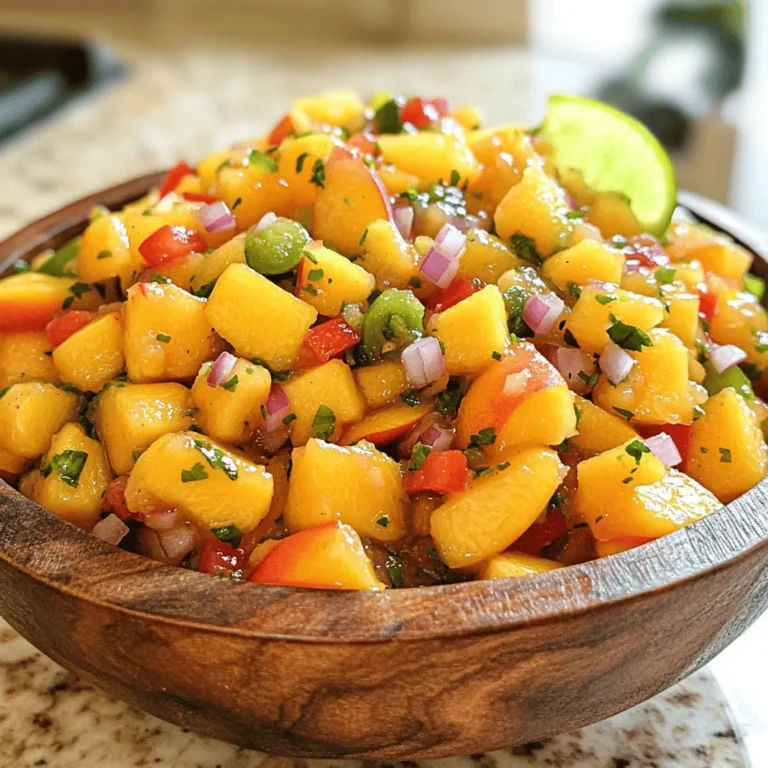
![- 2 cups Granny Smith apples, diced into bite-sized pieces - 1 cup celery, finely sliced - 1 cup red grapes, halved - 1 cup walnuts, coarsely chopped for texture - 1/2 cup plain Greek yogurt, for creaminess - 1/4 cup mayonnaise, to enhance richness - 1 tablespoon fresh lemon juice, to brighten flavors - 1 teaspoon honey, to balance tartness - Salt and freshly ground black pepper, to taste This classic Waldorf salad features fresh produce that bursts with flavor. I love using Granny Smith apples because they add a nice crunch and tartness. They pair perfectly with the sweet red grapes. Celery provides a refreshing crunch, making every bite enjoyable. You also need walnuts for a rich nutty flavor and a great texture. I like to coarsely chop them to keep some larger pieces for crunch. The creamy dressing comes from a mix of plain Greek yogurt and mayonnaise. This blend adds richness and keeps the salad light. Add fresh lemon juice to keep the apples bright and tasty. A touch of honey balances the tartness of the apples and grapes. Seasoning with salt and black pepper enhances the overall taste. This mix of ingredients creates a delightful and colorful salad that is perfect for any meal. For the full recipe, check out the detailed instructions to create this refreshing Waldorf salad. Start by dicing the Granny Smith apples into bite-sized pieces. This makes them easy to eat. To keep the apples fresh and bright, toss them in lemon juice right away. The juice helps stop browning. Next, slice the celery into thin pieces. You want them crunchy and fresh. Then, halve the red grapes. This adds a sweet and juicy burst to the salad. For the dressing, take a bowl and combine plain Greek yogurt and mayonnaise. This mix brings creaminess and smoothness to your salad. Add honey, salt, and black pepper. Whisk these together until you have a smooth, even texture. This dressing is key to making your salad flavorful. In a large bowl, fold the diced apples, sliced celery, halved grapes, and chopped walnuts together. Be gentle to keep all the pieces intact. Then, pour the creamy dressing over the salad. Carefully mix everything to coat the ingredients evenly. Taste the salad and adjust flavors if needed. Add more salt, pepper, or honey for balance. Let it chill for at least 30 minutes so the flavors blend well. Serve it on crisp lettuce leaves for a bright and tasty dish. For the full recipe, check the earlier sections. To keep your apples fresh, start by using lemon juice. After dicing Granny Smith apples, toss them in lemon juice right away. This helps prevent browning. You can also use a mix of water and lemon juice. Soak the diced apples for a few minutes. Drain and dry them before adding to your salad. This step keeps your salad looking vibrant. You can adjust the sweetness and tanginess of your Waldorf salad. If you want more sweetness, add extra honey. For a tangier taste, increase the lemon juice. You can also try different dressings. A bit of apple cider vinegar can give a nice twist. Experiment with your flavors until you find what you love. For a beautiful presentation, serve your salad on crisp lettuce leaves. Use romaine or butter lettuce for a nice touch. You can also add fresh herbs as a garnish. Chopped mint or parsley can add color. Serve the salad in a clear bowl to show off the bright colors. This makes your dish not only tasty but also eye-catching. For more details, refer to the Full Recipe. {{image_4}} You can switch up the fruits in Waldorf salad. Try using ripe pears or sweet strawberries. Each fruit gives a new flavor twist. You can also use different nuts. Pecans or almonds add a nice crunch. Each change can make the salad feel fresh and new. If you want a vegan version, swap Greek yogurt with plant-based yogurt. Use a vegan mayo for creaminess. For gluten-free diets, ensure your mayonnaise is gluten-free. You can also make a low-fat dressing. Use low-fat yogurt and reduce the mayo. These options keep the salad tasty while meeting dietary needs. Waldorf salad shines as both a side dish and a main course. Serve it alongside grilled chicken for a hearty meal. You can also pair it with other salads for a light lunch. Mixing flavors and textures makes it exciting. For a fun twist, serve it in endive leaves or on a bed of spinach. This adds a lovely presentation and taste. For the full recipe, check out the [Full Recipe]. To store leftover Waldorf salad, place it in an airtight container. Make sure to seal it tightly. This keeps the salad fresh and prevents any unwanted smells. Keep it in the fridge right after serving. If you have any extra lettuce, store it separately to keep it crisp. Waldorf salad tastes best when eaten within three days. After that, the apples may start to brown and lose their crunch. The salad will still be safe to eat for up to five days, but the texture might change. Waldorf salad is best served cold. If you need to serve it after refrigeration, just give it a gentle stir. If the salad seems a bit too thick, add a splash of lemon juice or a bit of yogurt to loosen it up. Avoid reheating, as it can change the texture and taste. Enjoy it fresh for the best flavor! Waldorf Salad dates back to the late 1800s. It first appeared at the Waldorf Astoria Hotel in New York City. Chef Oscar Tschirky created this dish for a charity ball. The original recipe included only apples, celery, and mayonnaise. Over time, people added nuts, grapes, and yogurt for extra flavor. Today, we enjoy many versions of this classic salad. Yes, you can prepare Waldorf Salad ahead of time. Make the salad and store it in the fridge. Keep it covered to keep it fresh. I recommend waiting to add nuts until serving. This keeps them crunchy. If you want to serve it later, mix all the ingredients except the dressing. Add the dressing just before serving for the best taste. You can easily swap out some ingredients in Waldorf Salad. Use different fruits like pears or strawberries if you like. If you prefer a vegan option, replace yogurt and mayo with avocado or a plant-based yogurt. For nuts, use almonds or pecans instead of walnuts. These options let you customize the salad to your taste. This blog post covered the making of a Waldorf Salad. You learned about fresh ingredients like apples, celery, and grapes. We discussed how to prepare them, make a tasty dressing, and mix everything together. I shared tips for keeping your apples crisp and customizing flavor. You can also try different fruits and nuts or adapt the recipe for dietary needs. Enjoy your Waldorf Salad, and remember to store it correctly for the best taste. Happy eating!](https://goldendishy.com/wp-content/uploads/2025/06/f7b618e5-0e03-408a-a1e5-f7591c04b926-768x768.webp)

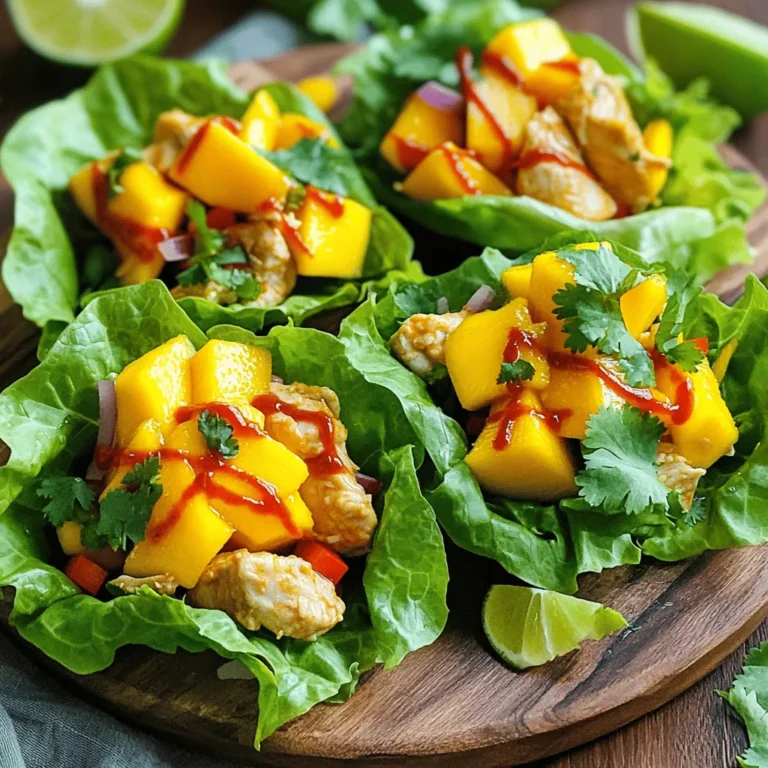
![- 1 can (15 oz) chickpeas, drained and rinsed - 2 ripe avocados - 1 tablespoon fresh lemon juice - 1 clove garlic, finely minced Chickpeas and avocados are the stars of this dish. Chickpeas give a nice, hearty feel. They are rich in protein and fiber. Ripe avocados add creaminess and healthy fats. Lemon juice brightens the mix, while garlic adds depth. - 1/4 teaspoon ground cumin - Salt and freshly ground black pepper - 4 slices of whole grain bread Cumin brings warmth to the mix. Salt and pepper help enhance the flavors. Whole grain bread gives a hearty base that complements the toppings well. Choose bread that toasts nicely for the best crunch. - 1 small red onion, finely chopped - 1/2 cup cherry tomatoes, halved - Fresh cilantro or parsley, chopped - Extra virgin olive oil for drizzling Toppings add fun and flavor. Red onion gives a sweet bite, while cherry tomatoes add freshness. Fresh herbs like cilantro or parsley add color and taste. A drizzle of olive oil adds richness that ties everything together. For the full recipe, check the [Full Recipe]. 1. Start by opening the can of chickpeas. Drain and rinse them well. This helps remove extra sodium and gives a cleaner taste. 2. In a medium bowl, use a fork or potato masher to lightly mash the chickpeas. Aim for a mix of chunky and smooth. This texture makes the spread more fun to eat. 3. Next, scoop out the ripe avocados and add them to the bowl. The creaminess of the avocado balances the chickpeas perfectly. 4. Pour in the fresh lemon juice and add the minced garlic. This gives your mixture a zesty kick. 5. Sprinkle in the ground cumin, salt, and black pepper. Adjust the seasonings based on your taste. Mix everything together until it’s creamy but still a bit chunky. 1. Take your slices of whole grain bread. Lightly toast them in a toaster or on a skillet. Aim for a golden brown color. 2. For a perfect crunch, keep an eye on the bread while toasting. Too light and it’s soft; too dark and it burns. You want that nice, crispy bite. 1. Once your bread is ready, take a generous scoop of the chickpea-avocado mixture. Spread it evenly over each slice of toast. 2. Now, chop the red onion finely and halve the cherry tomatoes. Scatter these colorful toppings over the spread for a fresh crunch. 3. Drizzle a touch of extra virgin olive oil over the top. This adds richness and a lovely finish. 4. Finish with a sprinkle of fresh cilantro or parsley. This not only looks great but also adds a burst of flavor. For the full recipe, check out the [Full Recipe]. Enjoy your vibrant and flavorful chickpea avocado toast! To make your chickpea avocado toast burst with flavor, start by adjusting the seasonings. Everyone's taste is different, and you may want more lemon or salt. Adding spices can also elevate the taste. Fresh ingredients are key. Ripe avocados give a creamy texture that blends beautifully with chickpeas. Use freshly squeezed lemon juice for the best zing. When mashing chickpeas, aim for a mix of chunky and smooth. This gives a nice texture that feels great on the palate. Use a fork or potato masher for this. Avoid over-mashing; you want some bits to stay whole. Ripe avocados are essential too. If they are too firm, the mixture won’t be creamy. Look for avocados that yield slightly when pressed. Presentation matters when serving your toast. Arrange the toasts on a wooden or elegant platter. This adds a rustic charm. You can also place extra cherry tomatoes around the toasts. This makes the dish look colorful and fresh. Drizzle olive oil on top for a glossy finish. A sprinkle of herbs adds a pop of green and invites your guests to dig in. {{image_4}} You can easily change the flavor of your chickpea avocado toast. Start by adding spices like smoked paprika or chili flakes. They give a warm kick that brings out the creaminess of the avocado. You might also try adding fresh herbs like basil or dill. These herbs add a fresh twist and brighten up your dish. Explore different toppings to make your toast unique. Adding protein like feta cheese crumbles or a poached egg can boost flavor and nutrition. For extra crunch, consider adding thinly sliced radishes or refreshing cucumbers. These toppings not only add texture but also enhance the color of your dish. Chickpea avocado toast is great for brunch or a light lunch. You can serve it with a side salad or crispy sweet potato fries for a hearty meal. Pair it with a refreshing iced tea or a glass of lemonade to complete the experience. Each bite is a fresh and flavorful delight that you can enjoy any time of day. Check out the Full Recipe for more tips! To keep your chickpea mixture fresh, store it in an airtight container. This helps lock in flavors. Always refrigerate the mixture right after you finish your meal. For the toasted bread, keep it separate from the chickpeas. Wrap the slices in foil or place them in a zip-top bag. This prevents the bread from getting soggy. Yes, you can freeze the chickpea-avocado mixture! Just place it in a freezer-safe container. Leave some space at the top, as it will expand. When you're ready to use it, take it out and thaw it in the fridge overnight. For serving, give it a quick stir. This helps bring back its creamy texture. You can refrigerate leftovers for about three days. After that, the quality drops. Always check for signs of spoilage. If the mixture smells off or looks discolored, it’s best to toss it. Keep an eye out for any mold or an unusual texture. It’s better to be safe than sorry when it comes to food! For chickpea avocado toast, I love using whole grain bread. Its dense texture holds the spread well. Sourdough also works great; it adds a tangy taste. If you want something softer, try multigrain bread. Look for bread that is sturdy enough to support the toppings without getting soggy. Yes, this recipe is vegan! Both chickpeas and avocados are plant-based. You can enjoy this dish without any animal products. Just ensure that your bread is vegan-friendly too. Most whole grain and multigrain breads are vegan. To make this recipe gluten-free, choose gluten-free bread. Many stores offer a variety of gluten-free options now. Check the label to ensure it’s truly gluten-free. Also, all other ingredients in this recipe are gluten-free. You can enjoy this delicious toast without worry. Chickpeas are high in protein and fiber. They help keep you full and satisfied. Avocados provide healthy fats, which are good for your heart. Together, they make a nutritious combo. In terms of calories, this dish is balanced. One serving has around 300 calories, depending on the bread. Each ingredient adds its own nutrients. This makes chickpea avocado toast great for a snack or meal. This blog post covered the ingredients for chickpea avocado toast, how to prepare it, and tips for great flavor and texture. You learned about various toppings, ways to store leftovers, and how to adapt the recipe to meet dietary needs. Remember, chickpea avocado toast is fun to make and packed with nutrients. You can customize it for any meal. Try different flavors and toppings to keep things exciting. Enjoy experimenting and creating your own delicious versions!](https://goldendishy.com/wp-content/uploads/2025/07/d91d2ffa-6d2b-4892-832e-374b5d5b44d0-768x768.webp)
