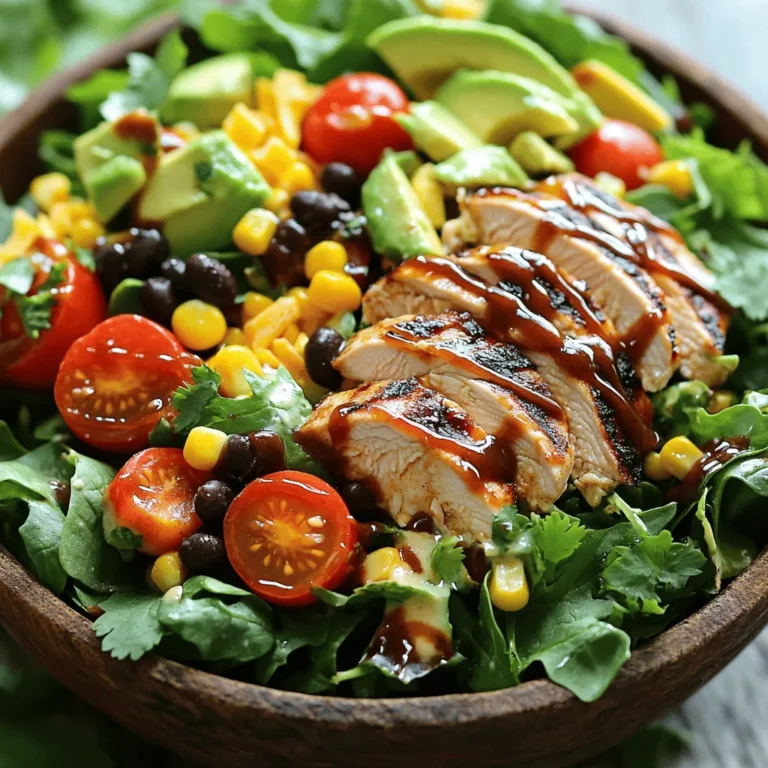
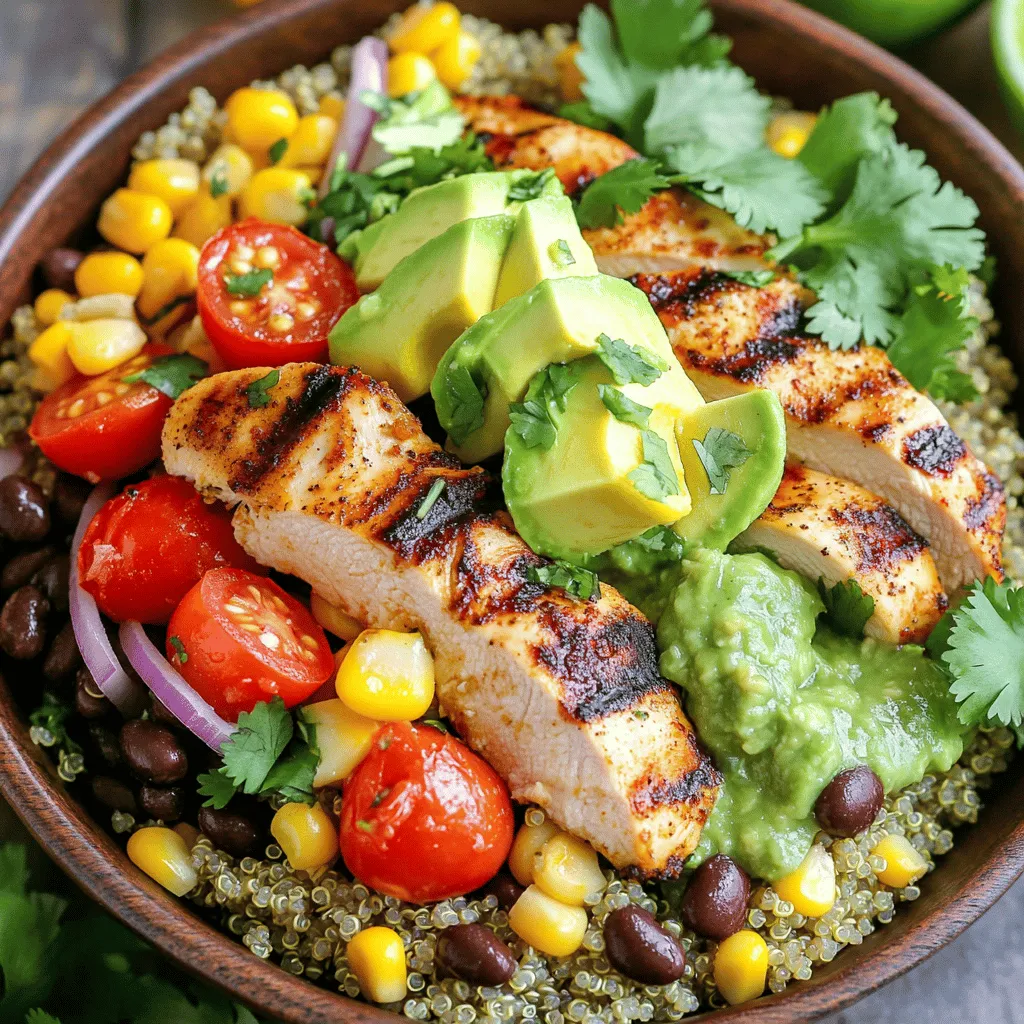
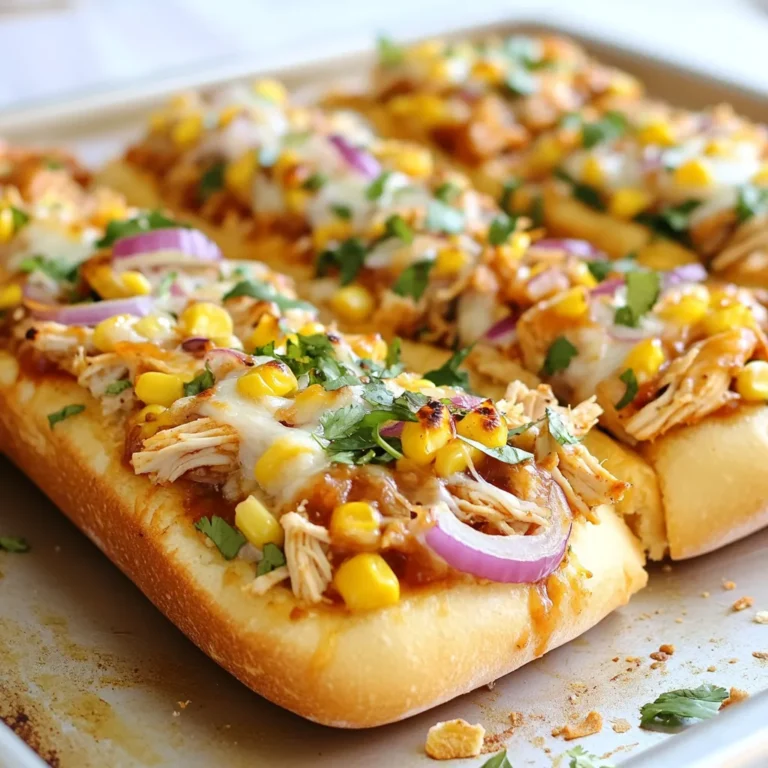
Salsa Verde Chicken Bowls Healthy and Flavorful Meal

Looking for a fun, healthy meal? You’ll love these Salsa Verde Chicken Bowls! They are packed with flavor and simple to make. With tender chicken, bright salsa verde, and wholesome quinoa, you’ll satisfy your hunger and taste buds. Plus, you can customize each bowl how you like. Let’s dive into this delicious recipe and get started on your new favorite dish!They mix chicken with fresh veggies and quinoa. Each bowl is healthy and filling.
Complete Ingredients List
– 2 boneless, skinless chicken breasts
– 1 cup salsa verde
– 1 tablespoon extra virgin olive oil
– 1 cup cooked quinoa
– 1 cup black beans, rinsed and drained
– 1 ripe avocado, sliced
– 1 cup cherry tomatoes, halved
– 1 cup corn (fresh or canned, drained if canned)
– 1/2 medium red onion, finely diced
– 1 cup fresh cilantro, roughly chopped
– Salt and freshly cracked pepper, to taste
– Juice of 1 lime (about 2 tablespoons)
These ingredients come together to create a great balance of protein, fiber, and vitamins. The chicken gives you lean protein. The quinoa adds whole grains. Beans and veggies bring fiber and nutrients. Each bite is not only tasty but also good for you.
Step-by-Step Instructions
Marinating the Chicken
Start by marinating the chicken. Take a mixing bowl and add the chicken breasts. Pour in the salsa verde, covering the chicken well. This adds so much flavor. Cover the bowl with plastic wrap and place it in the fridge for at least 30 minutes. This helps the chicken soak up all that tasty salsa.
Cooking the Quinoa
Next, we need to cook the quinoa. Rinse the quinoa under cold water. This removes a bitter coating called saponin. In a pot, combine 1 cup of quinoa and 2 cups of water. Bring the water to a boil. Then, reduce the heat to low, cover the pot, and let it simmer for about 15 minutes. Once the water is absorbed, remove the pot from heat and let it sit for 5 minutes. Fluff the quinoa with a fork, and it’s ready!
Preparing the Chicken
Now it’s time to cook the chicken. Heat a tablespoon of olive oil in a skillet over medium heat. Once the oil is hot, take the chicken from the marinade. Discard any leftover marinade. Place the chicken in the skillet and cook it for about 6-7 minutes on each side. The chicken should be golden brown and reach 165°F inside. After cooking, let it rest for a few minutes before you slice it thinly.
Combining Bowls Ingredients
In a large mixing bowl, combine the cooked quinoa, black beans, corn, halved cherry tomatoes, diced red onion, and half of the chopped cilantro. Drizzle lime juice over this mix. Season it with salt and freshly cracked pepper to taste. Toss everything gently until it’s all mixed well.
Assembling the Bowls
To assemble the bowls, divide the quinoa and black bean mixture evenly among four bowls. Top each bowl with sliced chicken. Place the avocado slices on top of the chicken, and sprinkle the rest of the cilantro over each bowl.
Garnishing and Serving
For a little extra flavor, you can drizzle more salsa verde on top. Serve the bowls right away. Add lime wedges on the side for a zesty touch. Enjoy your healthy and flavorful meal!
Tips & Tricks
Choosing the Best Salsa Verde
When picking salsa verde, look for freshness and flavor. Choose a brand made with real ingredients. Check for bright green color and a balance of spice. If you like heat, find one with jalapeños. A milder salsa works for those who prefer less spice. You can also make your own at home. Blend tomatillos, cilantro, lime juice, and garlic for a fresh twist.
Cooking the Chicken Perfectly
For juicy chicken, marinate it well. Salsa verde adds flavor and keeps the chicken moist. Use medium heat when cooking. This helps cook the chicken evenly without burning. Flip the chicken only once to get a nice sear. Use a meat thermometer to check for doneness. Chicken should reach 165°F. Let it rest before slicing to keep juices inside.
Preparing Quinoa Without Bitterness
Quinoa can taste bitter if not rinsed. Rinse it under cold water before cooking. This removes saponin, the coating that causes bitterness. Use a ratio of 1 part quinoa to 2 parts water. Bring it to a boil, then simmer. Fluff with a fork after cooking for a great texture. Cooked quinoa should be light and fluffy.
Customizing Your Bowls
Salsa verde chicken bowls are fun to customize! Add your favorite toppings like cheese, sour cream, or hot sauce. You can swap quinoa for brown rice or cauliflower rice. Try different beans like pinto or kidney beans. Add veggies like bell peppers or zucchini for extra crunch. Mix and match to suit your taste!
Variations
Vegetarian Option
You can easily make this dish vegetarian. Replace the chicken with grilled zucchini or mushrooms. These options add great texture and flavor. Use the same salsa verde to keep it vibrant. You can also add more beans or chickpeas to boost protein. This way, you keep the meal filling and nutritious.
Rice Substitute
If you prefer rice, swap quinoa for brown or white rice. Both options work well and absorb flavors nicely. Brown rice adds a nutty taste and more fiber. White rice gives a soft, fluffy texture. Cook the rice according to package instructions for best results.
Additional Toppings and Sides
Try adding toppings for a personal touch. Crumbled feta cheese or Greek yogurt adds creaminess. Fresh jalapeños give a spicy kick. You can also include pickled red onions for tang. Serve with tortilla chips or a fresh salad on the side. These extras make the meal more exciting and flavorful. Feel free to mix and match to find your favorite combination!
Storage Info
Storing Leftovers
You can keep leftovers in an airtight container. Make sure to let the bowl cool before sealing it. Store the chicken and quinoa mixture separately from the avocado. This keeps the avocado fresh and green. Leftovers will stay good for up to three days in the fridge.
Reheating Instructions
To reheat, warm up the chicken and quinoa mixture in a skillet over medium heat. Stir it often. You can also use the microwave. Heat in short bursts of 30 seconds until warm. Be careful not to overheat, or the chicken may dry out. Add fresh avocado after reheating for the best taste.
Freezing Tips
You can freeze the chicken and quinoa mixture for later. Use a freezer-safe container or bag. It will keep for up to three months. When you’re ready to eat, thaw it in the fridge overnight. Reheat it gently, and then add fresh toppings. This will help keep your bowl vibrant and tasty.
FAQs
What can I serve with Salsa Verde Chicken Bowls?
You can serve many tasty sides with Salsa Verde Chicken Bowls. I suggest:
– Tortilla chips for crunch.
– A fresh garden salad for extra greens.
– Greek yogurt or sour cream for creaminess.
– Fresh lime wedges for added zest.
– Extra salsa verde for more flavor.
These options add variety and balance to your meal.
How long does cooked chicken last in the fridge?
Cooked chicken stays good in the fridge for about 3 to 4 days. Make sure to store it in an airtight container. If you want it to last longer, freeze it. Frozen chicken can stay safe for up to 4 months.
Can I make this recipe in advance?
Yes, you can make parts of this recipe ahead of time. Marinate the chicken a day before. You can also cook the quinoa and store it in the fridge. Just keep everything in separate containers. This way, you save time when you’re ready to eat.
Is quinoa healthy?
Quinoa is very healthy! It is a complete protein. This means it has all nine essential amino acids. It’s high in fiber, which is good for digestion. Quinoa also has vitamins and minerals, like magnesium and iron. Adding quinoa to your meals boosts nutrition and keeps you full longer.
In this article, we covered making delicious Salsa Verde Chicken Bowls. You learned about all the key ingredients, step-by-step cooking tips, and even how to customize your bowls. Remember to choose the best salsa and marinate the chicken well for great flavor. These bowls are versatile and perfect for any meal. Feel free to adjust toppings and sides to suit your taste. Enjoy your cooking adventure and delight your family with this healthy dish!

![- 8 oz fettuccine pasta - 1 lb large shrimp, peeled and deveined - 2 tablespoons Cajun seasoning - 2 tablespoons olive oil - 3 cloves of garlic, minced - 1 cup heavy cream - 1 cup grated Parmesan cheese - 1/2 cup cream cheese, softened - Salt and pepper to taste - 2 tablespoons chopped fresh parsley (for garnish) - Zest of 1 lemon (for brightness) When I make Cajun Shrimp Alfredo, I love how rich and creamy it is. The fettuccine pasta serves as a perfect base for the dish. You can choose any pasta you like, but fettuccine offers a great texture that holds the sauce well. The shrimp is the star of this recipe. I always prefer large shrimp because they have a great bite and flavor. Make sure to peel and devein them for the best experience. The Cajun seasoning adds a warm kick that makes this dish pop. For the sauce, I use both heavy cream and cream cheese. They blend together to create a smooth and thick sauce. Parmesan cheese adds that salty, nutty flavor that ties everything together. Fresh garlic enhances the aroma, making your kitchen smell divine while cooking. I finish the dish with fresh parsley and lemon zest. The parsley brings a bright color, while the lemon zest adds a hint of freshness. This combination makes every bite a flavorful delight. You can find the Full Recipe to guide you through the cooking process. Enjoy creating this scrumptious meal! Start by bringing a large pot of salted water to a boil. The salt helps flavor the pasta. Once the water is boiling, add 8 ounces of fettuccine. Cook the pasta until it is al dente, which usually takes about 8 to 10 minutes. You want it firm, not mushy. After cooking, drain the pasta but save 1/2 cup of the water for later. Next, take 1 pound of large shrimp, peeled and deveined. In a bowl, sprinkle 2 tablespoons of Cajun seasoning over the shrimp. Toss them well so every piece is coated. This gives the shrimp a nice, bold taste. Heat 2 tablespoons of olive oil in a large skillet over medium-high heat. When hot, add the shrimp and sauté for 2 to 3 minutes per side. Cook until they turn pink and opaque. Once done, remove them from the skillet and set aside. In the same skillet, lower the heat a bit. Add 3 cloves of minced garlic to the skillet. Sauté the garlic for about 30 seconds. You want it fragrant but not burnt. Then, pour in 1 cup of heavy cream. Stir gently and let it come to a gentle simmer. Add in 1/2 cup of softened cream cheese, stirring until it melts. Now, gradually mix in 1 cup of grated Parmesan cheese. Stir vigorously to make the sauce creamy. If it’s too thick, add some of the reserved pasta water until you reach the right consistency. Now it’s time to bring everything together. Return the sautéed shrimp to the skillet with the creamy sauce. Add the cooked fettuccine next. Toss all the ingredients gently so the pasta and shrimp are well-coated. Taste and season with salt and pepper as needed. For a bright touch, add the zest of 1 lemon, mixing it in for extra flavor. Enjoy this flavorful creamy delight! For a complete recipe, check out the [Full Recipe]. - Avoid overcooking shrimp: Cook shrimp for only 2-3 minutes per side. They should be pink and opaque. Overcooked shrimp can turn rubbery. Keep a close eye on them as they cook. - How to achieve a silky sauce: To make a smooth sauce, stir the heavy cream gently as it heats. Add cream cheese and Parmesan slowly. If the sauce is too thick, use reserved pasta water to thin it out. - Suggesting additional spices: Try adding a pinch of cayenne for extra heat. Smoked paprika can add a nice depth. Experiment with flavors that excite your taste buds. - Importance of fresh herbs for garnishing: Fresh parsley adds color and brightness to the dish. You can also use basil or chives for a different twist. Fresh herbs make every plate look and taste better. - Pairing with a side salad or garlic bread: A crisp side salad balances the rich flavors of the Alfredo. Garlic bread is a perfect complement too. It helps soak up the creamy sauce. - Creative plating ideas: Swirl the fettuccine into a nest on the plate. Top it with shrimp and a sprinkle of parsley. Adding lemon zest on top gives it a fresh look and flavor. For added flair, drizzle some sauce around the plate. For the complete process of making this dish, check out the Full Recipe. {{image_4}} For those with dietary needs, there are great options. You can use gluten-free pasta. Many brands offer tasty versions made from rice or corn. These options cook well and hold sauce nicely. If you need a dairy-free choice, try cashew cream or almond milk. These alternatives give a creamy texture that works well in Alfredo. Both options keep your dish rich and full of flavor. Cajun seasoning can be adjusted to fit your taste. If you love spice, add more seasoning. For a milder dish, use less. You can also mix in smoked paprika for a smoky flavor. Adding vegetables can boost nutrition. Bell peppers, spinach, or zucchini blend well into the sauce. They add color, taste, and extra vitamins. Just sauté them with the shrimp for a quick mix. If you prefer a different protein, chicken works great. Simply swap shrimp for diced chicken breast. Cook it the same way until golden and cooked through. Tofu is another excellent option for a vegetarian twist. Firm tofu absorbs flavors well. Just cube it and sauté until crispy. For a seafood twist, try adding fish. Salmon or scallops can add rich flavor. Cook them gently to keep them tender. These variations keep the dish fun and tasty while catering to different diets. Enjoy mixing it up! For the full recipe, check out Cajun Shrimp Alfredo Delight. To keep your Cajun Shrimp Alfredo fresh, store leftovers in the fridge. Use airtight containers to avoid moisture loss. It’s best to cool the dish before sealing it. This helps maintain the creamy texture. Try to eat the leftovers within 2 to 3 days for the best taste. When reheating, use low heat on the stove or microwave. Stir the dish gently to avoid breaking the creamy sauce. Add a splash of milk or cream to refresh the texture. This will help revive the dish and keep it smooth. Remember to heat just until warm, so you don’t overcook the shrimp. If you want to freeze Cajun Shrimp Alfredo, cool it completely first. Use freezer-safe containers and leave some space for expansion. The dish will last about 2 to 3 months in the freezer. When you’re ready to eat, thaw it in the fridge overnight. Reheat slowly on the stove, adding a bit of cream if needed for a creamy finish. Cajun Shrimp Alfredo is a creamy pasta dish with bold flavors. It features fettuccine pasta and shrimp coated in a rich Alfredo sauce. The Cajun seasoning adds warmth and a bit of spice. This dish balances creamy texture with savory notes from garlic and cheese. You will taste hints of lemon zest, which brighten the flavors. It's a perfect mix of comfort food and exciting cuisine that can impress anyone. To add extra heat to your Cajun Shrimp Alfredo, try these options: - Use more Cajun seasoning than the recipe calls for. - Add a pinch of cayenne pepper or crushed red pepper flakes. - Incorporate diced jalapeños or fresh chili peppers into the shrimp. - Serve with a drizzle of hot sauce on top for a spicy kick. Yes, you can use frozen shrimp. Here are some best practices: - Thaw the shrimp in cold water for about 15-20 minutes before cooking. - Pat them dry with a paper towel to remove excess moisture. - Ensure you sauté them until fully cooked, which usually takes 2-3 minutes per side. Using frozen shrimp can save time and still give you great flavor. To keep your Alfredo sauce smooth and creamy: - Use low heat when making the sauce. - Stir continuously to help the cheese melt evenly. - Gradually add the cream and cheese, mixing well each time. - If the sauce gets too thick, slowly add reserved pasta water until it reaches the desired texture. Following these tips will help maintain a silky sauce that clings perfectly to your pasta. Cajun Shrimp Alfredo is a rich and tasty dish that you can easily make at home. You learned about key ingredients, cooking steps, and helpful tips. Variations allow you to adapt this dish to your diet or taste. Proper storage ensures your leftovers stay delicious. Remember, you can always customize flavors and ingredients to suit your needs. Enjoy creating this meal and impressing your family or friends. It’s all about the simple joys of cooking and sharing great food.](https://goldendishy.com/wp-content/uploads/2025/07/5d1dc84f-c815-4e1a-a64f-ea492bbf0a6c-768x768.webp)