
Lemon Herb Quinoa Salad Fresh and Flavorful Recipe
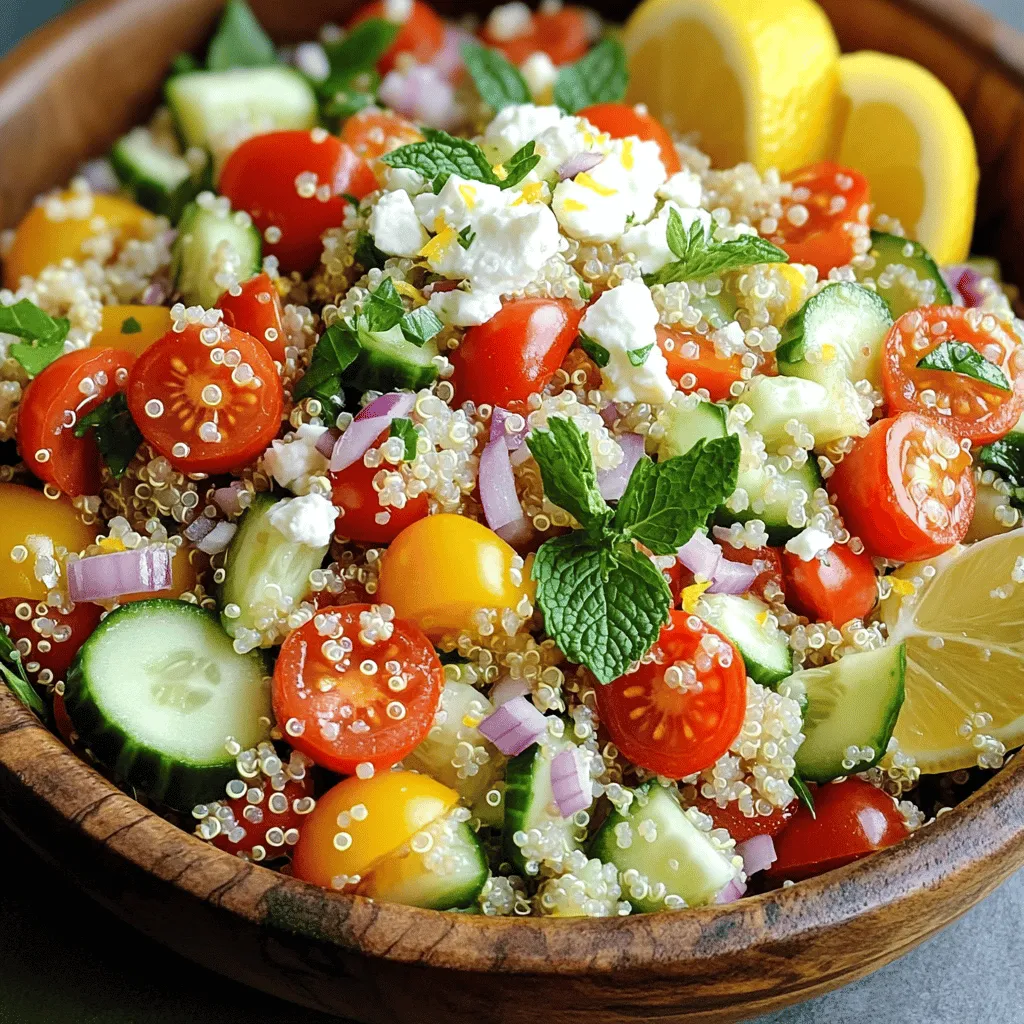
Looking for a fresh, tasty dish that’s easy to make? This Lemon Herb Quinoa Salad is your answer! Packed with bright flavors and healthy ingredients, it’s perfect for any meal. With simple steps, you’ll learn how to whip up this delightful salad in no time. Whether you need a quick lunch or a side for dinner, this recipe brings zest to your table. Let’s dive in and create something delicious together!
Ingredients
Complete List of Ingredients
To make the Lemon Herb Quinoa Salad, gather these fresh ingredients:
– 1 cup quinoa, thoroughly rinsed
– 2 cups vegetable broth (or water)
– 1 cup cherry tomatoes, halved
– 1 medium cucumber, diced
– 1 bell pepper (choose either red or yellow), diced
– 1/2 medium red onion, finely chopped
– 1/4 cup fresh parsley, coarsely chopped
– 1/4 cup fresh mint leaves, coarsely chopped
– 1/4 cup feta cheese, crumbled (optional)
– Juice of 1 large lemon
– 2 tablespoons extra virgin olive oil
– Sea salt and freshly ground black pepper, to taste
Ingredient Substitutions
You can swap some ingredients to fit your tastes or needs. Here are some easy ideas:
– Use chicken broth instead of vegetable broth for a richer flavor.
– Try quinoa blends like red quinoa or black quinoa for a colorful twist.
– Swap cherry tomatoes for diced bell peppers for a crunchier salad.
– If you dislike onions, use green onions or omit them entirely.
– Use sunflower seeds or nuts instead of feta for a nutty flavor.
Health Benefits of Key Ingredients
This salad is not just tasty; it has great health perks:
– Quinoa is a complete protein. It helps build and repair tissues.
– Cucumbers are hydrating and low in calories, making them great for weight loss.
– Tomatoes are rich in antioxidants and support heart health.
– Fresh herbs like parsley and mint add flavor while offering vitamins and minerals.
– Lemon boosts vitamin C, which can help your immune system.
– Olive oil is a healthy fat that may lower heart disease risk.
These ingredients make the Lemon Herb Quinoa Salad both delicious and nutritious.
Step-by-Step Instructions
Preparing the Quinoa
Start by rinsing one cup of quinoa under cold water. This step gets rid of any bitterness. In a medium saucepan, add the rinsed quinoa and two cups of vegetable broth. Turn the heat to medium-high and bring it to a boil. Once boiling, lower the heat to low. Cover it and let it simmer for about 15 minutes. You know it’s done when the quinoa is fluffy and all the liquid is gone. Remove the pot from the heat and let it cool to room temperature.
Mixing the Vegetables
While the quinoa cools, grab a large bowl. Add one cup of halved cherry tomatoes, one diced cucumber, and one diced bell pepper. You can pick either red or yellow. Then, finely chop half a red onion and toss it in. Stir well to mix the veggies. This colorful mix will add flavor and crunch to your salad.
Creating and Adding the Dressing
In a small bowl, whisk together the juice of one large lemon, two tablespoons of extra virgin olive oil, and a pinch of sea salt and black pepper. Mix it well until everything is blended. This dressing will brighten up the salad and bring all the flavors together.
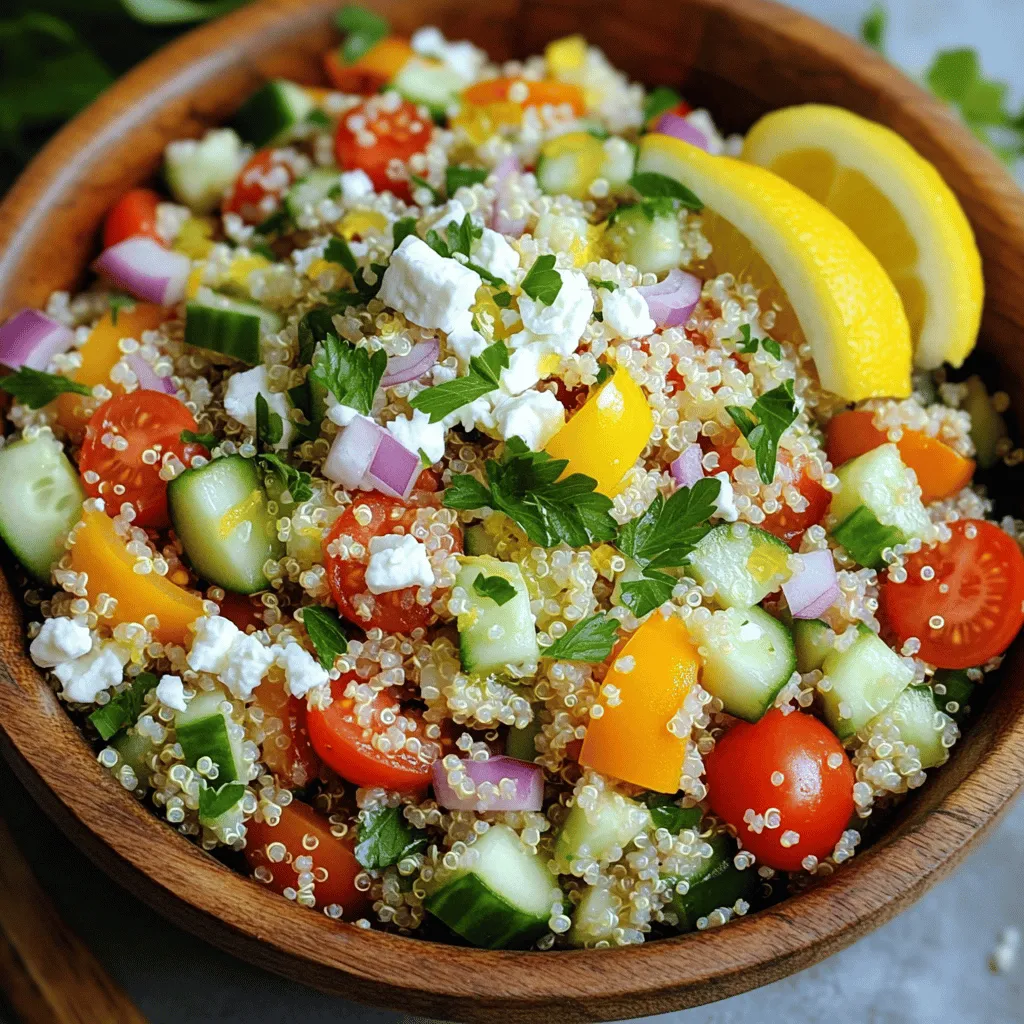
Final Touches and Serving Suggestions
Once the quinoa has cooled, add it to the bowl with the vegetables. Gently fold the mixture to combine without smashing the quinoa. Then, pour the dressing over the salad and toss to coat everything evenly. Next, add a quarter cup of coarsely chopped parsley and mint. If you like, sprinkle in a quarter cup of crumbled feta cheese. Taste the salad and adjust any seasonings as needed. For the best taste, cover the salad and chill it in the fridge for at least 30 minutes. This allows the flavors to blend nicely. When ready to serve, present the salad in a large bowl, garnished with extra herbs and lemon wedges. Enjoy your fresh and flavorful Lemon Herb Quinoa Salad!
Tips & Tricks
Perfecting Quinoa Texture
To cook quinoa just right, rinse it well before cooking. This removes a bitter coating called saponin. Use two parts liquid to one part quinoa. Bring it to a boil, then lower the heat and cover. Simmer it for about 15 minutes. Once done, let it sit covered for five minutes. Fluff it with a fork to get that light texture you want.
Enhancing Flavor Profiles
To boost flavors, use vegetable broth instead of water. It adds depth. Fresh herbs make a huge difference too. I love using parsley and mint for their bright taste. You could also add lemon zest for a citrusy punch. Always taste before serving and adjust salt or pepper as needed. A splash of vinegar can also lift the flavors.
Serving and Presentation Ideas
Serve your salad in a large, colorful bowl. This makes it look inviting. Consider garnishing with extra herbs or lemon wedges. For a fun twist, use a mason jar for individual servings. This adds a nice touch for gatherings. Chill the salad before serving. This helps the flavors mingle and taste even better.
Variations
Protein Additions (Chicken, Chickpeas, etc.)
You can boost the protein in your salad easily. Add cooked chicken for a hearty meal. Grilled or roasted chicken works best. If you prefer plant-based options, try chickpeas. They add great texture and flavor. You can even use cooked shrimp for a seafood twist. Each option makes the salad more filling.
Seasonal Vegetable Options
Seasonal veggies can change your salad game. In spring, add asparagus or peas for crunch. Summer brings fresh corn and zucchini, which taste amazing. In fall, roasted pumpkin or butternut squash can be a warm touch. Winter calls for hearty greens like kale. These veggies keep the salad fresh and exciting all year.
Different Dressing Ideas
The dressing is key to a flavorful salad. While lemon juice and olive oil are classic, you can mix it up. Try balsamic vinegar for a sweet tang. A honey mustard dressing adds a nice kick too. For a creamy texture, use Greek yogurt mixed with herbs. Each dressing creates a new flavor profile for your salad.
Storage Info
Best Practices for Refrigerator Storage
To store your Lemon Herb Quinoa Salad, use an airtight container. This keeps the salad fresh. Place it in the fridge right after making it. The salad will hold its flavor and texture better this way.
Freezing Options
You can freeze this salad if you want to keep it longer. However, the texture may change. To freeze, put the salad in a freezer-safe bag. Remove as much air as you can. It’s best to eat it within one month for great flavor.
How Long the Salad Lasts
In the fridge, this salad lasts about 3 to 5 days. After that, the veggies may become soggy. If you notice any odd smells or changes in color, it’s best to toss it. Always give it a quick taste test before serving leftovers to ensure freshness.
FAQs
What is the best way to cook quinoa?
The best way to cook quinoa is by using the ratio of two parts liquid to one part quinoa. Start by rinsing the quinoa to remove any bitter taste. Then, bring the liquid to a boil in a saucepan. Once boiling, add the rinsed quinoa, cover it, and reduce the heat. Let it simmer for about 15 minutes until the quinoa is fluffy and the liquid is absorbed. This method gives you perfect, tender grains every time.
Can I make Lemon Herb Quinoa Salad ahead of time?
Yes, you can make Lemon Herb Quinoa Salad ahead of time. Prepare it a day in advance for the best flavor. Just make sure to store it in an airtight container in the fridge. The flavors will blend together beautifully as it sits. Just give it a good stir before serving.
What can I substitute for feta cheese?
If you want to skip feta cheese, there are many options. You can use crumbled tofu for a similar texture. Or try using nutritional yeast for a cheesy flavor without dairy. Avocado also adds creaminess and can be a great addition.
Is this salad gluten-free?
Yes, Lemon Herb Quinoa Salad is gluten-free. Quinoa itself is a gluten-free grain. This makes it a perfect option for those with gluten sensitivities or celiac disease. Enjoy it worry-free!
How can I make it vegan?
To make this salad vegan, simply leave out the feta cheese. You can enhance the flavor with extra herbs or spices. Adding chickpeas can also boost protein and make it even heartier. Enjoy this vibrant salad as a fresh, plant-based meal!
You now have a complete guide to making a Lemon Herb Quinoa Salad. We covered ingredients, cooking steps, and useful tips. Plus, we shared variations for more flavor and storage options. This salad is tasty and packed with nutrients. Use the tips to make it your own. Enjoy the fresh flavors and healthy benefits it brings to your meals. Happy cooking!


. To start, you need to mash the chickpeas. Use a fork or a potato masher. Mash until you have a chunky texture. You want to leave some whole chickpeas. This gives your sandwich a nice bite and texture. Next, add the tahini, lemon juice, and Dijon mustard to the chickpeas. Mix everything well. You should have a creamy base. Now, chop the red onion, celery, and grate the carrot. Fold these veggies into the chickpeas. The crunch from the veggies adds great flavor and color to your salad. Now it's time to season your chickpea mixture. Add salt and black pepper to taste. Adjust the flavors to your liking. If you want more tang, add lemon juice. If you prefer creaminess, add more tahini. For the bread, lightly toast it if you want a crunch. Spread a generous amount of the chickpea salad on two slices of bread. Add a few crisp lettuce leaves on top. If you like, add thin slices of tomatoes and cucumbers. Place the other slices of bread on top. Cut each sandwich in half for easy eating. You can serve them right away or wrap them in parchment paper for later. For a nice touch, arrange the sandwiches on a wooden board or plate. Enjoy this fresh and flavorful meal! For the complete recipe, check the Full Recipe above. To prepare chickpeas, start with rinsing and draining. Use a fine mesh strainer for this task. Rinsing removes excess sodium from canned chickpeas. Draining helps avoid excess water that can make your salad soggy. You want the chickpeas dry but not overly crushed. Adjusting seasoning is key for a tasty salad. Start with salt and pepper. Taste your mixture before serving. Add more lemon juice for brightness. If you want creaminess, add more tahini. These simple changes can enhance the dish. Make your meal look nice with a few easy tips. Use a rustic wooden board or a bright plate. This adds charm to your presentation. Garnish with fresh dill on top of the sandwich. Serve with colorful veggie sticks on the side. It makes for an eye-catching and healthy display. For the full recipe, check the section above. {{image_4}} You can change up the chickpeas in this sandwich. Try using black beans or lentils instead. Both options give a different taste and texture. For extra creaminess, swap tahini with vegan mayonnaise. This will make the mix smooth and rich. You can even blend both for a unique flavor. Herbs and spices can change the taste of your sandwich. Instead of dill, use parsley or cilantro for a fresh kick. You can also add garlic powder or smoked paprika for depth. For a spicy twist, throw in some chopped jalapeños or a dash of hot sauce. These additions can bring a fun zing to your meal. When it comes to bread, you have many choices. Whole grain bread is great, but you can also use gluten-free options. Try wraps made from rice or corn for a lighter touch. This makes for a fun, portable meal. Each bread type changes the sandwich's feel, so choose what you love! To keep leftovers fresh, store your chickpea salad in an airtight container. Make sure to refrigerate it right away. This helps keep the flavors intact for up to three days. When ready to eat, just give it a good stir. You can enjoy it cold or make a fresh sandwich. If you want to store the chickpea salad for longer, freezing is a great option. Place the chickpea salad mixture in a freezer-safe container. Leave some space at the top to allow for expansion. It will stay good for about three months. When you're ready to eat it, let it thaw in the fridge overnight. To refresh your sandwich after storage, you can add a bit of olive oil or lemon juice. This helps bring back the moisture and flavor. If you want, you can toast the bread again for a crunchy bite. This simple step makes your sandwich taste fresh and delicious again. Enjoy your meal! To make this sandwich gluten-free, choose gluten-free bread. Many stores offer great options. Look for brands made from rice or almond flour. You can also try lettuce wraps instead of bread. This keeps it fresh and light too! Yes, you can. Make the chickpea salad a day ahead. Store it in an airtight container in the fridge. It stays good for about three days. Just remember to add fresh toppings right before serving for best flavor. Chickpeas are packed with protein and fiber. They help keep you full and satisfied. This sandwich is low in fat and high in vitamins. The veggies add crunch and nutrients. Tahini brings in healthy fats and flavor. Overall, this sandwich is a tasty way to eat healthy! This blog covered how to make a tasty chickpea salad sandwich. We explored main ingredients, step-by-step instructions, and storage tips. You learned how to adjust flavors and choose the right bread. Remember, you can customize the recipe with different herbs or legumes. Enjoy this easy meal any day! It’s healthy, quick, and delicious. I hope you try it soon. Your taste buds will thank you!](https://goldendishy.com/wp-content/uploads/2025/06/7c039c45-1f39-49ec-9b48-b25c6f87980b-768x768.webp)