Vegan Crispy Buffalo Tacos Flavorful and Easy Recipe

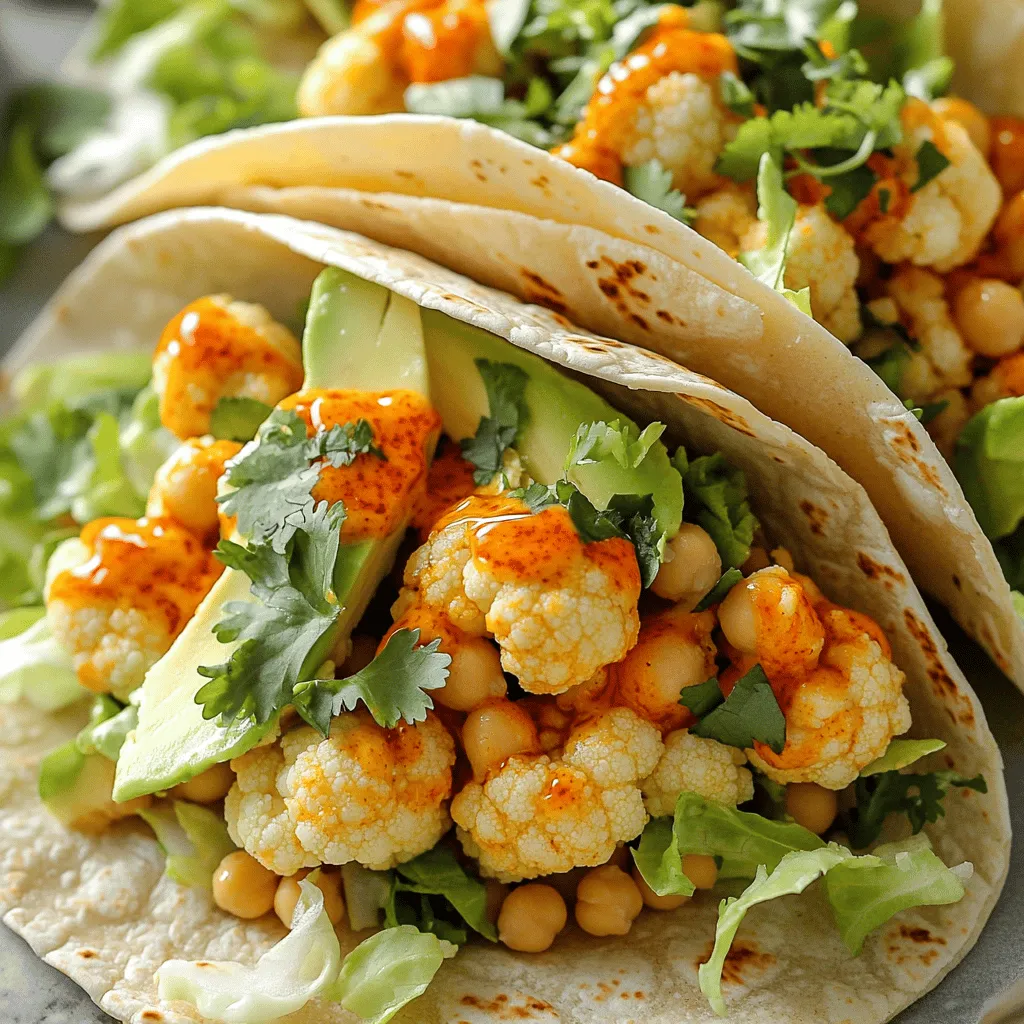
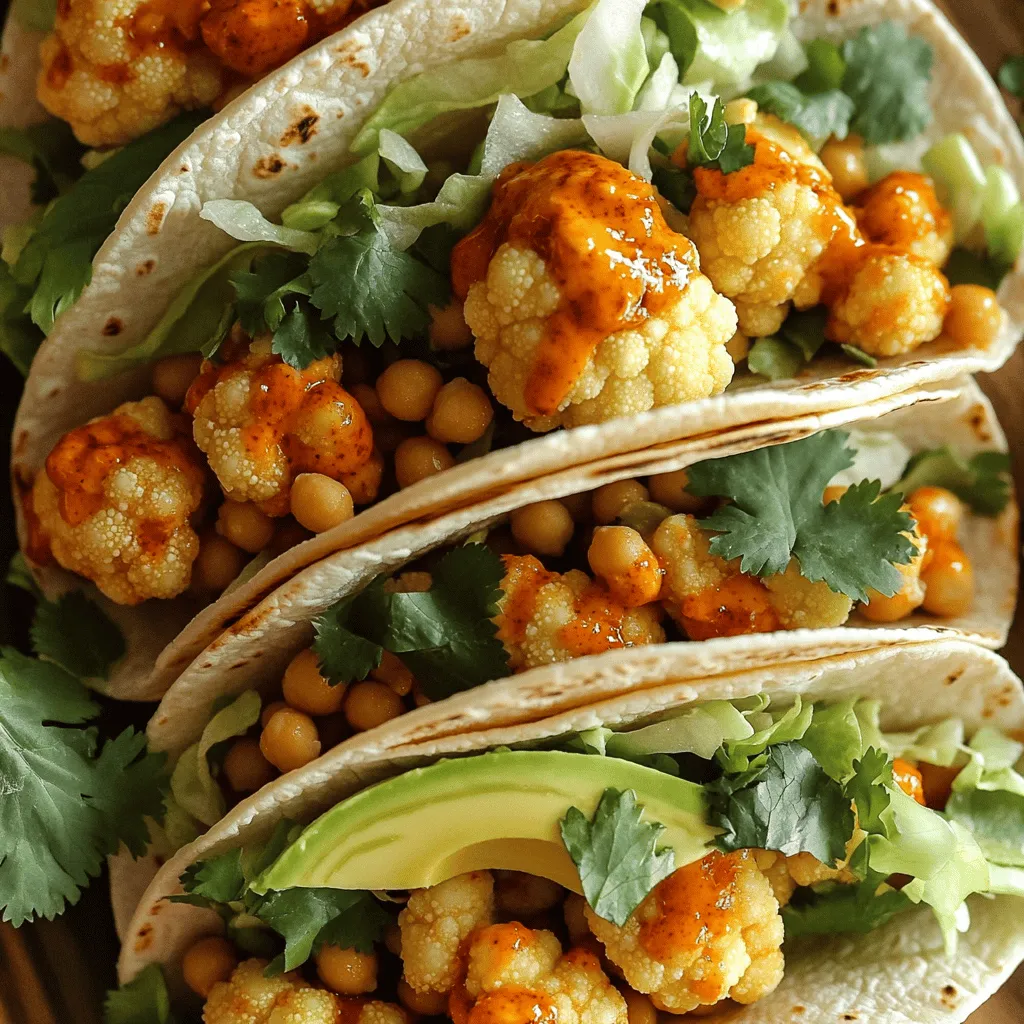
Get ready to spice up your taco night with my easy Vegan Crispy Buffalo Tacos! These crunchy bites of cauliflower and chickpeas will leave your taste buds dancing. With simple ingredients and quick steps, you can whip up a meal that satisfies everyone. Plus, I’ll share tips for perfect crispiness and exciting variations. Let’s dive into this flavorful recipe that proves vegan can be fun and delicious!
Ingredients
Main Ingredients
– 1 cup cauliflower florets
– 1 cup chickpeas, drained and rinsed
– 1 cup breadcrumbs (panko is best for crunch)
– 1/2 cup all-purpose flour (chickpea flour for gluten-free)
– 1 cup almond milk (or any plant-based milk)
– 1/2 cup buffalo sauce (adjust for spice level)
– 1 tsp garlic powder
– 1 tsp onion powder
– 1/2 tsp smoked paprika
– Salt and pepper to taste
– Corn or flour tortillas (for serving)
The main ingredients create a hearty base for your tacos. The cauliflower gives a great texture. Chickpeas add protein and flavor. Breadcrumbs bring that crunch we all love. The spices enhance the taste and make every bite exciting.
Optional Toppings
– Avocado slices
– Shredded lettuce or cabbage
– Fresh cilantro or parsley
Adding toppings makes the tacos even more fun! Avocado adds creaminess and healthy fats. Shredded lettuce or cabbage gives a nice crunch. Fresh cilantro or parsley brightens the dish and adds freshness. You can mix and match these toppings based on your taste.
Ingredient Substitutes
– Gluten-free options: Use chickpea flour instead of all-purpose flour.
– Other plant-based milk choices: Soy, oat, or coconut milk work well.
– Spice level adjustments: Use less buffalo sauce or opt for a milder sauce.
If you need to make changes, don’t worry! Gluten-free flour works great. Different plant-based milks can replace almond milk easily. Adjusting the spice lets everyone enjoy the meal. You can make it mild for kids or add more heat for adults.
Step-by-Step Instructions
Preparation Steps
Preheating the oven
First, set your oven to 400°F (200°C). This step is key for crispy tacos. While the oven heats, line a baking sheet with parchment paper. This helps the tacos not stick.
Preparing the vegetables and seasoning
In a large bowl, add 1 cup of drained chickpeas and 1 cup of cauliflower florets. Sprinkle in 1 tsp garlic powder, 1 tsp onion powder, 1/2 tsp smoked paprika, and salt and pepper to taste. Toss everything together. Make sure each piece is well-coated in the spices. This adds great flavor.
Making the Batter
Combining flour and almond milk
In another bowl, mix 1/2 cup all-purpose flour with 1 cup of almond milk. Whisk until you get a smooth batter. It should be thick but pourable. This batter helps the coating stick.
Achieving the right consistency
Check the batter. If it’s too thick, add a little more almond milk. If too thin, add a bit more flour. The right consistency is important for a good coating.
Baking Technique
Coating the vegetables
Take each chickpea and cauliflower piece. Dip it into the batter, then roll it in 1 cup of breadcrumbs. Make sure they are fully coated. This adds the crunch we want. Place the coated pieces on the baking sheet in a single layer.
Baking time and temperature
Put your baking sheet in the preheated oven. Bake for 20-25 minutes. Flip the pieces halfway through. This helps them cook evenly. You want them golden brown and crispy.
Tips & Tricks
Achieving the Perfect Crispiness
– Choosing the right breadcrumbs: Panko breadcrumbs work best. They create a nice crunch. Regular breadcrumbs are fine but won’t give the same texture. For a gluten-free option, use crushed rice or cornflakes.
– Baking tips for extra crunch: Keep space between the pieces on the baking sheet. This allows hot air to circulate. Flip the tacos halfway through baking. This ensures even crispiness on all sides.
Enhancing Flavor
– Recommended spices and seasonings: Add garlic powder, onion powder, and smoked paprika to the mix. These spices boost the overall taste. Feel free to experiment with cayenne pepper for heat or cumin for warmth.
– Combining sauces for varied taste: Mix buffalo sauce with a bit of ranch or vegan mayo. This gives a creamy touch. You can also try a mix of sweet chili sauce for a sweet-spicy combo.
Presentation Tips
– Plating the tacos attractively: Use a large platter for serving. Place the tacos in a line or a circle. This makes the dish more inviting.
– Suggested garnishes for visual appeal: Top the tacos with fresh cilantro or parsley for color. Add avocado slices and a sprinkle of lime juice for a pop of freshness. Shredded lettuce or cabbage adds crunch and looks great too.

Variations
Ingredient Swaps
You can mix it up by using different vegetables. Try sweet potatoes or zucchini for a fun twist. Both add great taste and texture. If you want a different protein source, use tempeh or tofu. They soak up flavors well and will keep your tacos filling.
Flavor Profiles
Do you like it spicy? Add extra buffalo sauce or some hot sauce. You can also mix in jalapeños for more heat. If you prefer mild flavors, use less buffalo sauce. Try a ranch or garlic sauce for a creamy touch instead. This will give your tacos a different experience.
Serving Suggestions
Pair your tacos with side dishes like rice or beans. A fresh salad also complements them well. You can assemble the tacos in many ways. Try folding the tortillas or stacking them for a fun presentation. Add layers of toppings to make each bite exciting.
Storage Info
Storing Leftovers
To keep your tacos fresh, use airtight containers. Glass or BPA-free plastic works well. Store your leftover tacos in the fridge for up to three days. After that, they may lose their crispiness and taste.
Reheating Instructions
To retain the crispiness, use the oven. Preheat it to 350°F (175°C). Place the tacos on a baking sheet and warm them for about 10 minutes. This method keeps the shells crunchy. If you use a microwave, the tacos may get soggy. If you must use the microwave, heat them in short bursts. Check often to avoid overcooking.
Freezing Tips
To freeze the tacos, wrap them tightly in foil or plastic wrap. Place them in a freezer-safe bag or container. You can freeze them for up to three months. When you’re ready to eat, thaw in the fridge overnight. Reheat in the oven to keep the texture. Avoid using the microwave for freezing tacos, as it can ruin their crunch.
FAQs
How to make vegan crispy buffalo tacos?
To make these tacos, start by preheating your oven to 400°F (200°C). Line a baking sheet with parchment paper to avoid sticking. In a bowl, mix chickpeas and cauliflower florets. Add garlic powder, onion powder, smoked paprika, salt, and pepper. Toss well to coat. In another bowl, whisk all-purpose flour and almond milk until smooth. Dip each piece in the batter and then coat with breadcrumbs. Place them on the baking sheet and bake for 20-25 minutes, flipping halfway. After baking, toss the crispy mixture in buffalo sauce. Warm tortillas in a skillet, fill them, and add toppings like lettuce and avocado. Enjoy your vegan crispy buffalo tacos!
Can I use different vegetables?
Yes, you can swap vegetables! Try using sweet potatoes or zucchini for a different taste. Broccoli also works well if you want something crunchy. You can mix and match according to your preference. Just make sure the vegetables are cut into small pieces for even cooking. This flexibility allows you to customize your tacos to suit your tastes.
What can I serve with buffalo tacos?
Buffalo tacos pair nicely with many side dishes. Consider serving them with a fresh salad for added crunch. You can also enjoy them with guacamole or salsa for extra flavor. Corn on the cob or Mexican rice makes great side dishes as well. These options add variety to your meal and make it more filling.
How do I store leftover tacos?
To store leftover tacos, place them in an airtight container. This helps keep them fresh. You can store them in the fridge for up to three days. If you want to keep them longer, freeze the filling separately. When ready to eat, reheat in the oven to regain crispiness. Using the microwave may make them soggy, so the oven is best.
You learned how to make vegan crispy buffalo tacos using simple ingredients and techniques. We discussed key steps, tips for the perfect crispiness, and optional toppings. Remember, you can customize flavors and swap ingredients as you wish. Enjoy these tacos fresh, or store them for later. With this guide, you can easily impress anyone at your next meal. Happy cooking!


![To make these crispy fish tacos, gather these key items: - 1 lb white fish fillets (cod or tilapia work great) - 1 cup all-purpose flour - 1 cup cornmeal - 1 teaspoon paprika - 1/2 teaspoon cayenne pepper - 1/2 teaspoon garlic powder - 1/2 teaspoon salt - 1/4 teaspoon black pepper - 2 large eggs, beaten - Vegetable oil, for frying - 8 small corn tortillas The toppings add flavor and texture to your tacos. Here are my favorites: - 1/2 cup red cabbage, thinly sliced - 1 avocado, sliced - Fresh cilantro leaves, for garnish - Lime wedges, for serving To round out your meal, consider these sides: - Fresh salsa for a zesty kick - A drizzle of spicy crema for creaminess - Mexican rice for a hearty addition These ingredients make crispy fish tacos a fun and tasty weeknight meal. For the full recipe, be sure to check out the details above! Start by drying the fish fillets with paper towels. This step helps the coating stick better. Cut the fish into strips that are about 1 inch wide. This size cooks evenly and fits nicely in the tacos. In a medium bowl, mix the flour, cornmeal, paprika, cayenne pepper, garlic powder, salt, and black pepper. Stir until well combined. In another bowl, beat the eggs until smooth. This egg wash will help the coating stick. Heat about 1 inch of vegetable oil in a large skillet over medium-high heat. Check if the oil is hot by dropping in a pinch of the flour mix; if it sizzles, it's ready. Dip each fish strip into the egg wash, letting excess drip off. Then coat it in the flour mixture, pressing lightly to ensure it sticks. Place the coated fish in the hot oil, frying in batches to prevent overcrowding. Cook for 3-4 minutes on each side until golden brown. Transfer the fried fish to a plate lined with paper towels to absorb extra oil. Warm each corn tortilla in a dry skillet for about 30 seconds on each side. This makes them soft and easy to fold. For each tortilla, place 2-3 pieces of crispy fish. Top with sliced red cabbage, avocado, and fresh cilantro. Don’t forget to serve the tacos with lime wedges. A squeeze of lime adds a bright, fresh flavor. For the full recipe, you can check the complete details above. To get that perfect crunch, follow these steps: - Dry the Fish: Start by patting the fish fillets with paper towels. This removes moisture and helps them get crispy. - Use Cornmeal: Mixing cornmeal with flour gives extra texture and crunch. It makes the coating thicker and crispier. - Hot Oil: Make sure the oil is hot enough before frying. If it’s too cool, the fish will absorb oil and turn soggy. - Don’t Overcrowd: Fry the fish in batches. Too many pieces at once cools the oil and affects crispiness. Here are some common mistakes you should steer clear of: - Skipping the Egg Wash: The egg wash helps the coating stick. Don’t skip this step! - Not Heating the Oil Properly: Always test the oil. If it’s not hot, you’ll end up with greasy fish. - Using Wet Fish: Wet fish won’t fry well. Always dry them before coating. - Flipping Too Soon: Let the fish cook fully on one side before flipping. This helps it stay intact and crispy. Enhance your tacos with these tasty garnishes: - Fresh Cilantro: Adds a burst of freshness and color. - Avocado: Creamy avocado pairs well with crispy fish. - Lime Wedges: A squeeze of lime brightens up the flavors. - Salsa or Crema: A drizzle of spicy crema or your favorite salsa adds flavor and moisture. For the full recipe, check out [Full Recipe]. {{image_4}} If you want to try a different protein, shrimp works great. Just peel and devein before cooking. You can also use chicken strips. They need a bit more time to cook, so adjust frying time. Another option is tofu for a different texture. Press it to remove water and cut into strips. For a vegetarian twist, use cauliflower. Cut it into small florets, coat, and fry. It gets nice and crispy. If you want a vegan option, tempeh is fantastic. Slice it thin and marinate for flavor before frying. Just make sure to use a plant-based egg wash or a mixture of flour and water. To boost flavor, add lime zest to the coating mix. It brightens each bite. For spice, increase the cayenne pepper in the coating. You can also create a spicy sauce for drizzling on top. Mix yogurt or mayo with hot sauce for a creamy kick. Fresh herbs like cilantro or parsley can add freshness too. These variations keep the dish exciting, ensuring you can enjoy crispy fish tacos in many ways! Try out the full recipe to explore these options. To keep your crispy fish tacos fresh, store leftovers in an airtight container. Place the fish in one container and the toppings in another. This keeps the fish crispy and the toppings fresh. You can also wrap the tortillas in foil for better storage. To reheat, use the oven or an air fryer for best results. Preheat your oven to 350°F (175°C). Place the fish on a baking sheet and bake for about 10 minutes. If using an air fryer, heat it to 350°F (175°C) and fry for 5 minutes. This way, the fish stays crispy. Cooked fish lasts about 2-3 days in the fridge. Fresh toppings, like cabbage and avocado, can last 1-2 days. Store each item separately. If you have leftover tortillas, they can stay fresh in a sealed bag for up to a week. Always check for signs of spoilage before using any of the ingredients. For the full recipe, check the complete list of ingredients. I recommend using white fish like cod or tilapia. These fish have a mild flavor and cook well. They stay tender inside while getting crispy on the outside. Other good options include haddock or snapper. Yes, you can prepare the fish ahead of time. Cut the fish into strips and coat them. Keep the coated fish in the fridge for up to an hour. This helps the coating stick better when you fry them. If you can't find corn tortillas, flour tortillas are a good choice. You can also use lettuce leaves for a low-carb option. They add a nice crunch and freshness to your tacos. Crispy fish tacos can be gluten-free if you use gluten-free flour. Make sure to check the labels on your ingredients. Corn tortillas are naturally gluten-free, so they work well for this dish. For the best results, use gluten-free breadcrumbs or a gluten-free flour blend for coating the fish. Crispy fish tacos are a fun dish to make at home. We discussed key ingredients, topped it with tasty options, and paired it with sides. The steps from preparing the fish to frying it were simple and clear. Use my tips for crispy results and avoid common mistakes. You can also explore variations for flavors and dietary choices. Proper storage will keep your tacos fresh. Now, enjoy making and sharing your crispy fish tacos! They’re sure to impress.](https://goldendishy.com/wp-content/uploads/2025/06/e15c4a6f-d152-43b4-ae39-d2f9004115b6-768x768.webp)


![To make Avocado Lime Crema Tacos, you need some fresh and simple ingredients. Here’s what you will need: - Fresh produce: - 2 ripe avocados - 1 cup cherry tomatoes, halved - 1 cup shredded red cabbage - 1/2 cup fresh cilantro leaves, roughly chopped - Pantry staples: - 8 small corn tortillas - 1/2 cup Greek yogurt - 2 tablespoons fresh lime juice - Zest of 1 lime - 1 clove garlic, finely minced - 1/4 teaspoon ground cumin - Sea salt, to taste - Optional toppings: - Sliced jalapeños - Radish slices - Crumbled feta cheese When you gather these ingredients, aim for ripe avocados. They will make your crema smooth and creamy. Fresh cilantro adds a burst of flavor to the tacos. You can also adjust the optional toppings based on your taste. If you want more heat, add jalapeños. For a crunchy touch, sprinkle some radish slices. You can find the full recipe in the article for detailed steps. Enjoy the fresh tastes of these tacos! To start, grab your food processor. Add the ripe avocados, Greek yogurt, fresh lime juice, lime zest, minced garlic, ground cumin, and a pinch of sea salt. Blend it all together until smooth and creamy. If it seems too thick, add a bit more lime juice. Taste it and adjust the salt or lime juice to your liking. A little extra zing can really elevate the flavor! Use a non-stick skillet for this step. Heat it over medium heat. Toast each corn tortilla for about 30 seconds on one side. Flip it and toast for another 30 seconds. The tortillas should feel warm and soft. Once done, stack them and wrap them in a clean kitchen towel to keep them warm. This keeps them from getting dry. Now, take a warm tortilla and spread a generous dollop of your avocado lime crema right in the center. Next, add a handful of shredded red cabbage for crunch. Layer on some halved cherry tomatoes for a fresh bite. Finally, sprinkle chopped fresh cilantro on top for a burst of flavor. For a fun twist, try adding some sliced jalapeños for heat, radish slices for crunch, or crumbled feta cheese for a savory touch. Serve your tacos right away. Enjoy them while they are fresh and bursting with flavor! Remember, you can find the full recipe [here]. You can switch up the base in your crema. Try sour cream or Greek yogurt for a tangy twist. If you want a dairy-free option, use silken tofu or cashew cream. For extra flavor, add herbs like cilantro or dill. You can also mix in spices such as smoked paprika or chipotle for a smoky kick. To balance flavors, add a mix of textures. Use crunchy cabbage, juicy tomatoes, and creamy crema. These layers make each bite exciting. To avoid tearing the tortillas, warm them first. Heat them in a skillet for about 30 seconds on each side. This softens them, making them easier to fold without breaking. Pair your tacos with simple sides. A fresh salad or rice works well. You might also enjoy them with a light drink like agua fresca or sparkling water. For garnishes, lime wedges and extra cilantro make your tacos look vibrant and fresh. These touches enhance both taste and presentation. For the Full Recipe, refer to the earlier section. {{image_4}} For a tasty vegetarian or vegan taco, swap Greek yogurt for cashew cream or coconut yogurt. Both options keep the creamy texture and flavor. You can also add black beans or roasted chickpeas for protein. These legumes add a nice texture and a mild flavor. Toss in some grilled zucchini or bell peppers for extra color and taste. Fresh herbs like mint or basil can bring a surprise twist. If you want to add protein, consider grilled chicken or shrimp. Marinate chicken in lime juice, garlic, and cumin for at least 30 minutes before grilling. For shrimp, a quick toss with olive oil and lime juice works well. Both options cook fast, making them easy to prepare. You could also try seared steak or fish for a heartier bite. Just remember to let the meat rest before slicing to keep it juicy. Tacos can take on many flavors based on where you are. In Mexico, you might find tacos with carne asada, topped with fresh cilantro and onions. In California, fish tacos with mango salsa are popular. Seasonal ingredients can also add a fresh touch. In summer, add sweet corn or peaches. In fall, roasted butternut squash or cranberries can provide a warm, cozy vibe. Each variation opens a new door to flavor! For full recipe details, check out the [Full Recipe]. You can store leftover tacos in different ways. If you have assembled tacos, wrap them in foil or plastic wrap. This keeps them fresh for a short time. Unassembled tacos store better. Keep the tortillas, crema, and toppings separate. Use airtight containers for each. This helps keep everything fresh. - Assembled Tacos: Wrap well in foil or plastic wrap. - Unassembled Tacos: Store tortillas, crema, and toppings in airtight containers. Store everything in the fridge. Consume within two days for best taste. To reheat tortillas, use a skillet. Heat it on medium for a few minutes. Place the tortilla for about 15 seconds on each side. This warms them without losing their texture. For the crema, avoid reheating. Instead, store it in the fridge. Use it cold or at room temperature. This keeps the fresh flavor. - Tortilla Method: Heat on medium in a skillet for 15 seconds per side. - Crema Storage: Keep it cold or at room temperature. These simple steps ensure your Avocado Lime Crema Tacos stay delicious! You can add heat with sliced jalapeños. Place them on top of the crema. For more heat, use hot sauce. A few drops can spice things up without being too much. Try different hot sauces to find your favorite flavor. This small change can make your tacos zing! Yes, you can make the crema ahead of time. Store it in an airtight container in the fridge. It stays fresh for about two days. To keep the color bright, add a little extra lime juice. Stir before using to bring back its smooth texture. If you can't find corn tortillas, use flour tortillas instead. They are soft and easy to fold. You can also use lettuce leaves for a low-carb option. For gluten-free diets, look for rice or almond flour tortillas. Each option gives a unique taste to your tacos. Yes, this recipe is great for meal prep. You can prepare the crema and store it in the fridge. Warm the tortillas before serving. Assemble the tacos just before eating to keep everything fresh. This way, you have tasty meals ready for the week with little effort. For the full recipe, check out the details above! In this article, we explored how to make tasty Avocado Lime Crema Tacos. We covered the essential ingredients, step-by-step instructions, and helpful tips for perfecting your taco assembly. You can easily customize your crema and taco fillings to suit your taste. Remember, you can prepare these tacos in advance and store leftovers for later enjoyment. Embrace these ideas to make your taco nights fun and delicious! With a little practice, you’ll impress family and friends with your new skills. Enjoy every bite!](https://goldendishy.com/wp-content/uploads/2025/07/f06e457d-602e-41ec-b362-5499d4ba2f55-768x768.webp)
![- 2 medium sweet potatoes, peeled and cut into ½-inch cubes - 1 can (15 oz) black beans, drained and thoroughly rinsed - 1 can (14 oz) diced tomatoes, including their juices - 1 medium onion, finely chopped - 2 cloves garlic, minced - 1 red bell pepper, diced - 2 tablespoons olive oil - 2 tablespoons chili powder - 1 teaspoon ground cumin - ½ teaspoon smoked paprika - 1 cup vegetable broth - Salt and pepper, to taste To make my sweet potato and black bean chili pop with flavor, I focus on fresh ingredients. The sweet potatoes provide a creamy texture and a hint of sweetness. I use black beans for protein and fiber, which makes this dish filling. The diced tomatoes add acidity and moisture, balancing the flavors. Aromatics like onion, garlic, and red bell pepper create a fragrant base. Olive oil helps to sauté these ingredients, unlocking their full taste. I season the chili with chili powder, cumin, and smoked paprika. These spices bring warmth and depth to the dish. Vegetable broth adds richness, making the chili hearty and satisfying. Don’t forget to season with salt and pepper to taste; this step enhances every bite. - Fresh cilantro - Avocado slices For extra flavor, I love to add fresh cilantro on top. It gives the chili a fresh kick. Avocado slices add a creamy touch, making each bowl even more delicious. The chili is packed with nutrients. One serving has about 300 calories. It offers a good mix of proteins, carbs, and healthy fats. Each ingredient brings its own health benefits: - Sweet Potatoes: High in vitamins A and C, they support your immune system. - Black Beans: Rich in fiber, they aid digestion and keep you full. - Diced Tomatoes: Loaded with antioxidants, they help fight inflammation. - Aromatics: Onions and garlic have heart health benefits. - Olive Oil: Contains healthy fats that support brain health. Enjoying this chili not only warms your belly but also fuels your body with great nutrition. For the full recipe, you can check out my Sweet Potato and Black Bean Chili. How to Prepare and Cut Sweet Potatoes To start, grab two medium sweet potatoes. Use a peeler to remove the skin. Cut them into ½-inch cubes. This size helps them cook evenly. Place the cubes in a bowl of water to prevent browning. Tips for Cooking Aromatics For the aromatics, chop one medium onion finely. Mince two cloves of garlic. Dice one red bell pepper. These add flavor and depth. Heat two tablespoons of olive oil in a large pot over medium heat. Once hot, add the onion. Sauté for about 3-4 minutes until soft. Detailed Instructions for Sautéing and Simmering Next, stir in the minced garlic and diced bell pepper. Cook for an additional two minutes until fragrant. Now, add the sweet potato cubes. Stir well and cook for about five minutes. This helps to soften them before the chili cooks. Sprinkle in two tablespoons of chili powder, one teaspoon of ground cumin, and ½ teaspoon of smoked paprika. Season with salt and pepper. Stir until the sweet potatoes are coated with the spices. Then, pour in a can of diced tomatoes and one cup of vegetable broth. Timing for Each Step Bring the mixture to a gentle boil. Then, lower the heat and cover the pot. Let it simmer for 25-30 minutes, or until the sweet potatoes are fork-tender. After this, add one can of drained and rinsed black beans. Simmer for another 5-10 minutes to warm them through. Adjusting Seasoning Before Serving Taste the chili and adjust seasoning as needed. Add more salt or pepper if you like. This helps enhance the flavors. Presentation Recommendations Ladle the hot chili into deep bowls. Drizzle a little olive oil over the top for richness. Garnish with freshly chopped cilantro. If you love creaminess, add slices of avocado on top. For the full recipe, check out the details above. To make the best sweet potato chili, start with the sweet potatoes. Cut them into small, even cubes. This helps them cook faster and evenly. I always peel them for a smoother taste. Cook them until they are soft but not mushy. This gives your chili the right texture. When cooking aromatics like onion and garlic, avoid burning them. Use medium heat and stir often. If they start to brown too fast, lower the heat. This way, you keep their sweet flavor. A little patience goes a long way. To make your chili even better, try adding more spices. A pinch of cayenne or a splash of hot sauce can add a kick. You can also add smoked paprika for a deeper flavor. Each spice brings something unique to the table. Experiment and find what you like best! If you want heat, add jalapeños or other fresh peppers. Dice them small to mix in well. Start with a small amount, then taste and adjust. You can always add more, but it’s hard to take it out! For a complete meal, serve your chili with bread or rice. I love cornbread with mine for a classic touch. It adds a nice crunch and sweetness. You can also serve it over rice for a filling option. Want to add a fresh touch? Serve with lime wedges and sour cream. They brighten the dish and cool the heat. If you want a healthy twist, add avocado slices on top. They give a creamy finish and pair well with the chili. For the full recipe, visit the link provided. Enjoy your cooking adventure! {{image_4}} You can easily switch up the beans in this chili. Try using pinto beans or kidney beans for a new twist. They offer a different taste but still pair well with sweet potatoes. If you prefer a meat option, ground turkey or beef can be added. Just brown the meat before adding other ingredients. For vegan or vegetarian choices, this recipe is perfect as is. It uses no animal products. You can add tofu or tempeh for extra protein if desired. Both options blend well with the flavors of the chili. You can make this chili in a slow cooker. Just add all your ingredients into the cooker. Set it on low and let it cook for 6-8 hours. If you want a quicker option, use an Instant Pot. Cook on high pressure for 10 minutes, then let it release naturally. Both methods create a rich flavor. Feel free to add seasonal vegetables to your chili. Zucchini, corn, or bell peppers can enhance the dish. They bring freshness and crunch to each bite. When the weather changes, you can adapt the chili. In colder months, add warming spices like cinnamon or nutmeg. On hot days, serve it chilled or over a salad for a refreshing twist. For the full recipe, click here: [Full Recipe]. To keep your chili fresh, store it in an airtight container. Place it in the fridge as soon as it cools down. This helps keep flavors strong. Sweet potato and black bean chili lasts about 3 to 5 days in the fridge. If you want to save some for later, freezing is a great option. Portion out your chili into smaller containers. Make sure to leave some space at the top, as it will expand when frozen. Sweet potato and black bean chili can last up to 3 months in the freezer. When you're ready to eat it, thaw it in the fridge overnight. For reheating, you can use the stove or microwave. If using the stove, heat on low until warm. Stir occasionally to prevent sticking. In the microwave, heat in short bursts, stirring in between. Always check the temperature. It should be hot all the way through. Chili is perfect for meal prep. You can make a big batch for the week. Serve it with rice or quinoa for a complete meal. You can also use the chili in other dishes. Try it in burritos, tacos, or even over a baked potato. This adds variety to your meal plan without much extra work. Check out the Full Recipe for more details on making this delicious dish! What can I serve with Sweet Potato and Black Bean Chili? You can enjoy this chili with warm cornbread, rice, or tortilla chips. A fresh salad also pairs well. For a complete meal, add avocado slices on top for creaminess. How spicy is this chili? This chili has a mild spice level. The chili powder adds flavor without too much heat. If you like it spicy, add some chopped jalapeños or hot sauce. Can I use fresh tomatoes instead of canned? Yes, you can use fresh tomatoes. Dice about four medium tomatoes. Just remember to adjust the liquid since fresh tomatoes have less juice than canned ones. How can I make this chili gluten-free? The ingredients in this chili are naturally gluten-free. Just check your chili powder and broth labels to ensure they are gluten-free. Is Sweet Potato and Black Bean Chili healthy? Yes, this chili is very healthy! Sweet potatoes are full of vitamins and fiber. Black beans offer protein and iron. Together, they make a nutritious meal. Can I eat it on a plant-based diet? Absolutely! This chili is plant-based and vegan-friendly. It’s a great choice for anyone looking to eat more plant-based meals. Enjoy it with confidence! This blog covered making a delicious Sweet Potato and Black Bean Chili. We discussed essential ingredients, health benefits, and cooking steps. You learned about tips for perfecting your chili and suggested variations to keep it fresh. Proper storage and meal prep ideas ensure you enjoy it later. Remember, this chili is flexible and healthy. Experiment with flavors and ingredients for your taste. Enjoy your cooking journey!](https://goldendishy.com/wp-content/uploads/2025/06/98b7eb11-b0dd-4c6d-9f71-53ea28c64add-768x768.webp)
