Creamy Spinach Stuffed Chicken Delightful Dinner Idea

Looking for a dinner that’s both easy and delicious? You’ve found it! Creamy Spinach Stuffed Chicken is a tasty option that impresses at any meal. This dish combines juicy chicken with creamy filling, making it a hit for anyone at your table. Get ready to cook your way through simple steps and tips that will ensure your chicken turns out perfect every time. Let’s dive into this delightful recipe!
Ingredients
Main Ingredients for Creamy Spinach Stuffed Chicken
To make this dish, you’ll need a few key items. Here’s the list:
– 4 boneless, skinless chicken breasts
– 2 cups fresh spinach, finely chopped
– 1 cup cream cheese, brought to room temperature
– ½ cup grated Parmesan cheese
– 1 teaspoon garlic powder
– 1 teaspoon onion powder
– ½ teaspoon salt
– ½ teaspoon freshly ground black pepper
– 1 tablespoon olive oil
These main ingredients create a rich and flavorful filling that will delight your taste buds.
Optional Ingredients for Additional Flavor
For those who want to enhance the dish, consider adding these options:
– ½ cup breadcrumbs (for a crunchy topping)
– Fresh parsley, chopped, for garnish
These optional ingredients add texture and a fresh touch to your meal.
Equipment Needed for Preparation
You’ll need some basic kitchen tools for this recipe. Gather these items:
– A medium mixing bowl
– A sharp knife
– An oven-safe skillet
– A meat thermometer
Having the right equipment makes the cooking process smooth and enjoyable.
Step-by-Step Instructions
Preparing the Filling
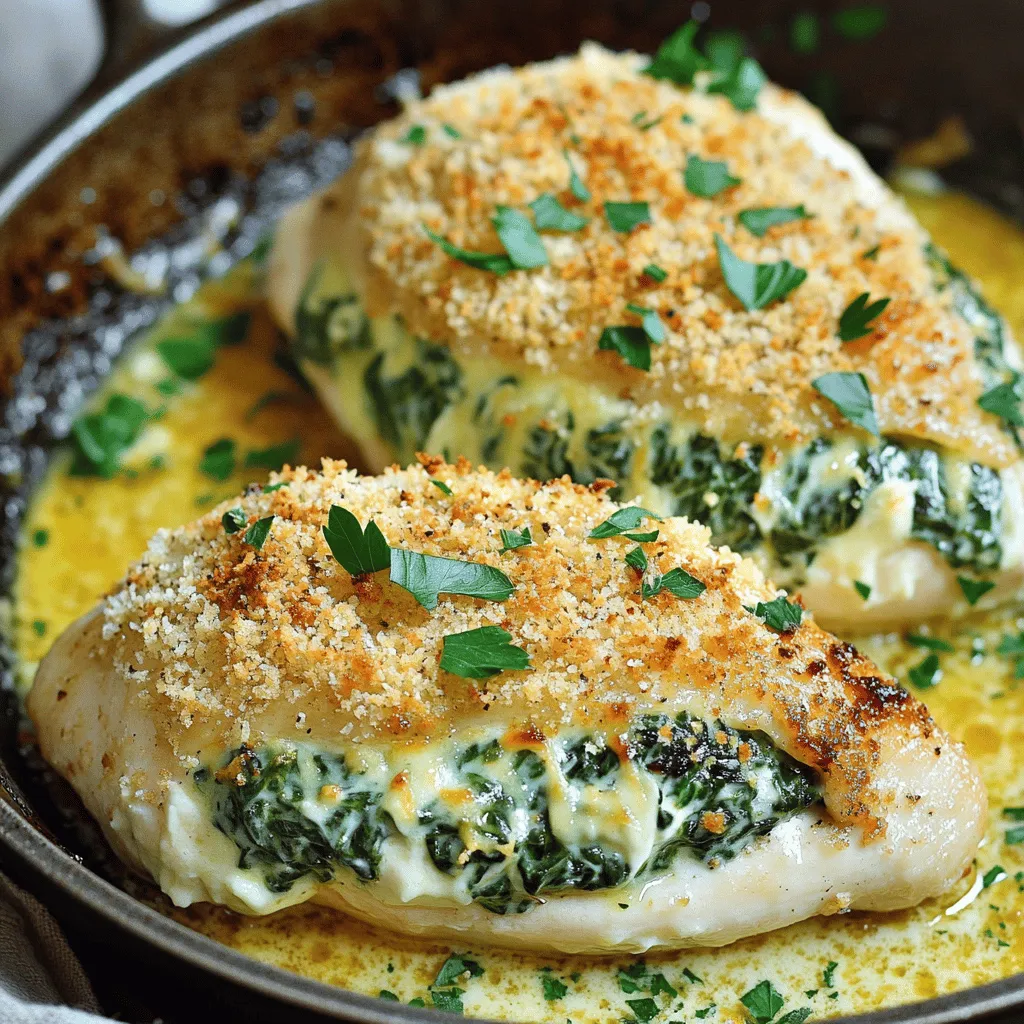
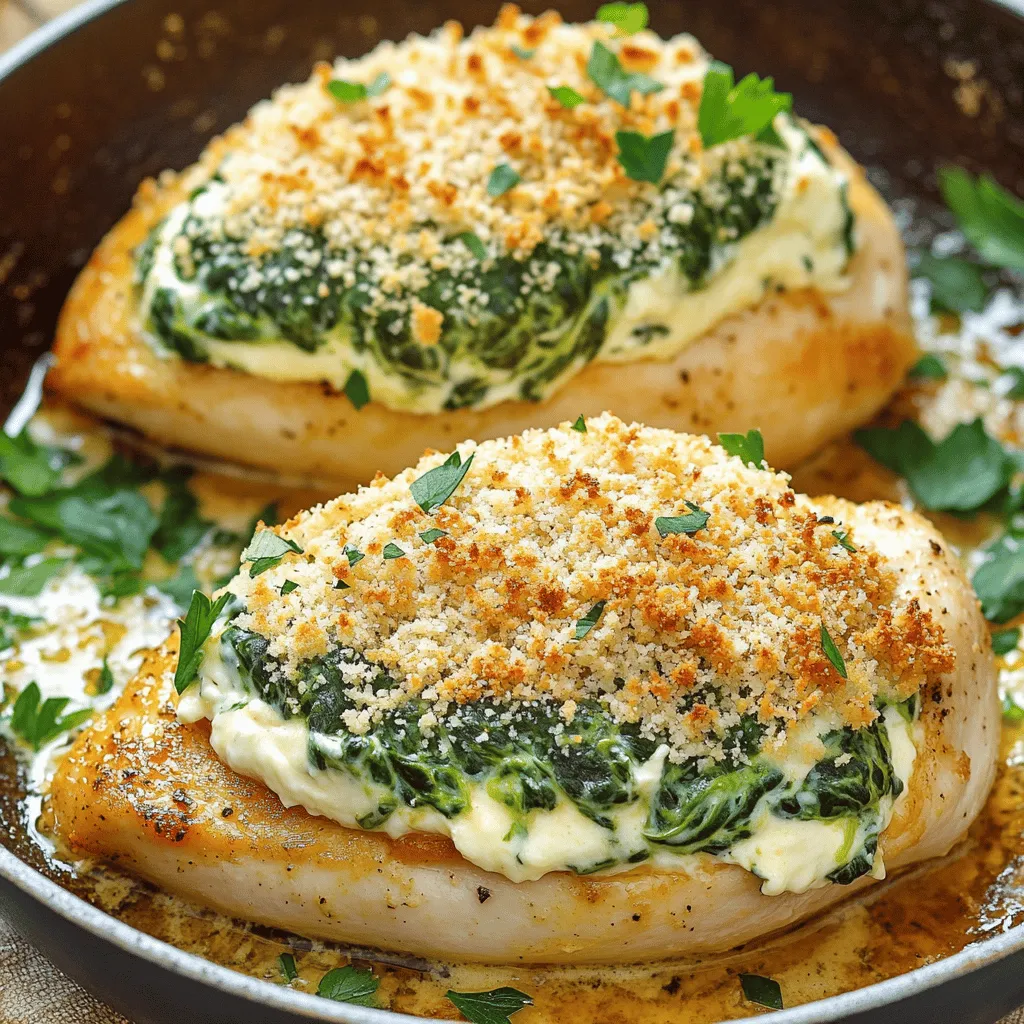
Start by gathering your ingredients. You will need fresh spinach, cream cheese, and Parmesan cheese. In a medium bowl, mix the chopped spinach with the cream cheese and Parmesan. Add garlic powder, onion powder, salt, and pepper. Stir well until the mixture is smooth and creamy. This filling is rich and packed with flavor.
Stuffing the Chicken Breasts
Next, take your chicken breasts. Carefully slice each breast to make a pocket. Be sure not to cut all the way through. This pocket will hold the creamy filling. Use a spoon to fill each pocket with the spinach mixture. Press it down gently to pack it in. If you want extra crunch, sprinkle breadcrumbs on top of the stuffed chicken.
Cooking Method: Searing and Baking
Now, it’s time to cook! Heat olive oil in a large oven-safe skillet over medium-high heat. Once hot, add the stuffed chicken breasts. Sear them for about 4-5 minutes on each side until they turn golden brown. After searing, move the skillet to the preheated oven at 375°F (190°C). Bake for 20-25 minutes until the chicken reaches 165°F (75°C). After baking, let the chicken rest for 5 minutes. This helps keep it juicy. Garnish with chopped parsley for a fresh touch.
Tips & Tricks
Best Seasoning Combinations
To elevate this dish, I like to mix fresh herbs with simple spices. Try using basil, thyme, or oregano alongside garlic and onion powders. This blend brings out the flavors in the spinach and cheese. You can even add a pinch of red pepper flakes for a slight kick.
Avoiding Common Mistakes
One common mistake is overcooking the chicken. Always check the internal temperature. It should reach 165°F (75°C) for safe eating. Another pitfall is not sealing the chicken pocket well. Ensure your filling is packed tight, so it doesn’t spill out while cooking.
Ensuring Perfectly Cooked Chicken
To get juicy chicken, start with even-sized breasts. If they vary, pound them to an even thickness. This helps them cook evenly. When searing, don’t rush. Let the chicken develop a golden crust before flipping. This step also adds flavor. For the final cooking, use a meat thermometer for accuracy. Trust me, it makes a big difference!

Variations
Alternative Fillings for Different Flavors
You can change the filling to match your taste. Try adding cooked mushrooms or sun-dried tomatoes for a rich twist. You might also like using feta cheese instead of Parmesan for a tangy kick. For a spicy touch, mix in some jalapeños or red pepper flakes. Each option gives the dish a new flavor that is still creamy and delicious.
Cooking Method Variations (Grilling vs. Baking)
You can grill or bake your stuffed chicken. Grilling adds a smoky flavor, while baking keeps it juicy. For grilling, preheat your grill to medium heat. Cook the stuffed chicken for about 6-8 minutes on each side.Both methods work well, so choose what fits your mood!
Dietary Adjustments for Special Diets
If you need a dairy-free version, use a plant-based cream cheese. This swap keeps the creaminess intact. For a low-carb option, skip the breadcrumbs and use crushed nuts for crunch. If you follow a gluten-free diet, choose gluten-free breadcrumbs or leave them out altogether. These easy changes help everyone enjoy this tasty meal.
Storage Info
Storing Leftovers Safely
After you enjoy your meal, let the chicken cool. Place leftovers in an airtight container. This keeps the chicken fresh and safe. Store it in the fridge for up to three days. If you want to keep it longer, you can freeze it.
Reheating Tips for Best Taste
To reheat your creamy spinach stuffed chicken, preheat the oven to 350°F (175°C). Place the chicken in an oven-safe dish. Add a splash of water or broth to keep it moist. Cover it with foil to prevent drying out. Heat for about 20 minutes or until hot. You can also use a microwave for quicker reheating, but the oven helps keep the chicken juicy.
Freezing Instructions for Meal Prep
If you want to meal prep, this dish freezes well. Wrap each stuffed chicken breast tightly in plastic wrap. Then, place them in a freezer bag. Be sure to label the bag with the date. You can freeze them for up to three months. When ready to eat, thaw the chicken in the fridge overnight before reheating. For quick meals, the creamy spinach stuffed chicken is always a delicious choice.
FAQs
What side dishes pair well with Creamy Spinach Stuffed Chicken?
Creamy Spinach Stuffed Chicken tastes great with many sides. Here are my top picks:
– Garlic mashed potatoes
– Roasted sweet potatoes
– Steamed green beans
– Sautéed asparagus
– Mixed green salad
Each of these adds flavor and texture. They balance the rich, creamy chicken.
Can I use frozen spinach instead of fresh?
Yes, you can use frozen spinach. Just make sure to thaw and drain it well. Frozen spinach has a lot of water, so draining is key. This helps keep the filling creamy, not watery.
How can I tell when the chicken is fully cooked?
The best way is to check the internal temperature. Use a meat thermometer. The chicken must reach 165°F (75°C) to be safe. You can also check the juices. They should run clear, not pink. If you cut into the chicken, the meat should be white with no pink spots.Enjoy!
Creamy spinach stuffed chicken is a delightful dish you can make at home. We explored its ingredients, preparation steps, and cooking tips. I shared ways to avoid mistakes and ensure your chicken is juicy. You learned about fun variations and how to store your leftovers.
This dish is not just easy to cook; it’s also perfect for any meal. Try it out to impress yourself and others! Your kitchen will feel like a gourmet restaurant. Enjoy cooking and savor every bite!


. Enjoy your cooking! Choosing the right chickpeas You can use canned chickpeas for ease. Just make sure to drain and rinse them well. This removes extra salt and makes them taste fresher. If you prefer, soak dried chickpeas overnight. This gives a firmer texture. Cook them until soft before adding to your stew. Spice adjustments and substitutions Spices are key to Moroccan flavors. If you want more kick, add cayenne pepper. For a different taste, swap smoked paprika for regular paprika. You can also try turmeric for a vibrant color and health boost. Feel free to adjust the salt and pepper to your liking. Cooking time adjustments for texture Cooking time affects the stew's texture. For softer vegetables, simmer longer. If you like a crunch, reduce the cooking time. Always check the stew as it cooks. This way, you can get the perfect blend of soft chickpeas and tender veggies. For the full recipe, check the details above. {{image_4}} To make Moroccan chickpea stew your own, you can swap some ingredients. Here are a few ideas: - Adding other vegetables: Sweet potatoes lend a nice sweetness. You can also try adding kale for a nutritious boost. - Using different beans or legumes: Kidney beans or lentils can replace chickpeas if you want a change. - Modifying spices to suit taste preferences: If you love heat, consider adding cayenne pepper. Or, reduce spice for a milder flavor. These swaps keep the stew fresh and exciting while fitting your taste. Pairing this warm stew with the right sides enhances the meal. Here are some great options: - Recommended sides: Crusty bread or warm pita is perfect for scooping. You can also serve it with fluffy rice for a hearty meal. - Pairing with beverages: A light-bodied red wine or herbal tea complements the flavors well. For a refreshing choice, try mint lemonade. These suggestions add to the experience, making each bite even more enjoyable. To keep your Moroccan Chickpea Stew fresh, follow these steps: - Refrigeration tips: Place the stew in an airtight container. It will last in the fridge for up to 4 days. Ensure it cools down before sealing the container to avoid condensation. - Freezing instructions: If you want to freeze it, use freezer-safe containers. The stew can stay good for 3 months in the freezer. Just leave some space at the top, as it may expand when frozen. When it's time to enjoy your stew again, reheating is key. - Best methods for reheating the stew: The best way is on the stove. Pour the stew into a pot and heat it over medium heat. Stir it often to ensure even heating. You can also use the microwave. Heat in a microwave-safe bowl, covering it loosely. Heat in short bursts and stir between to prevent hot spots. - Avoiding loss of texture and flavor: To keep the stew's texture, add a splash of vegetable broth or water during reheating. This helps maintain moisture. Always taste and adjust seasoning after reheating, as flavors can mellow. For the full recipe, you can refer to the earlier section. Can I make this stew in a slow cooker? Yes, you can! Start by sautéing the onion and garlic in a pan. Then, transfer them to your slow cooker. Add all the other ingredients, except the spinach and lemon. Cook on low for about 6-8 hours or high for 3-4 hours. Add spinach before serving. How can I make it spicier? To add heat, use fresh chili peppers or red pepper flakes. You can also add a dash of cayenne pepper. Start with a small amount and adjust to your taste. Is it possible to make this stew ahead of time? Absolutely! This stew tastes even better the next day. Make it ahead and store it in the fridge for up to three days. Reheat before serving to enjoy the rich flavors. Can I substitute fresh herbs for dried? Yes, you can! Use three times more fresh herbs than dried. So, if a recipe calls for one teaspoon of dried, use three teaspoons of fresh. Fresh herbs will add a vibrant flavor. What is the nutritional information for Moroccan Chickpea Stew? This stew is packed with nutrients! A serving typically contains about 250 calories, 10 grams of protein, and 8 grams of fiber. It’s a great source of vitamins from the veggies and chickpeas. For the full recipe, check out the detailed steps above. This article covered a tasty Moroccan Chickpea Stew. I shared the main ingredients, cooking steps, and helpful tips to perfect your dish. You can swap ingredients or adjust spices for your liking. Remember to store and reheat leftovers properly. This stew is not just healthy; it’s also fun to make. Enjoy sharing it with family and friends. Embrace exploring flavors and making this dish your own. Cooking can be easy and enjoyable.](https://goldendishy.com/wp-content/uploads/2025/06/4667d82b-b7b2-4094-8ffc-7c6a096b6e6d-768x768.webp)

. {{image_4}} To make your Lemon Basil Pasta Salad heartier, add protein. Grilled chicken is a great choice. Cook it simply with salt and pepper. Shrimp also works well when sautéed until just pink. For a vegetarian twist, use chickpeas or black beans. They add good texture and flavor. You can even sprinkle in some diced tofu for a plant-based option. The key is to balance flavors while keeping it light. Feel free to mix up the veggies in your salad. Instead of cherry tomatoes, try sun-dried tomatoes for a richer taste. Bell peppers can be swapped for zucchini or carrots. You can even toss in some spinach for a nutrient boost. Just remember to use fresh, crisp veggies for the best flavor. The colors will make your dish pop while adding more vitamins. While the lemon vinaigrette shines, other dressings can change the salad's vibe. A balsamic vinaigrette brings a sweet tang, while a creamy dressing adds richness. Consider a pesto for an Italian twist. Just be mindful of the dressing amount; you want to enhance, not overpower. Experimenting with dressings keeps your pasta salad exciting and fresh. For the full recipe, check the details above. After you enjoy your Lemon Basil Pasta Salad, store any leftovers in an airtight container. Keep the salad in the fridge. Make sure it is cool before sealing it. This helps to keep the flavors fresh. If you added feta cheese, cover it with a bit of extra dressing. This keeps it from drying out. Your Lemon Basil Pasta Salad can last up to three days in the fridge. After that, the veggies may lose their crispness. The salad may still taste good, but it won’t be as fresh. Always check for any off smells before eating. This salad is best served cold. If you want to refresh it, add a splash of olive oil and lemon juice. Toss it gently to mix. If you must reheat, do so briefly in the microwave. Heat it for just 15-30 seconds. This will warm it without cooking the veggies. Yes, you can make this pasta salad ahead. It tastes better after sitting in the fridge. I suggest preparing it up to a day in advance. Store it in an airtight container. Just remember to leave out the basil until you serve it. This keeps the basil fresh and bright. If you need gluten-free pasta, there are great choices. Look for pasta made from rice, quinoa, or chickpeas. Brands like Banza or Tinkyada offer tasty options. They hold up well in salads. Cook them according to the package directions for the best results. To make this pasta salad vegan, skip the feta cheese. You can add extra veggies for flavor. Consider using avocado for creaminess. Nutritional yeast can add a cheesy taste, too. Just mix it in with the dressing for a nice touch. For the dressing, all the other ingredients are already vegan-friendly. In this blog post, I shared how to make a refreshing lemon basil pasta salad. We covered key ingredients, step-by-step instructions, and tips for perfecting your dish. You learned how to add variety with proteins and different veggies. Storing leftover salad properly ensures it stays fresh. By answering important FAQs, I aimed to make this recipe easy for you. Enjoy this tasty dish at your next meal or gathering. With these insights, you'll impress everyone with your delicious creation!](https://goldendishy.com/wp-content/uploads/2025/06/6f7717e1-8c71-4a8f-834a-cf8283cfe0e6-768x768.webp)