
Blueberry Peach Crumble Bars Irresistible Dessert Treat
![- 2 cups fresh blueberries, rinsed and drained - 2 cups ripe peaches, diced (approximately 3 medium-sized peaches) - 1 tablespoon freshly squeezed lemon juice - 1/2 cup granulated sugar (adjust based on your sweetness preference) - 1 tablespoon cornstarch - 1 teaspoon pure vanilla extract - 1 1/2 cups rolled oats - 1 cup all-purpose flour - 1/2 cup packed brown sugar - 1/2 teaspoon baking powder - 1/4 teaspoon fine salt - 1/2 cup unsalted butter, melted and slightly cooled - 1 teaspoon ground cinnamon (optional, for added warmth) These simple ingredients create a tasty balance of sweet and tart flavors. The fresh blueberries and ripe peaches shine in each bite. You can change the sugar to fit your taste. I often add a bit more if the fruit is not very sweet. I love using oats for texture; they give a nice chewiness. This recipe is so flexible. You can swap out fruit or adjust flavors based on what you have at home. For example, try adding a pinch of nutmeg for a warm spice twist. This recipe takes only 15 minutes to prepare. It bakes in about 30 to 35 minutes. You will get about 12 bars from this batch, perfect for sharing with friends or family. If you want the full recipe, check the section below. - Preheat your oven to 350°F (175°C). - Grease a 9x13-inch baking dish or line it with parchment paper. - In a medium mixing bowl, combine 2 cups of fresh blueberries, 2 cups of diced peaches, 1 tablespoon of lemon juice, 1/2 cup of granulated sugar, 1 tablespoon of cornstarch, and 1 teaspoon of vanilla extract. - Gently mix the ingredients until the fruit is coated. Let it sit for a few minutes to enhance the flavor. - In a large mixing bowl, whisk together 1 1/2 cups of rolled oats, 1 cup of all-purpose flour, 1/2 cup of brown sugar, 1/2 teaspoon of baking powder, 1/4 teaspoon of salt, and 1 teaspoon of cinnamon if desired. - This mixture will give your bars that perfect crumb texture. - Pour 1/2 cup of melted butter into the dry mixture and stir until it looks like coarse crumbs. - Reserve about 1 cup of this crumb mixture for later. - Press the remaining crumb mixture into the bottom of your greased dish to form the crust. - Spread the fruit mixture evenly over the crust, then sprinkle the reserved crumbs on top. - Bake in your preheated oven for about 30-35 minutes. - Look for golden brown color and bubbling filling to know it's done. - Once baked, let the bars cool on a wire rack for 15-20 minutes before slicing into squares. - This cooling time helps the bars set well for easy serving. Enjoy making these Blueberry Peach Crumble Bars with the [Full Recipe]. - Check for doneness by ensuring the filling is bubbling and the top is golden brown. - Letting the bars cool completely aids in easier slicing. This step prevents squishing the filling and keeps the layers intact. - Use frozen blueberries or peaches if fresh ones are unavailable. Frozen fruit works well and saves time. - Substitute brown sugar with coconut sugar for a healthier option. Coconut sugar adds a nice depth to the flavor. - Serve warm or at room temperature. This allows the flavors to shine. - Pair with vanilla ice cream or whipped cream. This adds a creamy texture that balances the tartness of the fruit. For an extra touch, garnish with fresh blueberries or peach slices. You can find the Full Recipe above for detailed instructions on making these delightful bars! {{image_4}} You can mix things up with different fruits. For a fresh twist, switch blueberries and peaches for raspberries and apples. The tartness of raspberries pairs well with sweet apples. You can also try plums or cherries. Both add their unique flavors and keep the bars fun and exciting. Want to make these bars gluten-free? No problem! Just replace all-purpose flour with a gluten-free flour blend. Many good mixes are available at stores. Also, ensure that your oats are certified gluten-free. This small change lets everyone enjoy this tasty dessert. For a vegan version, swap unsalted butter for coconut oil or vegan butter. Both options work well and keep the bars rich and tasty. If your recipe includes eggs, you can use flax eggs instead. To make a flax egg, mix one tablespoon of ground flaxseed with two and a half tablespoons of water. Let it sit for five minutes. This creates a great egg substitute that still binds everything together. Store your Blueberry Peach Crumble Bars in an airtight container. They stay fresh at room temperature for up to 3 days. This makes them great for quick snacks or dessert. To keep them longer, refrigerate the bars. They will stay fresh for up to a week. For even longer storage, you can freeze the bars. Wrap them tightly in plastic wrap or aluminum foil. They can be frozen for up to 3 months. When you're ready to enjoy your frozen bars, reheating is easy. Simply pop them in the microwave for a few seconds. You can also warm them in the oven at 350°F (175°C). This brings back their delicious taste and texture. For the full recipe and tips, check out the detailed instructions above. Enjoy your tasty treat! Yes, you can make these bars a day in advance. Just store them in the fridge. This helps the flavors blend nicely. Look for bubbling filling and a golden brown topping. This shows they are ready to eat. Yes, you can add chopped nuts like almonds or walnuts. They give the bars extra crunch and flavor. I love pairing them with a scoop of ice cream or yogurt. It makes a delicious treat. Store them in an airtight container at room temperature. You can also refrigerate them for up to a week. - Blueberry Peach Crumble Bars 🫐 To make these delicious Blueberry Peach Crumble Bars, you need simple, fresh ingredients. Here’s what you will need: - 2 cups fresh blueberries, rinsed and drained - 2 cups ripe peaches, diced (approximately 3 medium-sized peaches) - 1 tablespoon freshly squeezed lemon juice - 1/2 cup granulated sugar (adjust based on your sweetness preference) - 1 tablespoon cornstarch - 1 teaspoon pure vanilla extract - 1 1/2 cups rolled oats - 1 cup all-purpose flour - 1/2 cup packed brown sugar - 1/2 teaspoon baking powder - 1/4 teaspoon fine salt - 1/2 cup unsalted butter, melted and slightly cooled - 1 teaspoon ground cinnamon (optional, for added warmth) These ingredients come together to create a wonderful balance of sweet and tart flavors. The fresh blueberries and peaches mix well with the lemon juice. This adds a nice zing to the bars. The sugar and cornstarch help create a thick, juicy filling. The crumble topping is a blend of oats, flour, and sugars. It gives the bars a crunchy texture that pairs perfectly with the soft fruit layer. The butter adds richness, while the cinnamon gives a warm, cozy vibe to each bite. If you want to try this recipe, check the Full Recipe for step-by-step instructions. You'll love making and sharing these bars! These Blueberry Peach Crumble Bars are easy to make and full of flavor. You learned about the key ingredients, simple steps, and different variations. Remember, you can swap fruits or adjust sweetness to fit your taste. Store leftovers in a container for later. Enjoy these bars warm or with ice cream for a tasty treat. Happy baking!](https://goldendishy.com/wp-content/uploads/2025/06/77e155cd-d820-4acd-a50c-b849e6ba2e1e.webp)
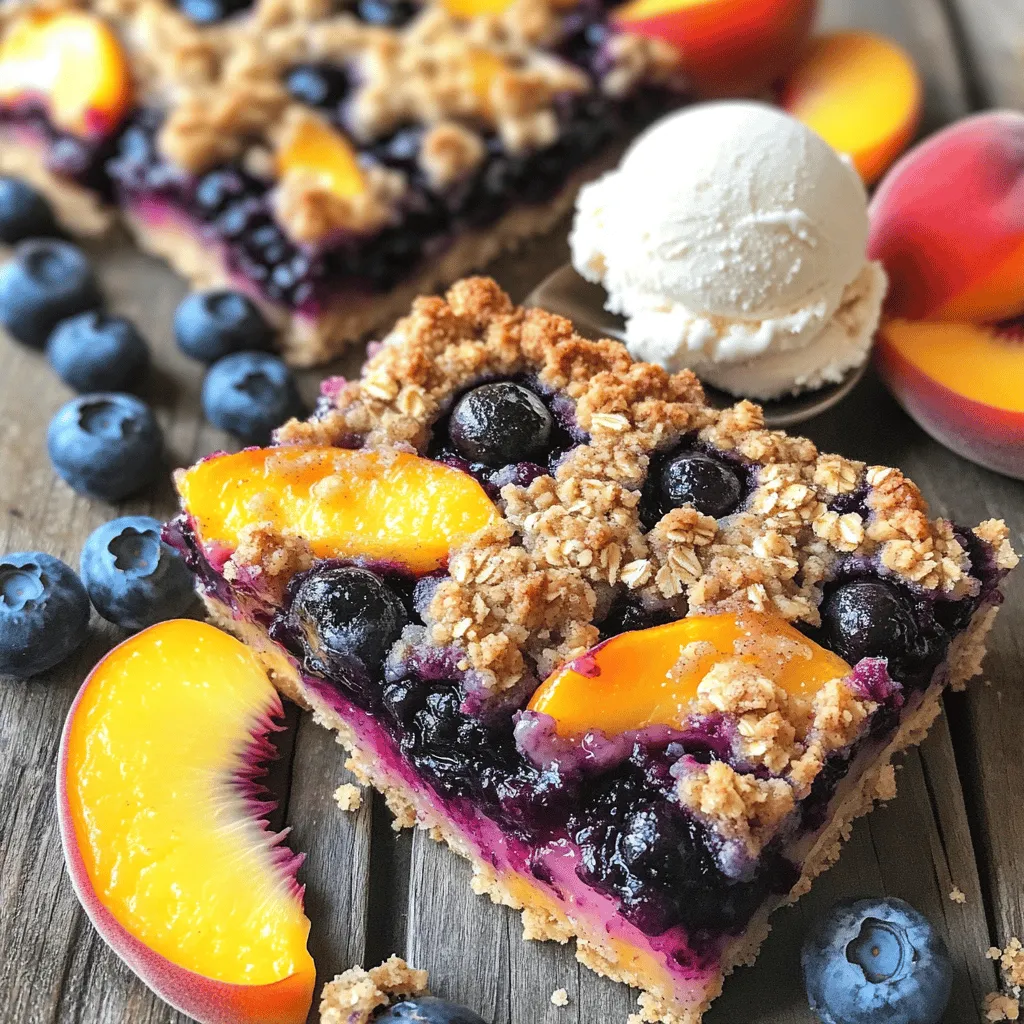
Are you craving a sweet treat that feels like summer? Look no further than these Blueberry Peach Crumble Bars! With juicy blueberries and ripe peaches, they deliver a burst of flavor in every bite. This easy recipe lets you whip up a delicious dessert in no time. So, grab your ingredients, and let’s make a dessert that your friends and family will love!
Ingredients
List of Ingredients
– 2 cups fresh blueberries, rinsed and drained
– 2 cups ripe peaches, diced (approximately 3 medium-sized peaches)
– 1 tablespoon freshly squeezed lemon juice
– 1/2 cup granulated sugar (adjust based on your sweetness preference)
– 1 tablespoon cornstarch
– 1 teaspoon pure vanilla extract
– 1 1/2 cups rolled oats
– 1 cup all-purpose flour
– 1/2 cup packed brown sugar
– 1/2 teaspoon baking powder
– 1/4 teaspoon fine salt
– 1/2 cup unsalted butter, melted and slightly cooled
– 1 teaspoon ground cinnamon (optional, for added warmth)
These simple ingredients create a tasty balance of sweet and tart flavors. The fresh blueberries and ripe peaches shine in each bite. You can change the sugar to fit your taste. I often add a bit more if the fruit is not very sweet.
I love using oats for texture; they give a nice chewiness. This recipe is so flexible. You can swap out fruit or adjust flavors based on what you have at home. For example, try adding a pinch of nutmeg for a warm spice twist.
This recipe takes only 15 minutes to prepare. It bakes in about 30 to 35 minutes. You will get about 12 bars from this batch, perfect for sharing with friends or family.
Step-by-Step Instructions
Preheat and Prepare
– Preheat your oven to 350°F (175°C).
– Grease a 9×13-inch baking dish or line it with parchment paper.
Prepare the Fruit Mixture
– In a medium mixing bowl, combine 2 cups of fresh blueberries, 2 cups of diced peaches, 1 tablespoon of lemon juice, 1/2 cup of granulated sugar, 1 tablespoon of cornstarch, and 1 teaspoon of vanilla extract.
– Gently mix the ingredients until the fruit is coated. Let it sit for a few minutes to enhance the flavor.
Prepare the Crumb Mixture
– In a large mixing bowl, whisk together 1 1/2 cups of rolled oats, 1 cup of all-purpose flour, 1/2 cup of brown sugar, 1/2 teaspoon of baking powder, 1/4 teaspoon of salt, and 1 teaspoon of cinnamon if desired.
– This mixture will give your bars that perfect crumb texture.
Assemble the Crumble Bars
– Pour 1/2 cup of melted butter into the dry mixture and stir until it looks like coarse crumbs.
– Reserve about 1 cup of this crumb mixture for later.
– Press the remaining crumb mixture into the bottom of your greased dish to form the crust.
– Spread the fruit mixture evenly over the crust, then sprinkle the reserved crumbs on top.
Baking Instructions
– Bake in your preheated oven for about 30-35 minutes.
– Look for golden brown color and bubbling filling to know it’s done.
Cooling and Serving
– Once baked, let the bars cool on a wire rack for 15-20 minutes before slicing into squares.
– This cooling time helps the bars set well for easy serving.
Tips & Tricks
Baking Tips
– Check for doneness by ensuring the filling is bubbling and the top is golden brown.
– Letting the bars cool completely aids in easier slicing. This step prevents squishing the filling and keeps the layers intact.
Ingredient Substitutions
– Use frozen blueberries or peaches if fresh ones are unavailable. Frozen fruit works well and saves time.
– Substitute brown sugar with coconut sugar for a healthier option. Coconut sugar adds a nice depth to the flavor.
Presentation Tips
– Serve warm or at room temperature. This allows the flavors to shine.
– Pair with vanilla ice cream or whipped cream. This adds a creamy texture that balances the tartness of the fruit. For an extra touch, garnish with fresh blueberries or peach slices.
Variations
Different Fruit Combinations
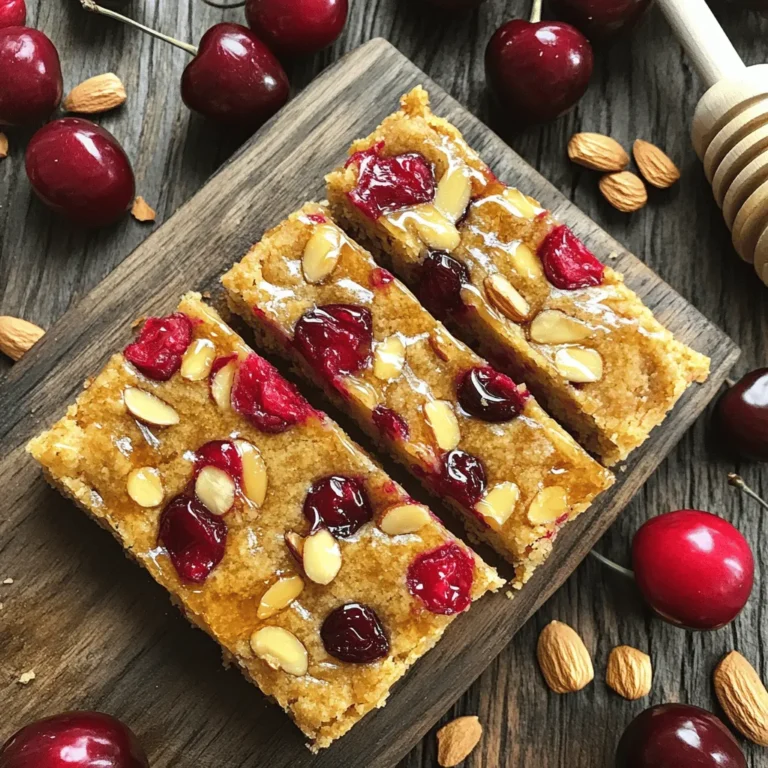
You can mix things up with different fruits. For a fresh twist, switch blueberries and peaches for raspberries and apples. The tartness of raspberries pairs well with sweet apples. You can also try plums or cherries. Both add their unique flavors and keep the bars fun and exciting.
Gluten-Free Option
Want to make these bars gluten-free? No problem! Just replace all-purpose flour with a gluten-free flour blend. Many good mixes are available at stores. Also, ensure that your oats are certified gluten-free. This small change lets everyone enjoy this tasty dessert.
Vegan Option
For a vegan version, swap unsalted butter for coconut oil or vegan butter. Both options work well and keep the bars rich and tasty. If your recipe includes eggs, you can use flax eggs instead. To make a flax egg, mix one tablespoon of ground flaxseed with two and a half tablespoons of water. Let it sit for five minutes. This creates a great egg substitute that still binds everything together.
Storage Info
Short-Term Storage
Store your Blueberry Peach Crumble Bars in an airtight container. They stay fresh at room temperature for up to 3 days. This makes them great for quick snacks or dessert.
Long-Term Storage
To keep them longer, refrigerate the bars. They will stay fresh for up to a week. For even longer storage, you can freeze the bars. Wrap them tightly in plastic wrap or aluminum foil. They can be frozen for up to 3 months.
Reheating Instructions
When you’re ready to enjoy your frozen bars, reheating is easy. Simply pop them in the microwave for a few seconds. You can also warm them in the oven at 350°F (175°C). This brings back their delicious taste and texture.Enjoy your tasty treat!
FAQs
Can I make Blueberry Peach Crumble Bars ahead of time?
Yes, you can make these bars a day in advance. Just store them in the fridge. This helps the flavors blend nicely.
How do I know when the crumble bars are done?
Look for bubbling filling and a golden brown topping. This shows they are ready to eat.
Can I add nuts to the crumble topping?
Yes, you can add chopped nuts like almonds or walnuts. They give the bars extra crunch and flavor.
What is the best way to serve these bars?
I love pairing them with a scoop of ice cream or yogurt. It makes a delicious treat.
How do I store leftover crumble bars?
Store them in an airtight container at room temperature. You can also refrigerate them for up to a week.Here’s what you will need:
– 2 cups fresh blueberries, rinsed and drained
– 2 cups ripe peaches, diced (approximately 3 medium-sized peaches)
– 1 tablespoon freshly squeezed lemon juice
– 1/2 cup granulated sugar (adjust based on your sweetness preference)
– 1 tablespoon cornstarch
– 1 teaspoon pure vanilla extract
– 1 1/2 cups rolled oats
– 1 cup all-purpose flour
– 1/2 cup packed brown sugar
– 1/2 teaspoon baking powder
– 1/4 teaspoon fine salt
– 1/2 cup unsalted butter, melted and slightly cooled
– 1 teaspoon ground cinnamon (optional, for added warmth)
These ingredients come together to create a wonderful balance of sweet and tart flavors. The fresh blueberries and peaches mix well with the lemon juice. This adds a nice zing to the bars. The sugar and cornstarch help create a thick, juicy filling.
The crumble topping is a blend of oats, flour, and sugars. It gives the bars a crunchy texture that pairs perfectly with the soft fruit layer. The butter adds richness, while the cinnamon gives a warm, cozy vibe to each bite.You’ll love making and sharing these bars!
These Blueberry Peach Crumble Bars are easy to make and full of flavor. You learned about the key ingredients, simple steps, and different variations. Remember, you can swap fruits or adjust sweetness to fit your taste. Store leftovers in a container for later. Enjoy these bars warm or with ice cream for a tasty treat. Happy baking!
![- 2 cups fresh blueberries, rinsed and drained - 2 cups ripe peaches, diced (approximately 3 medium-sized peaches) - 1 tablespoon freshly squeezed lemon juice - 1/2 cup granulated sugar (adjust based on your sweetness preference) - 1 tablespoon cornstarch - 1 teaspoon pure vanilla extract - 1 1/2 cups rolled oats - 1 cup all-purpose flour - 1/2 cup packed brown sugar - 1/2 teaspoon baking powder - 1/4 teaspoon fine salt - 1/2 cup unsalted butter, melted and slightly cooled - 1 teaspoon ground cinnamon (optional, for added warmth) These simple ingredients create a tasty balance of sweet and tart flavors. The fresh blueberries and ripe peaches shine in each bite. You can change the sugar to fit your taste. I often add a bit more if the fruit is not very sweet. I love using oats for texture; they give a nice chewiness. This recipe is so flexible. You can swap out fruit or adjust flavors based on what you have at home. For example, try adding a pinch of nutmeg for a warm spice twist. This recipe takes only 15 minutes to prepare. It bakes in about 30 to 35 minutes. You will get about 12 bars from this batch, perfect for sharing with friends or family. If you want the full recipe, check the section below. - Preheat your oven to 350°F (175°C). - Grease a 9x13-inch baking dish or line it with parchment paper. - In a medium mixing bowl, combine 2 cups of fresh blueberries, 2 cups of diced peaches, 1 tablespoon of lemon juice, 1/2 cup of granulated sugar, 1 tablespoon of cornstarch, and 1 teaspoon of vanilla extract. - Gently mix the ingredients until the fruit is coated. Let it sit for a few minutes to enhance the flavor. - In a large mixing bowl, whisk together 1 1/2 cups of rolled oats, 1 cup of all-purpose flour, 1/2 cup of brown sugar, 1/2 teaspoon of baking powder, 1/4 teaspoon of salt, and 1 teaspoon of cinnamon if desired. - This mixture will give your bars that perfect crumb texture. - Pour 1/2 cup of melted butter into the dry mixture and stir until it looks like coarse crumbs. - Reserve about 1 cup of this crumb mixture for later. - Press the remaining crumb mixture into the bottom of your greased dish to form the crust. - Spread the fruit mixture evenly over the crust, then sprinkle the reserved crumbs on top. - Bake in your preheated oven for about 30-35 minutes. - Look for golden brown color and bubbling filling to know it's done. - Once baked, let the bars cool on a wire rack for 15-20 minutes before slicing into squares. - This cooling time helps the bars set well for easy serving. Enjoy making these Blueberry Peach Crumble Bars with the [Full Recipe]. - Check for doneness by ensuring the filling is bubbling and the top is golden brown. - Letting the bars cool completely aids in easier slicing. This step prevents squishing the filling and keeps the layers intact. - Use frozen blueberries or peaches if fresh ones are unavailable. Frozen fruit works well and saves time. - Substitute brown sugar with coconut sugar for a healthier option. Coconut sugar adds a nice depth to the flavor. - Serve warm or at room temperature. This allows the flavors to shine. - Pair with vanilla ice cream or whipped cream. This adds a creamy texture that balances the tartness of the fruit. For an extra touch, garnish with fresh blueberries or peach slices. You can find the Full Recipe above for detailed instructions on making these delightful bars! {{image_4}} You can mix things up with different fruits. For a fresh twist, switch blueberries and peaches for raspberries and apples. The tartness of raspberries pairs well with sweet apples. You can also try plums or cherries. Both add their unique flavors and keep the bars fun and exciting. Want to make these bars gluten-free? No problem! Just replace all-purpose flour with a gluten-free flour blend. Many good mixes are available at stores. Also, ensure that your oats are certified gluten-free. This small change lets everyone enjoy this tasty dessert. For a vegan version, swap unsalted butter for coconut oil or vegan butter. Both options work well and keep the bars rich and tasty. If your recipe includes eggs, you can use flax eggs instead. To make a flax egg, mix one tablespoon of ground flaxseed with two and a half tablespoons of water. Let it sit for five minutes. This creates a great egg substitute that still binds everything together. Store your Blueberry Peach Crumble Bars in an airtight container. They stay fresh at room temperature for up to 3 days. This makes them great for quick snacks or dessert. To keep them longer, refrigerate the bars. They will stay fresh for up to a week. For even longer storage, you can freeze the bars. Wrap them tightly in plastic wrap or aluminum foil. They can be frozen for up to 3 months. When you're ready to enjoy your frozen bars, reheating is easy. Simply pop them in the microwave for a few seconds. You can also warm them in the oven at 350°F (175°C). This brings back their delicious taste and texture. For the full recipe and tips, check out the detailed instructions above. Enjoy your tasty treat! Yes, you can make these bars a day in advance. Just store them in the fridge. This helps the flavors blend nicely. Look for bubbling filling and a golden brown topping. This shows they are ready to eat. Yes, you can add chopped nuts like almonds or walnuts. They give the bars extra crunch and flavor. I love pairing them with a scoop of ice cream or yogurt. It makes a delicious treat. Store them in an airtight container at room temperature. You can also refrigerate them for up to a week. - Blueberry Peach Crumble Bars 🫐 To make these delicious Blueberry Peach Crumble Bars, you need simple, fresh ingredients. Here’s what you will need: - 2 cups fresh blueberries, rinsed and drained - 2 cups ripe peaches, diced (approximately 3 medium-sized peaches) - 1 tablespoon freshly squeezed lemon juice - 1/2 cup granulated sugar (adjust based on your sweetness preference) - 1 tablespoon cornstarch - 1 teaspoon pure vanilla extract - 1 1/2 cups rolled oats - 1 cup all-purpose flour - 1/2 cup packed brown sugar - 1/2 teaspoon baking powder - 1/4 teaspoon fine salt - 1/2 cup unsalted butter, melted and slightly cooled - 1 teaspoon ground cinnamon (optional, for added warmth) These ingredients come together to create a wonderful balance of sweet and tart flavors. The fresh blueberries and peaches mix well with the lemon juice. This adds a nice zing to the bars. The sugar and cornstarch help create a thick, juicy filling. The crumble topping is a blend of oats, flour, and sugars. It gives the bars a crunchy texture that pairs perfectly with the soft fruit layer. The butter adds richness, while the cinnamon gives a warm, cozy vibe to each bite. If you want to try this recipe, check the Full Recipe for step-by-step instructions. You'll love making and sharing these bars! These Blueberry Peach Crumble Bars are easy to make and full of flavor. You learned about the key ingredients, simple steps, and different variations. Remember, you can swap fruits or adjust sweetness to fit your taste. Store leftovers in a container for later. Enjoy these bars warm or with ice cream for a tasty treat. Happy baking!](https://goldendishy.com/wp-content/uploads/2025/06/77e155cd-d820-4acd-a50c-b849e6ba2e1e-300x300.webp)

![To make tasty Maple Pecan Scones, you need some key ingredients. Here they are: - 2 cups all-purpose flour - 1/2 cup chopped pecans, plus extra for garnish - 1/3 cup packed brown sugar - 1 tablespoon baking powder - 1/2 teaspoon fine salt - 1/2 teaspoon ground cinnamon - 1/4 cup cold unsalted butter, cut into small cubes - 1/2 cup heavy cream, chilled - 1/4 cup pure maple syrup - 1 large egg, at room temperature - 1 teaspoon pure vanilla extract - Additional maple syrup for drizzling (optional) These ingredients work together to create a rich, flavorful scone. The maple syrup and pecans bring a sweet and nutty taste. You can add a few optional ingredients to enhance your scones even more. Consider these: - Dried cranberries or cherries for a tart kick - Chocolate chips for a sweet treat - Fresh herbs like rosemary for a savory twist These extras can make your scones unique. Mix and match to find your favorite flavor. If you need to swap out some items, here are some good substitutions: - Use whole wheat flour instead of all-purpose flour for more fiber. - Swap brown sugar with coconut sugar for a different taste. - Replace heavy cream with coconut cream for a dairy-free option. - Use maple extract if you run out of pure maple syrup. These swaps still keep the scones delicious. Feel free to get creative with what you have on hand. For the full recipe, check out the earlier sections. First, you need to preheat your oven. Set it to 400°F (200°C). While that heats up, grab a baking sheet. Line it with parchment paper. This step helps the scones not stick. It makes clean-up easy too. Now, let’s get to the mixing! In a large bowl, whisk these dry ingredients together: - 2 cups all-purpose flour - 1/2 cup chopped pecans - 1/3 cup packed brown sugar - 1 tablespoon baking powder - 1/2 teaspoon fine salt - 1/2 teaspoon ground cinnamon Whisk until everything is mixed well. In another bowl, combine the wet ingredients. Take: - 1/2 cup heavy cream - 1/4 cup pure maple syrup - 1 large egg - 1 teaspoon pure vanilla extract Whisk them together until smooth. Next, add the wet mix to the dry mix. Stir gently with a spatula. The dough should be sticky and chunky. Don’t overmix! Now, turn the dough onto a floured surface. Knead it gently a few times. Shape it into a circle, about 1-inch thick. Cut it into 8 wedges. Place the wedges on the baking sheet, giving them some room to grow. Bake your scones for 15-20 minutes. They should turn a light golden color and feel firm. Once done, let them cool on a wire rack. For extra flavor, drizzle with more maple syrup and sprinkle some chopped pecans on top. Enjoy your delicious maple pecan scones! For a detailed list of steps, check the Full Recipe. To get the best texture in your Maple Pecan Scones, focus on the butter. Use cold, unsalted butter. Cut it into small cubes and mix it with the flour until you see coarse crumbs. Some pieces should be the size of peas. This step keeps the scones flaky and tender. Baking time is key. Preheat your oven to 400°F (200°C). Bake the scones for 15 to 20 minutes. Watch them closely during the last few minutes. You want them lightly golden and firm to the touch. If you bake them too long, they will become dry. Serving is just as important as baking. Place warm scones on a rustic wooden board or a nice platter. Drizzle with extra maple syrup for sweetness. Add chopped pecans on top for crunch. A sprig of mint or edible flowers can add color and make the dish more inviting. For more details, check the Full Recipe. {{image_4}} You can make gluten-free maple pecan scones easily. Replace all-purpose flour with a gluten-free blend. Look for a mix that has xanthan gum, as it helps bind the ingredients. Keep the other ingredients the same. The texture may change a bit, but they will still taste great! To make vegan maple pecan scones, swap the heavy cream with almond milk or coconut milk. Use coconut oil instead of butter. You can also replace the egg with a flax egg. To make a flax egg, mix one tablespoon of ground flaxseed with three tablespoons of water. Let it sit for five minutes to thicken. These changes keep the scones tasty and fluffy! You can add fun flavors to your scones. Try mixing in chocolate chips or dried fruit. For a sweet touch, add 1/2 cup of chocolate chips or chopped dried apricots. You can also use cranberries or raisins for a chewy texture. Mix these in when you fold in the pecans. This adds extra flavor and makes each bite exciting! For the full recipe, check out the recipe section above. To keep your maple pecan scones fresh, store them in an airtight container. Place a piece of parchment paper between layers to prevent sticking. They will stay good for about three days at room temperature. If you want to keep them longer, consider freezing them. To reheat your scones, preheat your oven to 350°F (175°C). Place the scones on a baking sheet and warm them for about 5-10 minutes. This helps restore their fresh-baked taste and texture. You can also microwave them for about 15-20 seconds, but the oven gives better results. If you want to freeze your scones, do it before baking. After shaping the dough into wedges, place them on a baking sheet. Freeze them for about an hour until firm, then transfer them to a freezer bag. They can stay frozen for up to three months. When ready to bake, just add a few extra minutes to the baking time. For the full recipe, refer back to the details above. Yes, you can make Maple Pecan Scones ahead of time. Prepare the dough and shape it into wedges. Then, wrap the dough in plastic wrap and store it in the fridge for up to two days. When you're ready to bake, just slice and bake as usual. This method keeps them fresh and tasty. You can tell when the scones are done by looking for a golden color on top. They should feel firm to the touch. You can also insert a toothpick into the center. If it comes out clean, the scones are ready. Maple Pecan Scones pair well with many things. You can serve them with a drizzle of maple syrup for added sweetness. A dollop of clotted cream or butter also works great. Pair them with coffee or tea for a lovely breakfast or snack. For a fun twist, add fresh fruit or yogurt on the side. For the full recipe, check out the [Full Recipe]. Maple pecan scones bring warmth and flavor to your kitchen. We explored key ingredients and smart substitutions for a perfect batch. Step-by-step instructions ensured clear baking methods. Tips helped with texture and bake time, making your scones shine. We also discussed tasty variations to brighten your meals. Finally, proper storage methods keep leftovers fresh. Enjoy these scones with friends or alone—they're a delight for all.](https://goldendishy.com/wp-content/uploads/2025/07/b23162c1-955c-4f99-8dc2-297b57ec6074-768x768.webp)