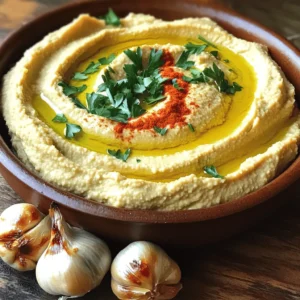
Roasted Garlic Hummus Creamy and Flavorful Spread
If you love bold flavors and creamy textures, you’ll adore this roasted garlic hummus. It’s an easy-to-make spread that elevates any snack or meal. I’ll guide you through each simple step, from roasting garlic to blending your perfect mix. You’ll learn tips for making it extra creamy and delicious. Ready to impress your friends and family? Let’s dive into the delightful world of roasted garlic hummus!
Ingredients
List of Essential Ingredients
To make roasted garlic hummus, you need:
– 1 can (15 oz) chickpeas, drained and rinsed
– 1 head of garlic
– 3 tablespoons tahini
– 2 tablespoons olive oil, plus extra for drizzling
– 2 tablespoons freshly squeezed lemon juice
– 1 teaspoon ground cumin
– Salt, to taste
– Water, as needed for desired consistency
Measurement Details
Each ingredient plays a key role. The chickpeas give the hummus its base. Garlic adds a rich, savory taste. Tahini brings creaminess and depth. Olive oil enhances the flavor and smoothness. Lemon juice adds brightness, while cumin gives a hint of warmth. Salt rounds out the taste. If the hummus is too thick, add water little by little until it reaches the right texture.
Optional Toppings
For a finishing touch, consider adding:
– Paprika for a pop of color
– A drizzle of olive oil for richness
– Freshly chopped parsley for a burst of freshness
These toppings not only enhance the look but also add extra flavor to your creamy, savory spread. Enjoy creating this delicious roasted garlic hummus!
Step-by-Step Instructions
Preparation of Roasted Garlic
To start, you need to roast the garlic. First, preheat your oven to 400°F (200°C). This heat brings out the sweet flavor in the garlic. Cut the top off a head of garlic, about ¼ inch down. Drizzle a bit of olive oil on the cut part. Wrap the garlic in aluminum foil to keep it moist. Place it on the oven rack and roast for 30 to 35 minutes. The garlic should be soft and golden brown. After roasting, let it cool a bit. Then, squeeze the base to push out the yummy cloves. Discard the skins.
Blending the Ingredients
Now it’s time to make the hummus! In a food processor, add the roasted garlic cloves, drained chickpeas, tahini, lemon juice, and olive oil. Sprinkle in the ground cumin and a pinch of salt. Blend the mix on high until it’s totally smooth. If it feels too thick, add water, one tablespoon at a time. Keep blending until you reach a creamy texture. Taste your hummus and adjust the salt or lemon juice as you like.
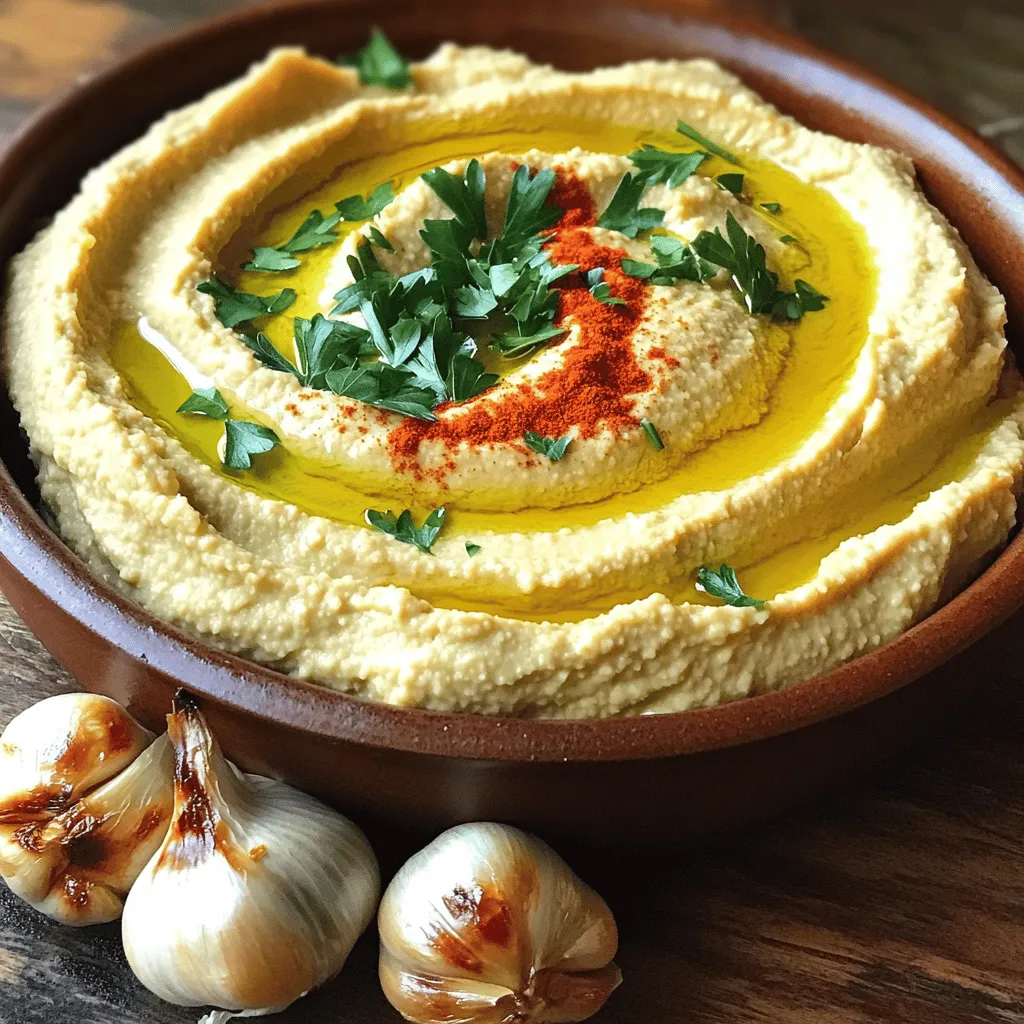
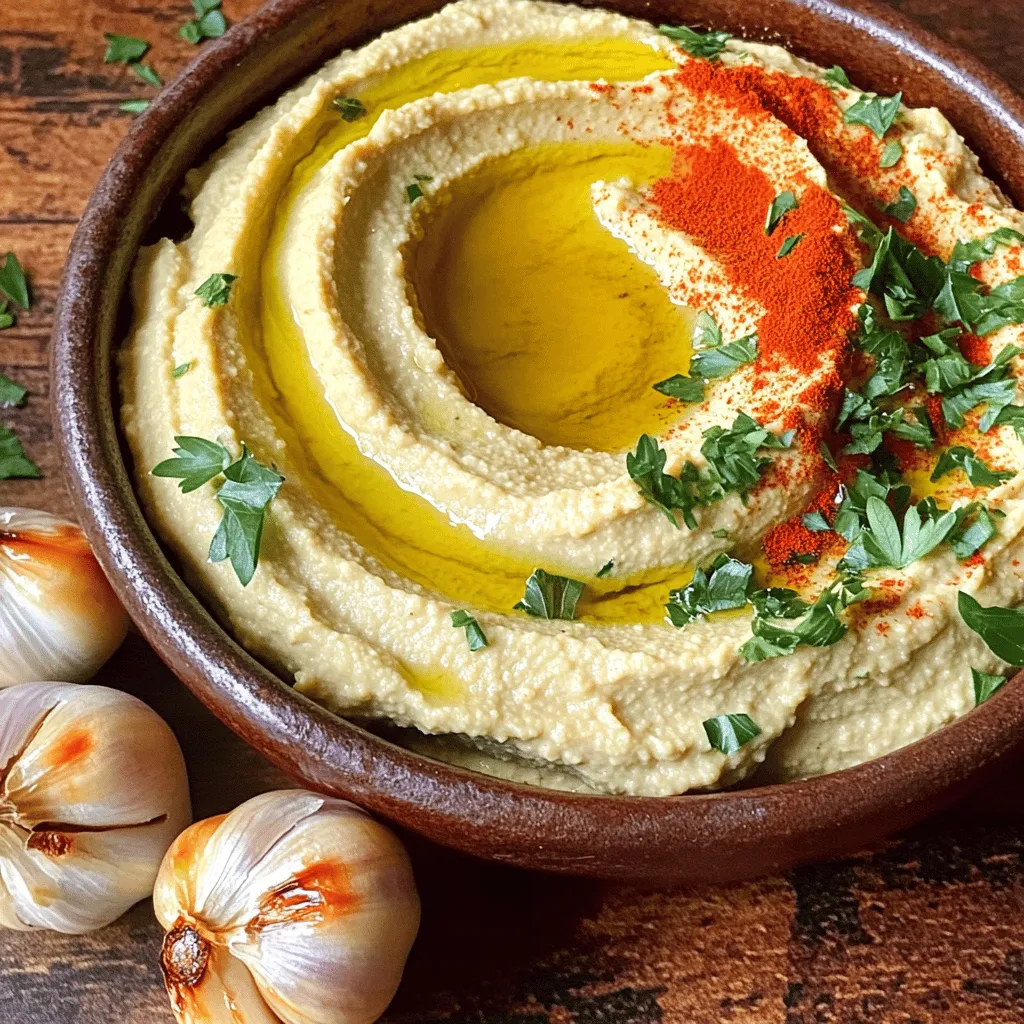
Final Touches and Presentation
Once your hummus is perfect, transfer it to a bowl. Use a spoon to make a swirl on top for style. Drizzle a little olive oil over it. You can sprinkle paprika and chopped parsley for added color and taste. Serve your roasted garlic hummus with fresh veggies, pita chips, or warm pita bread. Enjoy this creamy and flavorful spread!
Tips & Tricks
How to Achieve Creamy Consistency
To get a smooth and creamy hummus, you need to blend well. Start with well-drained chickpeas. If you want it even creamier, peel the chickpeas. This extra step helps create a silky texture. When blending, add water slowly. Start with one tablespoon at a time. Blend until you reach your desired thickness. If it’s too thick, just keep adding water.
Adjusting Flavors to Your Preference
Taste is key in hummus. After blending, try it and see what it needs. You might want more salt or lemon juice. If you like spice, add a pinch of cayenne pepper or smoked paprika. Feel free to experiment with other spices too. Don’t be afraid to make it your own!
Best Practices for Roasting Garlic
Roasting garlic brings out its sweet flavor. To roast, cut the top off the garlic head. Drizzle it with olive oil. Wrap it in foil to keep it moist. Bake at 400°F (200°C) for 30-35 minutes. The garlic should be soft and golden when done. Let it cool before squeezing the cloves out. This method gives you that rich, roasted taste.Enjoy your cooking!
Variations
Adding Spices for Extra Flavor
You can make your hummus more exciting by adding spices. Try smoked paprika for a warm flavor. A pinch of cayenne adds heat if you like spicy. You can also use ground coriander or turmeric for a unique twist. These spices will enhance the taste and give it a fresh character.
Alternative Beans and Legumes
Chickpeas are great, but you can mix it up! Use black beans for a rich flavor. White beans, like cannellini, create a creamy texture. Lentils work well too. Each bean brings a new taste and color to your hummus. Get creative and pick your favorite!
Creative Serving Suggestions
Think outside the box when serving your hummus. Serve it on a platter with fresh veggies like carrots, cucumbers, and bell peppers. You can also pair it with pita chips or warm pita bread. For a fun touch, spread it on toast and top with avocado slices. These ideas will make your hummus stand out at any meal or party.
Storage Info
Best Ways to Store Leftover Hummus
To keep your hummus fresh, store it in an airtight container. This helps prevent it from drying out. Always cover the hummus with a thin layer of olive oil. This layer acts as a barrier against air. Place the container in the fridge. It will stay tasty for up to one week.
Freezing Instructions for Long-term Storage
If you want to save hummus for later, freezing works well. Use a freezer-safe container or a heavy-duty freezer bag. Leave some space for expansion as it freezes. You can freeze hummus for up to three months. When you’re ready to eat it, thaw it in the fridge overnight. Blend it again if needed for a smooth texture.
Recommended Storage Containers
Choose glass or plastic containers with tight lids. Glass containers are great for flavor preservation. Plastic containers are lightweight and easy to handle. For freezing, use sturdy freezer bags. Remember to label the bags with the date. This way, you know when it was made. For the best results, use these storage options to enjoy your roasted garlic hummus anytime.
FAQs
What can I serve with roasted garlic hummus?
You can enjoy roasted garlic hummus with many tasty items. Fresh vegetables like carrots, cucumbers, and bell peppers make great dippers. Pita chips or warm pita bread also pair well. Crackers add a nice crunch. You can even spread it on sandwiches or wraps for extra flavor.
Can I make hummus without tahini?
Yes, you can make hummus without tahini. If you lack tahini, try using a bit of peanut butter or almond butter. You can also add more olive oil to keep the hummus creamy. The flavor might change, but it will still be delicious.
How long does roasted garlic hummus last?
Roasted garlic hummus lasts about 4 to 5 days in the fridge. Store it in an airtight container to keep it fresh. If you want to keep it longer, you can freeze it. It can last up to 3 months in the freezer. Just thaw it in the fridge before serving.
Is hummus healthy?
Yes, hummus is a healthy choice. It contains chickpeas, which are high in protein and fiber. The olive oil adds healthy fats. Plus, garlic has many health benefits. Hummus can be a great snack or meal addition, especially when served with fresh veggies.
How to make roasted garlic hummus vegan?
Making roasted garlic hummus vegan is easy! The main ingredients are already vegan. Just use olive oil and skip any dairy toppings. Stick to the recipe and enjoy a creamy, tasty spread.
To make roasted garlic hummus, I covered the key ingredients and steps, including measurement details and optional toppings. We explored preparation, blending, and how to serve it well. I shared tips for creamy texture, flavor adjustments, and best garlic roasting. Variations let you add spices or change beans. For storage, I explained how to keep leftovers and freeze your hummus.
Roasted garlic hummus is fun to make and customize. Enjoy your delicious creation and impress your friends!

![- 1 pound fresh asparagus, trimmed - 3 tablespoons unsalted butter - 2 tablespoons freshly squeezed lemon juice - Zest of 1 lemon - 2 cloves garlic, finely minced Fresh asparagus is key to this dish. When you choose asparagus, look for bright green stalks that feel firm. The butter adds richness, while the lemon juice and zest bring a bright, zesty punch. Garlic gives a nice aroma and flavor, making the dish exciting. - Salt and freshly ground black pepper, to taste Salt and pepper enhance all the flavors. Use good-quality salt for the best taste. Freshly ground black pepper adds warmth and a bit of spice. - 1 tablespoon fresh parsley, finely chopped (for garnish) Fresh parsley adds color and freshness. You can also use lemon wedges for extra zing. They allow you to customize how much lemon flavor you want. These small touches make the dish look and taste even better. For the full recipe, check out the details above! Start by washing the fresh asparagus. Rinse it well under cool water to remove dirt. Next, trim the tough ends. You can snap them off or cut 1-2 inches from the bottom. This makes the asparagus more tender and easy to eat. In a large skillet, melt the unsalted butter over medium heat. Watch for the butter to bubble and foam; this means it is hot enough. Once it is ready, add the minced garlic. Cook the garlic for about 30 seconds and stir often. It should smell great but not turn brown. Brown garlic can taste bitter. Now, add the trimmed asparagus to the skillet. Toss it gently in the garlic butter. Make sure each piece gets coated well. Sauté the asparagus for 4-6 minutes. Turn it with tongs so it cooks evenly. You want it bright green and still a bit crisp. Once cooked, drizzle the lemon juice over the asparagus and sprinkle the zest on top. Season with salt and black pepper. Toss everything together to mix the flavors. Finally, transfer the asparagus to a serving dish. Garnish with chopped parsley for a lovely look. For the complete recipe, check the [Full Recipe]. To cook asparagus just right, start with fresh, vibrant stalks. Look for asparagus that is firm and bright green. Trim the ends, as they can be tough. When cooking, aim for a tender yet crisp texture. Sauté for 4 to 6 minutes. The color should become a vivid green. If you want to test doneness, simply pierce a stalk with a fork. It should be easy to pierce but still hold its shape. If you're out of any ingredients, don't worry! You can swap unsalted butter for olive oil. This will give a different flavor but still taste great. For lemon juice, you can use lime juice instead. If you lack fresh garlic, try garlic powder. Use half the amount, as it's stronger. Fresh parsley can be replaced with basil or cilantro for a fun twist. These substitutions keep the dish flavorful while using what you have. How you present your dish matters! Arrange the asparagus neatly on a white platter. This will highlight the bright green color. For a pop of color, add lemon wedges around the sides. This not only looks nice but also invites guests to add more lemon. You can sprinkle extra parsley on top for a fresh look. A simple, clean presentation makes your lemon butter asparagus look gourmet. {{image_4}} You can make Lemon Butter Asparagus a full meal by adding protein. Chicken or shrimp works well. For chicken, use thin strips and sauté them in the butter first. Cook until they turn golden brown. Then, add the asparagus and follow the recipe as usual. For shrimp, add them after the garlic. Cook until they turn pink, then toss in the asparagus. This adds flavor and makes it more filling. To spice things up, add red pepper flakes. Just a pinch can bring a nice kick. You can mix them in with the garlic for a burst of heat. If you love bold flavors, try adding lemon zest or herbs like thyme or basil. These add depth and make the dish more exciting. Feel free to mix in other seasonal vegetables. Cherry tomatoes, bell peppers, or snap peas all pair nicely with asparagus. Add them in the skillet after the garlic to keep them fresh. This not only enhances the taste but also boosts the nutrition of your dish. For the full recipe, check out the details above. After enjoying your Lemon Butter Asparagus, you might have some left. Store it in an airtight container. Keep it in the fridge for up to three days. The asparagus will stay fresh, but it may lose its crispness over time. To reheat, use a skillet over medium heat. Add a splash of water or a bit of butter. This helps keep the asparagus moist. Cook for about 3-4 minutes. Stir occasionally until warm. You can also use a microwave. Heat in 30-second bursts until hot. Freezing is a great option if you want to save this dish for later. Start by blanching the asparagus for 2-3 minutes in boiling water. Then, cool it quickly in ice water. Once cool, drain and pat dry. Place it in a freezer-safe bag, removing as much air as possible. It can stay frozen for up to three months. When you're ready to eat, thaw it in the fridge overnight before reheating. Yes, you can use frozen asparagus. It is a great option if fresh asparagus is not available. Just remember to thaw it first. Drain any excess water before cooking. You may need to adjust cooking time. Frozen asparagus cooks faster, so keep an eye on it. Aim for a tender yet crisp texture. Lemon Butter Asparagus pairs well with many dishes. Here are some ideas: - Grilled chicken - Pan-seared fish - Quinoa or rice - Pasta with olive oil - A fresh salad These options balance the flavors and add variety to your meal. Making lemon butter sauce is simple. Here’s how: 1. Melt butter in a pan over medium heat. 2. Add minced garlic and sauté until fragrant. 3. Stir in freshly squeezed lemon juice and zest. 4. Season with salt and pepper. This easy lemon butter sauce elevates many dishes, not just asparagus. For the full recipe, refer to the earlier sections. In this post, we covered everything you need for Lemon Butter Asparagus. I shared the fresh ingredients, pantry staples, and optional garnishes. We went through step-by-step instructions to prepare and cook each part. Tips and tricks helped you perfect your dish and suggested tasty variations. Finally, I gave you storage info and answered common questions. Embrace this dish, and enjoy your cooking adventure!](https://goldendishy.com/wp-content/uploads/2025/07/9c4cbd12-069a-483d-8240-a9afe0533cf0-768x768.webp)