
Classic Meatloaf Juicy and Flavorful Family Dinner
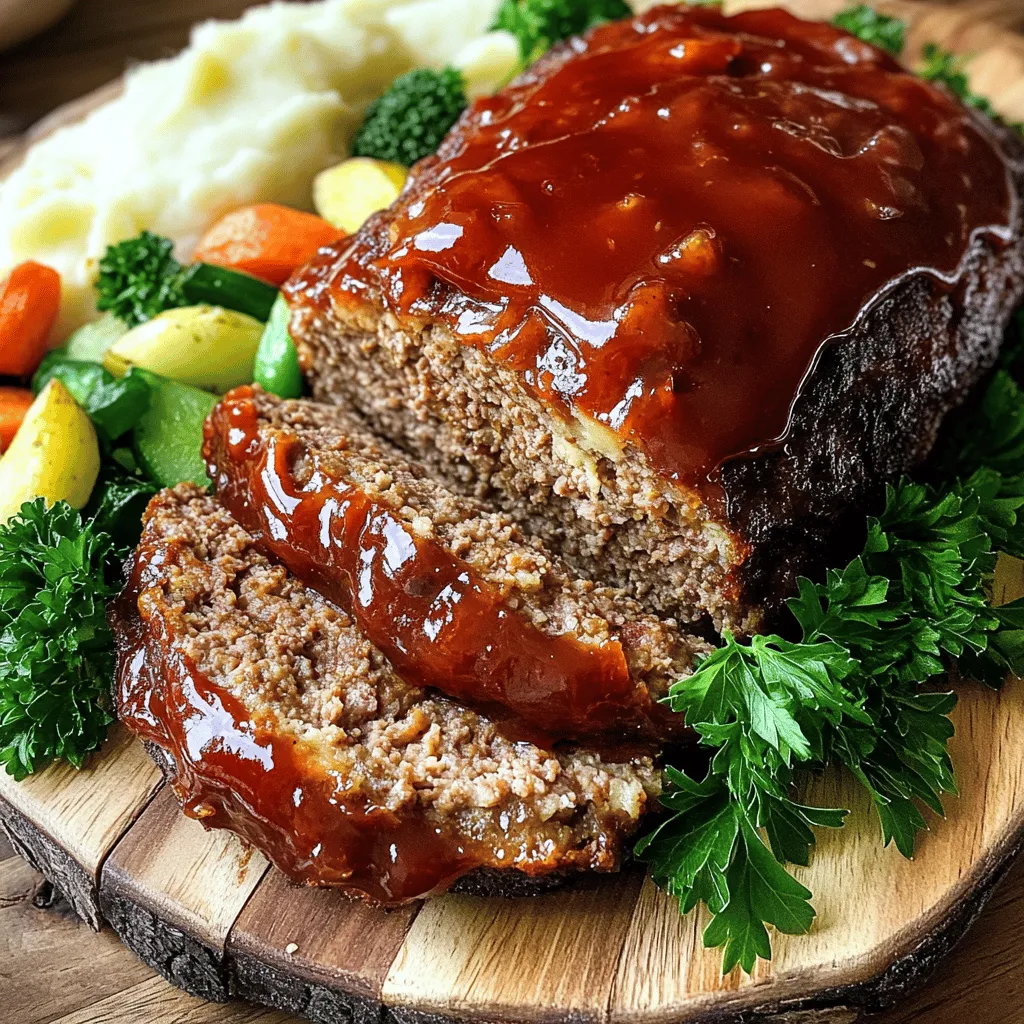
Are you ready to make a classic meatloaf that will wow your family? This dish is juicy, flavorful, and perfect for dinner. I’ll guide you through each step, from picking the right ingredients to cooking it just right. Whether you’re a meatloaf expert or a beginner, this recipe will help you create a meal everyone will love. Let’s dive into the secrets of a perfect meatloaf!
Ingredients
Main Ingredients for Classic Meatloaf
To make a great meatloaf, you need a few key ingredients. Here is what you will need:
– 1 ½ lbs ground beef
– 1 cup breadcrumbs
– 1 small onion, finely chopped
– 2 cloves garlic, minced
– 2 large eggs
– ½ cup milk
– 2 tablespoons Worcestershire sauce
– ½ cup ketchup (plus extra for topping)
These ingredients form the base of a flavorful meatloaf. The ground beef gives it a rich taste, while the breadcrumbs help bind it together. Onions and garlic add depth and aroma. Eggs and milk keep it moist and tender.
Essential Spices and Seasonings
Spices make your meatloaf shine. Here are the must-have spices:
– 1 teaspoon dried oregano
– 1 teaspoon dried thyme
– ½ teaspoon black pepper
– ½ teaspoon salt
– 1 tablespoon brown sugar
These spices add warmth and character. Oregano and thyme bring a hint of earthiness. Black pepper and salt enhance flavor, while brown sugar gives a sweet touch to the glaze.
Optional Ingredient Substitutions
You can adjust the recipe based on what you have. Here are some ideas:
– Use ground turkey instead of beef for a lighter option.
– Swap breadcrumbs with crushed crackers for a different texture.
– Replace milk with beef broth for added flavor.
Feel free to get creative! These substitutions can lead to fun variations and flavors.
Step-by-Step Instructions
Preparation and Preheating the Oven
Start by preheating your oven to 350°F (175°C). This step is key for even cooking. While the oven heats, gather your ingredients. You will need ground beef, breadcrumbs, onion, and garlic. Having everything ready makes the process smooth.
Mixing the Meatloaf Ingredients
In a large mixing bowl, combine the ground beef, breadcrumbs, chopped onion, and minced garlic. Mix gently with your hands or a wooden spoon. Avoid mashing the meat to keep it tender. In a separate bowl, whisk together the eggs, milk, Worcestershire sauce, oregano, thyme, black pepper, and salt. Pour this mixture into the meat. Mix until just combined. Be careful not to overwork it, or your meatloaf may become tough.
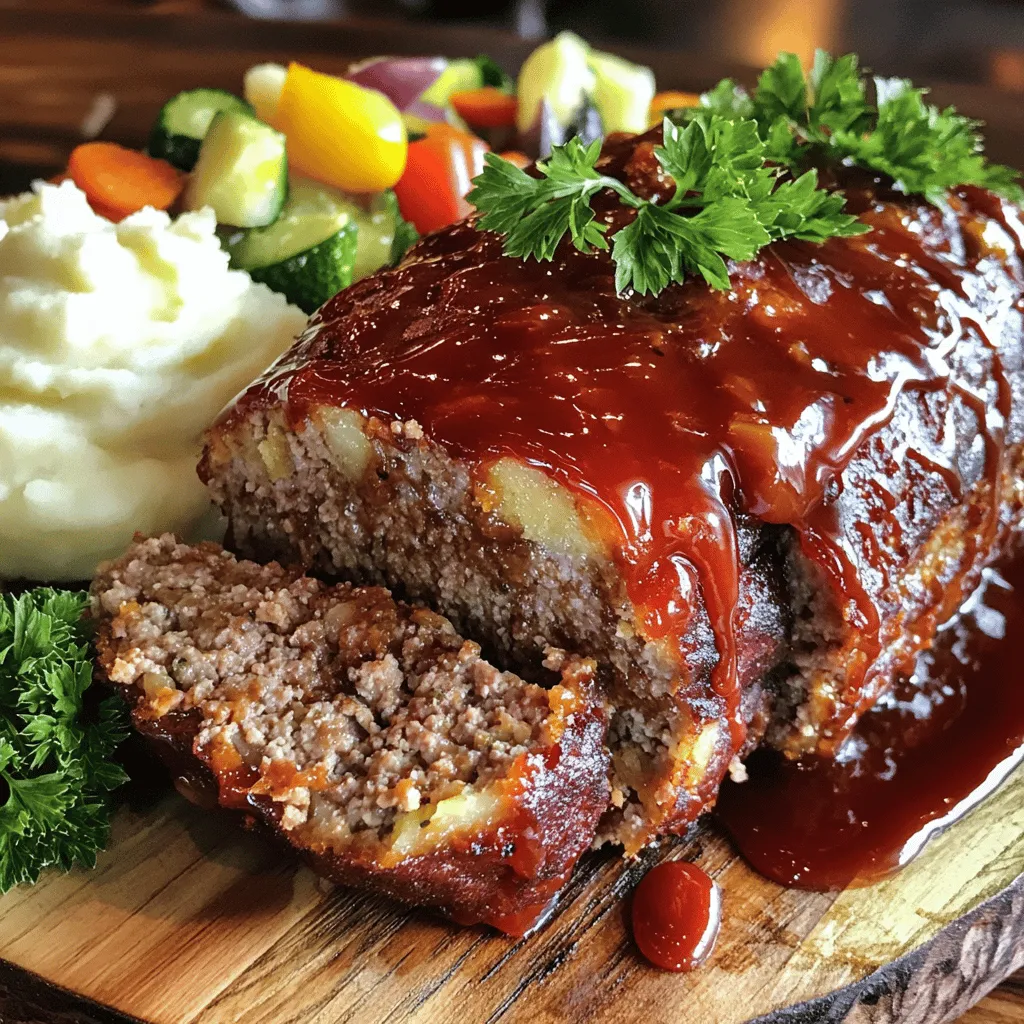
Shaping and Glazing the Meatloaf
Now, shape the meat mixture into a loaf. Place it in a lightly greased dish or lined loaf pan. This gives it a nice form. In a small bowl, mix ketchup and brown sugar to create a sweet glaze. Spread this glaze generously over the top of the meatloaf. It adds a lovely flavor. Place the loaf in the oven and bake for about 1 hour until it reaches an internal temperature of 160°F (71°C). After baking, let it rest for 10 minutes. This helps keep it juicy.
Tips & Tricks
Techniques for a Juicy Meatloaf
To make a juicy meatloaf, start with quality meat. I recommend using ground beef with 80% lean meat and 20% fat. This blend adds moisture and flavor. Mix your ingredients gently. Overmixing can make the meatloaf tough. Adding milk helps keep it moist. You can also include grated vegetables like zucchini or carrots for added moisture and flavor without changing the taste.
Common Mistakes to Avoid
One big mistake is cooking at too high a temperature. Always bake at 350°F (175°C). This helps the meatloaf cook evenly. Avoid skipping the resting time after baking. Letting it rest for 10 minutes keeps the juices inside. Don’t forget to check the internal temperature. It should reach 160°F (71°C) for safe eating.
Best Tools and Equipment for Meatloaf
A good mixing bowl is key for combining ingredients. I like to use a large glass bowl to see the mixing process. A loaf pan helps shape the meatloaf, but a baking dish works too. Use a meat thermometer to check the temperature. A sharp knife is great for slicing. Lastly, a set of measuring cups and spoons helps keep your ingredients precise.
Variations
Turkey Meatloaf Recipe
If you want a lighter option, try turkey meatloaf. Ground turkey makes a great swap for beef. It keeps the meal lean while still being tasty. Use the same ingredients as Mama’s Savory Meatloaf. Just replace the beef with 1 ½ lbs of ground turkey. The mix stays juicy if you add a bit more milk. Bake the turkey meatloaf the same way. It should also reach 160°F (71°C) inside.
Gluten-Free Meatloaf Options
For gluten-free meatloaf, you can use gluten-free breadcrumbs. They work just like regular breadcrumbs. Most stores carry gluten-free options now. You can also use oats instead of breadcrumbs. Just make sure to pulse them in a blender first. The rest of the recipe stays the same. You will still get that juicy flavor. This gluten-free meatloaf will please everyone at the table.
Vegetarian Meatloaf Alternatives
If you’re going meatless, try a vegetarian meatloaf. You can use lentils or black beans. Mash them up to form a base. Combine with vegetables like finely chopped carrots and bell peppers. Use 1 ½ cups of cooked lentils or beans. Add the same spices and sauces from the meatloaf recipe. Bake it like the other versions. This veggie meatloaf is filling and packed with flavor. It’s a fun twist on a classic dish.
Storage Info
How to Store Leftover Meatloaf
To store leftover meatloaf, let it cool first. Place it in an airtight container. You can keep it in the fridge for up to four days. If you want to save it longer, freezing is best.
Reheating Instructions
When you reheat meatloaf, use the oven for best results. Preheat your oven to 250°F (120°C). Slice the meatloaf and place it in a baking dish. Cover it with foil to keep it moist. Heat for about 25 minutes or until warm. You can also use a microwave. Place slices on a microwave-safe plate. Heat for one minute, check, then heat more if needed.
Freezing Meatloaf for Future Meals
To freeze meatloaf, let it cool completely. Wrap it tightly in plastic wrap. Then, place it in a freezer bag or container. Label it with the date. You can freeze it for up to three months. When ready to eat, thaw it in the fridge overnight. Then reheat as mentioned above. For the best taste, enjoy it within a month.
FAQs
What’s the best temperature to cook meatloaf?
The best temperature to cook meatloaf is 350°F (175°C). This heat cooks the meat evenly and helps it stay moist. At this temperature, your meatloaf will take about an hour to reach the safe internal temperature of 160°F (71°C). Using a meat thermometer is a smart way to check for doneness.
How long should meatloaf rest before slicing?
Meatloaf should rest for about 10 minutes before you slice it. This time allows the juices to settle back into the meat. If you cut it too soon, the juices will run out, and your meatloaf may become dry. Letting it rest ensures each slice is juicy and full of flavor.
Can I make meatloaf in advance?
Yes, you can make meatloaf in advance. You can prepare it a day ahead and store it in the fridge. Just shape the meatloaf, cover it well, and pop it in your fridge. When you’re ready to eat, bake it straight from the fridge. This method saves time and helps the flavors meld beautifully.
You learned how to make a great meatloaf today. We covered the key ingredients and spices. I shared step-by-step instructions to guide you. You now know tips for a juicy meatloaf and common mistakes to avoid. I even offered tasty variations and smart storage tips. Remember, practice makes perfect. Keep trying different flavors and techniques. Soon, you’ll have a meatloaf that everyone loves! Enjoy your cooking journey.


. In this post, we covered essential ingredients for cornbread, substitutions, and tips for fresh picks. I shared step-by-step instructions to ensure your cornbread turns out great. We discussed ways to perfect texture, enhance flavor, and explore different variations. Proper storage and reheating tips help keep your cornbread fresh for later. Remember, cornbread can be sweet or savory, so choose what you love. Get creative and enjoy the process! Your next batch will be delicious and fun to make.](https://goldendishy.com/wp-content/uploads/2025/07/3215032b-f688-44a5-9882-4fc644314e18-768x768.webp)
![To make Ranch Chicken and Rice Casserole, gather these items: - 1 lb (450g) boneless, skinless chicken breasts, cut into bite-sized pieces - 1 cup uncooked white rice (e.g., jasmine or basmati) - 2 cups low-sodium chicken broth - 1 cup creamy ranch dressing - 1 cup frozen mixed vegetables (a colorful blend of peas, carrots, and corn) - 1 cup shredded sharp cheddar cheese - 1 teaspoon onion powder - 1 teaspoon garlic powder - Salt and freshly ground black pepper to taste - Fresh parsley, chopped (for garnish, optional) Garnishes add beauty and taste to your dish. Here are a few: - Fresh parsley, chopped - Extra shredded cheddar cheese - A drizzle of ranch dressing These add color and a fresh taste to the casserole. You can mix and match based on what you like! Sometimes, you may need to swap out ingredients. Here are some ideas: - Chicken: Use turkey breast or cooked rotisserie chicken for a quicker option. - Rice: Brown rice or quinoa can work well. Just adjust the cooking time. - Vegetables: Feel free to use any frozen veggies you have, like broccoli or bell peppers. - Dressing: If you prefer, swap ranch dressing for other creamy dressings like blue cheese or Caesar. With these swaps, you can make the dish fit your taste or what you have on hand. First, preheat your oven to 375°F (190°C). This step is key for even cooking. A hot oven helps the chicken cook well and the cheese melt perfectly. In a large bowl, add the diced chicken, uncooked rice, chicken broth, and creamy ranch dressing. Then, sprinkle in the onion powder and garlic powder. Use a spatula to mix everything well. Make sure the chicken and rice are coated with the ranch dressing. Add salt and pepper to taste. Next, fold in the frozen mixed vegetables. This gives your casserole color and nutrition. Make sure the veggies are spread throughout the mixture. Pour your chicken and rice mixture into a greased 9x13-inch baking dish. Spread it out evenly for best results. Cover the dish tightly with aluminum foil. This traps moisture and helps the dish cook well. Bake in the preheated oven for 25 minutes. After 25 minutes, remove the foil carefully. Watch out for steam! Now, sprinkle the shredded cheddar cheese on top. Return the dish to the oven, uncovered, for another 15-20 minutes. You will know it’s ready when the chicken is cooked through, and the cheese is melted and bubbly. Once done, take it out and let it cool for about 5 minutes. This resting time helps the flavors settle. If you like, add freshly chopped parsley for a nice touch before serving. To make perfect rice, rinse it first. This removes extra starch. Use a 1:2 ratio of rice to broth. This keeps the rice moist. Cook it covered for even heat. If you want extra flavor, add herbs to the broth. You can mix in extras to change the taste. Try adding diced bell peppers for crunch. Use different frozen veggies like broccoli or green beans. You can also swap ranch dressing for a spicy sauce. This gives it a kick. For a cheesy twist, add cream cheese with the ranch. One mistake is not covering the dish while baking. This can dry out the rice. Another error is using too much liquid. Stick to the right amounts in the recipe. Don’t skip the resting time after baking. This helps the flavors blend well. Always taste before serving. Adjust salt and pepper as needed. For a full recipe with all these tips, check out the [Full Recipe]. {{image_4}} You can make a tasty vegetarian version of this dish. Start by swapping the chicken for a mix of beans or lentils. Use 2 cups of cooked black beans or chickpeas instead. Then, keep all the other ingredients the same. The ranch dressing adds great flavor, and the veggies provide crunch. This version is hearty and filling, perfect for a meatless meal. If you love heat, try a spicy twist on the classic recipe. Add diced jalapeños or a pinch of cayenne pepper to the mix. You can also use spicy ranch dressing in place of the regular one. This gives the dish a nice kick. Top it off with pepper jack cheese instead of cheddar for extra spice. Your taste buds will thank you! For a one-pan meal, mix everything in a large oven-safe skillet. This saves on clean-up time. Just add the rice and broth to the skillet along with the chicken and veggies. Cover and bake as you normally would. The flavors blend well, and you still get that creamy goodness from the ranch dressing. This method makes dinner even easier and quicker. You can find the full recipe linked above, allowing you to create these delicious variations! You can keep leftover Ranch Chicken and Rice Casserole in the fridge. Place it in an airtight container. It will stay fresh for up to three days. Make sure the casserole is cool before sealing it. This helps prevent moisture from building up. If you want to save some for later, freezing is easy. Use a freezer-safe container or heavy-duty freezer bag. Store the casserole in portions for easy meals. It will keep well for up to three months. To freeze, let it cool completely first. Label the container with the date to track freshness. When you’re ready to enjoy your casserole again, you can reheat it in different ways. The oven gives the best results. Preheat it to 350°F (175°C). Bake the casserole for about 20-30 minutes, covered with foil. This keeps it moist. You can also use a microwave. Heat in short bursts, stirring in between to ensure even warming. Always check that the chicken is heated all the way through. For extra flavor, add a little ranch dressing before serving. To adjust the recipe for fewer servings, simply halve the ingredients. Use ½ lb of chicken and ½ cup of rice. Also, cut the broth and dressing in half. This way, you keep the same flavors. Make sure to check the baking time. Smaller portions may cook faster, so keep an eye on them. Yes, you can use brown rice. However, brown rice takes longer to cook. It may need more liquid too. I recommend cooking it for a few minutes before adding it to the casserole. This helps it soften. Follow the same steps, but adjust the cooking time. Ranch Chicken and Rice Casserole goes well with many sides. Here are a few tasty options: - Simple green salad with a light dressing - Steamed broccoli or green beans for a crunchy bite - Garlic bread for a cozy touch - Roasted vegetables for extra flavor and color These sides add balance and make your meal complete. Enjoy the casserole with your favorite sides! For the full recipe, check out the link above. In this blog post, we covered the key steps to make a delicious Ranch Chicken and Rice Casserole. We explored the ingredients, sharing options for garnishes and substitutions. The step-by-step instructions guide you from preheating the oven to baking. I also shared tips to perfect your dish and variations for added flavor. Finally, we discussed how to store leftovers for later enjoyment. Follow these tips, and you’ll create a tasty meal that everyone will love!](https://goldendishy.com/wp-content/uploads/2025/06/349f3b9c-e648-45ce-b7ed-2f76b31339ac-768x768.webp)