Homemade Bagels Simple and Delicious Recipe Guide

Are you ready to bake some of the best homemade bagels you’ve ever had? With just a few simple ingredients and easy steps, you can create your own chewy, delicious bagels right in your kitchen. This guide covers everything from activating yeast to the perfect boil and bake. You’ll even find tips for fun flavor twists and storage tips. Let’s dive into the art of bagel making together!
Ingredients
Essential Ingredients for Homemade Bagels
To make tasty bagels at home, you need these key ingredients:
– 4 cups bread flour
– 1 packet (2 ¼ teaspoons) active dry yeast
– 1 ½ cups warm water (about 110°F/45°C)
– 2 tablespoons granulated sugar
– 2 teaspoons salt
– 2 tablespoons honey (for boiling)
– Assorted toppings (like sesame seeds or everything bagel seasoning)
These ingredients work together to create bagels that are soft inside and chewy outside. Bread flour gives them structure. Yeast helps them rise. Warm water activates the yeast. Sugar feeds the yeast and adds a hint of sweetness. Salt brings out the flavors. Honey helps with the boiling process and adds a touch of flavor. Finally, toppings add crunch and taste.
Optional Ingredients for Flavor Variations
You can also add these optional ingredients to mix things up:
– Garlic powder
– Onion powder
– Cheese
– Fresh herbs
If you love garlic or onion, sprinkle some powder into the dough. Cheese adds a rich taste. Fresh herbs bring in a burst of flavor. These fun additions let you create bagels that suit your fancy. Want a unique twist? Try a blend of toppings for a flavor explosion.
Step-by-Step Instructions
Activating the Yeast
Start by mixing warm water, yeast, and sugar in a small bowl. You want the water to be about 110°F (45°C). Stir gently and let it sit for 5-10 minutes. This waiting time helps the yeast froth up, showing it is ready to work. If you see bubbles forming, you know your yeast is active and good to go!
Preparing the Dough
In a large mixing bowl, sift together the bread flour and salt. This step ensures an even mix. Make a well in the center, and pour in the frothy yeast mixture. Stir with a wooden spoon until the dough becomes shaggy. Then, transfer it onto a lightly floured surface. Knead the dough with your hands for about 10 minutes. You want it smooth and elastic. If it sticks, add a bit more flour.
First Rise
Next, lightly grease a large bowl with oil or cooking spray. Place the kneaded dough inside the bowl. Cover it with a damp cloth or plastic wrap. Let it rise in a warm place for about 1 hour. The dough should double in size during this time.
Shaping the Bagels
Once the dough has risen, gently punch it down to release any air trapped inside. Now, divide the dough into 8 equal parts. Roll each piece into a ball. Use your finger to poke a hole in the center of each ball, shaping it into a bagel. Make sure the hole is big enough, as it will shrink during cooking.
Boiling the Bagels
Fill a large pot with water and bring it to a gentle boil. Add honey to the water, stirring it in well. Carefully place the bagels in the boiling water, making sure they don’t stick together. Boil each side for 1-2 minutes. This step helps create that classic chewy bagel texture. Once boiled, use a slotted spoon to remove them and place them on a greased baking sheet.
Baking the Bagels
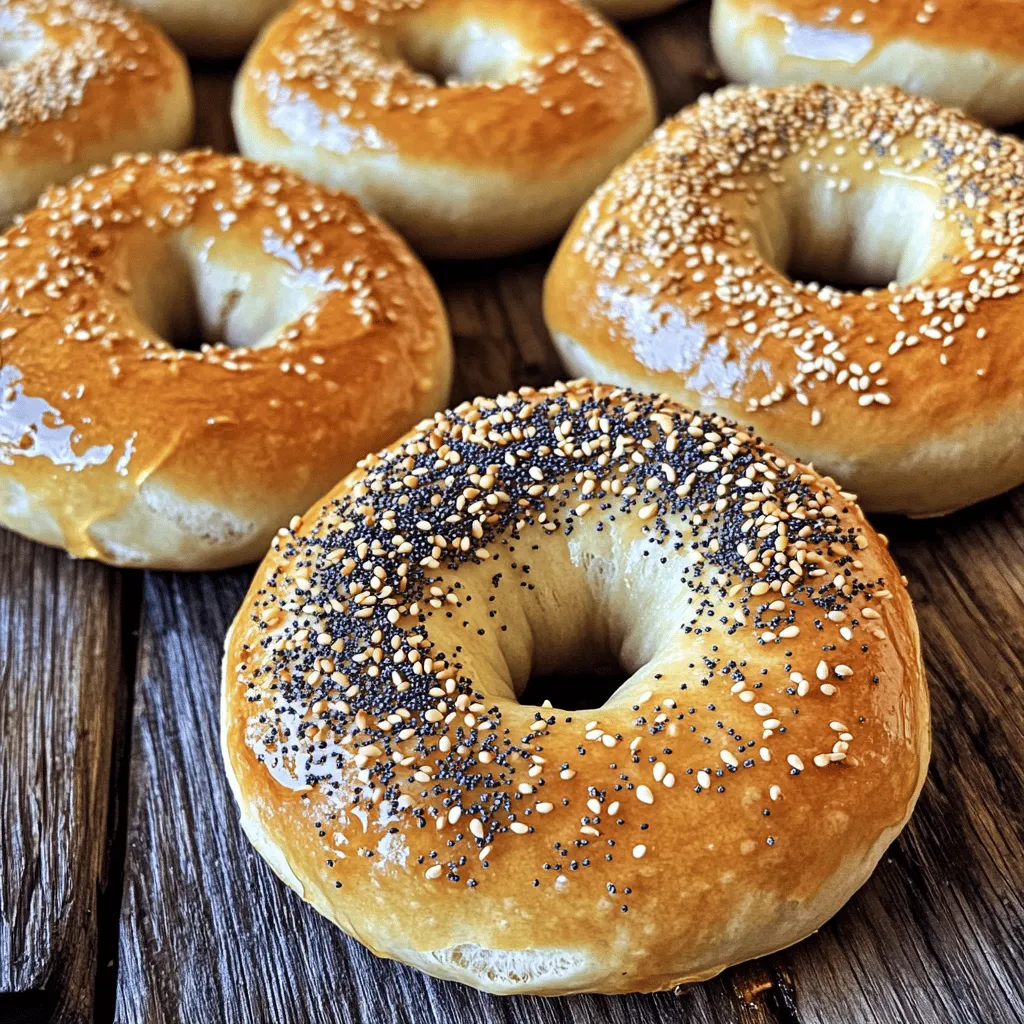
Preheat your oven to 425°F (220°C). While the bagels are still wet, sprinkle your choice of toppings over them. This helps the toppings stick. Place the baking sheet in the oven and bake for 20-25 minutes. Look for a golden brown color and a lovely aroma. After baking, let the bagels cool on a wire rack. This cooling step helps them firm up before you enjoy your delicious homemade bagels.
Tips & Tricks
Perfecting Texture and Flavor
Boiling is key to great bagels. This step gives them that unique chew. The honey in the boiling water adds flavor and shine. Adjust the water temperature to about 110°F. This warmth helps activate the yeast. Yeast loves warmth and needs it to grow well.
Common Mistakes to Avoid
One mistake is over-kneading the dough. Knead until smooth, about 10 minutes. Too much kneading can make bagels tough. Also, do not skip the rise time. Let the dough rise until it doubles. Rushing this step will lead to dense bagels.
Presentation and Serving Suggestions
You can get creative with toppings. Sesame seeds, poppy seeds, and everything seasoning are popular. Try adding garlic or onion powder for extra flavor. For serving, pair bagels with spreads like cream cheese or butter. Sliced bagels topped with smoked salmon are a classic.
Variations
Flavor Variations
You can make your bagels even more fun by adding flavors.
– Everything bagel seasoning: This mix contains sesame seeds, poppy seeds, garlic, and onion. It gives your bagels a savory crunch. Just sprinkle it on right after boiling.
– Sweet bagels: If you like sweet treats, try a cinnamon sugar mix. Combine sugar and cinnamon, then coat your bagels before baking. It makes for a delightful breakfast or snack.
Gluten-Free Bagel Recipe
Do you need gluten-free bagels? You can make them by swapping out the flour.
– Substituting flour types: Use a gluten-free blend that is meant for bread. These blends often have a mix of flours and starches to mimic bread flour.
– Adjusting measurements: Gluten-free dough may need more liquid. Start with the same water amount, then add more as needed. Aim for a smooth, pliable dough.
Vegan Bagel Options
Making vegan bagels is simple and tasty!
– Non-dairy alternatives: Use almond milk or soy milk instead of regular milk. You can also replace honey with maple syrup or agave nectar for that sweet touch.
– Egg substitutes: If your recipe calls for eggs, use flaxseed meal or chia seeds. Mix one tablespoon of either with three tablespoons of water. Let it sit for a few minutes to thicken, then add it to your dough.
These variations will help you create unique bagels for everyone to enjoy. Try mixing and matching flavors to find your favorite!
Storage Info
Best Practices for Storing Bagels
To keep your homemade bagels fresh, store them properly. You can keep bagels at room temperature for a short time. Use a clean cloth to wrap them. This keeps them soft, but only for a day or two. If you want to save them longer, it’s best to use the fridge. However, the fridge can dry them out. So, always use airtight containers. This method helps keep them moist and fresh for about a week.
Freezing Bagels
Freezing bagels is a great way to keep them tasty. Start by letting them cool completely. Once cool, place each bagel in a freezer bag. Remove as much air as you can. This prevents freezer burn. You can freeze bagels for up to three months. When you want to enjoy a bagel, take one out. Let it thaw at room temperature for about 30 minutes. For a warm treat, pop it in the toaster or oven. Heat it for around 5-10 minutes at 350°F (175°C) for a fresh, chewy bite. Enjoy your bagels again with your favorite toppings!
FAQs
How long do homemade bagels last?
Homemade bagels stay fresh for about 2 to 3 days. Store them at room temperature in a paper bag. This keeps them soft without making them soggy. If you want to keep them longer, freeze them. Place them in a freezer bag to avoid freezer burn. When you want to eat them, just toast or warm them up.
Can I make bagels without yeast?
Yes, you can make bagels without yeast. You can use baking powder instead. This makes a quick version of bagels. Mix flour, baking powder, salt, and yogurt. Knead it, shape it, and bake. They won’t taste the same but will still be tasty.
Why are my bagels not chewy?
Bagels may not be chewy for a few reasons. First, they might not have boiled long enough. Boiling helps give bagels their chewy texture. Second, using all-purpose flour instead of bread flour can change the texture. Bread flour has more protein, which helps with chewiness. Lastly, under-kneading the dough can also make them soft. Make sure to knead well until the dough is smooth.
How do I get shiny bagels?
To get shiny bagels, boil them in water with honey. Honey helps create a nice glaze. Boil each bagel for 1 to 2 minutes on each side. After boiling, place them directly on the baking sheet. Bake them until golden brown. This gives you that beautiful shine and crust.
You learned how to make delicious homemade bagels step by step. Start with key ingredients like bread flour and yeast. Activating the yeast ensures good rise, while boiling gives bagels that great chewy texture. I shared tips to perfect the flavor and avoid common mistakes. You can try fun variations, too, like gluten-free or sweet bagels. Proper storage keeps your bagels fresh longer. Now, it’s time to enjoy your bagels, share them with friends, and experiment with new flavors!

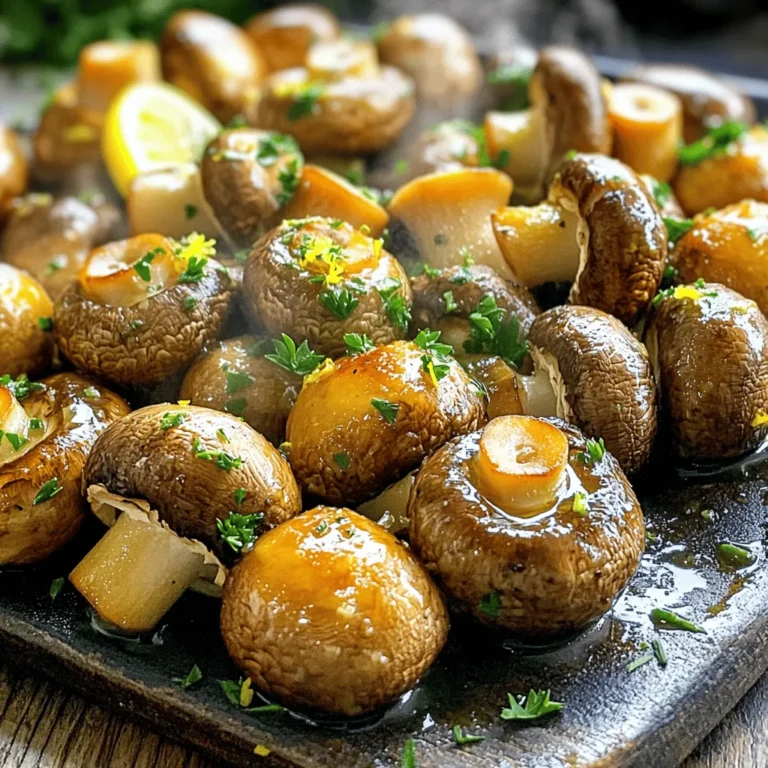
. 1. Heat olive oil in a large skillet over medium heat. 2. Add finely chopped red onion to the skillet. 3. Sauté the onion for 2-3 minutes until it becomes soft. 4. Now, add diced red and green bell peppers to the skillet. 5. Cook for 3-4 minutes until the peppers soften. 6. Stir in corn kernels and black beans. 7. Season with ground cumin, smoked paprika, garlic powder, salt, and pepper. 8. Mix well and cook for 5 more minutes until hot. 1. Heat another skillet over medium heat. 2. Place a tortilla in the skillet and sprinkle ¼ cup of cheese on it. 3. Layer ½ cup of the veggie mixture over the cheese. 4. Top with another ¼ cup of cheese for extra flavor. 5. Fold the tortilla in half, covering the filling. 6. Cook for 3-4 minutes until golden brown on one side. 7. Flip the quesadilla gently using a spatula. 8. Cook for another 3-4 minutes until crispy and cheese melts. - Keep the heat at medium for a crispy texture. - Use a spatula to flip the quesadilla easily. - Check for doneness by ensuring both sides are golden brown. These simple steps make it easy to create loaded veggie quesadillas at home. For the full recipe, refer to the recipe section above. Enjoy the process! Choosing the right cheese is key. I love a mix of cheddar and mozzarella. This mix melts well and adds great flavor. You want the cheese to stretch and pull when you take a bite. Balancing spices and seasonings is also important. Start with the basics like salt and pepper. Then, add spices like cumin and smoked paprika. Adjust them to fit your taste. A little heat can come from red pepper flakes if you like it spicy. Day-to-day storage tips help keep your quesadillas fresh. Place leftovers in an airtight container. Keep them in the fridge for up to three days. You can also wrap them tightly in foil or plastic wrap. Reheating suggestions for best flavor include using the oven or skillet. For the oven, preheat to 350°F. Heat the quesadillas for about 10 minutes. In a skillet, cook them over medium heat. This method keeps them crispy and delicious. Plating ideas can make your meal pop. Arrange the quesadillas in a fan shape on a colorful plate. This makes them look fun and inviting. Adding colorful garnishes like fresh cilantro adds a nice touch. You can also sprinkle some diced tomatoes or avocado on top. These small changes make your meal look gourmet. Enjoy your loaded veggie quesadillas! For the full recipe, check out the Loaded Veggie Quesadillas 🥑 section. {{image_4}} You can make loaded veggie quesadillas even more fun. Here are some easy ideas. Want some extra protein? You can add grilled chicken or tofu. Just cook them first, then slice and add to your quesadilla mix. If you like seafood, try shrimp. Cook them quickly and toss them in for a tasty twist. Spices can change the game. Try different spices like chili powder or oregano. They add depth and warmth. You can also add sauces or marinades. A dash of hot sauce or a sprinkle of lime juice can elevate your quesadillas. Need gluten-free options? Use gluten-free tortillas. They work great and taste just as good. If you're vegan, swap out the cheese for a plant-based version. There are many tasty dairy-free cheeses out there that melt well. You can find the full recipe for loaded veggie quesadillas to get started on these variations. To keep your uncooked quesadillas fresh, wrap them tightly in plastic wrap. This keeps out moisture and air. You can also place them in an airtight container. If you want to freeze them, stack the quesadillas with parchment paper in between. This prevents them from sticking together. Uncooked quesadillas can stay in the freezer for up to three months. After cooking, let the quesadillas cool completely. Then, wrap them in foil or place them in a container. Store them in the fridge for up to four days. I find they taste best within the first two days. If you notice any odd smell or mold, it’s best to toss them. To reheat, use an oven or a skillet. For the oven, preheat to 350°F (175°C). Place the quesadilla on a baking sheet and heat for about 10 minutes. If using a skillet, add a little oil and heat over medium heat for about 3-4 minutes on each side. Leftover quesadillas can also become a fun breakfast. Chop them up and add them to scrambled eggs for a tasty twist. For more ideas, check out the Full Recipe. Making loaded veggie quesadillas is quick and easy. It takes about 10 minutes to prep. Cooking them takes around 15 minutes. In total, you can make them in about 25 minutes. This makes them a great choice for busy days or quick meals. Yes, you can prep loaded veggie quesadillas in advance. To do this, cook the veggie mixture and let it cool. Then, assemble the quesadillas but do not cook them. Store them in an airtight container in the fridge for up to two days. You can also freeze them for a month. When ready to eat, just cook them straight from the fridge or freezer. This makes meal prepping super easy! You can mix and match many veggies in quesadillas. Some great options include: - Spinach or kale for a green boost - Mushrooms for a savory taste - Zucchini or squash for extra texture - Jalapeños for a spicy kick - Tomatoes for freshness Feel free to get creative! Each veggie adds its own flavor and texture. You can make quesadillas that fit your taste perfectly. For more ideas, check out the Full Recipe. These loaded veggie quesadillas are fun and easy to make. We explored essential ingredients like black beans, bell peppers, and corn. I’ve shared tips for perfect texture, storing leftovers, and creative garnishes. Remember, you can customize them with protein or spices to suit your taste. In the end, these quesadillas are more than just food; they bring flavor and joy. Enjoy making them your own!](https://goldendishy.com/wp-content/uploads/2025/06/a7c52493-2108-4a2f-8f90-ee80e7df7b2a-768x768.webp)