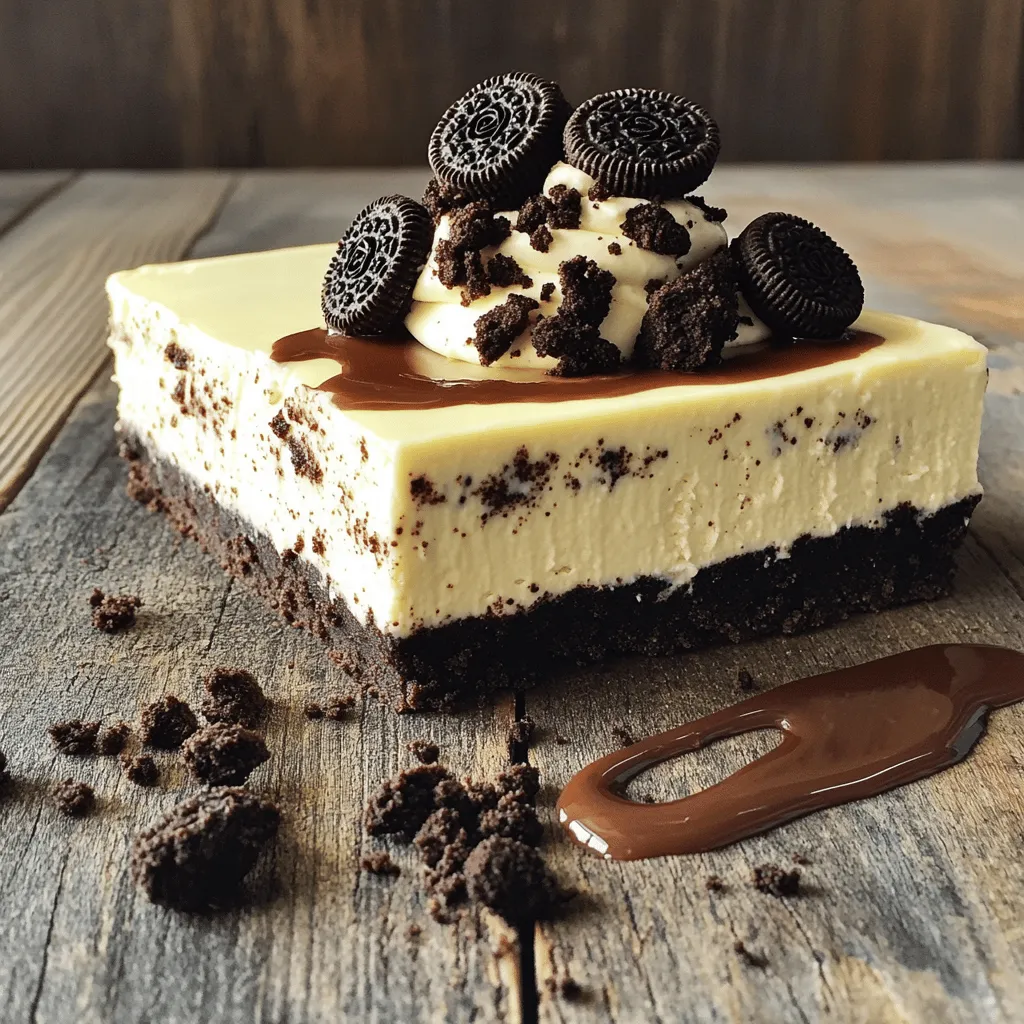
No Bake Oreo Cheesecake Simple and Delicious Recipe

Craving a sweet dessert that’s easy to make? You’ll love this No Bake Oreo Cheesecake! This simple recipe uses rich cream cheese and crumbly Oreos to create a treat you won’t forget. Perfect for parties or a family dinner, it’s a delight anyone can whip up without turning on the oven. Stick around to learn how to make this simple and delicious cheesecake that’s sure to impress!
Ingredients
List of Ingredients
– 24 Oreo cookies, finely crushed
– 1/2 cup unsalted butter, melted
– 2 cups cream cheese, softened to room temperature
– 1 cup powdered sugar, sifted
– 1 teaspoon vanilla extract
– 1 cup heavy whipping cream, chilled
– 10 Oreo cookies, roughly chopped for incorporation
– 4 whole Oreo cookies, for topping
Important Ingredient Notes
– Quality of Oreo cookies: Using fresh Oreo cookies is key. Old or stale cookies can affect taste and texture. Always choose the best quality for a great cheesecake.
– Alternatives for cream cheese: If you want a lighter option, use Greek yogurt instead of cream cheese. It gives a nice tang. For a dairy-free choice, try cashew cream.
– Substitutes for heavy whipping cream: You can use coconut cream for a non-dairy version. It adds a subtle flavor and works well in desserts. If you prefer a lower fat option, use half and half, but the texture may be less rich.
These ingredients all come together to create a simple and delicious No Bake Oreo Cheesecake.
Step-by-Step Instructions
Preparing the Oreo Crust
1. Combine Oreo crumbs and melted butter. In a medium bowl, take 24 finely crushed Oreo cookies. Pour in 1/2 cup of melted unsalted butter. Mix until the crumbs are fully coated.
2. Press the crust into the springform pan. Transfer this mixture into a 9-inch springform pan. Use your hands or a spatula to press it down firmly. Make sure it is compact and even across the bottom.
3. Prep the crust in the freezer. Place the pan in the freezer for about 10 minutes. This will help the crust set while you make the filling.
Making the Cheesecake Filling
1. Beat the cream cheese until smooth. In a large bowl, add 2 cups of softened cream cheese. Use an electric mixer on medium speed. Beat until it is creamy and smooth, with no lumps.
2. Add powdered sugar and vanilla extract. Gradually mix in 1 cup of sifted powdered sugar and 1 teaspoon of vanilla extract. Combine until the mixture is silky and well blended.
3. Whip the heavy cream to stiff peaks. In another bowl, pour in 1 cup of chilled heavy whipping cream. Whip it using a hand mixer until stiff peaks form. This means the cream should hold its shape well.
Assembling the Cheesecake
1. Fold the whipped cream and Oreos into the filling. Carefully add the whipped cream to the cream cheese mixture. Use a spatula to fold gently. Then, add 10 roughly chopped Oreos and fold until evenly mixed.
2. Pour and smooth the filling on the crust. Take the cheesecake filling and pour it over the prepared Oreo crust. Smooth the top with the spatula for an even finish.
3. Cover and refrigerate the cheesecake. Cover the springform pan with plastic wrap. Place it in the fridge for at least 4 hours. This allows the cheesecake to set properly.
Tips & Tricks
Ensuring the Perfect Texture
To get a creamy cheesecake, start with room temperature ingredients. Cold cream cheese makes it hard to mix well. Let it sit out for about 30 minutes. This helps the cream cheese blend smoothly without lumps. When you whip the cream, it should reach stiff peaks. This means it holds its shape and adds fluffiness.
When you mix the whipped cream into the cream cheese, fold gently. Use a spatula to lift and turn the mixture. This keeps the air in the whipped cream, making your cheesecake light and fluffy. Avoid stirring too hard, as it can deflate the mixture.
Presentation Tips
A stunning cheesecake deserves great presentation! First, consider garnishing with crushed Oreos on top. You can also add a drizzle of chocolate sauce for extra flair. Fresh fruit like berries can add a splash of color. For an elegant touch, place a sprig of mint on each slice. This will impress your guests and make the dessert pop on the table.
Serve the cheesecake on pretty plates. You can cut it into neat slices or use a cake server for individual servings. A beautiful presentation makes your dessert feel extra special.
Common Mistakes to Avoid
One mistake to watch out for is overmixing the cream cheese. This can make your cheesecake too dense. Mix just until smooth and creamy. Another mistake is not letting the cheesecake set long enough. It needs at least four hours in the fridge. If you cut it too soon, the slices may fall apart. Patience is key for a perfect cheesecake.
By following these tips, you will create a delicious No Bake Oreo Cheesecake that looks as great as it tastes.
Variations
Flavored Cheesecake Options
You can have fun with flavors in your cheesecake. Try adding chocolate or peanut butter to the filling. For chocolate, mix in melted chocolate or cocoa powder. For peanut butter, fold in creamy peanut butter for a nutty twist. Both options add rich taste and make the cheesecake even more special.
You can also swap Oreos for other cookie varieties. Try using chocolate wafer cookies or even graham crackers. Each cookie brings its own flavor and style. Experiment to find your favorite mix!
Mini Cheesecakes
Turning this recipe into mini cheesecakes is easy! Use a muffin tin with liners for perfect portions. Adjust the crust and filling to fit the smaller size. Bake them for about 10 to 15 minutes at 350°F if you choose to bake; otherwise, chill them like the full cheesecake.
Serving ideas for mini cheesecakes can be fun too. Add fresh fruit or drizzle with chocolate sauce on top. They make great desserts for parties or gatherings.
Vegan Alternatives
If you want a dairy-free option, there are great substitutes. Use vegan cream cheese and dairy-free cookies. Many brands offer tasty options that work well in this recipe. You can also use coconut cream instead of heavy whipping cream for a lighter texture.
These vegan alternatives maintain the taste and texture of a classic cheesecake. Enjoy your sweet treat without the dairy!
Storage Info
Proper Storage Techniques
To store the cheesecake in the fridge, cover it with plastic wrap or foil. This keeps the cheesecake fresh and prevents it from picking up other smells. Place it on a flat shelf to avoid any damage.
If you want to freeze the cheesecake, wrap it tightly in plastic wrap. Then, place it in an airtight container. This will help keep it safe from freezer burn. You can store it in the freezer for up to three months.
Shelf Life
The cheesecake lasts about five days in the fridge. After that, it may start to lose its flavor and texture. Look for signs that the cheesecake has gone bad. If you see mold or if it smells sour, it’s time to toss it out.
Reheating and Serving after Freezing
To thaw the cheesecake, move it from the freezer to the fridge. Let it sit overnight for the best results. If you need to thaw it faster, you can leave it at room temperature for about two hours.
After thawing, you may notice a change in texture. To restore it, gently whip a bit of heavy cream and fold it into the cheesecake. This will help bring back its creamy texture. Enjoy your cheesecake as a delicious treat!
FAQs
How long does it take to make No Bake Oreo Cheesecake?
Making this cheesecake takes about 20 minutes of prep time. You will also need to chill it for at least 4 hours. In total, you’re looking at about 4 hours and 20 minutes. This gives the cheesecake time to set and become firm.
Can I use different cookies for the crust?
Yes, you can use other cookies for the crust. Graham crackers work well, giving a nice flavor. You can also try chocolate wafer cookies for a richer taste. Just crush them finely and mix with melted butter, like you do with Oreos.
Is it necessary to use heavy whipping cream?
Heavy whipping cream is key for a fluffy texture. It helps the cheesecake become light and airy. If you don’t have it, you can use whipped topping as a substitute. This will change the taste a bit, but it will still be good.
What if my cheesecake doesn’t set?
If your cheesecake doesn’t set, check a few things. First, make sure you used enough heavy cream. Also, ensure you chilled it long enough. If it’s still soft, try putting it back in the fridge for a few more hours. Sometimes, a little more time is all it needs.
This blog post walks you through making a tasty No Bake Oreo Cheesecake. I covered ingredients, step-by-step instructions, and tips for perfecting your cheesecake. You learned how to ensure a great texture and avoid common mistakes. With variations and storage tips, you can tailor your cheesecake to your needs. Now, try this recipe and wow your friends! Remember, with practice, you’ll create a delicious dessert every time. Enjoy your cheesecake adventure!


![- 1 cup strawberries, hulled and sliced - 1 cup blueberries - 1 ripe mango, peeled and diced - 1 cup pineapple, diced - 1 banana, sliced The fruit selection is key. I enjoy using a mix of colors and flavors. Strawberries bring sweetness, while blueberries add a nice pop of tartness. The mango gives a tropical vibe, and pineapple adds a refreshing taste. The banana adds creaminess and helps balance the flavors. - 1/4 cup honey - 2 tablespoons freshly squeezed lime juice - Zest of 1 lime The dressing pulls everything together. I use honey for natural sweetness. Fresh lime juice brightens the dish, making it taste fresh. The lime zest adds an extra layer of flavor that's hard to resist. - Fresh mint leaves, for garnish Mint leaves add a beautiful touch. They not only look good but also give a nice hint of freshness. If you want to impress guests, sprinkle some mint on top before serving. Make sure to check out the Full Recipe for a detailed guide on how to combine these ingredients into a delicious Honey Lime Fruit Salad. To start, gather your fruits. Grab one cup of hulled and sliced strawberries, one cup of blueberries, one ripe mango peeled and diced, one cup of diced pineapple, and one sliced banana. In a large mixing bowl, combine all these fruits. Gently mix them to spread the flavors evenly. This step helps each fruit shine in the salad. Next, we make the dressing. In a separate bowl, add a quarter cup of honey, two tablespoons of freshly squeezed lime juice, and the zest of one lime. I like to whisk these together until the mixture is smooth. This dressing adds a sweet and zesty kick to the salad. Now, it's time to bring it all together. Drizzle the honey-lime dressing over your prepared fruits. Toss everything gently with a spatula or large spoon. Make sure each piece of fruit gets coated in the dressing. Let the salad sit for about ten minutes at room temperature. This resting time lets the flavors blend beautifully. Enjoy your fresh and colorful Honey Lime Fruit Salad! You can find the Full Recipe for details on preparation. To make a great Honey Lime Fruit Salad, choose ripe, seasonal fruits. Fresh fruits provide the best taste and texture. Look for strawberries with bright red color. Blueberries should be plump and firm. Pick mangoes that give slightly when you press them. Pineapples should smell sweet at the base. Bananas need to be ripe but not brown. When you select these fruits, you ensure a delightful salad. Let your salad rest for at least 10 minutes before serving. This short wait helps the flavors blend. The honey lime dressing seeps into the fruits. This makes each bite burst with flavor. The longer the salad sits, the better it tastes. You can prepare this ahead of time for easy serving. Presentation matters when serving this salad. You can use individual bowls for a personal touch. A large platter works well for gatherings. Arrange the fruits in a colorful pattern. Add lime wedges on the side for extra zest. A few fresh mint leaves on top make it look appealing. Your guests will love the bright colors and fresh taste. For the full recipe, check the instructions above. {{image_4}} You can easily change this fruit salad to suit your taste. Adding fruits like kiwi or grapes can make it even better. Kiwi adds a bright green color and a tangy taste. Grapes are sweet, crunchy, and add variety. Just chop them up and toss them in. Mix and match to create your dream fruit salad! For a fun tropical vibe, try adding shredded coconut or a splash of coconut juice. Shredded coconut gives a chewy texture and a hint of sweetness. Coconut juice can make the dressing even more refreshing. This twist takes your fruit salad to a whole new level. You’ll feel like you’re on a sunny beach with every bite! If you want a vegan option, use agave syrup instead of honey. Agave syrup is a great sweetener that works well in this recipe. It blends nicely with lime juice and keeps the salad tasty. This swap still gives you that sweet flavor without using honey. Enjoy your fruit salad without any worries! For the full recipe, check out the [Full Recipe]. Keep the salad in an airtight container in the fridge. This helps keep it fresh. Avoid letting the salad sit out for too long. If you plan to serve it later, store it right away. Consume within 1-2 days for best freshness. The fruits will start to lose their crispness after that. If you notice any browning, it’s time to toss it out. Always check for changes in smell or texture. Freezing fruit salad can change its texture. If you want to freeze it, use firm fruits like pineapple and mango. Avoid bananas, as they turn mushy. To freeze, place the salad in a freezer-safe container. When ready to eat, let it thaw in the fridge. You can also add fresh honey-lime dressing after defrosting for extra flavor. Yes, you can use frozen fruits in this salad. Frozen fruits can be a great option when fresh fruits are out of season. They are often picked at their peak and frozen right away, keeping their nutrients intact. However, frozen fruits can release more water as they thaw. This might make the salad a bit watery. To avoid this, let the frozen fruits thaw and drain excess liquid before mixing them in. Fresh fruits offer a crunchier texture and vibrant look, so choose based on your preference. No, this salad is not vegan due to honey. Honey comes from bees, making it an animal product. If you want a vegan option, you can easily replace honey with agave syrup or maple syrup. Both alternatives provide sweetness and work well with lime. The taste will differ slightly, but the salad will still be delicious. Just make sure to use the same amount of the substitute for the best flavor balance. This fruit salad is packed with vitamins and minerals. Here are some key benefits of its ingredients: - Strawberries: High in vitamin C and antioxidants, good for your skin. - Blueberries: Great for brain health, rich in fiber, and low in calories. - Mango: Full of vitamins A and C, supports eye health and boosts immunity. - Pineapple: Contains bromelain, which helps digestion and reduces inflammation. - Banana: A good source of potassium, great for heart health. Overall, this salad provides a mix of nutrients that can boost energy and support overall health. It’s a tasty way to enjoy fruits every day. For the full recipe, check out the details above. This blog post shared how to make a delicious Honey Lime Fruit Salad. I covered the best ingredients, including fresh fruits and a zesty dressing. You learned how to prepare everything step-by-step and found tips for picking juicy fruits. I also shared fun ways to adapt the salad to your taste. Finally, remember to store it properly to keep it fresh. Enjoy this vibrant mix and feel good about your healthy choice!](https://goldendishy.com/wp-content/uploads/2025/07/db0dca5e-aa0e-4365-a3c2-c9e5564148e0-768x768.webp)