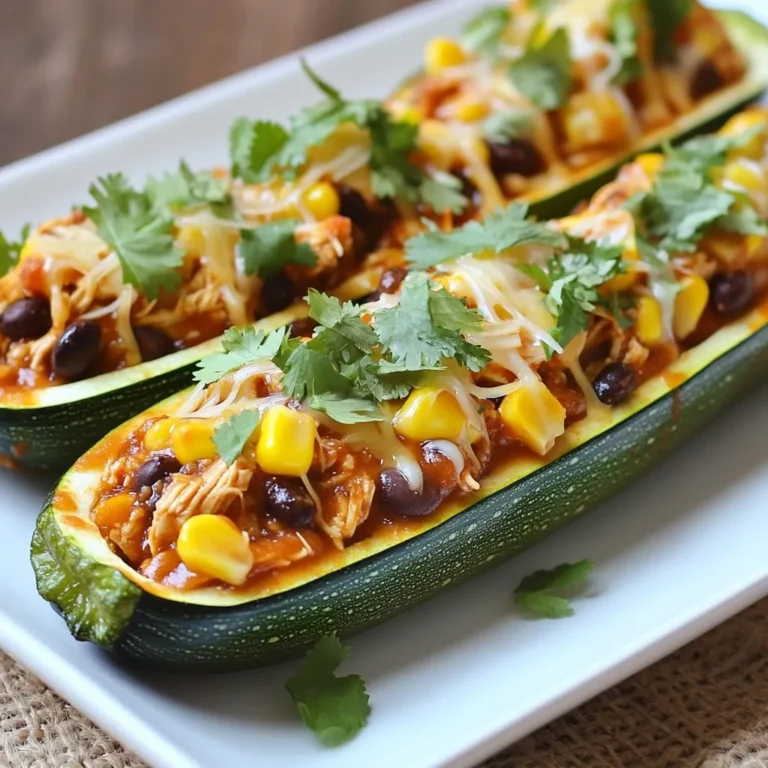
Loaded Breakfast Burritos Tasty and Filling Meal
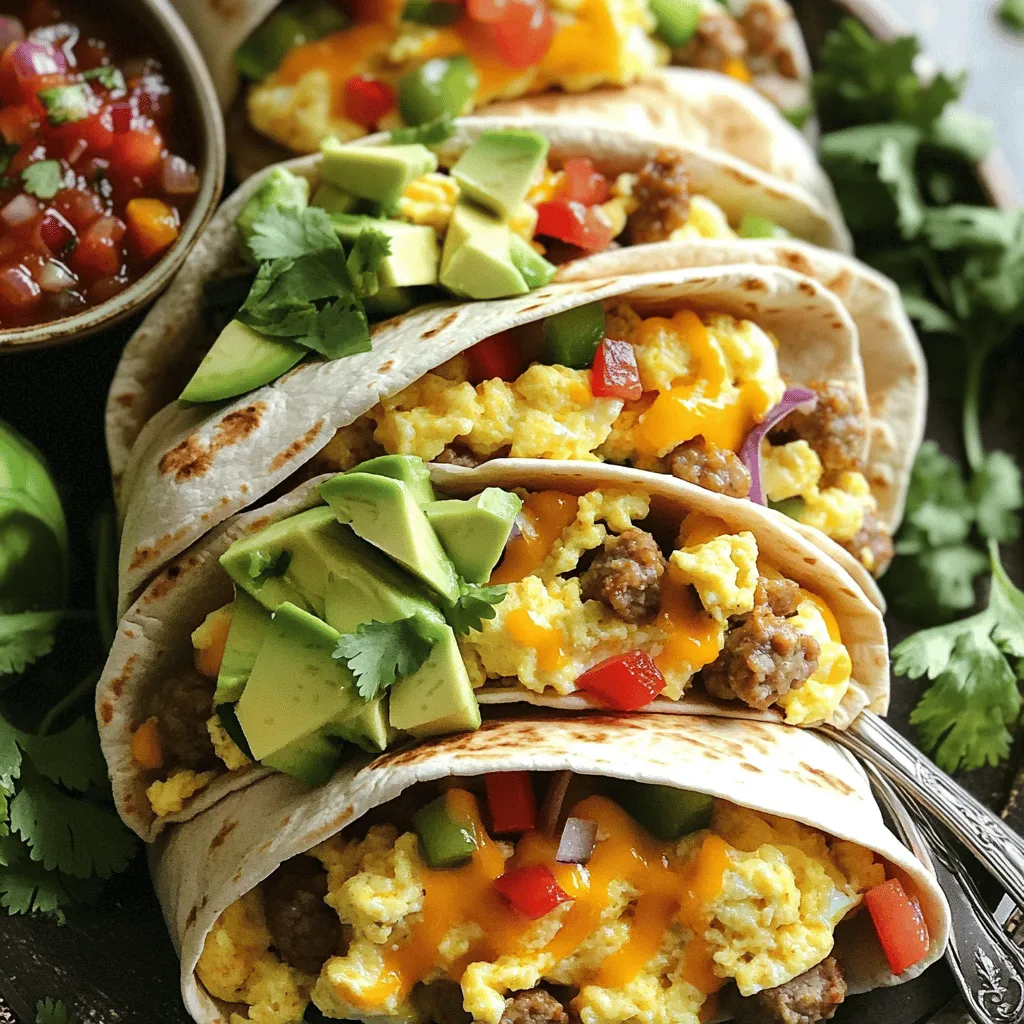
Start your day with energy and flavor by diving into loaded breakfast burritos. These tasty and filling meals pack protein, veggies, and spices into a warm tortilla. You can enjoy them for breakfast, brunch, or even lunch! In this guide, I’ll share ingredients, easy steps, and fun variations to help you create your perfect breakfast burrito. Let’s get cooking and make mornings a little brighter!
Ingredients
List of Ingredients for Loaded Breakfast Burritos
To make delicious loaded breakfast burritos, gather these simple ingredients:
– 4 large flour tortillas
– 6 large eggs
– 1 cup shredded sharp cheddar cheese
– 1 cup cooked breakfast sausage, crumbled
– 1 cup bell peppers, diced (a vibrant mix of both red and green)
– 1/2 cup red onion, finely diced
– 1 ripe avocado, sliced for creamy texture
– 1/2 cup salsa (your favorite kind will work)
– 1/4 cup fresh cilantro, chopped for a burst of flavor
– Salt and pepper to taste
– 2 tablespoons olive oil for sautéing
– Optional: hot sauce for an extra kick
Nutritional Information
Loaded breakfast burritos are not just tasty; they can also be nutritious. Each burrito offers a good balance of protein, carbs, and healthy fats. Here are some key facts:
– Calories: Approximately 500-600 per burrito (depending on fillings)
– Protein: About 25-30 grams per serving
– Fat: Roughly 30 grams, mostly from cheese and avocado
– Carbohydrates: Around 40 grams, mainly from tortillas
These values can vary based on your choices and portion sizes. Always adjust to your diet needs.
Common Substitutions for Ingredients
You can easily swap some ingredients to fit your taste or dietary needs. Here are some ideas:
– Tortillas: Try whole wheat or corn tortillas for a healthier option.
– Cheese: Use mozzarella or a dairy-free cheese for other options.
– Sausage: Replace with turkey sausage or black beans for vegetarian choices.
– Bell Peppers: Any color works; you can also use spinach or kale for greens.
– Avocado: Substitute with Greek yogurt for a creamy texture without the fat.
These substitutions keep your burritos tasty while fitting your style.
Step-by-Step Instructions
Preparation Steps Explained
First, gather all your ingredients for the loaded breakfast burritos. This makes cooking easier. You need flour tortillas, eggs, cheese, sausage, bell peppers, red onion, avocado, salsa, cilantro, and olive oil.
Start by heating the olive oil in a large skillet over medium heat. Add the diced bell peppers and red onion. Sauté them for about five minutes until they become soft. This step builds flavor and color.
Next, whisk the eggs in a mixing bowl. Use a pinch of salt and pepper to season them well. Pour the eggs into the skillet with the veggies. Stir gently until the eggs are fluffy and cooked to your liking. This keeps them light and airy.
Once the eggs are ready, remove the skillet from the heat. Mix in the crumbled sausage and half the cheese. Stir until everything is well combined. This adds protein and richness to your burrito filling.
Tips for Cooking Eggs to Perfection
To cook eggs perfectly, remember these tips:
– Use a non-stick skillet to prevent sticking.
– Stir slowly and gently to keep the eggs fluffy.
– Don’t overcook the eggs; they should be soft and slightly gooey.
– Season eggs at the start to let flavors deepen.
How to Assemble the Burritos
To assemble your burritos, lay a tortilla flat on a plate. Place a scoop of the egg mixture in the center. Top it with avocado slices, salsa, chopped cilantro, and the remaining cheese.
Next, fold the sides of the tortilla inwards. Then, roll it tightly from the bottom to the top. This keeps all the tasty fillings inside.
If you want a crispy texture, place the rolled burritos back in the skillet for one to two minutes on each side. This melts the cheese and adds a nice crunch.
Your loaded breakfast burritos are now ready! Serve them warm with extra salsa and hot sauce for those who enjoy a little heat. Enjoy the blend of flavors in every bite!
Tips & Tricks
Best Practices for Sautéing Vegetables
When sautéing vegetables, always choose a large skillet. This gives you space to stir. Heat your olive oil over medium heat. If it’s too hot, your veggies may burn. Add the diced bell peppers and red onion. Stir them often. Cook until they soften, which takes about five minutes. This step builds great flavor. You can also add a pinch of salt to help them sweat. Fresh herbs can be added for extra taste.
How to Prevent Burrito Filling from Falling Out
To keep your burrito filling safe, use the right amount of filling. Don’t overstuff your tortilla. Place a generous scoop in the center but not too much. Fold the sides in before rolling up the bottom. This helps to keep everything snug. You can also warm the tortillas slightly before filling. Warm tortillas are more flexible and less likely to tear.
Suggested Tools and Equipment for Efficiency
Using the right tools makes cooking easier and faster. Here are some must-haves:
– A large skillet for sautéing.
– A mixing bowl for whisking eggs.
– A sharp knife for chopping veggies.
– A cutting board for safe prep.
– A spatula for easy stirring and serving.
With these tools, you’ll move smoothly through the cooking process.
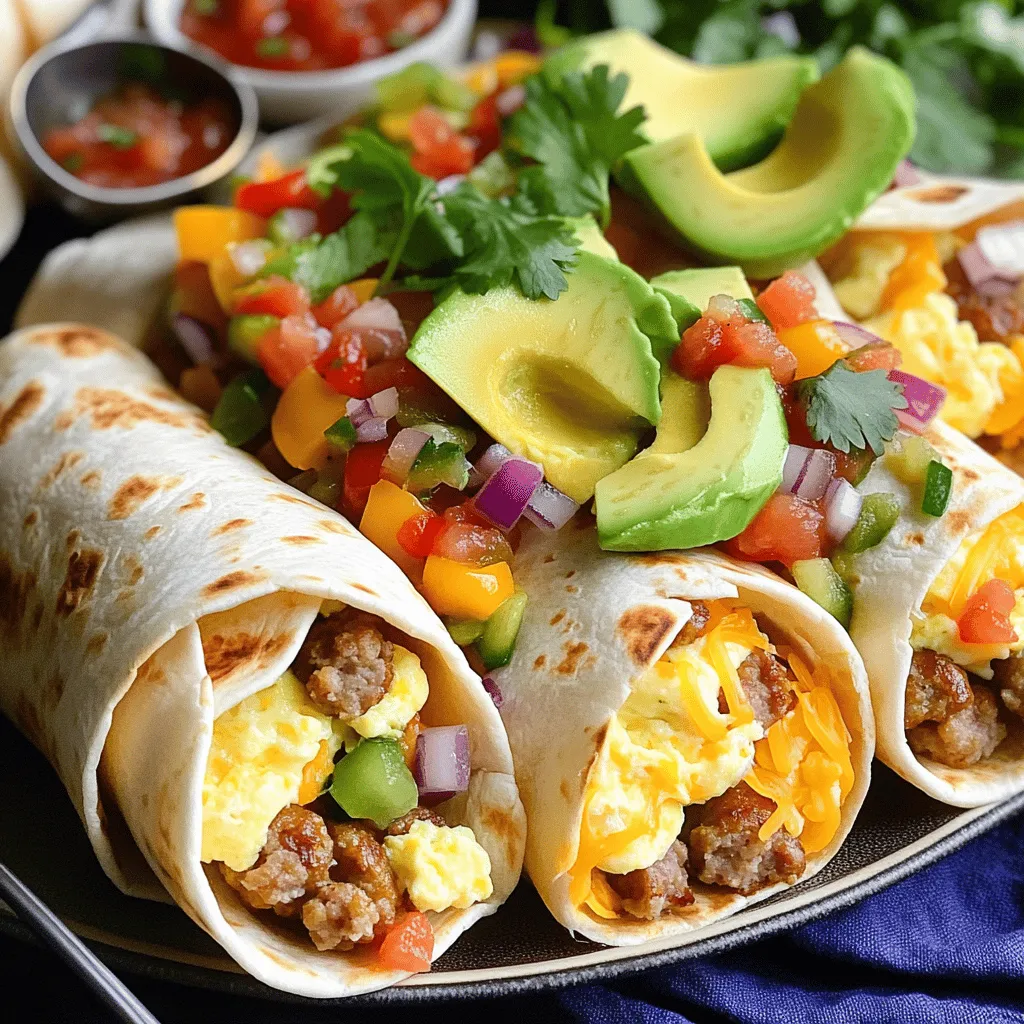
Variations
Vegetarian Loaded Breakfast Burritos
You can easily make vegetarian loaded breakfast burritos. Swap out the sausage for black beans or sautéed mushrooms. Add spinach, kale, or zucchini for extra nutrients. Use the same recipe, but focus on fresh veggies. You will get a tasty and filling burrito without meat.
Spicy Loaded Breakfast Burritos
If you love heat, try spicy loaded breakfast burritos. Add diced jalapeños or your favorite hot sauce to the egg mix. You can also use pepper jack cheese instead of cheddar. This will give your burrito a nice kick. Just make sure to balance the spice with creamy avocado.
Gluten-Free Options for Tortillas
For gluten-free options, use corn tortillas instead of flour. They work well and add a nice flavor. You can also find gluten-free flour tortillas in most stores. Just check the labels to ensure they meet your needs. Enjoy your loaded breakfast burritos without worry!Enjoy making these delicious variations!
Storage Info
How to Store Leftover Burritos
To keep your leftover burritos fresh, wrap them tightly in foil or plastic wrap. You can also place them in an airtight container. This way, they will stay moist and tasty. Store them in the fridge for up to three days. If you plan to eat them later, it’s best to freeze them.
Reheating Tips for Best Results
When you are ready to eat your burritos, the best way to reheat them is in the oven. Preheat the oven to 350°F (175°C). Place the burritos on a baking sheet and cover them with foil. Heat for about 15-20 minutes. This keeps the outside crisp while warming the inside. If you are in a hurry, you can use the microwave. Just heat them for 1-2 minutes, but this may make the tortillas a bit soft.
Freezing Loaded Breakfast Burritos
Freezing is a great option if you want to save some burritos for later. Wrap each burrito in foil or plastic wrap, then place them in a freezer-safe bag. Label the bag with the date, and they will last for up to three months. To reheat, let them thaw in the fridge overnight before using the oven or microwave. This keeps them delicious and ready to enjoy!
FAQs
What can I add to my loaded breakfast burritos?
You can add many tasty things! Try black beans for extra fiber. Spinach or kale can boost nutrients. You might like adding diced tomatoes for freshness. For a kick, jalapeños are great. Consider using different cheeses too. Feta or pepper jack can change the flavor. Fresh herbs like parsley or basil can also enhance taste.
Can I make loaded breakfast burritos ahead of time?
Yes, you can! Prepare the filling and store it in the fridge. Wrap the burritos tightly in foil or plastic wrap. They will stay fresh for two to three days. In the morning, you can easily reheat them. Just pop them in the microwave or skillet. This way, you save time and enjoy a quick meal.
What is the best way to serve loaded breakfast burritos?
Serve them warm on a large platter. Cut each burrito in half for easy eating. Add some extra salsa on the side. This lets everyone customize their taste. You can also offer toppings like sour cream or guacamole. Fresh cilantro or green onions can add a nice touch too. For a fun twist, serve them with a side of crispy hash browns. Enjoy your meal!
Loaded breakfast burritos are a tasty and fun dish to make. We’ve covered the ingredients, cooking tips, and ways to customize your burritos. Remember to store and reheat them properly for the best taste. You can add veggies, spices, or go gluten-free to suit your taste. These burritos are not only filling but also great for busy mornings. Now, get cooking and enjoy your delicious creations!


![- 2 cups cooked jasmine rice - 1 cup cooked chicken breast, diced - 1 cup mixed vegetables - 3 tablespoons soy sauce - 2 tablespoons sesame oil - Salt and freshly ground black pepper - 2 large beaten eggs - 3 green onions, finely chopped - Garlic Gathering the right ingredients is key to making easy chicken fried rice. Start with 2 cups of cooked jasmine rice; leftover rice works best. It helps keep the grains from sticking together. Next, you need 1 cup of cooked chicken breast, diced into small pieces. You can use rotisserie chicken for speed. Add 1 cup of mixed vegetables. Frozen peas and carrots work great. They heat up quickly and add color. For flavor, use 3 tablespoons of soy sauce. This gives the rice a savory kick. 2 tablespoons of sesame oil will add a nutty taste. Don't forget to season with salt and freshly ground black pepper to your liking. If you want to enhance the dish, consider adding 2 large beaten eggs. They add richness and protein. 3 green onions, finely chopped, add a fresh taste. Lastly, garlic can bring an aromatic depth to your fried rice. These ingredients create a simple yet tasty meal. For the full recipe, check out the link above. How to pre-cook jasmine rice To cook jasmine rice, use a 1:1.5 rice-to-water ratio. Rinse the rice first. Then, add it to boiling water. Cover and simmer for 15 minutes. Let it cool afterward. Using day-old rice gives the best texture in fried rice. How to dice chicken breast Start with a cooked chicken breast. Place it on a cutting board. Cut it in half lengthwise, then slice it into small, bite-sized pieces. Aim for even sizes to ensure even cooking. Tips for measuring vegetables When measuring mixed vegetables, use a cup. Fill it with your choice of peas, carrots, and corn. Make sure to level it off with a knife for accuracy. Fresh or frozen veggies work well, but thaw frozen ones first. Heating the skillet and oils Grab a large skillet or wok. Heat it on medium-high. Add vegetable oil until it shimmers but does not smoke. This oil helps fry the ingredients evenly. Sautéing garlic and eggs Add minced garlic to the hot oil. Stir for about 30 seconds until fragrant. Push the garlic aside. Pour in beaten eggs next. Scramble the eggs gently until fully cooked. Then, mix them with the garlic. Combining ingredients systematically Next, add the diced chicken to the skillet. Stir for about 2 minutes until heated through. Now, toss in the mixed vegetables. Stir-fry for another 2-3 minutes until tender yet crisp. Add the jasmine rice next. Break apart any clumps gently as you stir. Incorporating soy sauce and sesame oil Drizzle soy sauce and sesame oil over the rice mix. Stir well to evenly coat all ingredients. This step adds flavor and richness to the dish. Garnishing and presentation tips Add chopped green onions last. Season with salt and black pepper to taste. For a nice touch, serve in a large bowl or on plates. Garnish with more green onions and sesame seeds. Serving size and suggestions This recipe serves about four people. Pair it with lime wedges for a zesty kick. Enjoy your savory chicken fried rice! For the complete recipe, check out the [Full Recipe]. - Importance of using day-old rice: Day-old rice is drier and firmer. This helps prevent clumping when cooking. Fresh rice can be too sticky and mushy. It’s best to cook the rice a day before and store it in the fridge. - Tips for achieving perfect egg texture: Beat the eggs well before cooking. Pour them into the pan and let them sit for a second. Stir gently to form soft curds. Don’t overcook the eggs; they should be fluffy and tender. - Stir-fry techniques for even cooking: Keep the heat high and work quickly. Use a large skillet or wok to ensure space for all ingredients. Stir constantly to avoid burning. This helps everything cook evenly and stay crisp. - Adding spice: How to adjust heat levels: Start with a small amount of red pepper flakes or chili sauce. You can always add more, but you can’t take it away. Taste as you go to find your perfect heat level. - Incorporating fresh herbs: Fresh herbs like cilantro or basil can brighten the dish. Add them at the end for the best flavor. Chopped green onions also add a fresh taste and a nice crunch. - Using alternative sauces or marinades: Try adding oyster sauce or hoisin sauce for a twist. These can add a deeper flavor to your fried rice. Experiment to find what you enjoy most. - Best frying pan or wok for this recipe: A non-stick skillet or a wok works best. This helps prevent sticking and makes stirring easier. Look for one that is large enough to hold all your ingredients. - Recommended utensils for mixing: Use a sturdy spatula or wooden spoon. This will help you mix everything without damaging your pan. A thin spatula is great for scraping the sides. - Importance of a good spatula: A good spatula helps in flipping and mixing your ingredients. It should have a flat edge for easy scooping and stirring. This simple tool can make a big difference in your cooking process. Enjoy crafting your Easy Chicken Fried Rice with these tips and tricks! For the complete recipe, check out the Full Recipe section above. {{image_4}} You can easily adapt this chicken fried rice recipe to fit different diets. For a gluten-free option, replace soy sauce with tamari. This keeps the flavor but removes gluten. If you want a vegetarian version, swap chicken for tofu. Tofu absorbs flavors well, making it tasty and filling. For a low-carb choice, use cauliflower rice instead of jasmine rice. It offers a light texture while still giving you that satisfying fried rice feel. You can also change the flavor of your fried rice with simple tweaks. For an Asian twist, add hoisin sauce. This adds a sweet and savory taste that will excite your palate. If you want a Mexican flair, sprinkle in some taco seasonings. This gives the rice a spicy kick that is fun to try. For a Mediterranean touch, toss in olives and feta cheese. These ingredients bring a whole new level of taste to your dish. There are many ways to boost your chicken fried rice. You can add extra protein, like shrimp, pork, or beef. This makes the meal heartier and more satisfying. Another option is to enhance nutrition by adding more vegetables. You can include bell peppers, broccoli, or snap peas for extra crunch and color. Lastly, think about creative add-ins. Nuts, spices, or a splash of dressing can elevate the dish and make it your own. For the full recipe, check out the earlier section. To keep your chicken fried rice fresh, place it in a container with a tight lid. This helps prevent moisture loss and keeps flavors intact. Make sure the rice cools down to room temperature before sealing the container. Store it in the fridge for up to four days. Use glass or plastic containers that are microwave safe. These options make reheating easy. Avoid using metal containers as they can get too hot in the microwave. You can reheat chicken fried rice on the stovetop or in the microwave. For stovetop reheating, add a splash of water or oil in a skillet. Heat it over medium heat while stirring. This method keeps the rice from drying out. If using the microwave, place the rice in a bowl and cover it with a damp paper towel. This helps steam the rice and keeps it moist. Heat in short bursts, stirring in between, until warmed through. To freeze chicken fried rice, allow it to cool completely. Then, divide it into portions and place each in a freezer-safe bag. Remove as much air as possible before sealing. Label the bags with the date and use them within three months for best taste. For thawing, you can leave the rice in the fridge overnight. If you’re in a hurry, you can use the microwave. Just set it to defrost mode and stir frequently until thawed. How long can I store leftover fried rice? You can store fried rice in an airtight container for up to four days in the fridge. Make sure it cools down before sealing. Reheat over medium heat for best results. Can I use uncooked rice for this recipe? No, you should not use uncooked rice. Cooked rice absorbs flavors and keeps the dish from being too hard. Use day-old rice for the best texture. What if I don’t have sesame oil? If you lack sesame oil, you can use olive oil or any neutral oil instead. It won't have the same nutty taste, but it will still be good. How to make this dish vegan? To make vegan fried rice, replace chicken with tofu and skip the eggs. Use extra veggies for texture and flavor. Adjust soy sauce to taste. What vegetables work best in fried rice? Mixed vegetables like peas, carrots, and corn are great. You can also add bell peppers, broccoli, or snap peas for variety. Choose what you like best! Can I make this recipe ahead of time? Yes, you can prep the veggies and chicken ahead of time. Just store them separately in the fridge. Cook the rice fresh for the best taste. What is the best way to cook chicken for fried rice? Cook chicken breast in a skillet until golden brown. Dice it into small pieces for even cooking. Use cooked chicken for easier preparation. How do I prevent the rice from becoming mushy? To avoid mushy rice, make sure to use day-old rice. Fresh rice holds too much water. If using fresh, spread it out to cool. Why use day-old rice? Day-old rice dries out slightly, making it perfect for frying. It also helps to keep the grains separate. This ensures a better texture for your fried rice. This blog post covered how to make chicken fried rice. We looked at key ingredients, cooking steps, and helpful tips. You learned about variations to suit different diets and flavor profiles. Storing and reheating options were also explained for your convenience. In closing, chicken fried rice is simple and customizable. You can create a dish that fits your taste and needs. Enjoy making this tasty meal!](https://goldendishy.com/wp-content/uploads/2025/06/daf8b8b3-55d6-4d68-b799-ba1a17e73868-768x768.webp)
![- 4 salmon fillets (approximately 6 oz each) - 3 tablespoons miso paste (white or yellow) - 2 tablespoons honey - 1 tablespoon soy sauce (or tamari for gluten-free) - 1 tablespoon rice vinegar - 1 tablespoon sesame oil - 2 cloves garlic, minced - 1 teaspoon freshly grated ginger - Green onions, thinly sliced (for garnish) - Sesame seeds (for garnish) This list has everything you need for a tasty miso glazed salmon. The salmon fillets are the star of the show. Miso paste adds a rich flavor. Honey gives it a touch of sweetness. Soy sauce or tamari brings in saltiness. Rice vinegar adds a bit of tang. Sesame oil gives a nice nutty taste. Garlic and ginger add warmth and depth. Don't forget the green onions and sesame seeds! They make the dish look great and add a bit of crunch. You can find the full recipe to see how to combine these ingredients into a delicious meal. To start, gather your ingredients. In a mixing bowl, combine the miso paste, honey, soy sauce, rice vinegar, sesame oil, minced garlic, and grated ginger. Use a whisk to blend the ingredients. Mix until smooth and creamy. This glaze adds a sweet and savory flavor to the salmon. Next, place the salmon fillets in a shallow dish or a sealable bag. Pour the miso glaze over the salmon. Make sure each piece is well-coated. Cover the dish or seal the bag and marinate the salmon in the fridge. For best results, allow it to marinate for at least 30 minutes. If you have time, two hours gives a richer flavor. Now, preheat your oven to 400°F (200°C). Line a baking sheet with parchment paper to prevent sticking. After marinating, take the salmon out of the glaze. Let any excess glaze drip off, then place the fillets skin-side down on the sheet. Bake the salmon for 12 to 15 minutes. The fish is done when it turns opaque and flakes easily with a fork. You can find the complete instructions in the [Full Recipe]. You can boost the taste of miso glazed salmon by adding fresh herbs. Try using cilantro or basil for a fresh kick. You can also add spices like chili flakes for heat or black sesame seeds for extra crunch. These small tweaks can take your dish to a whole new level. For the best flavor, I suggest marinating the salmon for at least 30 minutes. If you have time, let it sit for up to 2 hours. This longer marinating lets the flavors soak in deeply. Just remember not to marinate too long, as the acid in the marinade can make the fish mushy. While baking the salmon is great, you can also broil or grill it. Broiling gives a nice char and caramelization, making it even tastier. If you grill, keep the heat medium to avoid burning the glaze. Whichever method you choose, keep an eye on the salmon. It cooks fast! {{image_4}} You can switch the salmon for other fish, like cod or trout. Both work well with miso glaze. Chicken is another great option. You can use chicken breasts or thighs. The cooking time will change, so check for doneness. For plant-based choices, try tofu or tempeh. Both absorb flavors well. Marinate them just like you do with salmon. Bake them until golden brown and firm. You can adjust the taste of the miso glaze. If you like it sweeter, add more honey. For a saltier flavor, increase the soy sauce. You can also try adding a splash of citrus juice. Lime or lemon will brighten the dish. Feel free to add other ingredients too. A spoonful of sriracha gives a spicy kick. You can also mix in chopped herbs like cilantro or basil for freshness. To make a full meal, serve the salmon with sides. Steamed vegetables like broccoli or green beans add color and nutrition. Jasmine rice or quinoa pairs well too. You can also add a simple salad for crunch. For a fun twist, serve the salmon on a bed of noodles. Drizzle some leftover glaze for extra flavor. Check out the Full Recipe for more tips on creating a balanced plate. To store leftover miso glazed salmon, let it cool first. Place it in an airtight container. Make sure to cover it well so it stays fresh. It can last in the fridge for up to three days. If your salmon has a strong smell, it’s best to throw it away. To freeze the salmon, wrap each piece tightly in plastic wrap. Then, place them in a freezer-safe bag. This method helps prevent freezer burn. Miso glazed salmon can be frozen for up to three months. When you’re ready to eat it, move it to the fridge for a night to thaw. For reheating, use an oven or a stovetop. If using the oven, preheat it to 350°F (175°C). Place the salmon on a baking sheet. Heat it for about 10 minutes. This method keeps it moist. If you prefer the stovetop, heat a pan over low heat. Add a splash of water to keep the fish from drying out. Cook for a few minutes until warmed through. You should marinate the salmon for at least 30 minutes. This gives the flavors time to soak in. For a richer taste, I recommend marinating for up to 2 hours. The longer the fish sits in the marinade, the better the flavor will be. Yes, you can use different types of miso. White miso is sweeter and milder. Yellow miso is a bit stronger but still smooth. Red miso is more intense and salty. Each type brings a unique flavor to the salmon. Experiment with what you like best! I love serving Miso Glazed Salmon with steamed rice. Jasmine or brown rice works great. You can also add some roasted veggies or a fresh salad. These sides balance the rich glaze. They make your plate colorful and fun! Check out the Full Recipe for more ideas. This blog post showed how to make miso-glazed salmon. You learned about the key ingredients, preparation, and cooking steps. I shared tips to enhance flavor and offered variations if you want to try something new. Proper storage can keep leftovers tasty for later. Remember, cooking should be fun! Experiment with flavors and enjoy your meal. With these insights and tips, you will create a dish that’s both delicious and satisfying. Happy cooking!](https://goldendishy.com/wp-content/uploads/2025/07/7f43d765-f0ef-46f9-86e2-eabd5628ba72-768x768.webp)
