Zucchini Spinach Quiche Flavorful and Nutritious Meal
![- 1 pre-made pie crust - 2 medium zucchinis, grated - 2 cups fresh spinach, chopped - 1 small onion, finely chopped - 3 large eggs - 1 cup milk I love using a pre-made pie crust for this quiche. It saves time and effort. The zucchinis bring a fresh taste, while the spinach adds color and nutrients. Eggs and milk create a rich, creamy texture that binds everything together. - 1 teaspoon garlic powder - Salt and pepper to taste - 1 tablespoon olive oil Garlic powder gives this dish a warm flavor. I always add salt and pepper to enhance the taste. Olive oil is perfect for cooking the veggies and adds a nice depth of flavor. - 1 cup shredded mozzarella cheese - 1/2 cup grated Parmesan cheese Cheese is key for a tasty quiche. Mozzarella melts beautifully, while Parmesan adds a sharp, salty kick. Together, they create a delightful flavor mix that elevates your dish. Don't forget to check the full recipe for complete details! First, heat olive oil in a skillet over medium heat. Add the finely chopped onion. Sauté it for about 3-4 minutes until it turns soft and clear. Next, add the grated zucchini and chopped spinach. Stir often and cook for about 5 minutes. The veggies should become tender, and any extra water will cook off. I love adding garlic powder, salt, and pepper to boost the flavor. After cooking, take it off the heat and let it cool for a moment. In a large bowl, whisk together the eggs and milk until they blend smoothly. This is where the magic begins! Next, add in the shredded mozzarella and grated Parmesan cheese. Fold them in gently. This mixture will bring richness to your quiche. It’s important that the cheese mixes well but still keeps some texture. Now, pour the vegetable and egg mixture into the prepared pie crust. Spread it out evenly to help it cook well. Place the quiche in your preheated oven. Bake for 30-35 minutes. You’ll know it’s ready when the edges turn golden brown and a toothpick inserted in the center comes out clean. Let it cool for about 10 minutes before slicing. This resting time helps enhance the flavors. You can find the full recipe in the previous section for all these steps! To get the best texture for your quiche, you must control moisture. Zucchini has a lot of water, which can make your quiche soggy. To fix this, grate the zucchini and lightly salt it. Let it sit for 10 minutes, then squeeze out the excess liquid. This step is key to a firm quiche. The cooking time can vary based on your oven. I find that checking it a few minutes early helps. If the edges look golden and a toothpick comes out clean, it's ready! For more flavor, consider adding fresh herbs like thyme or basil. A pinch of red pepper flakes can add a nice kick. You can also play with spices, like paprika or onion powder. Each of these can change the taste in a fun way. Cheese is another way to boost flavor. While mozzarella and Parmesan are great, try using feta or goat cheese for a tangy twist. These types add both creaminess and a bit of zest to the dish. When serving your zucchini spinach quiche, aim for a bright plate. A colorful plate makes a dish look more appealing. Add fresh basil or parsley on top for an eye-catching touch. You can also serve it with a light salad drizzled with citrus vinaigrette. This adds freshness and balance. For a photo-worthy presentation, slice the quiche into neat pieces. Arrange them in a circle on the plate. This simple trick makes your dish look polished and ready for sharing. Don't forget to snap a picture before you dig in! For the complete recipe, check out the [Full Recipe]. {{image_4}} You can switch up the veggies in your quiche. Broccoli, bell peppers, or mushrooms work great. Each veggie brings its own taste and texture. You can also try seasonal additions. In spring, add asparagus, and in fall, use roasted squash. This keeps your quiche fresh and exciting. If you need a gluten-free quiche, use a gluten-free crust. Many stores sell these now, or you can make your own. If you make your crust, use almond flour or coconut flour for a nice texture. You may need to adjust the liquid in the filling. This helps keep the quiche moist and tasty. Making mini quiches is fun and easy. You can use a muffin tin for individual servings. Just pour the mixture into each cup and fill them about three-quarters full. Bake for about 20-25 minutes. Keep an eye on them to avoid burning. These mini quiches are perfect for snacks or brunch. You can even freeze them for later! Check out the Full Recipe for more details. To keep your quiche fresh, store it in an airtight container. This helps keep moisture out. It stays fresh in the fridge for up to three days. If you plan to eat it later, cover it tightly with plastic wrap or foil. You can freeze your quiche before or after baking. If freezing before baking, wrap it well. This way, you can bake it fresh later. For freezing after baking, let it cool completely first. Store it in an airtight container. It can last up to three months in the freezer. When ready to eat, thaw it in the fridge overnight. For the best taste, reheat your quiche in the oven. Set it to 350°F (175°C) and heat for about 15-20 minutes. This keeps the crust crispy. You can also use a microwave for quick heating. However, the crust may not stay as crunchy. Heat slices for about 1-2 minutes. Always check that it's hot in the middle before serving. You can tell the quiche is done by looking for a few key signs. The edges should be golden brown, and the center should be firm. If you gently shake the quiche, it should not jiggle. Another great way to check is with a toothpick. Insert it into the center of the quiche. If it comes out clean, your quiche is ready to enjoy. Yes, you can use frozen spinach in this recipe. However, it’s important to make a few adjustments. First, thaw the spinach completely and drain any excess water. This helps prevent the quiche from becoming too watery. You may also want to chop the spinach further after thawing. This ensures even distribution in your quiche. Zucchini spinach quiche pairs well with many side dishes. A simple green salad with a light vinaigrette works great. You can also serve it with roasted vegetables for added flavor. If you want something heartier, serve it alongside a bowl of creamy tomato soup. This combination makes for a balanced and tasty meal. This blog post covers how to make a tasty zucchini and spinach quiche. You learned about the main ingredients, like pre-made crust and eggs, plus the best seasonings. I shared step-by-step instructions for preparing and baking. You also got tips for perfecting texture and ideas for variations. Making this dish can be easy and fun. Enjoy experimenting with flavors and ingredients. Whether you serve it for breakfast or dinner, this quiche will impress. Get cooking and enjoy your delicious creation!](https://goldendishy.com/wp-content/uploads/2025/06/2284a9f2-dfec-450d-ba9a-23981f99d5f6.webp)
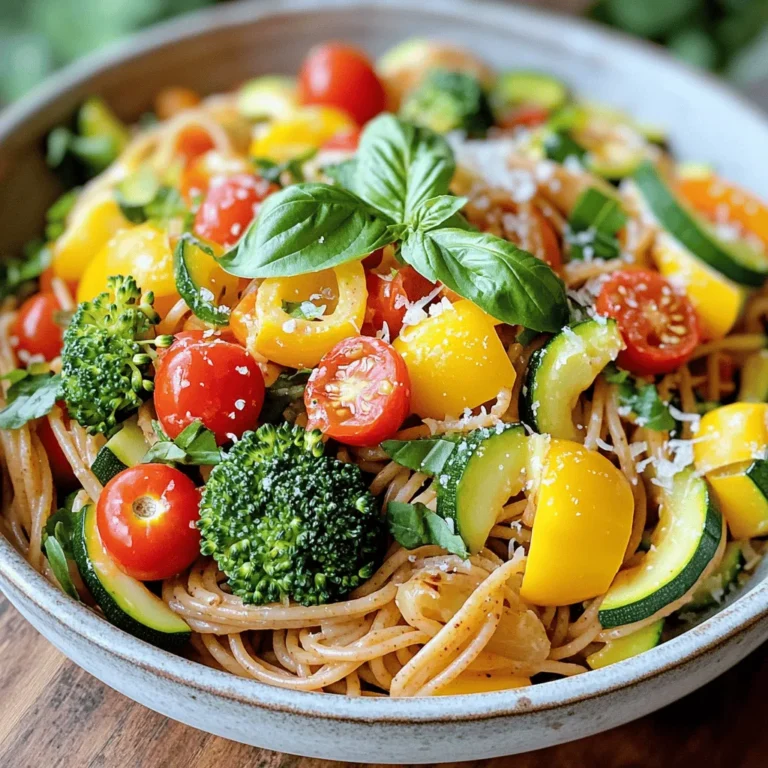
Are you ready to whip up a dish that’s both tasty and full of good stuff? This Zucchini Spinach Quiche packs a punch with fresh veggies and cheesy goodness. It’s perfect for breakfast, brunch, or a quick dinner. You’ll love how easy it is to make, and the taste will impress your family and friends. Let’s dive into this delightful recipe that’s sure to become a favorite!
Ingredients
Main Ingredients
– 1 pre-made pie crust
– 2 medium zucchinis, grated
– 2 cups fresh spinach, chopped
– 1 small onion, finely chopped
– 3 large eggs
– 1 cup milk
I love using a pre-made pie crust for this quiche. It saves time and effort. The zucchinis bring a fresh taste, while the spinach adds color and nutrients. Eggs and milk create a rich, creamy texture that binds everything together.
Seasonings and Oils
– 1 teaspoon garlic powder
– Salt and pepper to taste
– 1 tablespoon olive oil
Garlic powder gives this dish a warm flavor. I always add salt and pepper to enhance the taste. Olive oil is perfect for cooking the veggies and adds a nice depth of flavor.
Cheese Varieties
– 1 cup shredded mozzarella cheese
– 1/2 cup grated Parmesan cheese
Cheese is key for a tasty quiche. Mozzarella melts beautifully, while Parmesan adds a sharp, salty kick. Together, they create a delightful flavor mix that elevates your dish.
Step-by-Step Instructions
Preparing the Vegetables
First, heat olive oil in a skillet over medium heat. Add the finely chopped onion. Sauté it for about 3-4 minutes until it turns soft and clear. Next, add the grated zucchini and chopped spinach. Stir often and cook for about 5 minutes. The veggies should become tender, and any extra water will cook off. I love adding garlic powder, salt, and pepper to boost the flavor. After cooking, take it off the heat and let it cool for a moment.
Mixing the Egg Base
In a large bowl, whisk together the eggs and milk until they blend smoothly. This is where the magic begins! Next, add in the shredded mozzarella and grated Parmesan cheese. Fold them in gently. This mixture will bring richness to your quiche. It’s important that the cheese mixes well but still keeps some texture.
Assembling and Baking
Now, pour the vegetable and egg mixture into the prepared pie crust. Spread it out evenly to help it cook well. Place the quiche in your preheated oven. Bake for 30-35 minutes. You’ll know it’s ready when the edges turn golden brown and a toothpick inserted in the center comes out clean. Let it cool for about 10 minutes before slicing. This resting time helps enhance the flavors.
Tips & Tricks
Perfecting the Texture
To get the best texture for your quiche, you must control moisture. Zucchini has a lot of water, which can make your quiche soggy. To fix this, grate the zucchini and lightly salt it. Let it sit for 10 minutes, then squeeze out the excess liquid. This step is key to a firm quiche.
The cooking time can vary based on your oven. I find that checking it a few minutes early helps. If the edges look golden and a toothpick comes out clean, it’s ready!
Flavor Enhancements
For more flavor, consider adding fresh herbs like thyme or basil. A pinch of red pepper flakes can add a nice kick. You can also play with spices, like paprika or onion powder. Each of these can change the taste in a fun way.
Cheese is another way to boost flavor. While mozzarella and Parmesan are great, try using feta or goat cheese for a tangy twist. These types add both creaminess and a bit of zest to the dish.
Presentation Ideas
When serving your zucchini spinach quiche, aim for a bright plate. A colorful plate makes a dish look more appealing. Add fresh basil or parsley on top for an eye-catching touch. You can also serve it with a light salad drizzled with citrus vinaigrette. This adds freshness and balance.
For a photo-worthy presentation, slice the quiche into neat pieces. Arrange them in a circle on the plate. This simple trick makes your dish look polished and ready for sharing. Don’t forget to snap a picture before you dig in!

Variations
Different Vegetable Combinations
You can switch up the veggies in your quiche. Broccoli, bell peppers, or mushrooms work great. Each veggie brings its own taste and texture. You can also try seasonal additions. In spring, add asparagus, and in fall, use roasted squash. This keeps your quiche fresh and exciting.
Gluten-Free Options
If you need a gluten-free quiche, use a gluten-free crust. Many stores sell these now, or you can make your own. If you make your crust, use almond flour or coconut flour for a nice texture. You may need to adjust the liquid in the filling. This helps keep the quiche moist and tasty.
Mini Quiches
Making mini quiches is fun and easy. You can use a muffin tin for individual servings. Just pour the mixture into each cup and fill them about three-quarters full. Bake for about 20-25 minutes. Keep an eye on them to avoid burning. These mini quiches are perfect for snacks or brunch. You can even freeze them for later!
Storage Info
Refrigeration Tips
To keep your quiche fresh, store it in an airtight container. This helps keep moisture out. It stays fresh in the fridge for up to three days. If you plan to eat it later, cover it tightly with plastic wrap or foil.
Freezing Guidance
You can freeze your quiche before or after baking. If freezing before baking, wrap it well. This way, you can bake it fresh later. For freezing after baking, let it cool completely first. Store it in an airtight container. It can last up to three months in the freezer. When ready to eat, thaw it in the fridge overnight.
Reheating Methods
For the best taste, reheat your quiche in the oven. Set it to 350°F (175°C) and heat for about 15-20 minutes. This keeps the crust crispy. You can also use a microwave for quick heating. However, the crust may not stay as crunchy. Heat slices for about 1-2 minutes. Always check that it’s hot in the middle before serving.
FAQs
How do I know when the quiche is done?
You can tell the quiche is done by looking for a few key signs. The edges should be golden brown, and the center should be firm. If you gently shake the quiche, it should not jiggle. Another great way to check is with a toothpick. Insert it into the center of the quiche. If it comes out clean, your quiche is ready to enjoy.
Can I use frozen spinach instead of fresh?
Yes, you can use frozen spinach in this recipe. However, it’s important to make a few adjustments. First, thaw the spinach completely and drain any excess water. This helps prevent the quiche from becoming too watery. You may also want to chop the spinach further after thawing. This ensures even distribution in your quiche.
What can I serve with zucchini spinach quiche?
Zucchini spinach quiche pairs well with many side dishes. A simple green salad with a light vinaigrette works great. You can also serve it with roasted vegetables for added flavor. If you want something heartier, serve it alongside a bowl of creamy tomato soup. This combination makes for a balanced and tasty meal.
This blog post covers how to make a tasty zucchini and spinach quiche. You learned about the main ingredients, like pre-made crust and eggs, plus the best seasonings. I shared step-by-step instructions for preparing and baking. You also got tips for perfecting texture and ideas for variations.
Making this dish can be easy and fun. Enjoy experimenting with flavors and ingredients. Whether you serve it for breakfast or dinner, this quiche will impress. Get cooking and enjoy your delicious creation!
![- 1 pre-made pie crust - 2 medium zucchinis, grated - 2 cups fresh spinach, chopped - 1 small onion, finely chopped - 3 large eggs - 1 cup milk I love using a pre-made pie crust for this quiche. It saves time and effort. The zucchinis bring a fresh taste, while the spinach adds color and nutrients. Eggs and milk create a rich, creamy texture that binds everything together. - 1 teaspoon garlic powder - Salt and pepper to taste - 1 tablespoon olive oil Garlic powder gives this dish a warm flavor. I always add salt and pepper to enhance the taste. Olive oil is perfect for cooking the veggies and adds a nice depth of flavor. - 1 cup shredded mozzarella cheese - 1/2 cup grated Parmesan cheese Cheese is key for a tasty quiche. Mozzarella melts beautifully, while Parmesan adds a sharp, salty kick. Together, they create a delightful flavor mix that elevates your dish. Don't forget to check the full recipe for complete details! First, heat olive oil in a skillet over medium heat. Add the finely chopped onion. Sauté it for about 3-4 minutes until it turns soft and clear. Next, add the grated zucchini and chopped spinach. Stir often and cook for about 5 minutes. The veggies should become tender, and any extra water will cook off. I love adding garlic powder, salt, and pepper to boost the flavor. After cooking, take it off the heat and let it cool for a moment. In a large bowl, whisk together the eggs and milk until they blend smoothly. This is where the magic begins! Next, add in the shredded mozzarella and grated Parmesan cheese. Fold them in gently. This mixture will bring richness to your quiche. It’s important that the cheese mixes well but still keeps some texture. Now, pour the vegetable and egg mixture into the prepared pie crust. Spread it out evenly to help it cook well. Place the quiche in your preheated oven. Bake for 30-35 minutes. You’ll know it’s ready when the edges turn golden brown and a toothpick inserted in the center comes out clean. Let it cool for about 10 minutes before slicing. This resting time helps enhance the flavors. You can find the full recipe in the previous section for all these steps! To get the best texture for your quiche, you must control moisture. Zucchini has a lot of water, which can make your quiche soggy. To fix this, grate the zucchini and lightly salt it. Let it sit for 10 minutes, then squeeze out the excess liquid. This step is key to a firm quiche. The cooking time can vary based on your oven. I find that checking it a few minutes early helps. If the edges look golden and a toothpick comes out clean, it's ready! For more flavor, consider adding fresh herbs like thyme or basil. A pinch of red pepper flakes can add a nice kick. You can also play with spices, like paprika or onion powder. Each of these can change the taste in a fun way. Cheese is another way to boost flavor. While mozzarella and Parmesan are great, try using feta or goat cheese for a tangy twist. These types add both creaminess and a bit of zest to the dish. When serving your zucchini spinach quiche, aim for a bright plate. A colorful plate makes a dish look more appealing. Add fresh basil or parsley on top for an eye-catching touch. You can also serve it with a light salad drizzled with citrus vinaigrette. This adds freshness and balance. For a photo-worthy presentation, slice the quiche into neat pieces. Arrange them in a circle on the plate. This simple trick makes your dish look polished and ready for sharing. Don't forget to snap a picture before you dig in! For the complete recipe, check out the [Full Recipe]. {{image_4}} You can switch up the veggies in your quiche. Broccoli, bell peppers, or mushrooms work great. Each veggie brings its own taste and texture. You can also try seasonal additions. In spring, add asparagus, and in fall, use roasted squash. This keeps your quiche fresh and exciting. If you need a gluten-free quiche, use a gluten-free crust. Many stores sell these now, or you can make your own. If you make your crust, use almond flour or coconut flour for a nice texture. You may need to adjust the liquid in the filling. This helps keep the quiche moist and tasty. Making mini quiches is fun and easy. You can use a muffin tin for individual servings. Just pour the mixture into each cup and fill them about three-quarters full. Bake for about 20-25 minutes. Keep an eye on them to avoid burning. These mini quiches are perfect for snacks or brunch. You can even freeze them for later! Check out the Full Recipe for more details. To keep your quiche fresh, store it in an airtight container. This helps keep moisture out. It stays fresh in the fridge for up to three days. If you plan to eat it later, cover it tightly with plastic wrap or foil. You can freeze your quiche before or after baking. If freezing before baking, wrap it well. This way, you can bake it fresh later. For freezing after baking, let it cool completely first. Store it in an airtight container. It can last up to three months in the freezer. When ready to eat, thaw it in the fridge overnight. For the best taste, reheat your quiche in the oven. Set it to 350°F (175°C) and heat for about 15-20 minutes. This keeps the crust crispy. You can also use a microwave for quick heating. However, the crust may not stay as crunchy. Heat slices for about 1-2 minutes. Always check that it's hot in the middle before serving. You can tell the quiche is done by looking for a few key signs. The edges should be golden brown, and the center should be firm. If you gently shake the quiche, it should not jiggle. Another great way to check is with a toothpick. Insert it into the center of the quiche. If it comes out clean, your quiche is ready to enjoy. Yes, you can use frozen spinach in this recipe. However, it’s important to make a few adjustments. First, thaw the spinach completely and drain any excess water. This helps prevent the quiche from becoming too watery. You may also want to chop the spinach further after thawing. This ensures even distribution in your quiche. Zucchini spinach quiche pairs well with many side dishes. A simple green salad with a light vinaigrette works great. You can also serve it with roasted vegetables for added flavor. If you want something heartier, serve it alongside a bowl of creamy tomato soup. This combination makes for a balanced and tasty meal. This blog post covers how to make a tasty zucchini and spinach quiche. You learned about the main ingredients, like pre-made crust and eggs, plus the best seasonings. I shared step-by-step instructions for preparing and baking. You also got tips for perfecting texture and ideas for variations. Making this dish can be easy and fun. Enjoy experimenting with flavors and ingredients. Whether you serve it for breakfast or dinner, this quiche will impress. Get cooking and enjoy your delicious creation!](https://goldendishy.com/wp-content/uploads/2025/06/2284a9f2-dfec-450d-ba9a-23981f99d5f6-300x300.webp)


![To make this Creamy Tuscan White Bean Soup, gather these simple ingredients: - 2 cans (15 oz each) white beans (such as cannellini or navy beans), rinsed and drained - 1 tablespoon olive oil - 1 medium onion, finely diced - 2 cloves garlic, minced - 3 cups vegetable broth - 1 cup fresh spinach, roughly chopped - 1 cup full-fat coconut milk (for richer creaminess) - 1 teaspoon Italian seasoning blend - 1/2 teaspoon red pepper flakes (adjust based on your spice preference) - Salt and freshly ground black pepper, to taste - Fresh basil leaves, for garnish You can easily adapt this soup for different diets. Here are some options: - Use gluten-free vegetable broth if you need a gluten-free version. - Swap the coconut milk for almond milk for a lighter base. - If you are avoiding beans, try using lentils instead. - For added protein, consider adding cooked chicken or turkey. While fresh ingredients often taste best, canned ingredients save time. Here’s a breakdown: - Canned White Beans: Convenient and ready to use. Rinse them to remove excess sodium. - Fresh Spinach: Fresh spinach adds a vibrant color and flavor. - Fresh Garlic and Onion: These provide a strong base for your soup. Fresh is always best here. - Vegetable Broth: You can use homemade broth for more flavor or store-bought for quick prep. Using a mix of fresh and canned ingredients helps create a creamy and satisfying soup with less effort. For the full recipe, check it out above! 1. Sauté Aromatics: Start by heating olive oil in a large pot over medium heat. Once the oil is hot, add the diced onion. Sauté for about 5 to 7 minutes until the onion is soft and clear. 2. Add Garlic: Next, stir in minced garlic. Cook it for 1 minute. This will make the kitchen smell amazing. 3. Combine Main Ingredients: Now, add the rinsed white beans, vegetable broth, Italian seasoning, and red pepper flakes. Stir everything well and bring it to a gentle simmer. 4. Simmer for Flavor: Once the soup simmers, reduce the heat to low. Let it cook for about 15 minutes. This helps all the flavors blend nicely. 5. Blend for Creaminess: After 15 minutes, use an immersion blender to blend the soup until it's smooth. If you don’t have one, pour half into a regular blender, blend it, and return it to the pot. 6. Incorporate Coconut Milk: Pour in the full-fat coconut milk and stir to mix well. Then, add chopped spinach. Let it simmer for another 5 minutes until the spinach is tender. 7. Season to Taste: Taste the soup and add salt and black pepper as you like. 8. Serve and Garnish: Scoop the hot soup into bowls. Top with fresh basil leaves for extra flavor. - Prep Time: 10 minutes - Total Cooking Time: 30 minutes - Servings: 4-6 - Large pot - Immersion blender or regular blender - Wooden spoon for stirring - Measuring cups and spoons - Knife and cutting board for chopping With these steps, you can create a tasty and creamy Tuscan white bean soup. For the full recipe, check out the ingredients and instructions above. Enjoy making this warm comfort bowl! To make your soup creamy, use full-fat coconut milk. This adds a rich texture. Blend the soup well for smoothness. An immersion blender works best for this task. If you prefer, transfer half the soup to a regular blender. This method gives a nice blend of creaminess and beans. Add fresh herbs like basil at the end for bright flavor. A squeeze of lemon juice can also enhance taste. If you like it spicy, add more red pepper flakes. A good sprinkle of salt helps all the flavors pop. Consider using homemade vegetable broth for deeper taste. Don't rush the sautéing of the onions. This step builds the base flavor. Avoid blending the soup too early; let it simmer first. This helps flavors meld together. Always taste the soup before serving and adjust seasoning. Too little salt can make it bland. Lastly, don’t skip the fresh basil garnish. It adds color and flavor to each bowl. For the complete process, check out the Full Recipe. {{image_4}} You can easily switch ingredients in this soup to change its taste. Instead of white beans, try chickpeas or lentils. Both give a nice texture. For a richer flavor, add smoked paprika or sun-dried tomatoes. You can also swap coconut milk with heavy cream or cashew cream for a different creaminess. This soup is already vegan and gluten-free. Just ensure all ingredients are certified gluten-free. If you want to add protein, toss in some cooked quinoa or diced tofu. Both keep the soup hearty while sticking to your dietary needs. Get creative with your soup! Add roasted vegetables like carrots or zucchini for extra flavor. Top each bowl with crunchy croutons or toasted nuts for a nice contrast. You can even drizzle some balsamic glaze on top for a sweet touch. For a fresh kick, sprinkle some lemon zest before serving. Explore these ideas to make your creamy Tuscan white bean soup a personal favorite! For the full recipe, check out the [Full Recipe]. After making your Creamy Tuscan White Bean Soup, let it cool down. Once cooled, store it in an airtight container. Glass containers work great for this. Keep it in the fridge for up to 4 days. Make sure to label it with the date. This helps you keep track of freshness. When you’re ready to enjoy the soup again, pour it into a pot. Heat it on medium until it’s warm. Stir it often to prevent sticking. You can also use a microwave. Place the soup in a safe bowl and heat for 1-2 minutes. Stir and check the heat. This ensures even warming. Want to save some for later? You can freeze the soup! Use freezer-safe bags or containers. Leave some space at the top for expansion. The soup can last up to 3 months in the freezer. When you want to eat it, thaw it in the fridge overnight. Then, reheat it as described above. Enjoy your tasty meal whenever you want! For the full details of making this soup, check the Full Recipe. The best way to blend the soup is with an immersion blender. It makes blending easy and quick. Just blend until it’s smooth. If you don’t have one, use a regular blender. Pour half the soup into the blender, blend it, and return it to the pot. Yes, you can use dried beans. You will need to soak them first. Soak the dried beans overnight in water. Then, cook them until they are soft. This will take more time than using canned beans. Once cooked, follow the same steps in the recipe. To make the soup spicier, add more red pepper flakes. Start with an extra 1/4 teaspoon. You can also add hot sauce or diced jalapeños. Stir them in while the soup simmers. Taste as you go to find your perfect heat level. Enjoy experimenting with the spice! In this blog post, we looked at how to make Creamy Tuscan White Bean Soup. We covered ingredients, including options for diets like vegan and gluten-free. I explained step-by-step cooking, along with tips for the best creaminess and flavor. We also discussed storage and answered common questions. Making soup can be fun and easy. Try the variations and enjoy each bowl. You can impress yourself and others with this recipe. It’s a warm dish full of flavor and comfort.](https://goldendishy.com/wp-content/uploads/2025/07/ec110289-7482-4578-8259-8912d7aded83-768x768.webp)