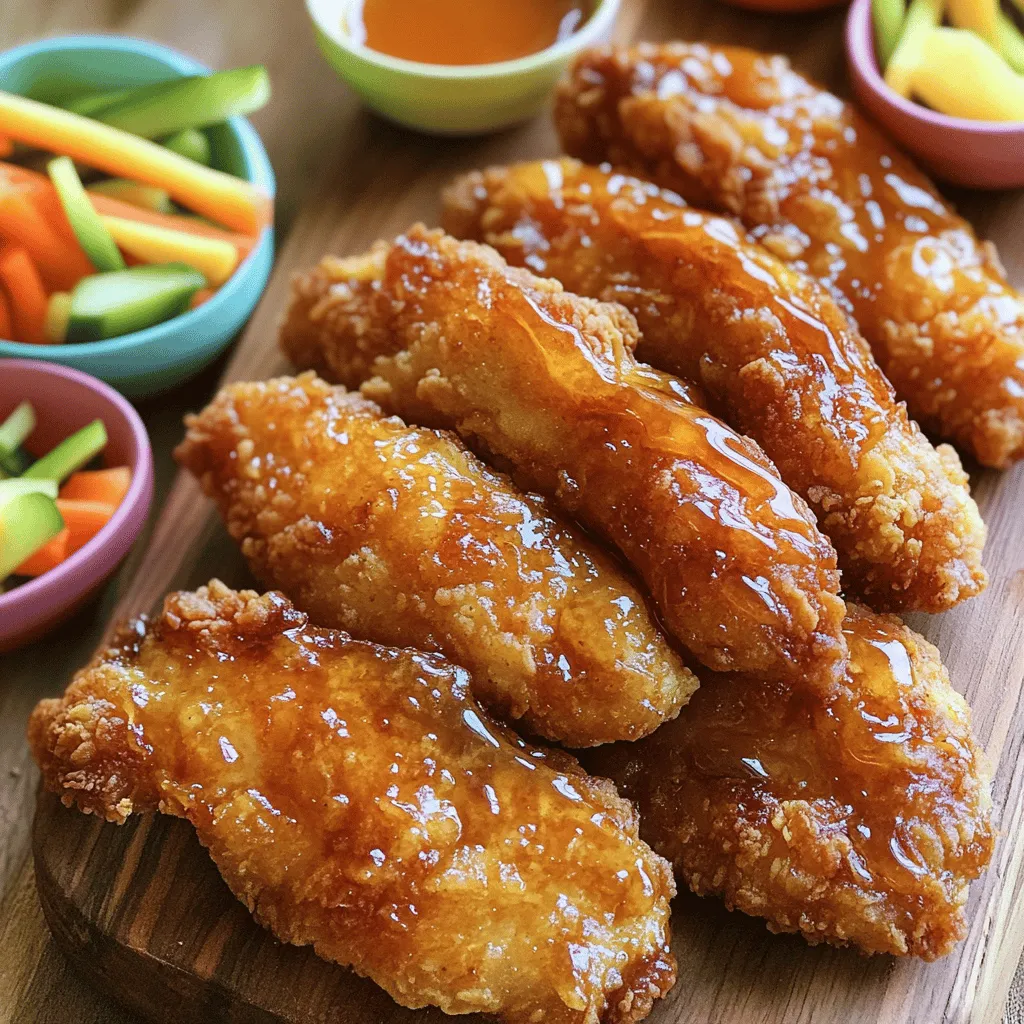
Homemade Chicken Tenders Easy and Crispy Recipe

Do you crave crispy, homemade chicken tenders that are easy to make? You’re in the right place! In this article, I’ll share my simple recipe that guarantees crunchy, juicy tenders every time. With easy steps, essential tips, and flavor-packed variations, you’ll impress everyone at the dinner table. Let’s dive in and turn your kitchen into a tender paradise!
Ingredients
Essential Ingredients for Homemade Chicken Tenders
To make the best homemade chicken tenders, you need a few key items. These ingredients work together to create a tasty meal.
– 1 pound boneless, skinless chicken breasts, cut into uniform strips
– 1 cup buttermilk
– 1 tablespoon hot sauce (adjust based on preferred spice level)
– 1 cup all-purpose flour
– 1 teaspoon paprika
– 1 teaspoon garlic powder
– 1 teaspoon onion powder
– 1 teaspoon salt
– 1/2 teaspoon black pepper
– 1/2 teaspoon cayenne pepper (optional for extra heat)
– 1 cup panko breadcrumbs
– 1/4 cup honey
– 2 tablespoons soy sauce
– 1 teaspoon sesame oil
– Vegetable oil (for frying)
These ingredients give the chicken its flavor and crunch. The buttermilk helps tenderize the chicken, making it juicy.
Optional Ingredients for Added Flavor
You can add more flavors to your chicken tenders. Here are some optional ingredients you might like:
– Fresh herbs like thyme or rosemary for extra aroma
– Lemon zest for a zesty kick
– Parmesan cheese in the breadcrumb mix for a cheesy twist
Feel free to get creative! These options can enhance the taste of your tenders.
Essential Cooking Equipment
Having the right tools makes cooking easier. Here’s what you need for this recipe:
– Large mixing bowl for marinating
– Three separate bowls for coating the chicken
– Whisk to mix dry ingredients
– Large skillet for frying
– Paper towels for draining excess oil
Using these tools helps keep things organized. You’ll have a smooth cooking experience with everything in place.
Step-by-Step Instructions
Marinating the Chicken
Start by mixing the buttermilk and hot sauce in a large bowl. This mixture adds flavor and helps the chicken stay moist. Cut your chicken breasts into uniform strips. Make sure they are all about the same size. This helps them cook evenly. Place the chicken strips in the buttermilk mix. Cover the bowl with plastic wrap. Let it marinate in the fridge for at least one hour. For the best taste, let it sit overnight.
Coating the Chicken Tenders
Prepare three bowls for the coating. In the first bowl, mix flour, paprika, garlic powder, onion powder, salt, black pepper, and cayenne pepper. Whisk it until it is blended well. In the second bowl, keep the panko breadcrumbs. After marinating, take the chicken out of the fridge. First, coat each strip in the flour mix. Shake off the extra flour. Next, dip the chicken back into the buttermilk. Let any extra liquid drip off. Finally, roll the chicken in the panko breadcrumbs, pressing gently to help it stick.
Cooking Methods: Frying, Baking, and Air Frying
You can cook your chicken tenders in three ways. Frying is the most common. Heat about half an inch of vegetable oil in a skillet over medium heat. To check if the oil is hot enough, drop in a small piece of bread. It should sizzle. Cook the chicken tenders in batches. Fry each side for about 3 to 5 minutes. They should be golden brown and cooked through.
If you prefer baking, preheat your oven to 400°F (200°C). Line a baking sheet with parchment paper. Place the coated chicken tenders on the sheet. Spray them lightly with cooking spray. Bake for about 15 to 20 minutes, flipping halfway through.
For air frying, preheat your air fryer to 400°F (200°C). Arrange the chicken tenders in a single layer in the basket. Cook for 10 to 12 minutes, shaking halfway through. Each method yields crispy, tasty chicken tenders.
Tips & Tricks
Achieving the Perfect Crispy Texture
To get that perfect crunch, start by marinating your chicken. Soak it in buttermilk and hot sauce. This step keeps the meat juicy and adds flavor. After marinating, coat the chicken well. Use seasoned flour first, then dip it back in buttermilk, and finally cover with panko breadcrumbs. The panko gives a light and airy crunch that is hard to beat. Fry them in hot oil, but do not crowd the pan. This ensures even cooking and crispiness all around.
Storage and Reheating Tips
If you have leftovers, store them in an airtight container. They can last for up to three days in the fridge. To reheat, place the tenders in an oven at 375°F (190°C) for about 10-15 minutes. This method keeps them crispy. If you microwave them, you may lose that crunch. You can also freeze the cooked tenders. Just wrap them tightly and they will stay good for up to three months.
Serving Suggestions for Homemade Chicken Tenders
These chicken tenders shine when served with dipping sauces. I recommend honey glaze for a sweet touch. You can also serve them with ranch, barbecue sauce, or even spicy mustard. For a fun twist, pair them with fresh veggie sticks like carrots or celery. Arrange the tenders on a wooden board for a rustic look. This makes your meal not just tasty, but also beautiful to serve.
Variations
Different Seasonings and Spice Blends
You can change the flavor of your chicken tenders with different seasonings. Try adding Italian herbs like oregano and basil for a fresh taste. Use cumin and chili powder for a smoky, southwestern twist. You can even mix in some lemon zest for brightness. Experimenting with spices keeps things fun and tasty.
Alternative Coatings: Gluten-Free Options
For a gluten-free option, replace all-purpose flour with almond flour or chickpea flour. These flours provide a crunchy texture, just like regular flour. Use gluten-free breadcrumbs instead of panko to maintain that crispy bite. Always check labels to ensure you’re using certified gluten-free products.
Accompaniments and Dipping Sauces
Serving your chicken tenders with dips makes them even better. Classic options include honey mustard, ranch, or BBQ sauce. For a twist, try a spicy sriracha mayo or a zesty avocado dip. Fresh veggies like carrot sticks or celery add crunch and color to your plate. These dips and sides will elevate your meal and impress your guests.
Storage Info
Storing Leftover Chicken Tenders
After enjoying your chicken tenders, store any leftovers right away. Place them in an airtight container. This helps keep them fresh. You can store them in the fridge for up to three days. Make sure to let them cool before sealing.
Freezing Homemade Chicken Tenders
To freeze your chicken tenders, let them cool completely first. Then, arrange them in a single layer on a baking sheet. Freeze them for about one hour until they are firm. After that, transfer the tenders to a freezer-safe bag. Squeeze out any air before sealing. You can freeze them for up to three months.
Best Practices for Keeping Chicken Tenders Fresh
To keep chicken tenders fresh, avoid stacking them too tightly. Use parchment paper between layers if needed. Always store them in a cool, dark place. When reheating, use an oven for the best texture. This method helps restore their crispiness. For best results, reheat at 375°F until warm.
FAQs
How do I make chicken tenders gluten-free?
To make chicken tenders gluten-free, you can swap out the all-purpose flour. Use gluten-free flour or cornstarch instead. For the breadcrumbs, choose gluten-free panko or crush gluten-free crackers.
Can I bake homemade chicken tenders instead of frying?
Yes, you can bake homemade chicken tenders! Preheat your oven to 400°F (200°C). After coating the chicken, place it on a baking sheet lined with parchment paper. Spray the tenders lightly with cooking spray to promote crispiness. Bake for 15-20 minutes, flipping halfway, until they are golden and fully cooked. This method is healthier and still tasty!
What’s the best way to reheat leftover chicken tenders?
The best way to reheat leftover chicken tenders is in the oven. Preheat your oven to 375°F (190°C). Place the tenders on a baking sheet and cover them loosely with foil. Heat for about 10-15 minutes until they are warm. This keeps them crispy and prevents them from getting soggy. Enjoy your tasty leftovers!
You can make tasty homemade chicken tenders by combining key ingredients, cooking methods, and storage tips. Start with the right chicken and seasonings, and choose your cooking method. Don’t forget the tips for achieving a crispy texture and the many ways to serve and dip.
Experiment with seasonings and coatings to suit your taste. With the right knowledge, you can enjoy delicious chicken tenders any time. Now, go ahead and try these steps to impress your family and friends!

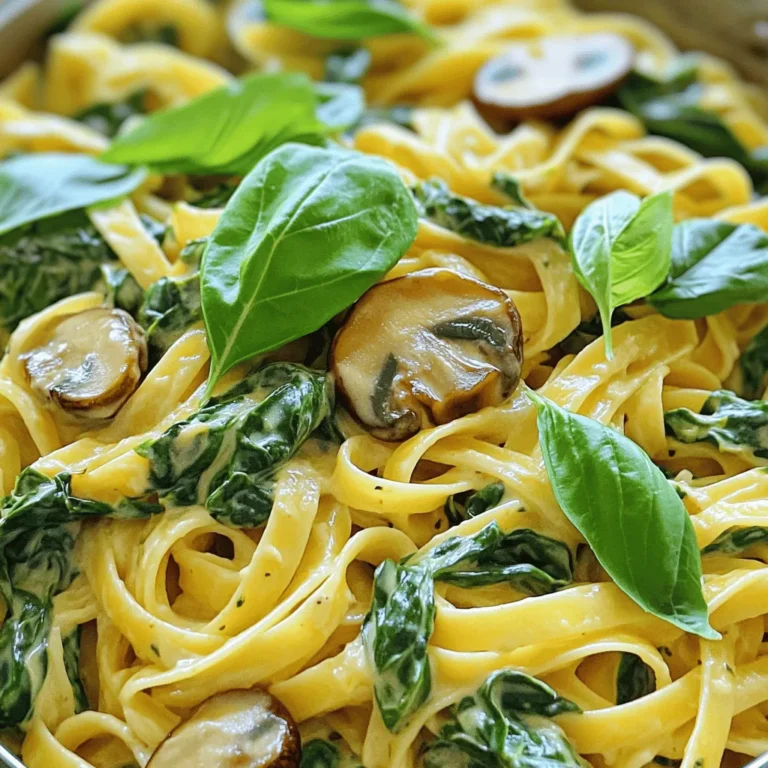
![- 8 oz fettuccine pasta - 1 lb large shrimp, peeled and deveined - 2 tablespoons Cajun seasoning - 2 tablespoons olive oil - 3 cloves of garlic, minced - 1 cup heavy cream - 1 cup grated Parmesan cheese - 1/2 cup cream cheese, softened - Salt and pepper to taste - 2 tablespoons chopped fresh parsley (for garnish) - Zest of 1 lemon (for brightness) When I make Cajun Shrimp Alfredo, I love how rich and creamy it is. The fettuccine pasta serves as a perfect base for the dish. You can choose any pasta you like, but fettuccine offers a great texture that holds the sauce well. The shrimp is the star of this recipe. I always prefer large shrimp because they have a great bite and flavor. Make sure to peel and devein them for the best experience. The Cajun seasoning adds a warm kick that makes this dish pop. For the sauce, I use both heavy cream and cream cheese. They blend together to create a smooth and thick sauce. Parmesan cheese adds that salty, nutty flavor that ties everything together. Fresh garlic enhances the aroma, making your kitchen smell divine while cooking. I finish the dish with fresh parsley and lemon zest. The parsley brings a bright color, while the lemon zest adds a hint of freshness. This combination makes every bite a flavorful delight. You can find the Full Recipe to guide you through the cooking process. Enjoy creating this scrumptious meal! Start by bringing a large pot of salted water to a boil. The salt helps flavor the pasta. Once the water is boiling, add 8 ounces of fettuccine. Cook the pasta until it is al dente, which usually takes about 8 to 10 minutes. You want it firm, not mushy. After cooking, drain the pasta but save 1/2 cup of the water for later. Next, take 1 pound of large shrimp, peeled and deveined. In a bowl, sprinkle 2 tablespoons of Cajun seasoning over the shrimp. Toss them well so every piece is coated. This gives the shrimp a nice, bold taste. Heat 2 tablespoons of olive oil in a large skillet over medium-high heat. When hot, add the shrimp and sauté for 2 to 3 minutes per side. Cook until they turn pink and opaque. Once done, remove them from the skillet and set aside. In the same skillet, lower the heat a bit. Add 3 cloves of minced garlic to the skillet. Sauté the garlic for about 30 seconds. You want it fragrant but not burnt. Then, pour in 1 cup of heavy cream. Stir gently and let it come to a gentle simmer. Add in 1/2 cup of softened cream cheese, stirring until it melts. Now, gradually mix in 1 cup of grated Parmesan cheese. Stir vigorously to make the sauce creamy. If it’s too thick, add some of the reserved pasta water until you reach the right consistency. Now it’s time to bring everything together. Return the sautéed shrimp to the skillet with the creamy sauce. Add the cooked fettuccine next. Toss all the ingredients gently so the pasta and shrimp are well-coated. Taste and season with salt and pepper as needed. For a bright touch, add the zest of 1 lemon, mixing it in for extra flavor. Enjoy this flavorful creamy delight! For a complete recipe, check out the [Full Recipe]. - Avoid overcooking shrimp: Cook shrimp for only 2-3 minutes per side. They should be pink and opaque. Overcooked shrimp can turn rubbery. Keep a close eye on them as they cook. - How to achieve a silky sauce: To make a smooth sauce, stir the heavy cream gently as it heats. Add cream cheese and Parmesan slowly. If the sauce is too thick, use reserved pasta water to thin it out. - Suggesting additional spices: Try adding a pinch of cayenne for extra heat. Smoked paprika can add a nice depth. Experiment with flavors that excite your taste buds. - Importance of fresh herbs for garnishing: Fresh parsley adds color and brightness to the dish. You can also use basil or chives for a different twist. Fresh herbs make every plate look and taste better. - Pairing with a side salad or garlic bread: A crisp side salad balances the rich flavors of the Alfredo. Garlic bread is a perfect complement too. It helps soak up the creamy sauce. - Creative plating ideas: Swirl the fettuccine into a nest on the plate. Top it with shrimp and a sprinkle of parsley. Adding lemon zest on top gives it a fresh look and flavor. For added flair, drizzle some sauce around the plate. For the complete process of making this dish, check out the Full Recipe. {{image_4}} For those with dietary needs, there are great options. You can use gluten-free pasta. Many brands offer tasty versions made from rice or corn. These options cook well and hold sauce nicely. If you need a dairy-free choice, try cashew cream or almond milk. These alternatives give a creamy texture that works well in Alfredo. Both options keep your dish rich and full of flavor. Cajun seasoning can be adjusted to fit your taste. If you love spice, add more seasoning. For a milder dish, use less. You can also mix in smoked paprika for a smoky flavor. Adding vegetables can boost nutrition. Bell peppers, spinach, or zucchini blend well into the sauce. They add color, taste, and extra vitamins. Just sauté them with the shrimp for a quick mix. If you prefer a different protein, chicken works great. Simply swap shrimp for diced chicken breast. Cook it the same way until golden and cooked through. Tofu is another excellent option for a vegetarian twist. Firm tofu absorbs flavors well. Just cube it and sauté until crispy. For a seafood twist, try adding fish. Salmon or scallops can add rich flavor. Cook them gently to keep them tender. These variations keep the dish fun and tasty while catering to different diets. Enjoy mixing it up! For the full recipe, check out Cajun Shrimp Alfredo Delight. To keep your Cajun Shrimp Alfredo fresh, store leftovers in the fridge. Use airtight containers to avoid moisture loss. It’s best to cool the dish before sealing it. This helps maintain the creamy texture. Try to eat the leftovers within 2 to 3 days for the best taste. When reheating, use low heat on the stove or microwave. Stir the dish gently to avoid breaking the creamy sauce. Add a splash of milk or cream to refresh the texture. This will help revive the dish and keep it smooth. Remember to heat just until warm, so you don’t overcook the shrimp. If you want to freeze Cajun Shrimp Alfredo, cool it completely first. Use freezer-safe containers and leave some space for expansion. The dish will last about 2 to 3 months in the freezer. When you’re ready to eat, thaw it in the fridge overnight. Reheat slowly on the stove, adding a bit of cream if needed for a creamy finish. Cajun Shrimp Alfredo is a creamy pasta dish with bold flavors. It features fettuccine pasta and shrimp coated in a rich Alfredo sauce. The Cajun seasoning adds warmth and a bit of spice. This dish balances creamy texture with savory notes from garlic and cheese. You will taste hints of lemon zest, which brighten the flavors. It's a perfect mix of comfort food and exciting cuisine that can impress anyone. To add extra heat to your Cajun Shrimp Alfredo, try these options: - Use more Cajun seasoning than the recipe calls for. - Add a pinch of cayenne pepper or crushed red pepper flakes. - Incorporate diced jalapeños or fresh chili peppers into the shrimp. - Serve with a drizzle of hot sauce on top for a spicy kick. Yes, you can use frozen shrimp. Here are some best practices: - Thaw the shrimp in cold water for about 15-20 minutes before cooking. - Pat them dry with a paper towel to remove excess moisture. - Ensure you sauté them until fully cooked, which usually takes 2-3 minutes per side. Using frozen shrimp can save time and still give you great flavor. To keep your Alfredo sauce smooth and creamy: - Use low heat when making the sauce. - Stir continuously to help the cheese melt evenly. - Gradually add the cream and cheese, mixing well each time. - If the sauce gets too thick, slowly add reserved pasta water until it reaches the desired texture. Following these tips will help maintain a silky sauce that clings perfectly to your pasta. Cajun Shrimp Alfredo is a rich and tasty dish that you can easily make at home. You learned about key ingredients, cooking steps, and helpful tips. Variations allow you to adapt this dish to your diet or taste. Proper storage ensures your leftovers stay delicious. Remember, you can always customize flavors and ingredients to suit your needs. Enjoy creating this meal and impressing your family or friends. It’s all about the simple joys of cooking and sharing great food.](https://goldendishy.com/wp-content/uploads/2025/07/5d1dc84f-c815-4e1a-a64f-ea492bbf0a6c-768x768.webp)
. This blog post covered how to make Parmesan Herb Crusted Tilapia. You learned about key ingredients like tilapia, herbs, and panko for a crunchy topping. I shared simple steps for prep, coating, and baking. Tips for flavor and variations help you personalize the dish. Knowing the right storage and reheating methods keeps leftovers tasty. Enjoy creating this dish with fresh herbs and your favorite flavors. Cooking can be fun and rewarding!](https://goldendishy.com/wp-content/uploads/2025/08/d7b754dc-0283-4cf5-9e7a-95472ebc1437-768x768.webp)