Vegan Chickpea Salad Sandwich Fresh and Flavorful Meal
. To start, you need to mash the chickpeas. Use a fork or a potato masher. Mash until you have a chunky texture. You want to leave some whole chickpeas. This gives your sandwich a nice bite and texture. Next, add the tahini, lemon juice, and Dijon mustard to the chickpeas. Mix everything well. You should have a creamy base. Now, chop the red onion, celery, and grate the carrot. Fold these veggies into the chickpeas. The crunch from the veggies adds great flavor and color to your salad. Now it's time to season your chickpea mixture. Add salt and black pepper to taste. Adjust the flavors to your liking. If you want more tang, add lemon juice. If you prefer creaminess, add more tahini. For the bread, lightly toast it if you want a crunch. Spread a generous amount of the chickpea salad on two slices of bread. Add a few crisp lettuce leaves on top. If you like, add thin slices of tomatoes and cucumbers. Place the other slices of bread on top. Cut each sandwich in half for easy eating. You can serve them right away or wrap them in parchment paper for later. For a nice touch, arrange the sandwiches on a wooden board or plate. Enjoy this fresh and flavorful meal! For the complete recipe, check the Full Recipe above. To prepare chickpeas, start with rinsing and draining. Use a fine mesh strainer for this task. Rinsing removes excess sodium from canned chickpeas. Draining helps avoid excess water that can make your salad soggy. You want the chickpeas dry but not overly crushed. Adjusting seasoning is key for a tasty salad. Start with salt and pepper. Taste your mixture before serving. Add more lemon juice for brightness. If you want creaminess, add more tahini. These simple changes can enhance the dish. Make your meal look nice with a few easy tips. Use a rustic wooden board or a bright plate. This adds charm to your presentation. Garnish with fresh dill on top of the sandwich. Serve with colorful veggie sticks on the side. It makes for an eye-catching and healthy display. For the full recipe, check the section above. {{image_4}} You can change up the chickpeas in this sandwich. Try using black beans or lentils instead. Both options give a different taste and texture. For extra creaminess, swap tahini with vegan mayonnaise. This will make the mix smooth and rich. You can even blend both for a unique flavor. Herbs and spices can change the taste of your sandwich. Instead of dill, use parsley or cilantro for a fresh kick. You can also add garlic powder or smoked paprika for depth. For a spicy twist, throw in some chopped jalapeños or a dash of hot sauce. These additions can bring a fun zing to your meal. When it comes to bread, you have many choices. Whole grain bread is great, but you can also use gluten-free options. Try wraps made from rice or corn for a lighter touch. This makes for a fun, portable meal. Each bread type changes the sandwich's feel, so choose what you love! To keep leftovers fresh, store your chickpea salad in an airtight container. Make sure to refrigerate it right away. This helps keep the flavors intact for up to three days. When ready to eat, just give it a good stir. You can enjoy it cold or make a fresh sandwich. If you want to store the chickpea salad for longer, freezing is a great option. Place the chickpea salad mixture in a freezer-safe container. Leave some space at the top to allow for expansion. It will stay good for about three months. When you're ready to eat it, let it thaw in the fridge overnight. To refresh your sandwich after storage, you can add a bit of olive oil or lemon juice. This helps bring back the moisture and flavor. If you want, you can toast the bread again for a crunchy bite. This simple step makes your sandwich taste fresh and delicious again. Enjoy your meal! To make this sandwich gluten-free, choose gluten-free bread. Many stores offer great options. Look for brands made from rice or almond flour. You can also try lettuce wraps instead of bread. This keeps it fresh and light too! Yes, you can. Make the chickpea salad a day ahead. Store it in an airtight container in the fridge. It stays good for about three days. Just remember to add fresh toppings right before serving for best flavor. Chickpeas are packed with protein and fiber. They help keep you full and satisfied. This sandwich is low in fat and high in vitamins. The veggies add crunch and nutrients. Tahini brings in healthy fats and flavor. Overall, this sandwich is a tasty way to eat healthy! This blog covered how to make a tasty chickpea salad sandwich. We explored main ingredients, step-by-step instructions, and storage tips. You learned how to adjust flavors and choose the right bread. Remember, you can customize the recipe with different herbs or legumes. Enjoy this easy meal any day! It’s healthy, quick, and delicious. I hope you try it soon. Your taste buds will thank you!](https://goldendishy.com/wp-content/uploads/2025/06/7c039c45-1f39-49ec-9b48-b25c6f87980b.webp)
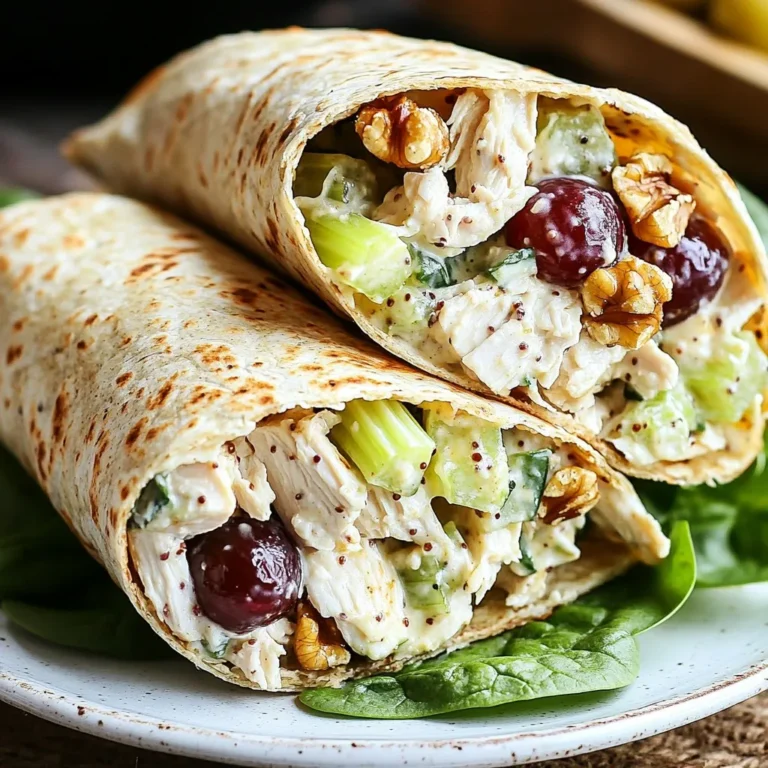
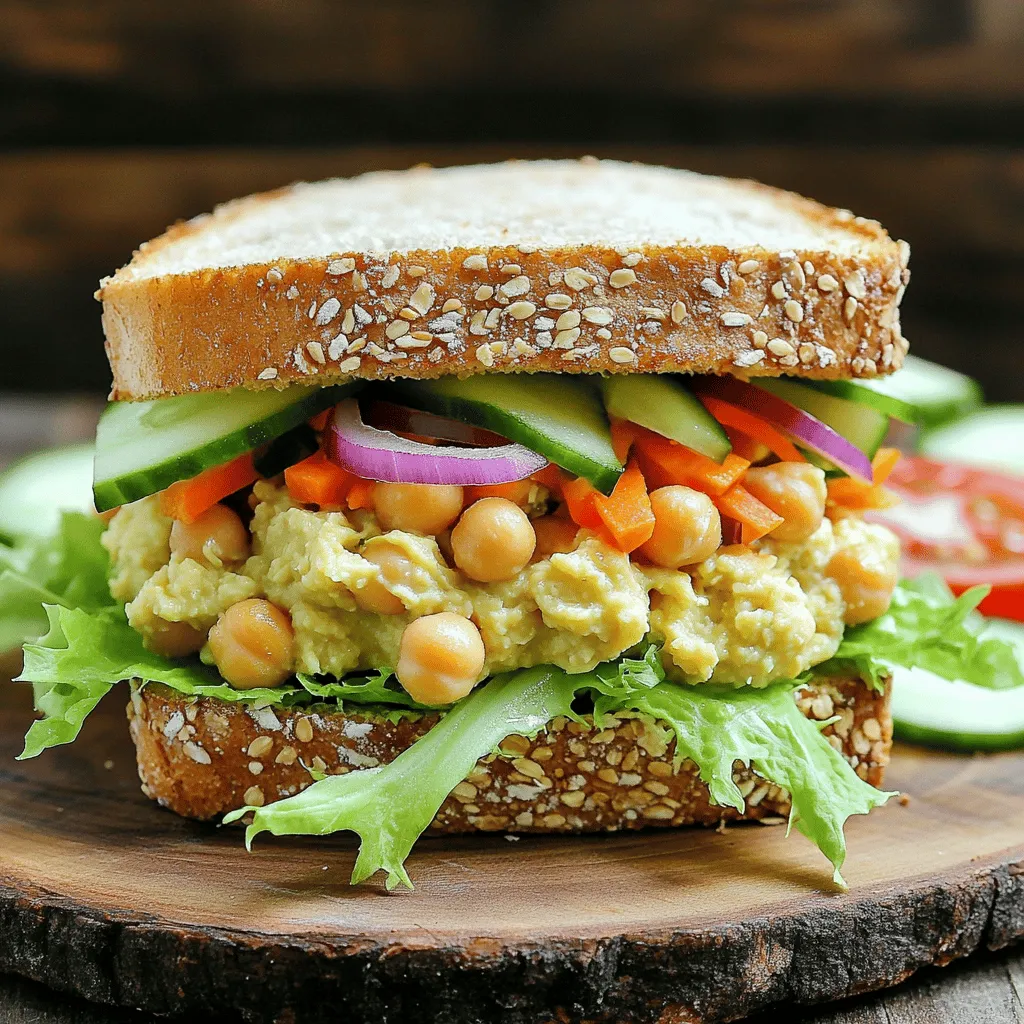
Looking for a fresh and tasty meal that’s easy to make? This Vegan Chickpea Salad Sandwich is just the thing! Packed with protein and flavor, it’s a delightful way to enjoy healthy eating. With just a few simple ingredients and steps, you can create a sandwich that will impress everyone at the table. Let’s dive into this fun, vibrant recipe that’s perfect for any meal!
Ingredients
Main Ingredients
– 1 can (15 oz) chickpeas, rinsed and drained
– 2 tablespoons tahini
– 2 tablespoons freshly squeezed lemon juice
– 1 tablespoon Dijon mustard
– 1 small red onion, finely chopped
– 1 stalk of celery, diced very small
– 1 medium carrot, grated
– 1 tablespoon fresh dill, chopped (or 1 teaspoon dried dill)
– Other vegetables like bell peppers or cucumber can add crunch and color.
Seasoning and Flavor Enhancers
– Salt and freshly ground black pepper to taste
– Fresh dill (or dried dill) to boost flavor
Bread and Optional Toppings
– 4 slices of whole grain or gluten-free bread
– Crisp lettuce leaves, for a fresh bite
– Optional: Thinly sliced tomatoes and cucumbers for extra flavor and nutrition
Creating this vegan chickpea salad sandwich is both simple and fun. Each ingredient brings its own unique taste, making every bite enjoyable. The chickpeas provide a hearty base, while tahini and lemon juice add creaminess and tang. The red onion and celery offer a nice crunch, and dill gives it a fresh, herbal note.
For the bread, I love using whole grain or gluten-free options. They hold up well against the filling. Adding lettuce and optional veggies like tomatoes or cucumbers enhances the sandwich’s taste and texture.
Step-by-Step Instructions
Preparation of Chickpeas
To start, you need to mash the chickpeas. Use a fork or a potato masher. Mash until you have a chunky texture. You want to leave some whole chickpeas. This gives your sandwich a nice bite and texture.
Mixing the Ingredients
Next, add the tahini, lemon juice, and Dijon mustard to the chickpeas. Mix everything well. You should have a creamy base. Now, chop the red onion, celery, and grate the carrot. Fold these veggies into the chickpeas. The crunch from the veggies adds great flavor and color to your salad.
Assembling the Sandwich
Now it’s time to season your chickpea mixture. Add salt and black pepper to taste. Adjust the flavors to your liking. If you want more tang, add lemon juice. If you prefer creaminess, add more tahini.
For the bread, lightly toast it if you want a crunch. Spread a generous amount of the chickpea salad on two slices of bread. Add a few crisp lettuce leaves on top. If you like, add thin slices of tomatoes and cucumbers. Place the other slices of bread on top.
Cut each sandwich in half for easy eating. You can serve them right away or wrap them in parchment paper for later. For a nice touch, arrange the sandwiches on a wooden board or plate. Enjoy this fresh and flavorful meal!
Tips & Tricks
Best Practices for Chickpea Preparation
To prepare chickpeas, start with rinsing and draining. Use a fine mesh strainer for this task. Rinsing removes excess sodium from canned chickpeas. Draining helps avoid excess water that can make your salad soggy. You want the chickpeas dry but not overly crushed.
Achieving Optimal Flavor
Adjusting seasoning is key for a tasty salad. Start with salt and pepper. Taste your mixture before serving. Add more lemon juice for brightness. If you want creaminess, add more tahini. These simple changes can enhance the dish.
Serving Suggestions
Make your meal look nice with a few easy tips. Use a rustic wooden board or a bright plate. This adds charm to your presentation. Garnish with fresh dill on top of the sandwich. Serve with colorful veggie sticks on the side. It makes for an eye-catching and healthy display.
Variations
Alternative Ingredients
You can change up the chickpeas in this sandwich. Try using black beans or lentils instead. Both options give a different taste and texture. For extra creaminess, swap tahini with vegan mayonnaise. This will make the mix smooth and rich. You can even blend both for a unique flavor.
Flavor Variations
Herbs and spices can change the taste of your sandwich. Instead of dill, use parsley or cilantro for a fresh kick. You can also add garlic powder or smoked paprika for depth. For a spicy twist, throw in some chopped jalapeños or a dash of hot sauce. These additions can bring a fun zing to your meal.
Bread Options
When it comes to bread, you have many choices. Whole grain bread is great, but you can also use gluten-free options. Try wraps made from rice or corn for a lighter touch. This makes for a fun, portable meal. Each bread type changes the sandwich’s feel, so choose what you love!
Storage Info
Short-Term Storage
To keep leftovers fresh, store your chickpea salad in an airtight container. Make sure to refrigerate it right away. This helps keep the flavors intact for up to three days. When ready to eat, just give it a good stir. You can enjoy it cold or make a fresh sandwich.
Long-Term Storage
If you want to store the chickpea salad for longer, freezing is a great option. Place the chickpea salad mixture in a freezer-safe container. Leave some space at the top to allow for expansion. It will stay good for about three months. When you’re ready to eat it, let it thaw in the fridge overnight.
Reheating Tips
To refresh your sandwich after storage, you can add a bit of olive oil or lemon juice. This helps bring back the moisture and flavor. If you want, you can toast the bread again for a crunchy bite. This simple step makes your sandwich taste fresh and delicious again. Enjoy your meal!
FAQs
How can I make this sandwich gluten-free?
To make this sandwich gluten-free, choose gluten-free bread. Many stores offer great options. Look for brands made from rice or almond flour. You can also try lettuce wraps instead of bread. This keeps it fresh and light too!
Can I prepare the chickpea salad in advance?
Yes, you can. Make the chickpea salad a day ahead. Store it in an airtight container in the fridge. It stays good for about three days. Just remember to add fresh toppings right before serving for best flavor.
What are the nutritional benefits of a chickpea salad sandwich?
Chickpeas are packed with protein and fiber. They help keep you full and satisfied. This sandwich is low in fat and high in vitamins. The veggies add crunch and nutrients. Tahini brings in healthy fats and flavor. Overall, this sandwich is a tasty way to eat healthy!
This blog covered how to make a tasty chickpea salad sandwich. We explored main ingredients, step-by-step instructions, and storage tips. You learned how to adjust flavors and choose the right bread. Remember, you can customize the recipe with different herbs or legumes.
Enjoy this easy meal any day! It’s healthy, quick, and delicious. I hope you try it soon. Your taste buds will thank you!
. To start, you need to mash the chickpeas. Use a fork or a potato masher. Mash until you have a chunky texture. You want to leave some whole chickpeas. This gives your sandwich a nice bite and texture. Next, add the tahini, lemon juice, and Dijon mustard to the chickpeas. Mix everything well. You should have a creamy base. Now, chop the red onion, celery, and grate the carrot. Fold these veggies into the chickpeas. The crunch from the veggies adds great flavor and color to your salad. Now it's time to season your chickpea mixture. Add salt and black pepper to taste. Adjust the flavors to your liking. If you want more tang, add lemon juice. If you prefer creaminess, add more tahini. For the bread, lightly toast it if you want a crunch. Spread a generous amount of the chickpea salad on two slices of bread. Add a few crisp lettuce leaves on top. If you like, add thin slices of tomatoes and cucumbers. Place the other slices of bread on top. Cut each sandwich in half for easy eating. You can serve them right away or wrap them in parchment paper for later. For a nice touch, arrange the sandwiches on a wooden board or plate. Enjoy this fresh and flavorful meal! For the complete recipe, check the Full Recipe above. To prepare chickpeas, start with rinsing and draining. Use a fine mesh strainer for this task. Rinsing removes excess sodium from canned chickpeas. Draining helps avoid excess water that can make your salad soggy. You want the chickpeas dry but not overly crushed. Adjusting seasoning is key for a tasty salad. Start with salt and pepper. Taste your mixture before serving. Add more lemon juice for brightness. If you want creaminess, add more tahini. These simple changes can enhance the dish. Make your meal look nice with a few easy tips. Use a rustic wooden board or a bright plate. This adds charm to your presentation. Garnish with fresh dill on top of the sandwich. Serve with colorful veggie sticks on the side. It makes for an eye-catching and healthy display. For the full recipe, check the section above. {{image_4}} You can change up the chickpeas in this sandwich. Try using black beans or lentils instead. Both options give a different taste and texture. For extra creaminess, swap tahini with vegan mayonnaise. This will make the mix smooth and rich. You can even blend both for a unique flavor. Herbs and spices can change the taste of your sandwich. Instead of dill, use parsley or cilantro for a fresh kick. You can also add garlic powder or smoked paprika for depth. For a spicy twist, throw in some chopped jalapeños or a dash of hot sauce. These additions can bring a fun zing to your meal. When it comes to bread, you have many choices. Whole grain bread is great, but you can also use gluten-free options. Try wraps made from rice or corn for a lighter touch. This makes for a fun, portable meal. Each bread type changes the sandwich's feel, so choose what you love! To keep leftovers fresh, store your chickpea salad in an airtight container. Make sure to refrigerate it right away. This helps keep the flavors intact for up to three days. When ready to eat, just give it a good stir. You can enjoy it cold or make a fresh sandwich. If you want to store the chickpea salad for longer, freezing is a great option. Place the chickpea salad mixture in a freezer-safe container. Leave some space at the top to allow for expansion. It will stay good for about three months. When you're ready to eat it, let it thaw in the fridge overnight. To refresh your sandwich after storage, you can add a bit of olive oil or lemon juice. This helps bring back the moisture and flavor. If you want, you can toast the bread again for a crunchy bite. This simple step makes your sandwich taste fresh and delicious again. Enjoy your meal! To make this sandwich gluten-free, choose gluten-free bread. Many stores offer great options. Look for brands made from rice or almond flour. You can also try lettuce wraps instead of bread. This keeps it fresh and light too! Yes, you can. Make the chickpea salad a day ahead. Store it in an airtight container in the fridge. It stays good for about three days. Just remember to add fresh toppings right before serving for best flavor. Chickpeas are packed with protein and fiber. They help keep you full and satisfied. This sandwich is low in fat and high in vitamins. The veggies add crunch and nutrients. Tahini brings in healthy fats and flavor. Overall, this sandwich is a tasty way to eat healthy! This blog covered how to make a tasty chickpea salad sandwich. We explored main ingredients, step-by-step instructions, and storage tips. You learned how to adjust flavors and choose the right bread. Remember, you can customize the recipe with different herbs or legumes. Enjoy this easy meal any day! It’s healthy, quick, and delicious. I hope you try it soon. Your taste buds will thank you!](https://goldendishy.com/wp-content/uploads/2025/06/7c039c45-1f39-49ec-9b48-b25c6f87980b-300x300.webp)
![- 2 boneless, skinless chicken breasts - 1 teaspoon garlic powder - 1 teaspoon smoked paprika - 1 teaspoon dried oregano - Salt and freshly ground black pepper to taste - 1 tablespoon extra-virgin olive oil - 1 cup cooked quinoa or couscous - 1 cucumber, finely diced - 1 cup cherry tomatoes, halved - 1/2 red onion, paper-thin sliced - 1 cup creamy Greek yogurt - 2 tablespoons fresh dill, finely chopped - 1 tablespoon fresh lemon juice - Crisp lettuce leaves for serving - Medium-sized mixing bowl - Grill or grill pan - Spatula or tongs - Knife and cutting board - Serving bowls This simple list of ingredients and tools sets you up for a tasty meal. You can find the full recipe to guide you through each step. Start by making a simple rub. In a bowl, mix garlic powder, smoked paprika, dried oregano, salt, and pepper. Add olive oil to this mix. Rub it all over the chicken breasts. Make sure they are well-coated. For the best taste, let the chicken marinate for at least 30 minutes. If you have time, let it sit in the fridge overnight. This will make the chicken super tasty. While the chicken marinates, let’s make the tzatziki sauce. In a clean bowl, combine Greek yogurt, finely diced cucumber, chopped dill, and lemon juice. Stir well until everything blends nicely. Add a pinch of salt and pepper to taste. Set this aside. Letting it sit helps the flavors come together. Preheat your grill or grill pan to medium heat. Once it’s hot, place the marinated chicken breasts on the grill. Cook them for about 5-6 minutes on each side. You want the chicken to reach an internal temperature of 165°F (75°C). After grilling, take the chicken off the heat. Let it rest for about 5 minutes. This helps keep it juicy. After resting, slice the chicken into bite-sized pieces. Grab your serving bowls and start building your dish. Begin with a layer of cooked quinoa or couscous at the bottom. This will be the base of your bowl. Next, add the grilled chicken pieces on top of the quinoa. Then, layer on the diced cucumber, halved cherry tomatoes, and thinly sliced red onion. This adds a pop of color and flavor. Finally, drizzle the tzatziki sauce generously over everything. This brings a creamy contrast. If you like, add a handful of crisp lettuce leaves on top. This gives an extra crunch. Serve your Chicken Tzatziki Bowls in bright plates. It makes the dish look inviting. For a final touch, sprinkle some fresh dill on top and add a lemon wedge for extra zest. Enjoy your meal! To grill chicken that is juicy and flavorful, follow these tips: - Marinate Well: Use the spice rub with garlic powder, smoked paprika, and oregano. Let the chicken sit for at least 30 minutes. For best results, marinate overnight. - Use Medium Heat: Preheat your grill to a medium setting. This helps cook the chicken evenly without burning it. - Check Temperature: Use a meat thermometer to ensure the chicken reaches 165°F (75°C). This keeps it safe to eat. - Rest the Chicken: After grilling, let the chicken rest for 5 minutes. This keeps the juices inside. You can make tzatziki in different ways to suit your taste: - Add Spice: Mix in a pinch of cayenne or red pepper flakes for heat. - Use Different Herbs: Swap dill with mint or parsley for a fresh twist. - Try Other Veggies: Add grated carrots or chopped bell peppers for extra crunch. Presentation makes your Chicken Tzatziki Bowls shine. Here are some ideas: - Choose Colorful Bowls: Use deep plates to highlight the bright ingredients. - Layer Thoughtfully: Start with quinoa or couscous, then add chicken, veggies, and a drizzle of tzatziki. - Garnish: Add a sprinkle of fresh dill or a lemon wedge for a burst of color. These tips will help you create a delicious and beautiful meal that impresses everyone. For the complete recipe, check [Full Recipe]. {{image_4}} If you want a vegetarian twist, try using tofu or chickpeas. Tofu absorbs flavors well. Press and marinate it like the chicken. Cut it into cubes and grill or sauté until golden. Chickpeas also work great. Use canned or cooked chickpeas. Toss them in the same spices and roast in the oven. Both options are rich in protein and add a nice texture. You can swap grains in your Chicken Tzatziki Bowls for variety. Quinoa is high in protein and gluten-free. Couscous cooks quickly and is light on your stomach. Brown rice is hearty and adds fiber. Each grain brings a unique taste and texture. Try different grains each time for a fun twist! Add more fresh veggies to your bowl for color and crunch. Sliced bell peppers bring sweetness and crunch. Shredded carrots add a bright pop and extra nutrition. You can also use radishes for a peppery kick. Mix and match your favorites! This makes each bowl unique, fresh, and delicious. For the full recipe, check out the complete guide. After enjoying your Chicken Tzatziki Bowls, store leftovers in airtight containers. This keeps the chicken juicy and the veggies fresh. Place the chicken and veggies in one container. Store the tzatziki sauce in another. This helps prevent sogginess. You can keep the leftovers in the fridge for up to three days. To reheat the chicken, use a microwave or a skillet. If using a microwave, cover the chicken with a damp paper towel. This keeps moisture in and prevents it from drying out. Heat it for 30 seconds, check, and repeat if needed. If using a skillet, heat on low. Add a splash of water to keep it juicy. Cook until warmed through, about 3-4 minutes. Store your tzatziki sauce in a sealed container in the fridge. It stays fresh for about four days. If you notice extra water on top, just drain it off. Stir the sauce well before using it again. This keeps all the flavors mixed and tasty. For longer storage, you can freeze tzatziki in ice cube trays. Once frozen, transfer the cubes to a freezer bag. This way, you can enjoy it later in your Chicken Tzatziki Bowls or other dishes. If you don't have Greek yogurt, you can use regular yogurt. You can also try sour cream. Both will give a creamy texture, but they may taste a bit different. For a dairy-free option, use coconut yogurt or a blended cashew cream. These options keep the dish rich and tasty. You can marinate the chicken for at least 30 minutes. For better flavor, marinate it overnight. This gives the spices time to soak in. The longer, the better! Just keep it in the fridge to stay safe. Yes, you can make this dish ahead of time. Prepare the chicken and tzatziki sauce a day before. Store them in separate containers in the fridge. When you're ready to eat, just grill the chicken and assemble your bowls. It saves time and tastes fresh! Chicken Tzatziki Bowls taste great with various sides. Try a simple Greek salad with tomatoes and olives. Pita bread with hummus is also a good match. You can add roasted veggies or a light soup for extra flavor and nutrition. Yes, this dish is gluten-free if you use quinoa. Couscous is not gluten-free, so skip it if needed. Always check the labels on your ingredients to be sure. Enjoy this tasty meal without worry! This blog post covered how to make tasty Chicken Tzatziki Bowls. We explored essential ingredients, step-by-step instructions, and helpful tips. I shared fun variations, storage info, and answers to common questions. Now, you can impress your friends with this easy dish. Enjoy the fresh flavors and simple steps. With practice, you’ll make perfect bowls every time. Dive in and have fun in the kitchen!](https://goldendishy.com/wp-content/uploads/2025/06/3644d9ce-b609-47a4-b270-daf6d08e9407-768x768.webp)

![- 2 boneless, skinless chicken breasts - 1 cup buttermilk - 1 cup all-purpose flour - 1 teaspoon baking powder - 1 teaspoon smoked paprika - 1/2 teaspoon garlic powder - 1/2 teaspoon cayenne pepper - Salt and freshly ground black pepper, to taste - 4 ready-made waffles (or homemade) - 2 tablespoons honey - Maple syrup, for drizzling - Fresh parsley, chopped, for garnish In this easy chicken and waffles recipe, you start with two boneless, skinless chicken breasts. Soak them in one cup of buttermilk. This step makes the chicken juicy and tender. Next, prepare the breading mix. You need one cup of all-purpose flour, one teaspoon of baking powder, one teaspoon of smoked paprika, half a teaspoon of garlic powder, and half a teaspoon of cayenne pepper. Don’t forget to add salt and pepper to taste. For the waffles, you can use four ready-made waffles or make your own. To finish, you will need two tablespoons of honey and maple syrup for drizzling. Chop some fresh parsley for garnish. This dish combines sweet and savory flavors, making it a favorite for many. Check out the Full Recipe to see how to put it all together. - Immerse chicken in buttermilk. - Cover and refrigerate. Start by taking two boneless, skinless chicken breasts. Place them in a bowl and pour in one cup of buttermilk. Make sure the chicken is fully coated. Cover the bowl with plastic wrap and set it in the fridge. Let it sit for at least one hour, or overnight for the best flavor. The buttermilk helps tenderize the chicken and adds a nice tang. - Combine flour and spices. - Mix to create a uniform dry mixture. Next, grab a shallow dish. In it, combine one cup of all-purpose flour with one teaspoon of baking powder, one teaspoon of smoked paprika, half a teaspoon of garlic powder, and half a teaspoon of cayenne pepper. Add salt and black pepper to taste. Mix well until everything is even. This blend will give your chicken a delicious crust. - Dredge marinated chicken in flour mixture. - Shake off excess flour. After marinating, take the chicken out of the fridge. Let the extra buttermilk drip off. Now, dredge each piece in the flour mixture. Make sure to coat both sides well. Once coated, shake off any excess flour. This step is key for achieving a crispy texture. - Heat oil in a skillet. - Fry chicken until golden-brown. In a large skillet, heat about half an inch of oil over medium-high heat. Wait until the oil is shimmering. Carefully place the coated chicken breasts into the skillet. Fry each piece for about 5-7 minutes on each side. They should turn a beautiful golden-brown color. Check the internal temperature; it should reach 165°F. Once cooked, transfer the chicken to a plate lined with paper towels to soak up excess oil. - Toast waffles according to instructions. While the chicken fries, it’s time to warm the waffles. You can use ready-made waffles or make your own if you prefer. Just toast them according to the package instructions until they are crispy and heated through. This will balance the hot chicken nicely. - Layer waffle and chicken. - Drizzle with honey and maple syrup. To assemble, take a warm waffle and place it on a serving plate. Top it with a piece of the golden fried chicken. Now, for the fun part! Drizzle honey generously over the chicken. Then, add a touch of maple syrup according to your taste. This sweet and savory combo makes every bite a delight. - Ensure oil is hot before frying. Hot oil makes the chicken crispy. - Don’t overcrowd the skillet. This helps keep the oil hot and even. - Stack chicken slightly off-center. This adds height and looks appealing. - Garnish with parsley and drizzle syrup. It gives color and extra flavor. - Consider brining chicken overnight. This makes it juicier and more flavorful. - Experiment with different spices. Try herbs or blends for new tastes. For a detailed guide, check out the Full Recipe. {{image_4}} You can switch things up with grilled chicken instead of fried. Grilled chicken has a nice smoky flavor. Plus, it's a lighter option. I love using chicken thighs for this dish. They are more juicy and tender than breasts. Thighs also add great flavor to the meal. For the waffles, try adding flavors like cinnamon or vanilla. These will give your dish a fun twist. You can also make mini waffles. They are perfect for a bite-sized treat. Kids love them, and they are easy to share. If you want to change the sweet element, try agave syrup instead of honey. It’s a nice alternative for a sweeter touch. You can also use a fruit compote. Fresh berries or peaches work great and add a fruity burst. These options make your chicken and waffles even more special. For the full recipe, check out the ingredients and steps above! After you savor your chicken and waffles, store any leftovers in an airtight container. This keeps the food fresh and safe. The dish is best consumed within 2 days. If you wait too long, the taste and texture will suffer. You can freeze the cooked chicken and waffles for later. Be sure to store them separately. This way, the waffles do not get soggy. When you are ready to eat, reheat the chicken and waffles in the oven for best results. This helps keep everything crispy and tasty. When it's time to enjoy leftovers, use an oven or air fryer to reheat the chicken. This method preserves the crispy coating. Avoid using a microwave, as it can make the chicken chewy and wet. Keeping the texture nice is key to enjoying your meal again. To make homemade waffles, start with a simple batter. Mix together: - 1 cup all-purpose flour - 1 tablespoon sugar - 1 teaspoon baking powder - 1/2 teaspoon salt - 1 cup milk - 1 large egg - 2 tablespoons melted butter Combine all the dry ingredients in one bowl. In another bowl, whisk the wet ingredients. Mix them together until just combined. Cook in a preheated waffle maker for about 5 minutes until golden brown. You can also use my [Full Recipe] for a quick option with ready-made waffles. Yes! You can explore using turkey or even tofu for a vegetarian option. Turkey breast works well as a leaner choice. For tofu, press it to remove excess moisture, then marinate like the chicken. This adds great flavor and keeps it moist. To get crispy chicken, keep the oil hot. Heat it to about 350°F before frying. This helps form a crust. Don't overcrowd the skillet; fry in batches if needed. Cook until golden brown, about 5-7 minutes per side. Yes, meal prepping is easy! You can marinate the chicken in advance. Also, cook and freeze the chicken separately from the waffles. Store in airtight containers. This meal stays tasty for up to two days in the fridge. You can spice up your chicken with different seasonings. Try adding more cayenne pepper or smoked paprika for heat. Top your waffles with fresh fruit or whipped cream. Maple syrup adds sweetness, but feel free to experiment! For sides, think about fresh fruit or a light salad. Sliced strawberries or mixed berries add a nice touch. A simple green salad can balance the dish’s richness. You can also serve it with sweet potato fries for a fun twist. You learned how to make a tasty chicken and waffles dish. We covered marinating chicken, preparing breading, and frying until golden-brown. You also saw tips for storage and variations. Don't be afraid to try different spices or use grilled chicken. This dish is fun and delicious. Enjoy making it and sharing with friends!](https://goldendishy.com/wp-content/uploads/2025/06/c6fcab88-53c4-4cda-8439-7edbb7c77c72-768x768.webp)