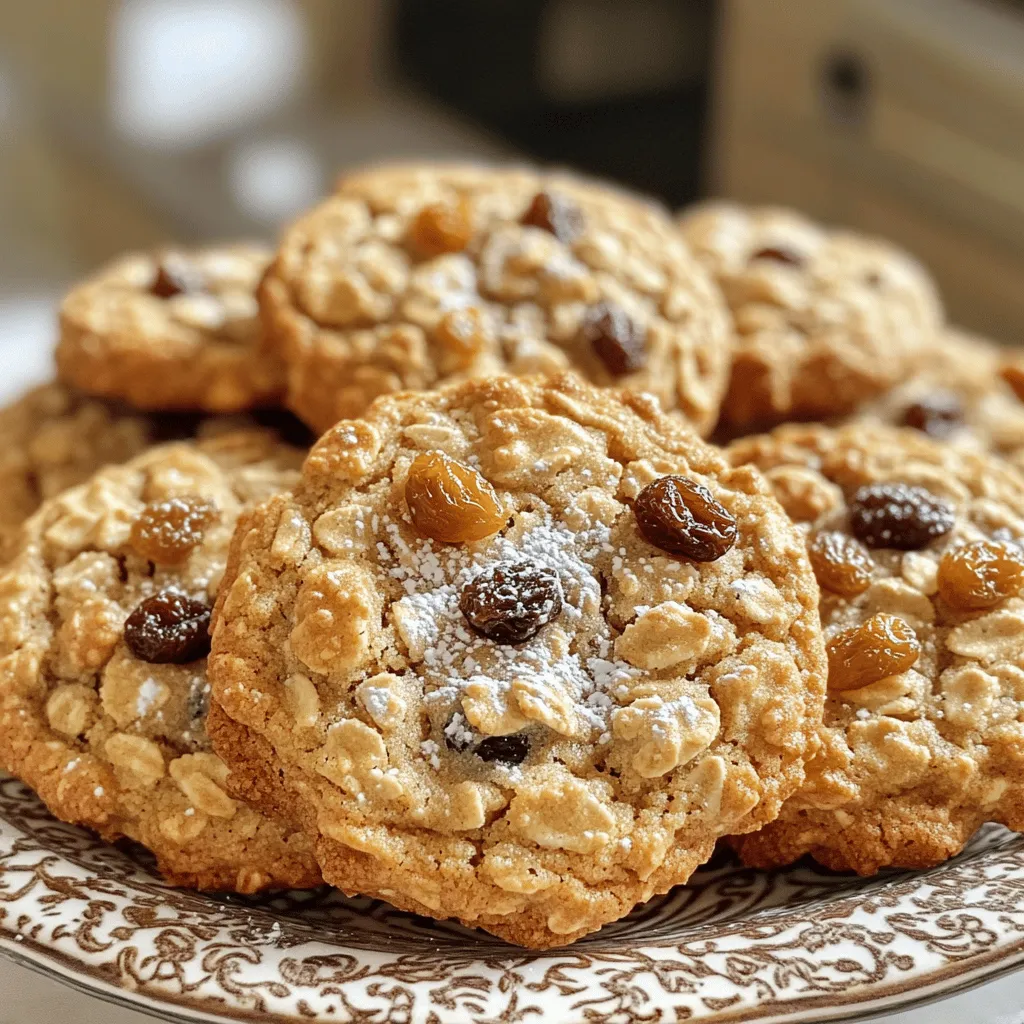
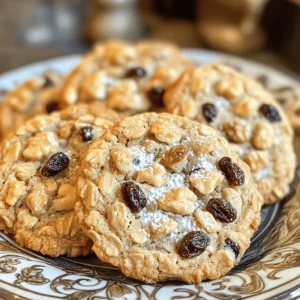
Classic Oatmeal Raisin Cookies Irresistible Treat

Welcome to your go-to guide for making Classic Oatmeal Raisin Cookies. These cookies are a timeless favorite that perfectly blend chewy oats, sweet raisins, and a hint of cinnamon. I’ll share easy steps, tips, and variations to make your treats irresistible. Whether you’re a baking pro or a beginner, you’ll find everything you need right here. Let’s dive in and create something amazing together!
Ingredients
List of Ingredients
– Rolled oats
– All-purpose flour
– Baking soda
– Salt
– Ground cinnamon
– Unsalted butter
– Brown sugar
– Granulated sugar
– Egg
– Vanilla extract
– Raisins
– Walnuts (optional)
Ingredient Measurements
For this oatmeal raisin cookie recipe, here are the specific amounts you need:
– 1 cup rolled oats
– 1 cup all-purpose flour
– 1/2 teaspoon baking soda
– 1/2 teaspoon salt
– 1 teaspoon ground cinnamon
– 1/2 cup unsalted butter, softened
– 1/2 cup packed brown sugar
– 1/2 cup granulated sugar
– 1 large egg
– 1 teaspoon pure vanilla extract
– 1 cup raisins
– 1/2 cup chopped walnuts (optional)
Ingredient Substitutions
You can swap some ingredients to fit your needs and tastes.
– For a gluten-free version, use almond or oat flour instead of all-purpose flour.
– If you’re vegan, replace the egg with 1/4 cup unsweetened applesauce or a flax egg (1 tablespoon ground flaxseed mixed with 2.5 tablespoons water).
– Use coconut oil in place of butter for a dairy-free option.
– You can switch raisins with dried cranberries or chocolate chips for a fun twist.
These changes keep the flavor while catering to dietary needs.
Step-by-Step Instructions
Preparation Details
First, preheat your oven to 350°F (175°C). This step ensures even baking. Next, prepare your baking sheet by lining it with parchment paper. This will help your cookies not stick and make cleanup easy.
Now, grab a medium-sized bowl to mix the dry ingredients. Combine 1 cup of rolled oats, 1 cup of all-purpose flour, 1/2 teaspoon of baking soda, 1/2 teaspoon of salt, and 1 teaspoon of ground cinnamon. Stir well until everything is evenly mixed. Set this bowl aside for later.
Combining Ingredients
In a large mixing bowl, cream together 1/2 cup of softened unsalted butter, 1/2 cup of packed brown sugar, and 1/2 cup of granulated sugar. Use a hand mixer or whisk to beat the mixture until it is light and fluffy. This process takes about 2-3 minutes.
Next, add in 1 large egg and 1 teaspoon of pure vanilla extract. Beat these into the butter and sugar mixture until it is smooth and well combined.
Now, it’s time to bring the dry and wet mixtures together. Gradually add the dry mix to the wet mix. Use a spatula to stir gently until just combined. Avoid overmixing; the dough should remain slightly sticky.
Finally, fold in 1 cup of raisins and, if you wish, 1/2 cup of chopped walnuts. Make sure the raisins and walnuts are evenly spread throughout the dough.
Baking Process
Using a tablespoon or cookie scoop, drop rounded balls of dough onto your prepared baking sheet. Leave about 2 inches of space between each cookie. This space allows them to spread as they bake.
Place the baking sheet in your preheated oven. Bake for 10-12 minutes. The edges should turn golden brown, while the centers should remain soft and slightly underbaked.
Once baked, remove the sheet from the oven. Let the cookies cool for 5 minutes on the sheet. After that, transfer them to wire racks to cool completely.
For the full joy of this recipe, try serving these cookies fresh with a tall glass of cold milk.
Tips & Tricks
Perfecting the Cookie Texture
To get chewy cookies, use rolled oats. They give a great texture. Make sure to measure your ingredients carefully. Too much flour can make your cookies dry. Mix until just combined for the best chew. Overmixing can lead to tough cookies.
Enhancing Flavor
Add spices like nutmeg or ginger for extra warmth. These spices pair well with cinnamon. You can also try adding a touch of maple syrup for depth. Always use fresh ingredients. Fresh spices and quality butter can make a big difference in taste.
Baking Equipment Recommendations
Choose a light-colored baking sheet. It helps cookies bake evenly. Use parchment paper to prevent sticking. This makes cleanup easy too. For scooping dough, a cookie scoop works best. It helps create uniform cookies that bake evenly. A tablespoon also works if you don’t have a scoop.
Variations
Flavor Variations
You can easily change the taste of your cookies. Adding chocolate chips makes them rich and sweet. You might also want to try different nuts. Pecans or almonds add a nice crunch. Dried fruits can bring a twist too. Try cranberries or apricots for extra flavor. Each choice adds a new layer of taste to the classic oatmeal raisin cookie.
Dietary Adjustments
If you need gluten-free cookies, swap all-purpose flour for almond flour or oat flour. These options keep the cookies tasty while meeting dietary needs. For a vegan version, use coconut oil for butter and a flaxseed egg instead of a regular egg. These swaps keep the cookie soft and chewy, just like the original recipe.
Cookie Size Options
You can make cookies in different sizes. For mini cookies, use a teaspoon to scoop the dough. Bake them for about 8-10 minutes. Larger cookies need more time. Use a tablespoon and bake them for 12-14 minutes. Keep an eye on the edges. They should be golden brown, while the centers stay soft and slightly underbaked.
Storage Info
Best Storage Practices
To keep your cookies fresh, store them in an airtight container. This prevents air from making them dry. You can also add a slice of bread inside. The moisture from the bread helps keep the cookies soft. Use a container that fits the number of cookies you have. A small jar works well for a few cookies. A larger container is great for a big batch.
Freezing Tips
You can freeze both cookie dough and baked cookies. For the dough, scoop it onto a baking sheet lined with parchment paper. Freeze the dough balls until they are solid. Then, transfer them to a freezer bag. This way, you can bake fresh cookies anytime. For baked cookies, let them cool completely first. Place them in an airtight container or freezer bag. To thaw, leave them at room temperature for a few hours. You can also warm them in the oven for a few minutes.
Shelf Life
When stored properly, cookies can last about one week at room temperature. If you freeze them, they can last up to three months. Check for signs of staleness. If the cookies feel hard or taste bland, they may be past their prime. Fresh cookies should be soft and chewy with a rich flavor. Enjoy your cookies while they’re still at their best!
FAQs
How long do oatmeal raisin cookies last?
Oatmeal raisin cookies will last about one week at room temperature. Store them in an airtight container. This keeps them fresh and soft. You can also freeze them for up to three months. Just make sure to wrap them well in plastic wrap. Thaw them at room temperature when ready to eat.
Can I use quick oats instead of rolled oats?
Yes, you can use quick oats. They cook faster and have a finer texture. This will make your cookies softer and less chewy. Rolled oats give a nice chewy bite. If you like a heartier cookie, stick with rolled oats. Both types will still taste great!
What can I substitute for eggs in this recipe?
You have a few good options for egg substitutes. You can use 1/4 cup unsweetened applesauce for each egg. Mashed banana works too, but it will add flavor. Another option is using 1 tablespoon ground flaxseed mixed with 2.5 tablespoons water. Let it sit for a few minutes to thicken. This works well for binding in cookies.
This article covered all you need to know for perfect oatmeal raisin cookies. We looked at key ingredients, their measurements, and possible substitutes. You learned step-by-step instructions for mixing, baking, and achieving great texture. We also shared tips for flavor, equipment, and storage.
Now you can bake delicious cookies that fit your taste and diet. Enjoy your baking journey with these simple recipes!
![- 1 ripe avocado, peeled and pitted - 1/2 cup unsweetened cocoa powder - 1/2 cup maple syrup or honey - 1/4 cup almond butter or peanut butter - 1/2 cup whole wheat flour - 1/2 teaspoon baking soda - 1/4 teaspoon salt - 1 teaspoon pure vanilla extract - 1/2 cup dark chocolate chips The key ingredient here is the avocado. Why choose avocado for brownies? It adds creaminess and healthy fats. This makes the brownies moist without extra oil. Next, we have cocoa powder. It gives the brownies a rich chocolate taste. The maple syrup or honey acts as a natural sweetener. I prefer maple syrup for its unique flavor. Almond butter or peanut butter brings a nutty taste. Whole wheat flour adds fiber, making these brownies healthier. Baking soda helps the brownies rise. Salt enhances all the flavors. Finally, dark chocolate chips are a must for that gooey chocolate burst. Using avocado offers many perks. It is rich in vitamins and healthy fats. These fats can help lower bad cholesterol. The fiber in avocado also aids digestion. Cocoa powder is full of antioxidants. It can improve heart health while making brownies delicious. Maple syrup is a lower glycemic option. It can provide a steady energy boost without a sugar crash. Switching to whole wheat flour adds more nutrients. It has more fiber than white flour. This helps keep you full longer. If you need gluten-free options, use almond flour instead of whole wheat. It works well and keeps the taste rich. For a vegan-friendly version, replace honey with maple syrup. Use a nut butter that fits your diet. You can also find dairy-free chocolate chips easily. These easy swaps ensure everyone can enjoy these healthy chocolate avocado brownies! - Preheat your oven to 350°F (175°C). - Line an 8x8 inch baking pan with parchment paper. Leave some paper hanging over the edges. This helps with easy removal later. - Take your ripe avocado and mash it in a bowl. You want it smooth and creamy. You can also use a food processor for this step. - In the same bowl, add maple syrup (or honey), almond butter, and vanilla extract. Mix until everything is blended well. - In a different bowl, whisk together cocoa powder, whole wheat flour, baking soda, and salt. Make sure these dry ingredients are mixed well. - Gradually add the dry mix to the wet mix. Stir gently until just combined. It’s okay to have a few lumps; this helps keep the brownies soft. - Fold in dark chocolate chips so they are evenly spread in the batter. - Pour the batter into your prepared pan. Use a spatula to smooth it out evenly. - Place the pan in your oven. Bake for 20-25 minutes. - To check if they are done, insert a toothpick into the center. It should come out with a few moist crumbs but not wet batter. - Once baked, let the brownies cool in the pan on a wire rack for 15 minutes. Use the parchment paper to lift them out. Let them cool further before cutting into squares. Enjoy making these Healthy Chocolate Avocado Brownies with the [Full Recipe]. To make your brownies just right, avoid overmixing. When you combine wet and dry ingredients, mix gently. A few lumps are okay. This keeps your brownies soft and fudgy. Even baking is also key. Make sure to spread the batter evenly in the pan. This helps them bake at the same time. For a lovely presentation, dust the brownies with cocoa powder or powdered sugar. You can also serve them with fresh berries. A dollop of yogurt adds creaminess and balances the rich chocolate. These simple touches make your brownies look great on any plate. You can boost the taste of your brownies easily. Try adding spices like cinnamon or a pinch of sea salt. A splash of almond or peppermint extract gives a fun twist. Using flavored chocolate chips adds another layer of taste. Think about using orange or hazelnut chips for a unique flavor profile. Check out the Full Recipe for more ideas! {{image_4}} To make these brownies gluten-free, swap whole wheat flour for almond flour or coconut flour. These options keep the texture rich and moist while avoiding gluten. Just remember to adjust the amount, as almond flour is more absorbent. For a vegan twist, replace honey with maple syrup. You can also use a plant-based nut butter, like almond or sunflower seed butter, instead of peanut butter. This keeps the flavor intact without any animal products. You can add a fresh twist to these brownies by mixing in mint extract. Use about 1 teaspoon of pure mint extract for a refreshing flavor. This makes mint chocolate avocado brownies that are perfect for any mint lover! Another fun option is to create a peanut butter swirl. Drop spoonfuls of peanut butter into the brownie batter before baking. Use a knife to swirl it around for a beautiful marbled look. This adds a delicious peanut flavor that pairs well with chocolate. If you want to change the serving size, you can easily convert the recipe. For a smaller batch, halve the ingredients. Use a smaller pan, like 6x6 inches, and keep an eye on the baking time. Smaller brownies will bake faster. You can also bake these brownies in a larger pan for thinner squares. A 9x13 inch pan works well, but adjust the baking time to about 15-20 minutes. Check for doneness with a toothpick, just like before. For the full recipe, check out the details above! To keep your brownies fresh, store them in an airtight container. This prevents air from making them dry. You can also place a slice of bread in the container. The bread helps maintain moisture. Always let brownies cool before storing. This avoids steam build-up, which can make them soggy. If you want to freeze brownies, first cut them into squares. Wrap each piece tightly in plastic wrap. Then, place them in a freezer-safe bag or container. This helps avoid freezer burn. When you're ready to eat them, just take out a piece and let it thaw at room temperature. You can also warm them in the microwave for a few seconds. Brownies last about 3-4 days at room temperature. If you see any mold, throw them away. To keep them fresh longer, refrigerate or freeze them. Refrigeration can extend their life to about a week. For best taste, enjoy them within a few days. For the full recipe, check out the provided details. Can I use ripe bananas instead of avocado? Yes, you can use ripe bananas. They add sweetness and moisture. However, the flavor changes slightly. Bananas may make the brownies taste fruitier. If you love banana, give it a try! How can I make these brownies less sweet? To reduce sweetness, cut back on the maple syrup or honey. You can also swap some sweetener for unsweetened applesauce. This keeps the texture but lowers the sugar. What is the best way to test brownies for doneness? The best way is to use a toothpick. Insert it in the center. If it comes out with a few moist crumbs, the brownies are done. If it has wet batter, bake a bit longer. Can these brownies be made without flour? Yes, you can make them without flour. Use a blend of nut flour or almond flour instead. This gives a nutty flavor and keeps the brownies moist. How many calories are in a serving? Each brownie has about 100 calories. This can change based on the ingredients you use. For example, using less sweetener or different nut butter may alter the calorie count. What are good dairy-free alternatives for chocolate chips? Look for dairy-free dark chocolate chips. Many brands make these with coconut or almond milk. You can also chop up a dairy-free chocolate bar for chunks. In this article, I covered a delicious brownie recipe that uses healthy ingredients. You learned about the key components, their nutritional benefits, and how to adapt the recipe for dietary needs. I shared step-by-step instructions for baking these brownies to perfection. With tips on flavor and texture, you can create the best version. Remember to store your leftovers properly to keep them fresh. Enjoy baking these brownies, knowing they are a tasty treat that can fit your diet!](https://goldendishy.com/wp-content/uploads/2025/06/19347e51-2d6e-4328-baa5-83086a8293f2-768x768.webp)


. To keep your scones fresh, let them cool completely. Place them in an airtight container. You can store them at room temperature for up to three days. If you live in a humid area, refrigerate them to prevent spoilage. Use parchment paper between layers to keep them from sticking. Reheat your scones for the best taste. Preheat your oven to 350°F (175°C). Place the scones on a baking sheet. Heat them for about 5 to 10 minutes, or until warm. You can also use a microwave. Heat them for 15 to 20 seconds. This warms them quickly but may make them soft. To freeze scones, wrap each one in plastic wrap. Place them in a freezer bag or airtight container. Label with the date for easy tracking. They can last up to three months in the freezer. When ready to eat, thaw them in the fridge overnight. Reheat as mentioned above for a fresh taste. Check the Full Recipe for more tips on making these treats! To make cinnamon roll scones, follow this simple process. First, mix the dry ingredients in a bowl. This includes flour, sugar, baking powder, salt, and cinnamon. Next, cut in cold butter until the mix looks crumbly. Then, whisk buttermilk, melted butter, and vanilla in another bowl. Combine the wet and dry mixes gently. Pat the dough into a rectangle, brush melted butter, and sprinkle brown sugar for the swirl. Roll it up, slice it, and bake. For the full recipe, check the details above. Yes, you can use milk instead of buttermilk. If you do, add a splash of lemon juice or vinegar. This helps the milk mimic buttermilk's tangy flavor. It also makes the scones soft and fluffy. However, buttermilk adds a richer taste. Serve cinnamon roll scones warm for the best taste. Drizzle the icing over the top just before serving. You can also sprinkle a little cinnamon on top for added flavor. Pair them with coffee or tea for a relaxing treat. They look great on a nice platter. Cinnamon roll scones last for about two days at room temperature. To keep them fresh longer, store them in an airtight container. You can also refrigerate them for up to a week. Just warm them in the oven before serving to regain that fresh-baked taste. Yes, you can make cinnamon roll scones ahead of time. Prepare the dough, and cut the scones. Then, place them on a baking sheet and freeze until firm. After that, transfer them to a bag or container. When you’re ready, bake them straight from the freezer, adding a few extra minutes to the baking time. This way, you enjoy fresh scones anytime! Making scones is simple and fun. You learned about ingredients, tools, and baking steps. I shared tips to help you avoid mistakes and find the best flavors. You also discovered flavor variations and storage methods. Scones can be your tasty treat for any occasion. With a few easy steps, you can impress your friends. Enjoy baking, and don’t forget to share your tasty results!](https://goldendishy.com/wp-content/uploads/2025/07/878de396-77ac-4fc1-b8cf-b56551936fe1-768x768.webp)