
Garlic Butter Grilled Shrimp Tacos Fresh and Flavorful
![- 1 pound fresh shrimp, peeled and deveined - 3 tablespoons unsalted butter, divided - 4 cloves garlic, finely minced - 1 teaspoon smoked paprika - 1 teaspoon ground cumin - Salt and freshly ground black pepper, to taste - 8 small corn tortillas - 1 cup red cabbage, finely shredded - 1 ripe avocado, sliced into thin wedges - Fresh cilantro leaves, roughly chopped, for garnish - Lime wedges, cut into quarters, for serving To make these garlic butter grilled shrimp tacos, you need fresh shrimp. I recommend getting shrimp that are firm and have a nice sheen. Make sure they are peeled and deveined for easy eating. Butter is key for adding richness. Use unsalted butter so you can control the saltiness. Garlic adds a wonderful aroma and flavor. Mince it finely for the best taste. For spices, smoked paprika brings a deep, smoky flavor. Ground cumin adds warmth. Be sure to season with salt and black pepper to taste. Corn tortillas are the perfect wrap. They are soft and add a nice corn flavor. Red cabbage gives a crunchy texture and a pop of color. Sliced avocado adds creaminess. Fresh cilantro gives a burst of freshness. Finally, lime wedges add a zesty kick. To see the full recipe, check out the [Full Recipe]. To start, melt 2 tablespoons of unsalted butter in a large skillet. Use medium heat. Once the butter is melted, add 4 cloves of minced garlic. Sauté the garlic for 1-2 minutes. It should smell great and turn a light golden color. Be careful not to burn the garlic! Next, stir in 1 teaspoon of smoked paprika and 1 teaspoon of ground cumin. Add a pinch of salt and fresh black pepper to taste. Mix well. This creates a tasty marinade for the shrimp. Now, add 1 pound of peeled and deveined shrimp to the skillet. Cook the shrimp for 3-4 minutes. Stir occasionally to make sure they cook evenly. You will know they are done when they turn opaque and pink. This buttery garlic mixture makes them extra delicious! While the shrimp cooks, take another skillet and heat it over medium-high heat. Warm each of the 8 small corn tortillas for about 30 seconds on each side. You want them to be soft and flexible. Look for slight char marks on the tortillas. This adds great flavor! To build your tacos, take a warm tortilla and layer some cooked shrimp in the center. Then, top it with shredded red cabbage and avocado slices. The cabbage adds crunch, while the avocado gives creaminess. Finish off your tacos by adding fresh cilantro on top. Serve them with lime wedges on the side for a zesty touch. For a nice presentation, arrange the tacos on a colorful platter. You can add extra cilantro and lime wedges to make it look even better. Enjoy every bite with a squeeze of lime! When picking shrimp, you have two main choices: fresh or frozen. Fresh shrimp can taste better, but frozen shrimp is often just as good. If you choose frozen shrimp, look for those that are flash-frozen right after harvest. This keeps them fresh and tasty. Size matters too! For tacos, I suggest using medium to large shrimp. They hold up well in the taco and give you a satisfying bite. Aim for shrimp that are about 21 to 30 per pound. To boost the flavor, you can swap the spices. Try adding chili powder or even a pinch of cayenne for heat. If you want a smoky taste, smoked paprika works wonders. You can also mix in some lime zest for a bright kick. To elevate your tacos, think about toppings. Mango salsa adds sweetness, while jalapeños bring heat. A drizzle of sour cream or a splash of hot sauce can make your tacos sing. Do not overcook your shrimp. They cook quickly and should only take 3-4 minutes. When they turn pink and opaque, they are done. Overcooking makes them tough and rubbery. For the tortillas, warmth is key. Heat them in a hot skillet for about 30 seconds on each side. This gives them a nice char and keeps them soft. You can also wrap them in a clean towel to keep them warm while you assemble your tacos. {{image_4}} You can switch the shrimp for other proteins. Chicken is a great option. Use boneless chicken breasts cut into bite-sized pieces. Season them like the shrimp. Cook until golden brown and juicy. Fish also works well. Choose firm fish like mahi-mahi or cod. Grill or pan-fry the fish until flaky. For a vegetarian twist, try veggies or tofu. Grilled bell peppers, onions, and zucchini make a colorful filling. Tofu absorbs flavors well, so marinate it before grilling. Want to spice things up? Add jalapeños or your favorite hot sauce. Slice jalapeños and mix them in with the shrimp. This adds a nice kick. You can change the toppings too. Mango salsa adds sweetness and freshness. Just mix diced mango, red onion, and lime juice. Another tasty option is crema. This creamy sauce balances the spices. Mix sour cream with lime juice and a pinch of salt. Serve your tacos with tasty sides. A fresh salad pairs well. Try a simple cucumber and tomato salad. Rice and beans are classic choices too. Cilantro lime rice adds bright flavor. For drinks, grab a cold beer or a zesty margarita. A light, fruity drink will complement the meal. Explore the full recipe for more ideas. To keep your garlic butter grilled shrimp tacos fresh, store them in an airtight container. Place the shrimp and toppings in separate containers. This helps maintain the flavors and textures. For the tortillas, wrap them in foil or plastic wrap. This keeps them soft and prevents them from drying out. Use them within three days for the best taste. To reheat the shrimp, place them in a skillet over low heat. Add a splash of water or a bit of butter to keep them moist. Heat for about five minutes, stirring gently. For the tortillas, warm them in a dry skillet for about 30 seconds each side. This method helps keep them soft and adds a nice char. Avoid using the microwave, as it may make them chewy. Yes, you can freeze grilled shrimp! Cool the shrimp completely before placing them in a freezer-safe bag. Squeeze out as much air as possible to prevent freezer burn. They can last up to three months in the freezer. When you're ready to use them, thaw overnight in the fridge. For meal prep, consider freezing the shrimp without the seasonings. This way, you can add fresh spices when you cook them later. You can tell when shrimp are cooked by looking for a few signs. First, they change color from grey to bright pink. Second, they curl into a C shape. Finally, perfectly cooked shrimp feel firm to the touch. If they are tough or rubbery, they may be overcooked. The cooking time is usually 3-4 minutes, but this can vary with size. Yes, you can prepare some parts of the tacos in advance. Cook the shrimp and store them in the fridge for up to two days. You can also warm the tortillas just before serving. If you want to save time, chop the cabbage and avocado ahead of time. Just remember to squeeze lime juice on the avocado to keep it fresh and green. Some great sides to serve with shrimp tacos include: - Cilantro lime rice - Black beans - Corn salad - Chips with salsa - Grilled vegetables These sides balance the flavors of the shrimp tacos and make the meal more complete. You can also serve a light salad to add freshness. You learned how to make delicious shrimp tacos from scratch. We covered fresh ingredients, step-by-step cooking, and tasty toppings. Remember, fresh shrimp and warm tortillas make a big difference. You can customize flavors with spices or different proteins. Enjoy serving them with a refreshing drink on the side. Proper storage will keep your leftovers tasty too. Whether you’re cooking for one or many, these tacos are a hit. Enjoy your cooking and get ready for a yummy meal.](https://goldendishy.com/wp-content/uploads/2025/06/f6806160-83d3-4aa8-a207-34a87a11273f.webp)
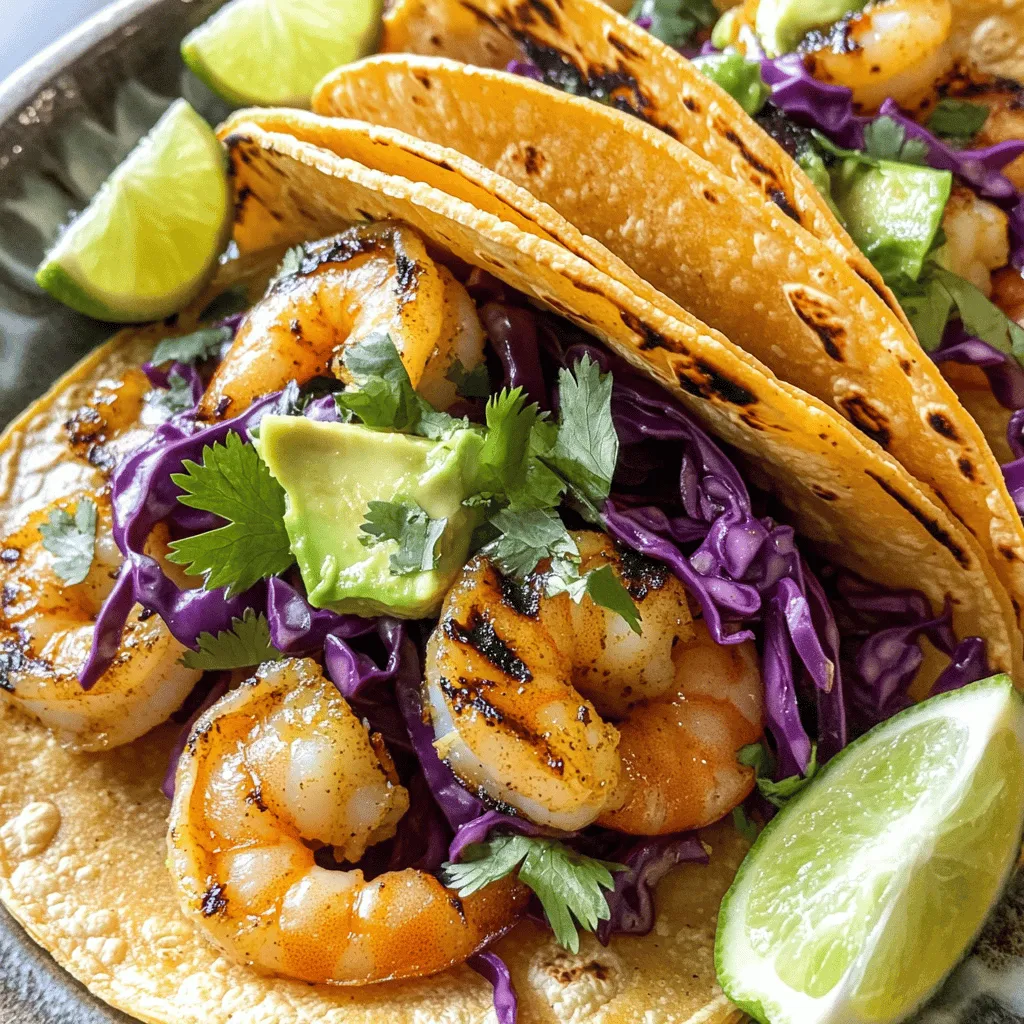
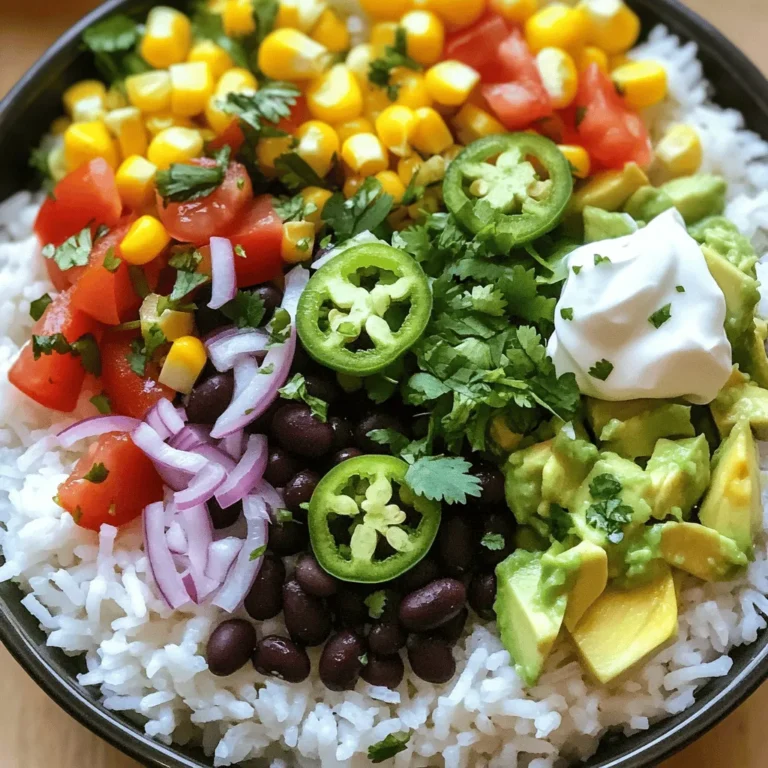
If you love fresh and tasty tacos, you’re in for a treat! Garlic Butter Grilled Shrimp Tacos are a game-changer. Picture plump shrimp sizzling in garlic butter, topped with crunchy cabbage and creamy avocado. In just a few easy steps, you can whip up a meal that’s bursting with flavor. Let’s dive into this simple recipe that will make your next taco night unforgettable!
Ingredients
Main Ingredients
– 1 pound fresh shrimp, peeled and deveined
– 3 tablespoons unsalted butter, divided
– 4 cloves garlic, finely minced
Spices and Seasoning
– 1 teaspoon smoked paprika
– 1 teaspoon ground cumin
– Salt and freshly ground black pepper, to taste
Toppings and Wraps
– 8 small corn tortillas
– 1 cup red cabbage, finely shredded
– 1 ripe avocado, sliced into thin wedges
– Fresh cilantro leaves, roughly chopped, for garnish
– Lime wedges, cut into quarters, for serving
To make these garlic butter grilled shrimp tacos, you need fresh shrimp. I recommend getting shrimp that are firm and have a nice sheen. Make sure they are peeled and deveined for easy eating.
Butter is key for adding richness. Use unsalted butter so you can control the saltiness. Garlic adds a wonderful aroma and flavor. Mince it finely for the best taste.
For spices, smoked paprika brings a deep, smoky flavor. Ground cumin adds warmth. Be sure to season with salt and black pepper to taste.
Corn tortillas are the perfect wrap. They are soft and add a nice corn flavor. Red cabbage gives a crunchy texture and a pop of color. Sliced avocado adds creaminess. Fresh cilantro gives a burst of freshness. Finally, lime wedges add a zesty kick.
Step-by-Step Instructions
Preparing the Garlic Butter
To start, melt 2 tablespoons of unsalted butter in a large skillet. Use medium heat. Once the butter is melted, add 4 cloves of minced garlic. Sauté the garlic for 1-2 minutes. It should smell great and turn a light golden color. Be careful not to burn the garlic!
Next, stir in 1 teaspoon of smoked paprika and 1 teaspoon of ground cumin. Add a pinch of salt and fresh black pepper to taste. Mix well. This creates a tasty marinade for the shrimp.
Cooking the Shrimp
Now, add 1 pound of peeled and deveined shrimp to the skillet. Cook the shrimp for 3-4 minutes. Stir occasionally to make sure they cook evenly. You will know they are done when they turn opaque and pink. This buttery garlic mixture makes them extra delicious!
Warming the Tortillas
While the shrimp cooks, take another skillet and heat it over medium-high heat. Warm each of the 8 small corn tortillas for about 30 seconds on each side. You want them to be soft and flexible. Look for slight char marks on the tortillas. This adds great flavor!
Assembling the Tacos
To build your tacos, take a warm tortilla and layer some cooked shrimp in the center. Then, top it with shredded red cabbage and avocado slices. The cabbage adds crunch, while the avocado gives creaminess.
Garnishing and Serving
Finish off your tacos by adding fresh cilantro on top. Serve them with lime wedges on the side for a zesty touch. For a nice presentation, arrange the tacos on a colorful platter. You can add extra cilantro and lime wedges to make it look even better. Enjoy every bite with a squeeze of lime!
Tips & Tricks
Choosing the Best Shrimp
When picking shrimp, you have two main choices: fresh or frozen. Fresh shrimp can taste better, but frozen shrimp is often just as good. If you choose frozen shrimp, look for those that are flash-frozen right after harvest. This keeps them fresh and tasty.
Size matters too! For tacos, I suggest using medium to large shrimp. They hold up well in the taco and give you a satisfying bite. Aim for shrimp that are about 21 to 30 per pound.
Enhancing Flavor
To boost the flavor, you can swap the spices. Try adding chili powder or even a pinch of cayenne for heat. If you want a smoky taste, smoked paprika works wonders. You can also mix in some lime zest for a bright kick.
To elevate your tacos, think about toppings. Mango salsa adds sweetness, while jalapeños bring heat. A drizzle of sour cream or a splash of hot sauce can make your tacos sing.
Cooking Techniques
Do not overcook your shrimp. They cook quickly and should only take 3-4 minutes. When they turn pink and opaque, they are done. Overcooking makes them tough and rubbery.
For the tortillas, warmth is key. Heat them in a hot skillet for about 30 seconds on each side. This gives them a nice char and keeps them soft. You can also wrap them in a clean towel to keep them warm while you assemble your tacos.
Variations
Different Proteins
You can switch the shrimp for other proteins. Chicken is a great option. Use boneless chicken breasts cut into bite-sized pieces. Season them like the shrimp. Cook until golden brown and juicy.
Fish also works well. Choose firm fish like mahi-mahi or cod. Grill or pan-fry the fish until flaky.
For a vegetarian twist, try veggies or tofu. Grilled bell peppers, onions, and zucchini make a colorful filling. Tofu absorbs flavors well, so marinate it before grilling.
Flavor Customizations
Want to spice things up? Add jalapeños or your favorite hot sauce. Slice jalapeños and mix them in with the shrimp. This adds a nice kick.
You can change the toppings too. Mango salsa adds sweetness and freshness. Just mix diced mango, red onion, and lime juice.
Another tasty option is crema. This creamy sauce balances the spices. Mix sour cream with lime juice and a pinch of salt.
Sides to Serve
Serve your tacos with tasty sides. A fresh salad pairs well. Try a simple cucumber and tomato salad.
Rice and beans are classic choices too. Cilantro lime rice adds bright flavor.
For drinks, grab a cold beer or a zesty margarita. A light, fruity drink will complement the meal.
Storage Info
Storing Leftovers
To keep your garlic butter grilled shrimp tacos fresh, store them in an airtight container. Place the shrimp and toppings in separate containers. This helps maintain the flavors and textures. For the tortillas, wrap them in foil or plastic wrap. This keeps them soft and prevents them from drying out. Use them within three days for the best taste.
Reheating Instructions
To reheat the shrimp, place them in a skillet over low heat. Add a splash of water or a bit of butter to keep them moist. Heat for about five minutes, stirring gently. For the tortillas, warm them in a dry skillet for about 30 seconds each side. This method helps keep them soft and adds a nice char. Avoid using the microwave, as it may make them chewy.
Freezing Options
Yes, you can freeze grilled shrimp! Cool the shrimp completely before placing them in a freezer-safe bag. Squeeze out as much air as possible to prevent freezer burn. They can last up to three months in the freezer. When you’re ready to use them, thaw overnight in the fridge. For meal prep, consider freezing the shrimp without the seasonings. This way, you can add fresh spices when you cook them later.
FAQs
How do I know when shrimp are cooked?
You can tell when shrimp are cooked by looking for a few signs. First, they change color from grey to bright pink. Second, they curl into a C shape. Finally, perfectly cooked shrimp feel firm to the touch. If they are tough or rubbery, they may be overcooked. The cooking time is usually 3-4 minutes, but this can vary with size.
Can I make these tacos in advance?
Yes, you can prepare some parts of the tacos in advance. Cook the shrimp and store them in the fridge for up to two days. You can also warm the tortillas just before serving. If you want to save time, chop the cabbage and avocado ahead of time. Just remember to squeeze lime juice on the avocado to keep it fresh and green.
What are the best sides to serve with shrimp tacos?
Some great sides to serve with shrimp tacos include:
– Cilantro lime rice
– Black beans
– Corn salad
– Chips with salsa
– Grilled vegetables
These sides balance the flavors of the shrimp tacos and make the meal more complete. You can also serve a light salad to add freshness.
You learned how to make delicious shrimp tacos from scratch. We covered fresh ingredients, step-by-step cooking, and tasty toppings. Remember, fresh shrimp and warm tortillas make a big difference. You can customize flavors with spices or different proteins. Enjoy serving them with a refreshing drink on the side. Proper storage will keep your leftovers tasty too. Whether you’re cooking for one or many, these tacos are a hit. Enjoy your cooking and get ready for a yummy meal.
![- 1 pound fresh shrimp, peeled and deveined - 3 tablespoons unsalted butter, divided - 4 cloves garlic, finely minced - 1 teaspoon smoked paprika - 1 teaspoon ground cumin - Salt and freshly ground black pepper, to taste - 8 small corn tortillas - 1 cup red cabbage, finely shredded - 1 ripe avocado, sliced into thin wedges - Fresh cilantro leaves, roughly chopped, for garnish - Lime wedges, cut into quarters, for serving To make these garlic butter grilled shrimp tacos, you need fresh shrimp. I recommend getting shrimp that are firm and have a nice sheen. Make sure they are peeled and deveined for easy eating. Butter is key for adding richness. Use unsalted butter so you can control the saltiness. Garlic adds a wonderful aroma and flavor. Mince it finely for the best taste. For spices, smoked paprika brings a deep, smoky flavor. Ground cumin adds warmth. Be sure to season with salt and black pepper to taste. Corn tortillas are the perfect wrap. They are soft and add a nice corn flavor. Red cabbage gives a crunchy texture and a pop of color. Sliced avocado adds creaminess. Fresh cilantro gives a burst of freshness. Finally, lime wedges add a zesty kick. To see the full recipe, check out the [Full Recipe]. To start, melt 2 tablespoons of unsalted butter in a large skillet. Use medium heat. Once the butter is melted, add 4 cloves of minced garlic. Sauté the garlic for 1-2 minutes. It should smell great and turn a light golden color. Be careful not to burn the garlic! Next, stir in 1 teaspoon of smoked paprika and 1 teaspoon of ground cumin. Add a pinch of salt and fresh black pepper to taste. Mix well. This creates a tasty marinade for the shrimp. Now, add 1 pound of peeled and deveined shrimp to the skillet. Cook the shrimp for 3-4 minutes. Stir occasionally to make sure they cook evenly. You will know they are done when they turn opaque and pink. This buttery garlic mixture makes them extra delicious! While the shrimp cooks, take another skillet and heat it over medium-high heat. Warm each of the 8 small corn tortillas for about 30 seconds on each side. You want them to be soft and flexible. Look for slight char marks on the tortillas. This adds great flavor! To build your tacos, take a warm tortilla and layer some cooked shrimp in the center. Then, top it with shredded red cabbage and avocado slices. The cabbage adds crunch, while the avocado gives creaminess. Finish off your tacos by adding fresh cilantro on top. Serve them with lime wedges on the side for a zesty touch. For a nice presentation, arrange the tacos on a colorful platter. You can add extra cilantro and lime wedges to make it look even better. Enjoy every bite with a squeeze of lime! When picking shrimp, you have two main choices: fresh or frozen. Fresh shrimp can taste better, but frozen shrimp is often just as good. If you choose frozen shrimp, look for those that are flash-frozen right after harvest. This keeps them fresh and tasty. Size matters too! For tacos, I suggest using medium to large shrimp. They hold up well in the taco and give you a satisfying bite. Aim for shrimp that are about 21 to 30 per pound. To boost the flavor, you can swap the spices. Try adding chili powder or even a pinch of cayenne for heat. If you want a smoky taste, smoked paprika works wonders. You can also mix in some lime zest for a bright kick. To elevate your tacos, think about toppings. Mango salsa adds sweetness, while jalapeños bring heat. A drizzle of sour cream or a splash of hot sauce can make your tacos sing. Do not overcook your shrimp. They cook quickly and should only take 3-4 minutes. When they turn pink and opaque, they are done. Overcooking makes them tough and rubbery. For the tortillas, warmth is key. Heat them in a hot skillet for about 30 seconds on each side. This gives them a nice char and keeps them soft. You can also wrap them in a clean towel to keep them warm while you assemble your tacos. {{image_4}} You can switch the shrimp for other proteins. Chicken is a great option. Use boneless chicken breasts cut into bite-sized pieces. Season them like the shrimp. Cook until golden brown and juicy. Fish also works well. Choose firm fish like mahi-mahi or cod. Grill or pan-fry the fish until flaky. For a vegetarian twist, try veggies or tofu. Grilled bell peppers, onions, and zucchini make a colorful filling. Tofu absorbs flavors well, so marinate it before grilling. Want to spice things up? Add jalapeños or your favorite hot sauce. Slice jalapeños and mix them in with the shrimp. This adds a nice kick. You can change the toppings too. Mango salsa adds sweetness and freshness. Just mix diced mango, red onion, and lime juice. Another tasty option is crema. This creamy sauce balances the spices. Mix sour cream with lime juice and a pinch of salt. Serve your tacos with tasty sides. A fresh salad pairs well. Try a simple cucumber and tomato salad. Rice and beans are classic choices too. Cilantro lime rice adds bright flavor. For drinks, grab a cold beer or a zesty margarita. A light, fruity drink will complement the meal. Explore the full recipe for more ideas. To keep your garlic butter grilled shrimp tacos fresh, store them in an airtight container. Place the shrimp and toppings in separate containers. This helps maintain the flavors and textures. For the tortillas, wrap them in foil or plastic wrap. This keeps them soft and prevents them from drying out. Use them within three days for the best taste. To reheat the shrimp, place them in a skillet over low heat. Add a splash of water or a bit of butter to keep them moist. Heat for about five minutes, stirring gently. For the tortillas, warm them in a dry skillet for about 30 seconds each side. This method helps keep them soft and adds a nice char. Avoid using the microwave, as it may make them chewy. Yes, you can freeze grilled shrimp! Cool the shrimp completely before placing them in a freezer-safe bag. Squeeze out as much air as possible to prevent freezer burn. They can last up to three months in the freezer. When you're ready to use them, thaw overnight in the fridge. For meal prep, consider freezing the shrimp without the seasonings. This way, you can add fresh spices when you cook them later. You can tell when shrimp are cooked by looking for a few signs. First, they change color from grey to bright pink. Second, they curl into a C shape. Finally, perfectly cooked shrimp feel firm to the touch. If they are tough or rubbery, they may be overcooked. The cooking time is usually 3-4 minutes, but this can vary with size. Yes, you can prepare some parts of the tacos in advance. Cook the shrimp and store them in the fridge for up to two days. You can also warm the tortillas just before serving. If you want to save time, chop the cabbage and avocado ahead of time. Just remember to squeeze lime juice on the avocado to keep it fresh and green. Some great sides to serve with shrimp tacos include: - Cilantro lime rice - Black beans - Corn salad - Chips with salsa - Grilled vegetables These sides balance the flavors of the shrimp tacos and make the meal more complete. You can also serve a light salad to add freshness. You learned how to make delicious shrimp tacos from scratch. We covered fresh ingredients, step-by-step cooking, and tasty toppings. Remember, fresh shrimp and warm tortillas make a big difference. You can customize flavors with spices or different proteins. Enjoy serving them with a refreshing drink on the side. Proper storage will keep your leftovers tasty too. Whether you’re cooking for one or many, these tacos are a hit. Enjoy your cooking and get ready for a yummy meal.](https://goldendishy.com/wp-content/uploads/2025/06/f6806160-83d3-4aa8-a207-34a87a11273f-300x300.webp)
![For this recipe, you need key ingredients to make the salmon shine. Here’s what to gather: - 4 salmon fillets (approximately 6 oz each) - 2 tablespoons Sriracha sauce - 3 tablespoons honey - 1 tablespoon soy sauce - 2 cloves garlic, finely minced - 1 tablespoon fresh ginger, finely grated - 2 tablespoons olive oil - Salt and freshly ground black pepper, to taste These main ingredients create a sweet and spicy glaze that makes the salmon pop. Seasoning is crucial in cooking. It helps to enhance the natural flavors of the fish. Use these simple items: - Salt - Freshly ground black pepper Make sure to season both sides of the salmon. This step adds depth to every bite. Garnishes make your dish look great and add extra flavor. For this salmon recipe, you will need: - 1 tablespoon sesame seeds - 2 green onions, thinly sliced Sprinkling these on top gives the meal a beautiful finish. The sesame seeds add crunch, while green onions bring freshness. To see the full details for cooking, check the [Full Recipe]. To make the glaze, grab a medium bowl. Combine 2 tablespoons of Sriracha sauce, 3 tablespoons of honey, and 1 tablespoon of soy sauce. Add 2 minced garlic cloves and 1 tablespoon of freshly grated ginger. Whisk these together until the mixture is smooth. This sweet and spicy glaze will add the perfect flavor to your salmon. Set this aside for later use. Next, take 4 salmon fillets and dry them with a paper towel. This step helps the skin get crispy. Now, sprinkle salt and pepper on both sides of each fillet. Make sure to cover every inch. This simple seasoning enhances the natural taste of the fish. Now, heat 2 tablespoons of olive oil in a large skillet over medium-high heat. Once the oil shimmers, carefully place the salmon fillets in the skillet, skin-side down. Sear them for about 4-5 minutes until the skin turns golden and crispy. Once that happens, gently flip the fillets over. Lower the heat to medium and pour the glaze over the salmon. Cook for another 4-5 minutes, basting the salmon occasionally with the glaze. When it is cooked through and caramelized, remove the fillets from the skillet. Enjoy every bite of this flavorful salmon dish! For the full recipe, check out the details above! To get that perfect crispy skin, start with dry salmon. Use a paper towel to pat it well. This removes extra moisture, which helps the skin crisp nicely. Heat your skillet until it shimmers before adding the salmon. Place the fillets skin-side down and don’t move them for the first few minutes. This helps create a nice golden crust. Sear for about 4-5 minutes, then flip gently to finish cooking. If you like a milder glaze, reduce the Sriracha amount. Start with 1 tablespoon instead of 2. You can also add extra honey to balance the heat. For spice lovers, add more Sriracha or a pinch of cayenne pepper. Taste the glaze before pouring it on the salmon. This way, you can adjust it to your liking. Using the right tools makes cooking easier. Here’s what I recommend: - Large skillet for searing - Mixing bowl for the glaze - Whisk for blending ingredients - Paper towels for drying salmon - Spatula for flipping fillets These tools help you create a delicious Sriracha honey glazed salmon from the [Full Recipe]. {{image_4}} You can switch up the Sriracha honey glaze if you want. Try a sweet soy glaze instead. Mix soy sauce, brown sugar, and ginger for a tasty alternative. You can also use teriyaki sauce for a different flavor. It adds a rich, savory taste that pairs well with salmon. Another option is a citrus glaze. Mix orange juice and honey for a bright, zesty twist. While salmon shines in this recipe, other fish work too. Try using trout, which has a similar flavor and texture. Mahi-mahi also holds up well to grilling and glazing. Cod is another great option, as it absorbs flavors nicely. Each fish brings its own unique taste, so feel free to experiment. Toppings can elevate your dish further. Try adding sliced avocados for creaminess. Chopped cilantro or parsley adds a fresh touch. You can also sprinkle crushed peanuts or cashews for crunch. For a spicy kick, add sliced jalapeños. These toppings can make your meal even more fun and flavorful. Enjoy customizing your Sriracha honey glazed salmon with these ideas! Store your leftover salmon in an airtight container. Make sure to let it cool first. Place a piece of parchment paper between layers if stacking. This keeps the fish from sticking together. Refrigerate the salmon for up to three days. If you plan to keep it longer, freezing is a better option. To reheat, use the oven for the best taste. Preheat to 350°F (175°C). Place the salmon on a baking sheet and cover it with foil. Heat for about 10 to 15 minutes. This keeps the salmon moist and tasty. You can also use the microwave. Heat it in short bursts of 30 seconds. Check often to avoid overcooking. If you want to freeze your salmon, do it right after cooking. Wrap each piece tightly in plastic wrap. Then, place them in a freezer bag. Remove as much air as you can before sealing. You can freeze it for up to three months. When ready to eat, thaw it in the fridge overnight before reheating. For more ideas, check out the Full Recipe. You can tell if the salmon is cooked when it flakes easily with a fork. The flesh should be opaque and no longer translucent. A good rule is to cook it for about 4-5 minutes per side, depending on thickness. Use a food thermometer if you want to be precise. The internal temperature should reach 145°F (63°C). Cooking it just right keeps it moist and tasty. Yes, you can prepare the glaze ahead of time. Just store it in the fridge in an airtight container. This makes cooking easier later. However, I recommend cooking the salmon fresh. This keeps it juicy and full of flavor. If you must, you can cook the salmon and store it in the fridge for up to 2 days. For a full meal, pair the salmon with fluffy jasmine rice or quinoa. Steamed broccoli or snap peas add color and crunch. You can also serve it with a fresh salad for a light touch. If you want something more filling, try roasted potatoes or sweet potatoes. These sides balance the bold flavors of the salmon well. Check out the Full Recipe for more details! This blog post shared key details about making Sriracha Honey Glazed Salmon. You learned what ingredients to use, including seasoning and garnishes. I outlined simple steps to prepare the glaze, season the fish, and achieve that perfect sear. Plus, you found helpful tips for crispy skin and spice adjustments. I also covered variations for sauces and fish, along with storage options for leftovers. Savor this dish and share it with others. Enjoy your cooking!](https://goldendishy.com/wp-content/uploads/2025/07/1e0cb0f2-d69e-43b4-ab0e-316143d411f1-768x768.webp)