Crispy Potato Wedges Simple and Flavorful Recipe

Are you ready to elevate your snack game? My crispy potato wedges are simple to make and bursting with flavor. With just a few ingredients, you’ll create golden, crunchy bites that your friends and family will love. Whether you’re watching a game or enjoying a cozy night in, these wedges are the perfect addition to your table. Let’s dive into the easy recipe and get cooking!
Ingredients
Here’s what you need for crispy potato wedges.
– 4 large russet potatoes
– 3 tablespoons olive oil
– 1 teaspoon garlic powder
– 1 teaspoon onion powder
– 1 teaspoon smoked paprika
– 1/2 teaspoon cayenne pepper
– 1 teaspoon dried oregano
– Salt and freshly ground black pepper to taste
– Fresh parsley, finely chopped (for garnish)
These ingredients create amazing flavor and texture. The russet potatoes give you that fluffy inside and crispy outside. Olive oil helps in browning the wedges. Garlic powder and onion powder add depth. Smoked paprika brings warmth, while cayenne pepper adds a kick. Oregano gives a hint of earthiness. Use salt and pepper to enhance all these great flavors. Fresh parsley adds a lovely touch at the end.
Step-by-Step Instructions
Preparation Steps
– Preheat oven to 425°F (220°C).
– Wash and slice potatoes into wedges.
– Prepare seasoning blend.
First, I start by preheating my oven to 425°F (220°C). This high heat helps make the wedges crispy. While the oven heats up, I wash the russet potatoes. I scrub them well but keep the skins on for texture. Next, I slice each potato in half lengthwise. Then, I quarter each half to create wedge shapes.
Now it’s time to prepare the seasoning blend. In a bowl, I mix together the olive oil, garlic powder, onion powder, smoked paprika, cayenne pepper, oregano, and a good pinch of salt and pepper. This blend gives the wedges a great flavor.
Cooking Steps
– Toss the potato wedges in the seasoning.
– Arrange on baking sheet and bake.
– Flip wedges halfway for even cooking.
Once I have the seasoning ready, I toss the potato wedges in it. I make sure every wedge gets coated. This step is key for flavor. Next, I arrange the seasoned wedges in a single layer on a baking sheet. I avoid overcrowding them; this helps them crisp up nicely.
I place the baking sheet in the oven and bake for 30 to 35 minutes. At the halfway point, I flip the wedges to ensure they brown evenly. When they turn golden brown, I know they are ready.
Final Touch
– Garnish and serve.
After baking, I take the wedges out of the oven and let them cool for a minute. I like to finish them off by garnishing with fresh parsley. This adds a nice pop of color and freshness. These crispy potato wedges are now ready to enjoy!
Tips & Tricks
Achieving Crispiness
To get crispy potato wedges, arrange them in a single layer. This allows the heat to circulate evenly around each wedge. If you stack them or crowd the pan, they steam instead of crisping. Flip the wedges halfway through cooking. This step helps both sides brown and crisp up perfectly.
Seasoning Adjustments
You can change the spice level to fit your taste. If you like heat, add more cayenne pepper. For milder flavor, use less. Try using different herbs, like rosemary or thyme, for a fresh twist. You can also experiment with curry powder or Italian seasoning.
Cooking Methods
Oven baking is great, but air frying is an excellent option too. Air fryers can make them even crispier while using less oil. If you prefer grilling, you can cook wedges on a grill for a smoky flavor. Just make sure to watch them closely to prevent burning.

Variations
Flavor Variations
You can take your crispy potato wedges to new heights. Here are two tasty ideas:
– Cheesy herb wedges: Add shredded cheese and fresh herbs. Try mixing in parmesan and thyme before baking. The cheese will melt and create a delightful crust.
– Spicy buffalo-style wedges: Toss the wedges in buffalo sauce after baking. This adds heat and flavor. Serve with blue cheese dressing for a cool counterbalance.
Dietary Modifications
If you have dietary needs, here are some easy swaps:
– Vegan alternatives: Use vegetable oil instead of olive oil. This keeps it plant-based. You can also skip cheese or use a vegan cheese if you try the cheesy variation.
– Gluten-free considerations: This recipe is naturally gluten-free. Just check your seasoning blends. Some spices may have additives with gluten.
Serving Suggestions
Pair your crispy potato wedges with fun dips and mains:
– Pairing with dips: Try serving with ketchup, ranch, or spicy mayo. These will enhance the flavor and make it more fun.
– Ideal mains to serve alongside: Crispy wedges pair nicely with grilled chicken or veggie burgers. They also work great with steak or a fresh salad.Enjoy!
Storage Info
Storing Leftovers
To keep your crispy potato wedges fresh, follow these tips:
– Refrigeration: Place the cooled wedges in an airtight container. They can last up to 3 days in the fridge. If you want optimal crispiness, store them without any sauce.
– Freezing: For longer storage, freeze the wedges. Place them in a single layer on a baking sheet. Once frozen, transfer them to a freezer bag. They can last for up to 2 months.
Reheating Suggestions
To enjoy your crispy potato wedges again, use these methods:
– Restoring Crispiness: The best way to make them crispy is to use the oven. Preheat your oven to 400°F (200°C). Spread the wedges on a baking sheet and bake for 10-15 minutes. They will crisp up beautifully.
– Microwave vs. Oven: The microwave is quick but may make the wedges soft. If you’re short on time, use it for about 1 minute. However, if you want that crunchy texture, the oven is the way to go.
FAQs
How long do crispy potato wedges last?
Crispy potato wedges can last in the fridge for about 3 to 5 days. Store them in an airtight container. If you want to keep them longer, freeze them. Frozen wedges can last up to 3 months. Just be sure to let them cool completely before freezing.
Can I use other types of potatoes?
Yes, you can use different types of potatoes! Russet potatoes are great for their crispiness, but Yukon Golds or red potatoes work well too. Each type has its own flavor and texture, so feel free to experiment.
How do I make potato wedges crispier?
To make potato wedges crispier, follow these tips:
– Cut the wedges evenly for uniform cooking.
– Soak the potato wedges in cold water for 30 minutes. This helps remove excess starch.
– Use enough oil to coat them well but not drown them.
– Bake them in a single layer without overcrowding.
Can I make these wedges ahead of time?
You can prepare the wedges ahead of time. Cut and season them, then store them in the fridge for up to 24 hours. When ready to cook, pop them in the oven. If you want to freeze them, freeze the raw wedges. Just remember to let them thaw before cooking.
What dips go well with crispy potato wedges?
Popular dips for crispy potato wedges include:
– Ketchup
– Ranch dressing
– Spicy mayo
– Garlic aioli
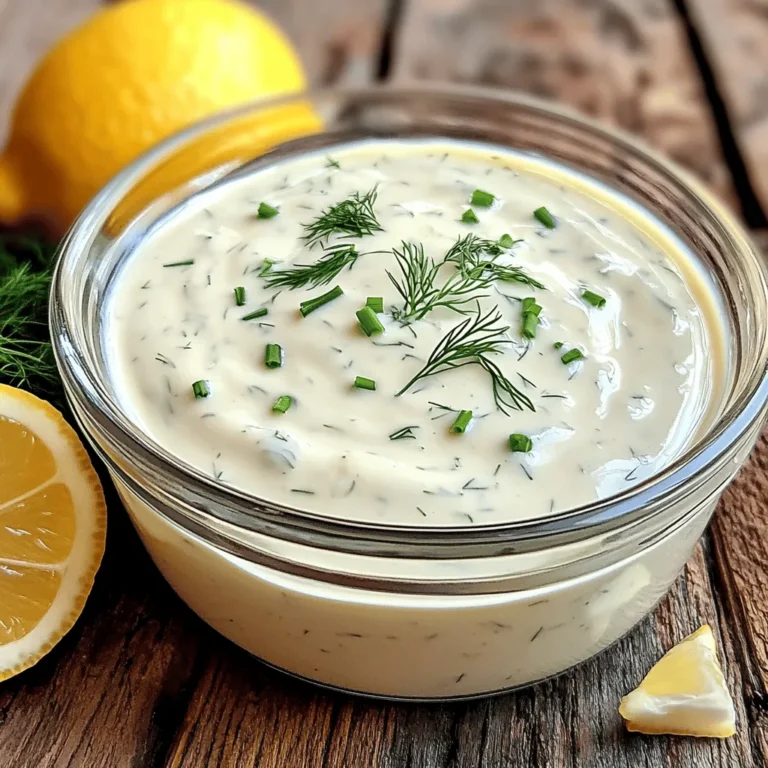
– Sour cream with chives
These dips enhance the flavor and make each bite even better!
This blog post guided you through making crispy potato wedges, from the right ingredients to preparing and cooking methods. Remember, using a single layer on the baking sheet is key for crispiness. You can also tweak the seasonings for your personal taste. Try different potatoes or cooking methods, and don’t forget about delicious dips. Enjoy your tasty wedges as a perfect snack or side dish. Keep exploring and experimenting with flavors!


![- 2 cups cooked chicken breast, shredded - 1 ripe avocado, mashed until smooth - 1/4 cup smooth Greek yogurt - 1 tablespoon freshly squeezed lemon juice - 1/4 cup red onion, finely chopped - 1/2 cup cherry tomatoes, halved - 1/4 cup celery, finely diced - 1/4 teaspoon garlic powder - Salt and freshly ground black pepper to taste - Fresh cilantro or parsley, chopped, for garnish The ingredients in creamy avocado chicken salad make it tasty and healthy. The chicken provides protein, while avocado adds healthy fats. Greek yogurt makes it creamy without extra calories. Fresh veggies like tomatoes and celery give a nice crunch. Using fresh ingredients is key. This brings out the best flavors. You can adjust the amounts based on what you like. For example, add more tomatoes if you love them. Don’t forget the seasoning! Salt and pepper enhance the taste. Fresh herbs like cilantro or parsley top it off perfectly. They add color and flavor. I recommend checking the full recipe for detailed steps. Enjoy making this delicious dish! - Combine mashed avocado, Greek yogurt, and lemon juice in a bowl. - Mix until smooth using a fork or whisk. To make the creamy dressing, start with a ripe avocado. Mash it in a bowl until it is smooth. Next, add 1/4 cup of Greek yogurt. This adds creaminess and protein. Then, squeeze in 1 tablespoon of lemon juice. This will brighten the flavor. Mix these three ingredients well with a fork or whisk. You want a creamy and smooth texture. This creamy dressing is the base of your salad and full of healthy fats. - Add shredded chicken to the avocado mixture. - Stir thoroughly to coat the chicken evenly. Now it’s time to add in the chicken. Use 2 cups of cooked chicken breast, shredded. You can use leftover chicken or rotisserie chicken for ease. Add the chicken to the creamy dressing. Stir well so every piece of chicken is coated. This adds protein and makes the salad filling. The creamy dressing brings all the flavors together. - Gently fold in red onion, cherry tomatoes, and celery. - Season with garlic powder, salt, and black pepper to taste. Next, let’s add some crunch and color. Gently fold in 1/4 cup of finely chopped red onion, 1/2 cup of halved cherry tomatoes, and 1/4 cup of diced celery. These veggies add freshness and texture. Now, season your salad. Add a pinch of garlic powder, salt, and freshly ground black pepper. Taste it and adjust the seasoning as needed. Mix gently so you don’t break the veggies. Now, your creamy avocado chicken salad is ready to serve! Check out the Full Recipe for more details. - Look for avocados that yield slightly to pressure. - Check the color; ripe avocados usually have a darker skin. Selecting the perfect avocado is key for your creamy avocado chicken salad. When you gently press the avocado, it should give a bit. This tells you it is ripe and ready to use. A darker skin tone often means ripeness, but don't rely on color alone. Always feel for that slight softness! - Use rotisserie chicken for convenience. - Ensure chicken is fully cooked; internal temperature should reach 165°F (75°C). Cooking the chicken can take time, but using rotisserie chicken saves you effort. It offers great flavor and saves cooking time. If you cook your own chicken, make sure to check the internal temperature. It needs to reach 165°F (75°C) to be safe to eat. - Serve in individual bowls, atop lettuce leaves, or in a wrap. - Consider a lemon wedge on the side for added flavor. Serving your salad can be fun! You can use individual bowls or place it on crisp lettuce leaves. If you want a wrap, that works too. A lemon wedge on the side brightens the meal and adds a zesty kick. For the full experience, try the [Full Recipe]. Enjoy your tasty and healthy choice! {{image_4}} You can make your creamy avocado chicken salad even better by adding fruits. Diced apples or grapes bring a nice sweetness. They also add a nice crunch. If you want a tropical twist, try adding mango. Its juicy flavor blends well with creamy avocado. Not in the mood for chicken? You can easily swap it out. Canned tuna or chickpeas work well for a vegetarian option. Both of these options add protein and flavor. If you love seafood, consider using grilled shrimp. It adds a fresh, light taste to the salad. Want to spice things up? Adding spices can really boost the flavor. Try cumin or smoked paprika for a warm kick. If you like heat, toss in some jalapeños. These will give your salad a spicy edge that keeps it exciting. Feel free to get creative with your mix-ins! Each variation gives you a new twist on this delicious dish. Check out the Full Recipe for more ideas. Store your creamy avocado chicken salad in an airtight container in the refrigerator. It will stay fresh for up to 2 days. I suggest enjoying it right after you make it. However, if you keep the ingredients separate, it can last a little longer. This way, you keep the textures nice. Do not freeze the salad. Avocado gets mushy when frozen. If you want to prepare ahead, consider freezing the chicken on its own. This will keep it fresh and ready for your salad. Prep your ingredients ahead of time. Store them separately to mix later. This salad is a great option for busy weeks. You can have a tasty meal ready in minutes! For the full recipe, check out the detailed instructions above. Typically lasts for about 2 days when stored properly. I recommend using an airtight container. This helps keep your salad fresh and tasty. After two days, the avocado may brown and lose its creamy texture. Yes, but it’s best to combine the ingredients just before serving to maintain freshness. If you prepare it early, store the salad components separately. This way, the avocado stays bright and creamy. Great with whole-grain bread, crackers, or a side of fruit. I love serving it on toast for a hearty lunch. Pairing it with fresh fruit offers a nice, sweet contrast. You can also use it as a filling in wraps for a tasty twist. For the full recipe, check out the detailed steps above. This creamy avocado chicken salad is easy to make and full of flavor. We covered the main ingredients, steps, and tips to perfect it. You learned how to mix chicken with creamy dressing and fresh veggies. Remember to store leftovers properly for the best taste. Enjoy this salad as a quick meal or snack. Feel free to customize with your favorite ingredients. With these simple tips, you can create a dish that is both healthy and delicious.](https://goldendishy.com/wp-content/uploads/2025/06/50306de2-9119-4a0c-8cb7-3da0c4c0a2a4-768x768.webp)


![- 1 pound fresh asparagus, trimmed - 3 tablespoons unsalted butter - 2 tablespoons freshly squeezed lemon juice - Zest of 1 lemon - 2 cloves garlic, finely minced Fresh asparagus is key to this dish. When you choose asparagus, look for bright green stalks that feel firm. The butter adds richness, while the lemon juice and zest bring a bright, zesty punch. Garlic gives a nice aroma and flavor, making the dish exciting. - Salt and freshly ground black pepper, to taste Salt and pepper enhance all the flavors. Use good-quality salt for the best taste. Freshly ground black pepper adds warmth and a bit of spice. - 1 tablespoon fresh parsley, finely chopped (for garnish) Fresh parsley adds color and freshness. You can also use lemon wedges for extra zing. They allow you to customize how much lemon flavor you want. These small touches make the dish look and taste even better. For the full recipe, check out the details above! Start by washing the fresh asparagus. Rinse it well under cool water to remove dirt. Next, trim the tough ends. You can snap them off or cut 1-2 inches from the bottom. This makes the asparagus more tender and easy to eat. In a large skillet, melt the unsalted butter over medium heat. Watch for the butter to bubble and foam; this means it is hot enough. Once it is ready, add the minced garlic. Cook the garlic for about 30 seconds and stir often. It should smell great but not turn brown. Brown garlic can taste bitter. Now, add the trimmed asparagus to the skillet. Toss it gently in the garlic butter. Make sure each piece gets coated well. Sauté the asparagus for 4-6 minutes. Turn it with tongs so it cooks evenly. You want it bright green and still a bit crisp. Once cooked, drizzle the lemon juice over the asparagus and sprinkle the zest on top. Season with salt and black pepper. Toss everything together to mix the flavors. Finally, transfer the asparagus to a serving dish. Garnish with chopped parsley for a lovely look. For the complete recipe, check the [Full Recipe]. To cook asparagus just right, start with fresh, vibrant stalks. Look for asparagus that is firm and bright green. Trim the ends, as they can be tough. When cooking, aim for a tender yet crisp texture. Sauté for 4 to 6 minutes. The color should become a vivid green. If you want to test doneness, simply pierce a stalk with a fork. It should be easy to pierce but still hold its shape. If you're out of any ingredients, don't worry! You can swap unsalted butter for olive oil. This will give a different flavor but still taste great. For lemon juice, you can use lime juice instead. If you lack fresh garlic, try garlic powder. Use half the amount, as it's stronger. Fresh parsley can be replaced with basil or cilantro for a fun twist. These substitutions keep the dish flavorful while using what you have. How you present your dish matters! Arrange the asparagus neatly on a white platter. This will highlight the bright green color. For a pop of color, add lemon wedges around the sides. This not only looks nice but also invites guests to add more lemon. You can sprinkle extra parsley on top for a fresh look. A simple, clean presentation makes your lemon butter asparagus look gourmet. {{image_4}} You can make Lemon Butter Asparagus a full meal by adding protein. Chicken or shrimp works well. For chicken, use thin strips and sauté them in the butter first. Cook until they turn golden brown. Then, add the asparagus and follow the recipe as usual. For shrimp, add them after the garlic. Cook until they turn pink, then toss in the asparagus. This adds flavor and makes it more filling. To spice things up, add red pepper flakes. Just a pinch can bring a nice kick. You can mix them in with the garlic for a burst of heat. If you love bold flavors, try adding lemon zest or herbs like thyme or basil. These add depth and make the dish more exciting. Feel free to mix in other seasonal vegetables. Cherry tomatoes, bell peppers, or snap peas all pair nicely with asparagus. Add them in the skillet after the garlic to keep them fresh. This not only enhances the taste but also boosts the nutrition of your dish. For the full recipe, check out the details above. After enjoying your Lemon Butter Asparagus, you might have some left. Store it in an airtight container. Keep it in the fridge for up to three days. The asparagus will stay fresh, but it may lose its crispness over time. To reheat, use a skillet over medium heat. Add a splash of water or a bit of butter. This helps keep the asparagus moist. Cook for about 3-4 minutes. Stir occasionally until warm. You can also use a microwave. Heat in 30-second bursts until hot. Freezing is a great option if you want to save this dish for later. Start by blanching the asparagus for 2-3 minutes in boiling water. Then, cool it quickly in ice water. Once cool, drain and pat dry. Place it in a freezer-safe bag, removing as much air as possible. It can stay frozen for up to three months. When you're ready to eat, thaw it in the fridge overnight before reheating. Yes, you can use frozen asparagus. It is a great option if fresh asparagus is not available. Just remember to thaw it first. Drain any excess water before cooking. You may need to adjust cooking time. Frozen asparagus cooks faster, so keep an eye on it. Aim for a tender yet crisp texture. Lemon Butter Asparagus pairs well with many dishes. Here are some ideas: - Grilled chicken - Pan-seared fish - Quinoa or rice - Pasta with olive oil - A fresh salad These options balance the flavors and add variety to your meal. Making lemon butter sauce is simple. Here’s how: 1. Melt butter in a pan over medium heat. 2. Add minced garlic and sauté until fragrant. 3. Stir in freshly squeezed lemon juice and zest. 4. Season with salt and pepper. This easy lemon butter sauce elevates many dishes, not just asparagus. For the full recipe, refer to the earlier sections. In this post, we covered everything you need for Lemon Butter Asparagus. I shared the fresh ingredients, pantry staples, and optional garnishes. We went through step-by-step instructions to prepare and cook each part. Tips and tricks helped you perfect your dish and suggested tasty variations. Finally, I gave you storage info and answered common questions. Embrace this dish, and enjoy your cooking adventure!](https://goldendishy.com/wp-content/uploads/2025/07/9c4cbd12-069a-483d-8240-a9afe0533cf0-768x768.webp)
![Creating Peach and Basil Flatbread is simple and fun. Here’s what you need: - Pre-made flatbread or naan - Ripe peaches - Fresh mozzarella cheese - Fresh basil leaves - Olive oil - Balsamic glaze (optional) - Salt and pepper - Red pepper flakes (optional) Each ingredient adds its own flair. The flatbread or naan forms a sturdy base. Ripe peaches bring sweetness. Fresh mozzarella melts beautifully, creating a rich layer. Fresh basil adds a burst of flavor that ties everything together. Olive oil enhances the taste and helps with crispness. Balsamic glaze can heighten the sweet and tangy notes. Remember to season with salt and pepper for balance. If you like some heat, sprinkle red pepper flakes on top. This mix of ingredients makes for a delightful summer treat. You can find the full recipe to guide you through the steps. 1. Preheat your oven to 425°F (220°C). This helps the flatbread bake evenly. 2. Line a baking sheet with parchment paper. This keeps the flatbread from sticking. Place your flatbread or naan on the lined sheet. 3. Brush the flatbread with olive oil using a spoon or brush. This adds flavor and helps it crisp up. 4. Spread the shredded mozzarella cheese evenly over the flatbread. This creates a creamy base. 5. Layer the thinly sliced peaches on top of the cheese. Make sure each slice is well-placed for the best taste. 6. Season with salt, pepper, and red pepper flakes if you like some heat. This adds extra flavor. 1. Bake the flatbread in the oven for 10-12 minutes. Keep an eye on it until the cheese melts and bubbles. 2. Watch for the cheese to brown lightly. This gives the flatbread a nice, toasty flavor. 1. After baking, take the flatbread out of the oven. Sprinkle the torn basil leaves on top while it's hot. This brings out the fresh aroma. 2. If you want, drizzle balsamic glaze over the flatbread for extra flavor. This adds a sweet and tangy twist. 3. Let the flatbread cool for a couple of minutes. Then slice it up for sharing or enjoying by yourself. This method makes a Peach and Basil Flatbread that bursts with flavor, perfect for summer. For the complete recipe, check [Full Recipe]. - Selecting ripe peaches for the best flavor Choose peaches that feel slightly soft but are not mushy. Look for a rich color, usually yellow or orange, indicating ripeness. The aroma should be sweet and fragrant. These factors ensure your flatbread bursts with juicy flavor. - Cheese melting tips for a creamy texture Use fresh mozzarella for the best melt. Shred it yourself for a creamier texture. Spread the cheese evenly on the flatbread, ensuring each bite has that gooey goodness. Bake until bubbly and golden for added richness. - Seasoning tricks for additional flavor enhancement Season your flatbread with salt and pepper. Add red pepper flakes for a spicy kick if you like heat. A drizzle of balsamic glaze at the end gives a sweet tang. These little touches elevate the dish. - Best sides or drinks to pair with the dish Serve with a fresh green salad or a cool cucumber salad. A chilled white wine or sparkling water pairs nicely. These sides balance the sweetness of the peaches and the creaminess of the cheese. - Presentation tips to impress guests Use a wooden board or a large platter for serving. Garnish with extra basil leaves for color. A small bowl of balsamic glaze on the side invites guests to add more if they wish. This presentation makes the dish even more tempting. For the full recipe, you can check out the details above. Enjoy creating your Peach and Basil Flatbread! {{image_4}} You can change the cheese to create new flavors. Goat cheese adds a tangy taste. Feta cheese brings a salty bite. Both pair well with peaches. You can also add proteins to make it heartier. Prosciutto gives a nice savory touch. Grilled chicken adds a juicy element. Both options enhance the flatbread's flavor. Try different toppings to switch things up. Arugula adds peppery notes. Toasted nuts give a crunchy texture. Both add depth and interest to each bite. You can also explore different herbs. Mint offers a refreshing twist, while thyme adds warmth. Each herb changes the flatbread's character, making it unique. For the full recipe, check the details above to get started on this delightful dish! To keep your Peach and Basil Flatbread fresh, store leftovers in the fridge. Wrap the flatbread in plastic wrap or foil. This helps to prevent it from drying out. You can also place it in an airtight container for extra protection. The flatbread lasts for about 2 to 3 days in the fridge. After that, the quality may decline. When reheating, the oven works best for keeping that crispy texture. Preheat your oven to 350°F (175°C). Place the flatbread directly on the oven rack or on a baking sheet. Heat for about 5 to 8 minutes until warm. If you use a microwave, the flatbread may become soggy. To maintain crispness, heat it in short bursts and check often. Enjoy your flatbread just like it was fresh from the oven! How do I know when the peaches are ripe enough? Look for peaches that are slightly soft to the touch. The color should be a warm golden hue. A sweet aroma is a good sign of ripeness too. If they feel hard, give them a few more days at room temperature. Can I use frozen flatbread or naan for this recipe? Yes, you can use frozen flatbread or naan. Just thaw them first. You may need to adjust baking time. Keep an eye on the cheese to avoid burning. What can I substitute for mozzarella cheese? If you don’t have mozzarella, try goat cheese or feta. They add a tangy flavor. You can also use provolone for a similar texture. How do I make this flatbread in advance? You can prepare the flatbread up to the baking step. Assemble it and store it in the fridge. Bake it when you are ready to serve. This keeps the flatbread fresh and tasty. For the best results, use it within a day. In this blog post, we explored how to make delicious Peach and Basil Flatbread. I shared key ingredients, easy steps, and tips for the best results. Remember to use ripe peaches and choose your cheese wisely. You can even mix in proteins or herbs for unique flavors. Storing leftovers properly keeps them fresh. With easy reheating tips, you can enjoy your flatbread again. Try this recipe for a tasty treat and impress your friends and family! Happy cooking!](https://goldendishy.com/wp-content/uploads/2025/07/1088bccc-4c8b-4254-a72a-0cec77bef739-768x768.webp)