31. Lemon Garlic Butter Shrimp Flavorful Dinner Recipe
. - Heat your skillet over medium heat. - Add the unsalted butter and let it melt. - Once melted, watch for it to bubble gently. - Next, add the minced garlic. - Sauté the garlic for about one minute. - Stir often until it smells great and turns lightly golden. - Now, add the peeled and deveined shrimp to the skillet. - Season the shrimp with salt and pepper. - If you like spice, sprinkle in some red pepper flakes. - Cook the shrimp for 2-3 minutes on one side. - Flip the shrimp to cook the other side evenly. - Add the lemon zest and juice as they cook. - Keep cooking until the shrimp are opaque. - Remove the skillet from the heat. - Stir in the chopped parsley for a fresh taste. - Serve the shrimp over warm pasta or fluffy rice. - Drizzle the leftover lemon-garlic butter sauce on top for extra flavor. - For a lovely presentation, you can garnish with lemon wedges. For more details, check the Full Recipe. - Achieving the perfect shrimp texture: To get tender shrimp, avoid overcooking. Cook them just until they turn pink. This usually takes about 2-3 minutes per side. - Best practices for sautéing garlic: Start with a hot skillet and melted butter. Add minced garlic and stir for about 1 minute. Keep an eye on it so it doesn’t burn; burnt garlic tastes bitter. - Presentation ideas for a beautiful dish: Serve the shrimp in shallow bowls to make it look elegant. Add a sprinkle of parsley on top for color. Include lemon wedges on the side for a fresh touch. - Pairing options with side dishes: Lemon garlic butter shrimp goes well with cooked pasta or fluffy rice. You can also serve it with a side salad for a light meal. - Additional herbs or spices to try: Consider adding fresh basil or thyme for extra flavor. These herbs pair well with lemon and shrimp. - Adjusting spice levels with red pepper flakes: If you like heat, add more red pepper flakes. Start with a teaspoon and adjust to your taste. This will make your dish more exciting! For more details, check the Full Recipe. {{image_4}} You can change the seafood in this recipe. Try scallops or even crab. These swaps add new tastes while keeping the dish simple. If you want a healthier fat, swap butter for olive oil. Olive oil works well and gives a light, fresh flavor. To mix things up, add other citrus flavors. Lime or orange juice can brighten the dish. You can also infuse the recipe with herbs. Try basil or thyme for a different twist. These herbs can make the dish feel more seasonal. If you need a gluten-free option, serve the shrimp over quinoa or zucchini noodles. Both are great gluten-free choices. For a low-calorie meal, cut back on the butter. You can use less or replace it with vegetable broth. This keeps the dish tasty but lighter. After enjoying your lemon garlic butter shrimp, store any leftovers in the fridge. Use an airtight container to keep them fresh. These shrimp will stay good for about 2-3 days. Always check for freshness before eating. To freeze lemon garlic butter shrimp, let them cool completely first. Place them in a freezer-safe bag, removing as much air as possible. They can last for about 2 months in the freezer. When you're ready to eat, thaw the shrimp in the fridge overnight. Reheat them gently in a skillet over low heat. This keeps them tender and tasty. Always ensure your shrimp is safe to eat after storage. Check for any off smells or changes in color. If the shrimp look slimy or smell bad, it’s best to discard them. Trust your senses to keep your meals safe and enjoyable. Cook shrimp for 4-6 minutes. They cook quickly. In a hot skillet, shrimp turn pink when done. Avoid overcooking; it makes them tough. Yes, you can use frozen shrimp. Thaw them first for best results. Place them in cold water for about 15 minutes. This way, they cook evenly and taste fresh. I love serving lemon garlic butter shrimp with: - Cooked pasta - Fluffy rice - Fresh salad - Garlic bread These sides balance the rich flavors well. Check for color and texture. Cooked shrimp turn pink and opaque. They should feel firm but not hard. When in doubt, cut one open. It should be white inside, not translucent. You’ve learned how to make lemon garlic butter shrimp. We covered essential ingredients, easy steps, tips for cooking, and variations to try. Remember to adjust flavors to your taste and pair with your favorite sides. Store leftovers safely for later enjoyment. Cooking shrimp can be simple and satisfying. Enjoy every bite, and don't hesitate to experiment. Whether for a cozy night in or impressing guests, this dish shines every time. Let your kitchen be a place of fun and flavor!](https://goldendishy.com/wp-content/uploads/2025/06/8ad1771e-7d26-4dd4-879b-9e464bbb0647.webp)
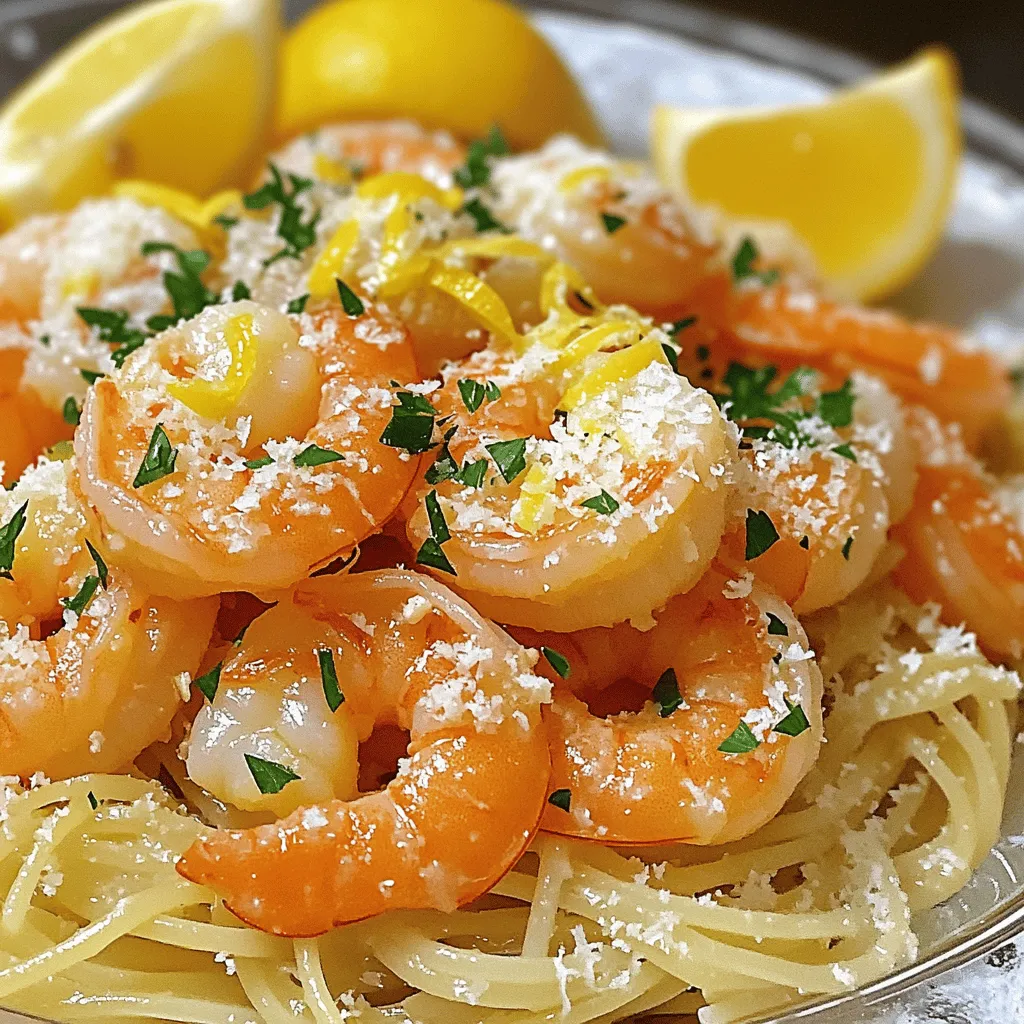
Looking for a quick and tasty dinner? My Lemon Garlic Butter Shrimp recipe is here to save the day! With just a few simple ingredients, you can whip up a mouthwatering dish that shines with fresh flavors. Perfectly sautéed shrimp combined with garlic and lemon make this a dinner winner. Ready to impress your family and friends? Let’s dive into the easy steps to create a flavorful meal they’ll love!
Ingredients
Main Ingredients
– 1 pound large shrimp, peeled and deveined
– 4 tablespoons unsalted butter
– 4 cloves garlic, finely minced
– Zest and juice of 1 fresh lemon
Seasonings
– 1 teaspoon red pepper flakes (optional)
– Salt and freshly ground black pepper
– 2 tablespoons fresh parsley, finely chopped
Serving Suggestions
– Cooked pasta or rice, for serving
– Additional garnish options (e.g. parsley, lemon wedges)
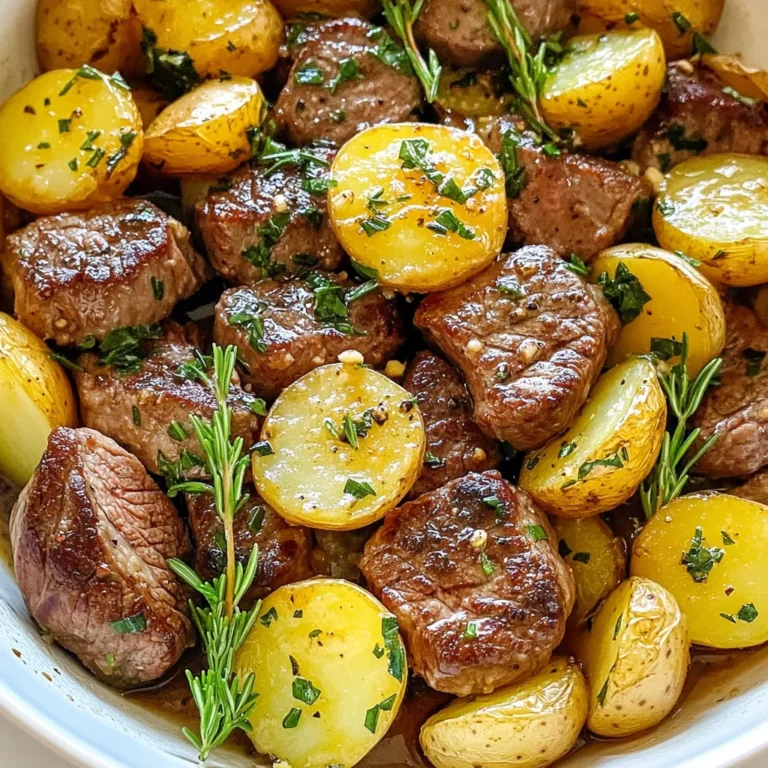
Lemon garlic butter shrimp is a simple dish with big flavor! Start with fresh shrimp. You want them large, peeled, and deveined for the best taste. The butter gives richness, while garlic adds a fragrant punch. Fresh lemon zest and juice brighten the dish. These ingredients work well together. You can also add red pepper flakes if you like heat.
Now, let’s talk about seasonings. Salt and black pepper enhance the flavors. Fresh parsley adds a pop of color and freshness. When you serve this dish, warm pasta or rice makes a great base. You can also garnish with lemon wedges and extra parsley. This creates a lovely presentation.
Step-by-Step Instructions
Preparing the Base
– Heat your skillet over medium heat.
– Add the unsalted butter and let it melt.
– Once melted, watch for it to bubble gently.
– Next, add the minced garlic.
– Sauté the garlic for about one minute.
– Stir often until it smells great and turns lightly golden.
Cooking the Shrimp
– Now, add the peeled and deveined shrimp to the skillet.
– Season the shrimp with salt and pepper.
– If you like spice, sprinkle in some red pepper flakes.
– Cook the shrimp for 2-3 minutes on one side.
– Flip the shrimp to cook the other side evenly.
– Add the lemon zest and juice as they cook.
– Keep cooking until the shrimp are opaque.
Finishing Touches
– Remove the skillet from the heat.
– Stir in the chopped parsley for a fresh taste.
– Serve the shrimp over warm pasta or fluffy rice.
– Drizzle the leftover lemon-garlic butter sauce on top for extra flavor.
– For a lovely presentation, you can garnish with lemon wedges.
Tips & Tricks
Cooking Tips
– Achieving the perfect shrimp texture: To get tender shrimp, avoid overcooking. Cook them just until they turn pink. This usually takes about 2-3 minutes per side.
– Best practices for sautéing garlic: Start with a hot skillet and melted butter. Add minced garlic and stir for about 1 minute. Keep an eye on it so it doesn’t burn; burnt garlic tastes bitter.
Serving Tips
– Presentation ideas for a beautiful dish: Serve the shrimp in shallow bowls to make it look elegant. Add a sprinkle of parsley on top for color. Include lemon wedges on the side for a fresh touch.
– Pairing options with side dishes: Lemon garlic butter shrimp goes well with cooked pasta or fluffy rice. You can also serve it with a side salad for a light meal.
Pro Tips for Flavor Enhancement
– Additional herbs or spices to try: Consider adding fresh basil or thyme for extra flavor. These herbs pair well with lemon and shrimp.
– Adjusting spice levels with red pepper flakes: If you like heat, add more red pepper flakes. Start with a teaspoon and adjust to your taste. This will make your dish more exciting!
Variations
Ingredient Swaps
You can change the seafood in this recipe. Try scallops or even crab. These swaps add new tastes while keeping the dish simple. If you want a healthier fat, swap butter for olive oil. Olive oil works well and gives a light, fresh flavor.
Flavor Variations
To mix things up, add other citrus flavors. Lime or orange juice can brighten the dish. You can also infuse the recipe with herbs. Try basil or thyme for a different twist. These herbs can make the dish feel more seasonal.
Dietary Modifications
If you need a gluten-free option, serve the shrimp over quinoa or zucchini noodles. Both are great gluten-free choices. For a low-calorie meal, cut back on the butter. You can use less or replace it with vegetable broth. This keeps the dish tasty but lighter.
Storage Info
Refrigeration
After enjoying your lemon garlic butter shrimp, store any leftovers in the fridge. Use an airtight container to keep them fresh. These shrimp will stay good for about 2-3 days. Always check for freshness before eating.
Freezing
To freeze lemon garlic butter shrimp, let them cool completely first. Place them in a freezer-safe bag, removing as much air as possible. They can last for about 2 months in the freezer.
When you’re ready to eat, thaw the shrimp in the fridge overnight. Reheat them gently in a skillet over low heat. This keeps them tender and tasty.
Best Practices for Safety
Always ensure your shrimp is safe to eat after storage. Check for any off smells or changes in color. If the shrimp look slimy or smell bad, it’s best to discard them. Trust your senses to keep your meals safe and enjoyable.
FAQs
How long do I cook shrimp?
Cook shrimp for 4-6 minutes. They cook quickly. In a hot skillet, shrimp turn pink when done. Avoid overcooking; it makes them tough.
Can I use frozen shrimp?
Yes, you can use frozen shrimp. Thaw them first for best results. Place them in cold water for about 15 minutes. This way, they cook evenly and taste fresh.
What can I serve with lemon garlic butter shrimp?
I love serving lemon garlic butter shrimp with:
– Cooked pasta
– Fluffy rice
– Fresh salad
– Garlic bread
These sides balance the rich flavors well.
How to tell if shrimp are cooked?
Check for color and texture. Cooked shrimp turn pink and opaque. They should feel firm but not hard. When in doubt, cut one open. It should be white inside, not translucent.
You’ve learned how to make lemon garlic butter shrimp. We covered essential ingredients, easy steps, tips for cooking, and variations to try. Remember to adjust flavors to your taste and pair with your favorite sides. Store leftovers safely for later enjoyment. Cooking shrimp can be simple and satisfying. Enjoy every bite, and don’t hesitate to experiment. Whether for a cozy night in or impressing guests, this dish shines every time. Let your kitchen be a place of fun and flavor!
. - Heat your skillet over medium heat. - Add the unsalted butter and let it melt. - Once melted, watch for it to bubble gently. - Next, add the minced garlic. - Sauté the garlic for about one minute. - Stir often until it smells great and turns lightly golden. - Now, add the peeled and deveined shrimp to the skillet. - Season the shrimp with salt and pepper. - If you like spice, sprinkle in some red pepper flakes. - Cook the shrimp for 2-3 minutes on one side. - Flip the shrimp to cook the other side evenly. - Add the lemon zest and juice as they cook. - Keep cooking until the shrimp are opaque. - Remove the skillet from the heat. - Stir in the chopped parsley for a fresh taste. - Serve the shrimp over warm pasta or fluffy rice. - Drizzle the leftover lemon-garlic butter sauce on top for extra flavor. - For a lovely presentation, you can garnish with lemon wedges. For more details, check the Full Recipe. - Achieving the perfect shrimp texture: To get tender shrimp, avoid overcooking. Cook them just until they turn pink. This usually takes about 2-3 minutes per side. - Best practices for sautéing garlic: Start with a hot skillet and melted butter. Add minced garlic and stir for about 1 minute. Keep an eye on it so it doesn’t burn; burnt garlic tastes bitter. - Presentation ideas for a beautiful dish: Serve the shrimp in shallow bowls to make it look elegant. Add a sprinkle of parsley on top for color. Include lemon wedges on the side for a fresh touch. - Pairing options with side dishes: Lemon garlic butter shrimp goes well with cooked pasta or fluffy rice. You can also serve it with a side salad for a light meal. - Additional herbs or spices to try: Consider adding fresh basil or thyme for extra flavor. These herbs pair well with lemon and shrimp. - Adjusting spice levels with red pepper flakes: If you like heat, add more red pepper flakes. Start with a teaspoon and adjust to your taste. This will make your dish more exciting! For more details, check the Full Recipe. {{image_4}} You can change the seafood in this recipe. Try scallops or even crab. These swaps add new tastes while keeping the dish simple. If you want a healthier fat, swap butter for olive oil. Olive oil works well and gives a light, fresh flavor. To mix things up, add other citrus flavors. Lime or orange juice can brighten the dish. You can also infuse the recipe with herbs. Try basil or thyme for a different twist. These herbs can make the dish feel more seasonal. If you need a gluten-free option, serve the shrimp over quinoa or zucchini noodles. Both are great gluten-free choices. For a low-calorie meal, cut back on the butter. You can use less or replace it with vegetable broth. This keeps the dish tasty but lighter. After enjoying your lemon garlic butter shrimp, store any leftovers in the fridge. Use an airtight container to keep them fresh. These shrimp will stay good for about 2-3 days. Always check for freshness before eating. To freeze lemon garlic butter shrimp, let them cool completely first. Place them in a freezer-safe bag, removing as much air as possible. They can last for about 2 months in the freezer. When you're ready to eat, thaw the shrimp in the fridge overnight. Reheat them gently in a skillet over low heat. This keeps them tender and tasty. Always ensure your shrimp is safe to eat after storage. Check for any off smells or changes in color. If the shrimp look slimy or smell bad, it’s best to discard them. Trust your senses to keep your meals safe and enjoyable. Cook shrimp for 4-6 minutes. They cook quickly. In a hot skillet, shrimp turn pink when done. Avoid overcooking; it makes them tough. Yes, you can use frozen shrimp. Thaw them first for best results. Place them in cold water for about 15 minutes. This way, they cook evenly and taste fresh. I love serving lemon garlic butter shrimp with: - Cooked pasta - Fluffy rice - Fresh salad - Garlic bread These sides balance the rich flavors well. Check for color and texture. Cooked shrimp turn pink and opaque. They should feel firm but not hard. When in doubt, cut one open. It should be white inside, not translucent. You’ve learned how to make lemon garlic butter shrimp. We covered essential ingredients, easy steps, tips for cooking, and variations to try. Remember to adjust flavors to your taste and pair with your favorite sides. Store leftovers safely for later enjoyment. Cooking shrimp can be simple and satisfying. Enjoy every bite, and don't hesitate to experiment. Whether for a cozy night in or impressing guests, this dish shines every time. Let your kitchen be a place of fun and flavor!](https://goldendishy.com/wp-content/uploads/2025/06/8ad1771e-7d26-4dd4-879b-9e464bbb0647-300x300.webp)

