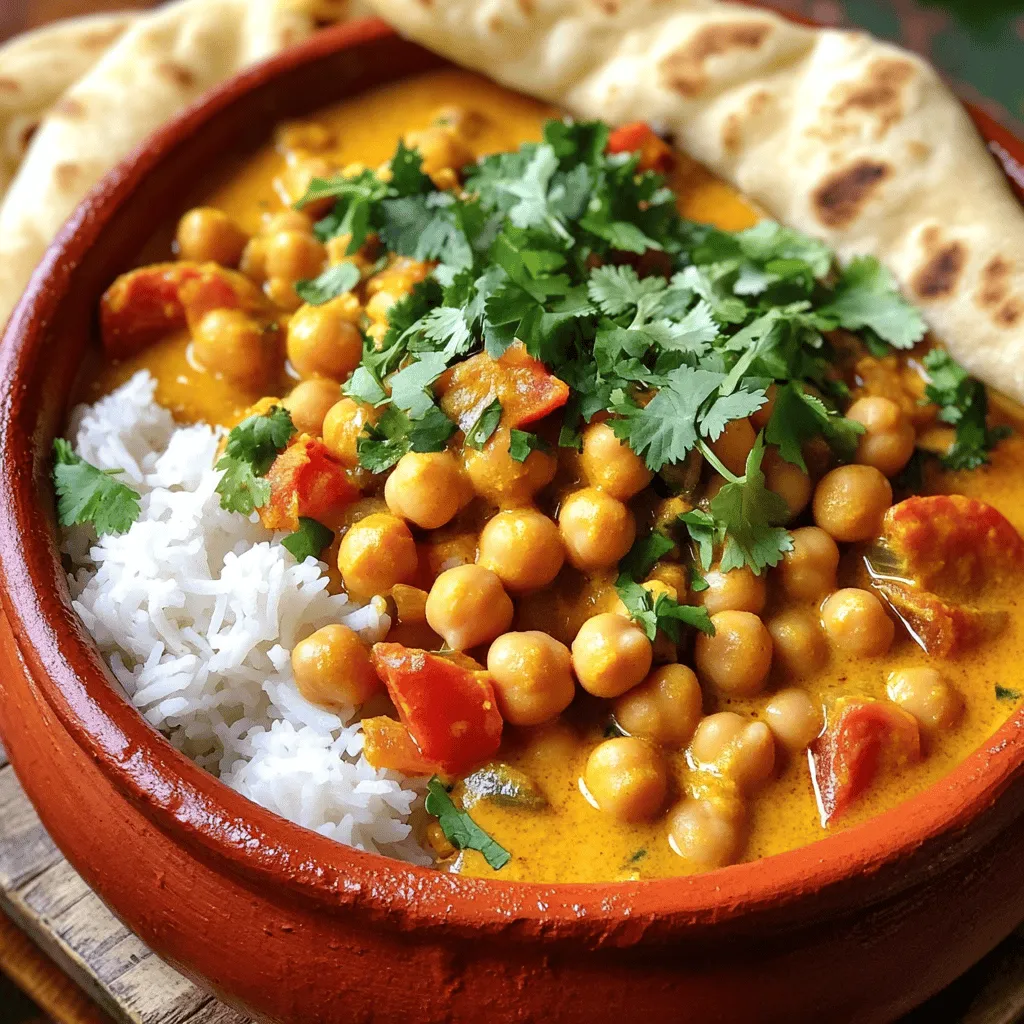
Spicy Chickpea Curry Flavorful and Easy to Make

Are you ready to spice up your dinner routine? This Spicy Chickpea Curry is not only bursting with flavor but also super easy to make. In just a few simple steps, you can create a warm, hearty dish that your whole family will love. From the essential ingredients to cooking tips, I’ll guide you through making the best curry ever. Let’s dive into this delicious recipe that will have your taste buds dancing!
Ingredients
Essential Ingredients for Spicy Chickpea Curry
To make a tasty spicy chickpea curry, you need key ingredients. They form the base of the dish. Gather these items:
– 2 cans of chickpeas, rinsed and drained
– 1 large onion, finely chopped
– 4 cloves garlic, minced
– 1-inch piece fresh ginger, grated
– 1 can (14 oz) full-fat coconut milk
– 2 medium ripe tomatoes, diced
– 2 tablespoons curry powder
– 1 teaspoon ground cumin
– 1 teaspoon turmeric powder
– 1 teaspoon chili powder (adjust to taste)
– 2 tablespoons vegetable oil
– Salt to taste
– Fresh cilantro, roughly chopped, for garnish
– Cooked rice or warm naan for serving
These ingredients come together to create a rich and creamy curry. The chickpeas add protein and fiber, while the spices deliver warmth and flavor.
Optional Ingredients for Extra Flavor
You can enhance your curry by adding optional ingredients. These add depth and freshness. Consider these additions:
– 1 bell pepper, diced
– 1 cup spinach or kale, chopped
– 1 tablespoon lemon juice
– A handful of peas
These ingredients boost nutrition and flavor. They also make the dish more colorful and appealing.
Spice Substitutions and Alternatives
If you need to swap spices, you have options. Here are some alternatives:
– Use garam masala instead of curry powder for a different flavor.
– Try coriander powder in place of cumin for a milder taste.
– If you like heat, add cayenne pepper instead of chili powder.
These substitutions help you tailor the curry to your taste. Don’t be afraid to experiment with spices! You can create your own signature flavor.
Step-by-Step Instructions
Overview of Cooking Process
Making spicy chickpea curry is simple and fun. You start by cooking onion, garlic, and ginger. Then, you add spices and tomatoes. Finally, you mix in chickpeas and coconut milk. The whole process takes about 35 minutes.
Detailed Cooking Steps for Perfect Curry
1. In a large pot, heat 2 tablespoons of vegetable oil over medium heat until it shimmers.
2. Add the finely chopped onion and sauté for about 5-7 minutes. Wait until the onion is soft and clear.
3. Next, add 4 minced garlic cloves and 1-inch grated ginger. Cook for 2 minutes. You will smell the goodness!
4. Now, stir in 2 diced tomatoes, 2 tablespoons of curry powder, 1 teaspoon of cumin, 1 teaspoon of turmeric, and 1 teaspoon of chili powder. Cook for 3-4 minutes. This helps the tomatoes break down.
5. Add 2 cans of rinsed chickpeas and 1 can of coconut milk. Stir well to mix everything.
6. Bring the mix to a gentle simmer. Let it heat through, about 15-20 minutes. Stir often to avoid sticking.
7. Season with salt to taste. When the sauce thickens, it’s ready!
8. Remove from heat, and garnish with fresh cilantro. Serve hot with rice or naan.
Cooking Times and Temperature Tips
Cook the onions at medium heat. This helps them soften nicely. When simmering, keep it low to avoid burning. You want the curry to blend well, so patience is key. Enjoy the wonderful smells while it cooks!
Tips & Tricks
How to Achieve the Best Flavor
To make your spicy chickpea curry burst with flavor, focus on fresh ingredients. Use ripe tomatoes for sweetness and fresh ginger for heat. Sauté onions until they are soft and sweet, about 5-7 minutes. This step builds a strong base. Don’t rush the cooking time; let the spices bloom in the oil. This releases their full aroma and taste.
Common Mistakes to Avoid
One common mistake is adding salt too early. Salt can draw out moisture, which slows cooking. Wait until later to add salt for the best taste. Another mistake is not letting the curry simmer. Simmering helps the flavors meld together. If you skip this step, your dish may taste flat.
Garnishing Suggestions for Presentation
Garnish is key to a great dish. Use freshly chopped cilantro to add color and freshness. You can also add a squeeze of lime for a zesty kick. Serve your curry in a large bowl to showcase the vibrant colors. Pair it with rice shaped into small mounds or neatly folded naan. This makes your meal look inviting and delicious.
Variations
Vegan and Gluten-Free Adaptations
You can easily make this dish vegan and gluten-free. The spicy chickpea curry is already vegan. You use coconut milk for creaminess instead of dairy. This makes it rich and tasty. For gluten-free options, just check your curry powder and spices. Most are gluten-free, but it’s safe to verify.
Ingredient Variations for Different Flavors
Feel free to switch up some ingredients for new tastes. Add spinach or kale for a green boost. If you like heat, toss in diced jalapeños or more chili powder. Want a smoky flavor? Use smoked paprika instead of regular paprika. You can also add sweet potatoes or carrots for sweetness.
Regional Twists on Chickpea Curry
Different cultures have their own takes on chickpea curry. In India, you might find it with garam masala and coconut. The Middle East often adds lemon and tahini for zest. In North Africa, try adding saffron and raisins for a sweet touch. Explore these twists to find your favorite version!
Storage Info
How to Store Leftovers Properly
To keep your spicy chickpea curry fresh, let it cool first. Use an airtight container to store it. Make sure to refrigerate it within two hours. Properly stored, it lasts for 3 to 4 days.
Reheating Tips for Best Results
When you are ready to enjoy your leftovers, reheat them gently. Use a saucepan over medium heat. Stir often to heat evenly. You can also warm it in the microwave. Just cover the bowl to keep moisture in.
Freezing Spicy Chickpea Curry for Future Meals
Freezing is a great way to save your curry. Let it cool completely, then transfer it to freezer-safe containers. Label them with the date. This dish can stay in the freezer for up to 3 months. When you’re ready to eat, thaw it in the fridge overnight. Then reheat it as mentioned above. Enjoy this flavorful meal anytime!
FAQs
What Can I Serve with Spicy Chickpea Curry?
You can serve spicy chickpea curry with many tasty sides. Here are some great options:
– Fluffy cooked rice
– Warm naan bread
– Quinoa for a healthy twist
– A fresh green salad
– Roasted vegetables for crunch
These sides soak up the curry’s rich flavors. They also add texture and balance to your meal. You will love how they complement the dish!
Can I Use Dried Chickpeas Instead of Canned?
Yes, you can use dried chickpeas! They are tasty and nutritious. Here’s how to use them:
1. Soak the dried chickpeas overnight in water.
2. Drain and rinse them.
3. Cook them in boiling water for about 1 to 1.5 hours until soft.
Using dried chickpeas adds a deeper flavor and texture to your curry. Just remember to adjust cooking time in your recipe!
How to Make Spicy Chickpea Curry Less Spicy?
If you want to tone down the heat, try these tips:
– Reduce the chili powder in the recipe.
– Add extra coconut milk for creaminess.
– Mix in a little sugar or honey to balance the spice.
– Serve with yogurt, which cools down the flavors.
These steps help you enjoy the dish without too much heat!
This blog post covered how to make spicy chickpea curry from start to finish. We talked about key ingredients, options for more flavor, and spice swaps. I outlined each cooking step clearly, including tips on timing and temperature. We also shared tricks for great taste and ways to avoid common mistakes. Lastly, we discussed storage and answered common questions.
Enjoy creating your own delicious curry! With these insights, you can make it perfect every time.


. 1. Preheating the oven: Start by setting your oven to 400°F (200°C). This heat helps the chicken cook evenly and ensures a crispy skin. 2. Drying the chicken thighs: Use paper towels to pat the chicken thighs dry. Getting rid of moisture is key for that nice, crispy texture. 1. Mixing seasoning and applying to chicken: In a bowl, mix olive oil, garlic powder, dried oregano, salt, and black pepper. Rub this mix all over the chicken thighs. Be sure to coat them well for great flavor. 2. Layering the pesto: Take your basil pesto and spoon a good amount onto each thigh. Make sure each piece is coated well for the best taste. 1. Arranging chicken in the baking dish: Place the chicken thighs skin-side up in a baking dish. Scatter halved cherry tomatoes around the chicken. Their juices will add even more flavor. 2. Baking time and checking doneness: Put the dish in the oven. Bake for about 35-40 minutes. Check that the juices run clear and the thickest part of the thigh reads 165°F (74°C) on a meat thermometer. This step-by-step guide will help you create the best Baked Pesto Chicken Thighs. For the full recipe, check out the earlier section. To get crispy skin on your baked pesto chicken thighs, start by patting the chicken dry with paper towels. This step removes extra moisture, helping the skin crisp up nicely. Next, set your oven to 400°F (200°C). This temperature is key for cooking the chicken evenly while also achieving that perfect crispy finish. Mix your basil pesto with a teaspoon of olive oil if it feels thick. This makes it easier to coat the chicken thighs evenly. A good layer of pesto adds rich flavor to each bite. For a fresh touch, use herbs like basil or parsley to garnish the dish. They add color and a bright flavor. Serve your baked pesto chicken thighs on a large platter. Drizzle any juices from the baking dish over the chicken. Scatter the halved cherry tomatoes around for a colorful look. Pair this dish with a fresh salad or fluffy rice. Both sides complement the chicken well and make for a complete meal. For the full recipe, check out the details above. {{image_4}} You can use chicken breast instead of thighs. Chicken breasts are lean and cook faster. They will still soak up the pesto flavor. For a twist, try turkey. Turkey thighs or breasts work well too. They add a different taste while keeping it juicy. Experiment with homemade pesto. You can make it from sun-dried tomatoes or spinach. Both options give a unique flavor. If you like heat, add red pepper flakes. Just a pinch can spice things up without being too hot. This recipe can fit gluten-free diets. Just check that the pesto is gluten-free. Use gluten-free pasta or a side dish to complete the meal. For those avoiding dairy, choose dairy-free cheese. Many brands offer great options that melt well. Feel free to explore these variations to make your Baked Pesto Chicken Thighs even more exciting. For the full details on the base recipe, check the Full Recipe section. To store leftovers properly, let the chicken cool first. Place the chicken thighs in an airtight container. This will keep them fresh longer. I recommend using glass or BPA-free plastic. These containers seal well and prevent spills. You can freeze baked chicken thighs for later use. To do this, wrap each thigh in plastic wrap. Then, place them in a freezer bag. Remove as much air as possible before sealing. When you’re ready to eat, thaw the chicken overnight in the fridge. Reheat it in the oven at 350°F (175°C) until hot. In the fridge, baked pesto chicken thighs last about 3-4 days. Keep an eye on them. If you see any off-smells or discoloration, discard them right away. These signs mean the chicken is spoiled. Enjoy your meal with peace of mind by storing it properly. For the full recipe, check back to make this tasty dish! Bake chicken thighs for about 35 to 40 minutes. This time gives you juicy meat and crispy skin. Check the chicken at 35 minutes to see if it's done. The juices should run clear. If you have a meat thermometer, insert it in the thickest part. It should read 165°F (74°C). This temperature ensures the chicken is safe to eat. Yes, you can prep this dish ahead of time. Season the chicken and coat it with pesto. Place it in your baking dish and cover it. Store it in the fridge for up to 24 hours. When you're ready to cook, just bake it as directed. This makes meal prep easy and quick. Chicken should reach a safe cooking temperature of 165°F (74°C). This temperature kills harmful bacteria. Use a meat thermometer for the most accurate reading. Insert it into the thickest part of the thigh. Once it hits 165°F, your chicken is safe and ready to eat. This post covered juicy chicken thighs baked with pesto and cherry tomatoes. You learned about the key ingredients, seasoning, and steps to prepare this dish. I shared tips to achieve crispy skin and suggestions for variations. Storing leftovers and meal prep were also discussed. Incorporate these ideas in your cooking. Enjoy the flavors and share with others. Your kitchen is now ready for this tasty meal!](https://goldendishy.com/wp-content/uploads/2025/06/60e55a10-6222-4f06-b0be-30d915c75343-768x768.webp)
![- 1 pre-made pie crust - 2 medium zucchinis, grated - 2 cups fresh spinach, chopped - 1 small onion, finely chopped - 3 large eggs - 1 cup milk I love using a pre-made pie crust for this quiche. It saves time and effort. The zucchinis bring a fresh taste, while the spinach adds color and nutrients. Eggs and milk create a rich, creamy texture that binds everything together. - 1 teaspoon garlic powder - Salt and pepper to taste - 1 tablespoon olive oil Garlic powder gives this dish a warm flavor. I always add salt and pepper to enhance the taste. Olive oil is perfect for cooking the veggies and adds a nice depth of flavor. - 1 cup shredded mozzarella cheese - 1/2 cup grated Parmesan cheese Cheese is key for a tasty quiche. Mozzarella melts beautifully, while Parmesan adds a sharp, salty kick. Together, they create a delightful flavor mix that elevates your dish. Don't forget to check the full recipe for complete details! First, heat olive oil in a skillet over medium heat. Add the finely chopped onion. Sauté it for about 3-4 minutes until it turns soft and clear. Next, add the grated zucchini and chopped spinach. Stir often and cook for about 5 minutes. The veggies should become tender, and any extra water will cook off. I love adding garlic powder, salt, and pepper to boost the flavor. After cooking, take it off the heat and let it cool for a moment. In a large bowl, whisk together the eggs and milk until they blend smoothly. This is where the magic begins! Next, add in the shredded mozzarella and grated Parmesan cheese. Fold them in gently. This mixture will bring richness to your quiche. It’s important that the cheese mixes well but still keeps some texture. Now, pour the vegetable and egg mixture into the prepared pie crust. Spread it out evenly to help it cook well. Place the quiche in your preheated oven. Bake for 30-35 minutes. You’ll know it’s ready when the edges turn golden brown and a toothpick inserted in the center comes out clean. Let it cool for about 10 minutes before slicing. This resting time helps enhance the flavors. You can find the full recipe in the previous section for all these steps! To get the best texture for your quiche, you must control moisture. Zucchini has a lot of water, which can make your quiche soggy. To fix this, grate the zucchini and lightly salt it. Let it sit for 10 minutes, then squeeze out the excess liquid. This step is key to a firm quiche. The cooking time can vary based on your oven. I find that checking it a few minutes early helps. If the edges look golden and a toothpick comes out clean, it's ready! For more flavor, consider adding fresh herbs like thyme or basil. A pinch of red pepper flakes can add a nice kick. You can also play with spices, like paprika or onion powder. Each of these can change the taste in a fun way. Cheese is another way to boost flavor. While mozzarella and Parmesan are great, try using feta or goat cheese for a tangy twist. These types add both creaminess and a bit of zest to the dish. When serving your zucchini spinach quiche, aim for a bright plate. A colorful plate makes a dish look more appealing. Add fresh basil or parsley on top for an eye-catching touch. You can also serve it with a light salad drizzled with citrus vinaigrette. This adds freshness and balance. For a photo-worthy presentation, slice the quiche into neat pieces. Arrange them in a circle on the plate. This simple trick makes your dish look polished and ready for sharing. Don't forget to snap a picture before you dig in! For the complete recipe, check out the [Full Recipe]. {{image_4}} You can switch up the veggies in your quiche. Broccoli, bell peppers, or mushrooms work great. Each veggie brings its own taste and texture. You can also try seasonal additions. In spring, add asparagus, and in fall, use roasted squash. This keeps your quiche fresh and exciting. If you need a gluten-free quiche, use a gluten-free crust. Many stores sell these now, or you can make your own. If you make your crust, use almond flour or coconut flour for a nice texture. You may need to adjust the liquid in the filling. This helps keep the quiche moist and tasty. Making mini quiches is fun and easy. You can use a muffin tin for individual servings. Just pour the mixture into each cup and fill them about three-quarters full. Bake for about 20-25 minutes. Keep an eye on them to avoid burning. These mini quiches are perfect for snacks or brunch. You can even freeze them for later! Check out the Full Recipe for more details. To keep your quiche fresh, store it in an airtight container. This helps keep moisture out. It stays fresh in the fridge for up to three days. If you plan to eat it later, cover it tightly with plastic wrap or foil. You can freeze your quiche before or after baking. If freezing before baking, wrap it well. This way, you can bake it fresh later. For freezing after baking, let it cool completely first. Store it in an airtight container. It can last up to three months in the freezer. When ready to eat, thaw it in the fridge overnight. For the best taste, reheat your quiche in the oven. Set it to 350°F (175°C) and heat for about 15-20 minutes. This keeps the crust crispy. You can also use a microwave for quick heating. However, the crust may not stay as crunchy. Heat slices for about 1-2 minutes. Always check that it's hot in the middle before serving. You can tell the quiche is done by looking for a few key signs. The edges should be golden brown, and the center should be firm. If you gently shake the quiche, it should not jiggle. Another great way to check is with a toothpick. Insert it into the center of the quiche. If it comes out clean, your quiche is ready to enjoy. Yes, you can use frozen spinach in this recipe. However, it’s important to make a few adjustments. First, thaw the spinach completely and drain any excess water. This helps prevent the quiche from becoming too watery. You may also want to chop the spinach further after thawing. This ensures even distribution in your quiche. Zucchini spinach quiche pairs well with many side dishes. A simple green salad with a light vinaigrette works great. You can also serve it with roasted vegetables for added flavor. If you want something heartier, serve it alongside a bowl of creamy tomato soup. This combination makes for a balanced and tasty meal. This blog post covers how to make a tasty zucchini and spinach quiche. You learned about the main ingredients, like pre-made crust and eggs, plus the best seasonings. I shared step-by-step instructions for preparing and baking. You also got tips for perfecting texture and ideas for variations. Making this dish can be easy and fun. Enjoy experimenting with flavors and ingredients. Whether you serve it for breakfast or dinner, this quiche will impress. Get cooking and enjoy your delicious creation!](https://goldendishy.com/wp-content/uploads/2025/06/2284a9f2-dfec-450d-ba9a-23981f99d5f6-768x768.webp)