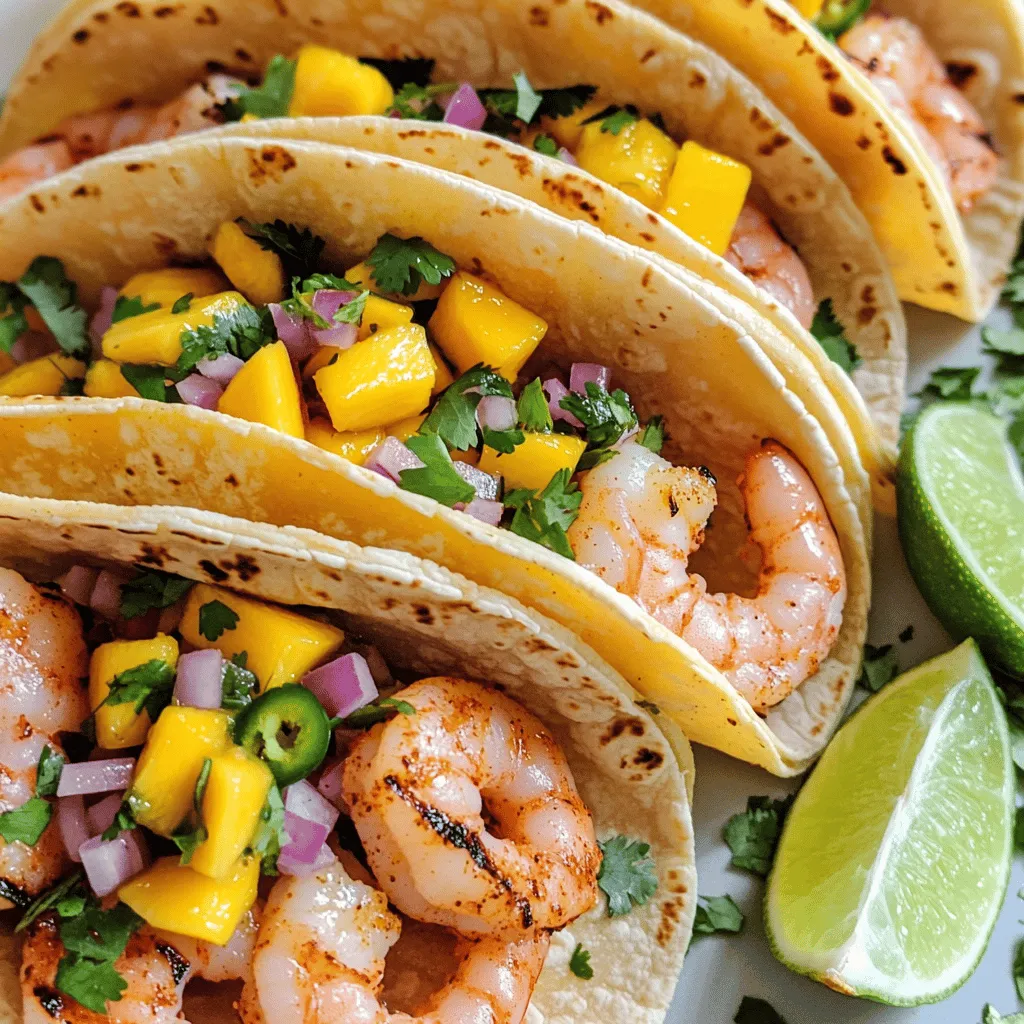
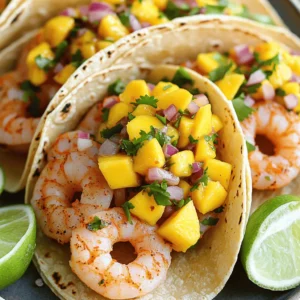
Grilled Shrimp Tacos with Mango Salsa Delight

Looking for a tasty twist on taco night? You’ll love these grilled shrimp tacos with mango salsa! I’ll show you how to create juicy shrimp, perfect spices, and a fresh mango salsa that brightens every bite. This dish is easy to make and packed with flavor. Let’s dive into the vibrant world of grilled shrimp and tropical salsa that will keep your taste buds dancing!
Ingredients
Main Ingredients
– 1 pound large shrimp, peeled and deveined
– 2 tablespoons olive oil
– 1 teaspoon chili powder
– 1 teaspoon ground cumin
– 1/2 teaspoon smoked paprika
– Salt and freshly ground black pepper to taste
– 8 small corn tortillas
Mango Salsa Ingredients
– 1 ripe mango, diced into small cubes
– 1/2 red onion, finely chopped
– 1 small jalapeño pepper, minced (remove seeds for milder flavor)
– Juice of 1 fresh lime
– Fresh cilantro, chopped, for garnish
Optional Garnishes
– Lime wedges
– Extra cilantro
I love using fresh ingredients for my grilled shrimp tacos. The shrimp are large and juicy. They soak up the marinade and burst with flavor. Olive oil adds richness. Chili powder brings a nice kick. Ground cumin gives a warm note. Smoked paprika adds a hint of smokiness. Don’t forget salt and pepper; they enhance all the flavors.
For the mango salsa, I pick a ripe mango. It should be sweet and fragrant. The red onion adds crunch and sweetness. The jalapeño brings heat, but you can adjust that. Fresh lime juice brightens everything up. Finally, chopped cilantro adds a fresh taste.
I also like to serve lime wedges and extra cilantro. They add a nice touch to the tacos.
Step-by-Step Instructions
Marinade Preparation
– Whisking the marinade
In a bowl, mix olive oil, chili powder, ground cumin, smoked paprika, salt, and pepper. Whisk until smooth.
– Marinating the shrimp
Add shrimp to the bowl. Toss gently to coat each piece. Cover and let it sit for 15-20 minutes.
Mango Salsa Preparation
– Combining salsa ingredients
In another bowl, combine diced mango, chopped red onion, minced jalapeño, and lime juice. Mix gently.
– Setting aside the salsa
Add a pinch of salt to the salsa. Let it rest while the shrimp marinates.
Grilling Process
– Preheating the grill
Heat your grill or grill pan over medium-high heat for about 5 minutes.
– Grilling the shrimp
Lay marinated shrimp on the hot grill. Cook for 2-3 minutes per side. They should turn pink and opaque.
– Warming the tortillas
Place corn tortillas on the grill for 1 minute on each side. This warms and adds flavor.
Taco Assembly
– Building the tacos
On each warm tortilla, place a few grilled shrimp. Top with the mango salsa.
– Serving suggestions
Add chopped cilantro on top. Serve the tacos with lime wedges for extra zest. Enjoy your tasty creation!
Tips & Tricks
Perfecting the Shrimp
To make your shrimp shine, marinate them well. A good marinade adds rich flavor. Use olive oil, chili powder, cumin, and smoked paprika. Let the shrimp sit in it for 15-20 minutes. This helps the spices soak in.
Cook the shrimp for 2-3 minutes on each side. Watch for a pink color. This means they are done. Overcooking can make them tough.
Mango Salsa Enhancement
Mango salsa can be a fun twist. Try adding other fruits like pineapple or peaches. These bring sweetness and balance. You can also mix in spices like cumin or garlic for depth.
Want some heat? Adjust the jalapeño level. For mild salsa, remove the seeds. For more spice, keep them in. This gives your salsa a nice kick!
Tortilla Options
Corn tortillas are a classic choice. They are soft and flavorful. You can also use flour tortillas if you prefer a different texture.
Grilling tortillas is a great idea! Just warm them on the grill for 1 minute per side. This adds a nice smoky taste. Enjoy the combination of flavors in your tacos.
Variations
Protein Substitutes
You can swap the shrimp for fish in this recipe. Fish tacos are tasty and quick. Use firm fish like tilapia or mahi-mahi. Just season it like the shrimp and grill until flaky.
If you want a vegetarian option, try using grilled portobello mushrooms or zucchini. Slice them thick and brush with olive oil. Grill until tender and smoky. These options add great texture and flavor.
Salsa Variations
For a twist on the mango salsa, try a pineapple salsa. Use fresh pineapple instead of mango. Chop it into small chunks and mix with onion and lime juice. This gives a sweet and tangy taste.
You can also add avocado to your mango salsa. Dice ripe avocado and fold it in gently. This adds creaminess and richness to your dish.
Serving Suggestions
Pair your tacos with a fresh side salad. A crunchy slaw with cabbage and lime works well. You can also serve them with chips and guacamole for a fun touch.
For beverages, try a crisp, cold beer. A light lager or pale ale complements the flavors nicely. You could also enjoy your tacos with a fruity mocktail or fresh limeade.
Storage Info
Storing Leftover Shrimp
To keep your leftover shrimp fresh, place them in an airtight container. Store them in the fridge right away. They can stay good for 2-3 days. If you want to keep them longer, freeze the shrimp. Place them in a freezer bag, removing as much air as you can. Frozen shrimp last up to three months.
Storing Mango Salsa
For mango salsa, use a clean, airtight container. This keeps the salsa fresh and tasty. You can store it in the fridge for up to 3 days. If you need to keep it longer, consider freezing it. Just know that freezing may change the texture.
Reheating Instructions
When reheating shrimp, do it gently. Use a skillet on low heat. This helps the shrimp stay juicy. Heat for about 2-3 minutes until warm. For salsa, you can enjoy it cold. If you prefer warm, heat it in the microwave for a few seconds. Avoid cooking it too long; you want to keep that fresh taste!
FAQs
What type of shrimp is best for grilling?
I recommend using large or jumbo shrimp for grilling. They hold up well on the grill and offer a nice bite. Look for shrimp that are fresh, firm, and have a clean smell. Wild-caught shrimp often taste better, but farmed shrimp can be good too. Just make sure they are peeled and deveined for easy cooking.
Can I make the mango salsa ahead of time?
Yes, you can make the mango salsa ahead of time! It tastes even better after sitting for a while. Just mix all the ingredients and store it in the fridge. Try to make it a few hours before serving. This allows the flavors to blend nicely.
How do I know when shrimp is properly cooked?
You can tell shrimp is done when it turns pink and opaque. It should curl into a C shape, not an O shape. This usually takes about 2-3 minutes per side on the grill. If you have a food thermometer, aim for an internal temperature of 120°F.
Can I use frozen shrimp?
Yes, you can use frozen shrimp! Just make sure to thaw them first. The best way is to leave them in the fridge overnight. If you’re in a hurry, place them in a bowl of cold water for about 15-20 minutes. Once thawed, pat them dry before marinating. This helps the marinade stick better.
To sum up, this blog post guides you through making tasty shrimp tacos with mango salsa. We discussed essential ingredients, preparation steps, and helpful tips to create delicious flavors. Remember, you can customize your meal with different proteins and salsas. Storing leftovers properly ensures you enjoy these flavors later. I hope these steps inspire you to create your own shrimp taco feast! Enjoy the cooking journey and share your creations with friends!
![To make Avocado Lime Crema Tacos, you need some fresh and simple ingredients. Here’s what you will need: - Fresh produce: - 2 ripe avocados - 1 cup cherry tomatoes, halved - 1 cup shredded red cabbage - 1/2 cup fresh cilantro leaves, roughly chopped - Pantry staples: - 8 small corn tortillas - 1/2 cup Greek yogurt - 2 tablespoons fresh lime juice - Zest of 1 lime - 1 clove garlic, finely minced - 1/4 teaspoon ground cumin - Sea salt, to taste - Optional toppings: - Sliced jalapeños - Radish slices - Crumbled feta cheese When you gather these ingredients, aim for ripe avocados. They will make your crema smooth and creamy. Fresh cilantro adds a burst of flavor to the tacos. You can also adjust the optional toppings based on your taste. If you want more heat, add jalapeños. For a crunchy touch, sprinkle some radish slices. You can find the full recipe in the article for detailed steps. Enjoy the fresh tastes of these tacos! To start, grab your food processor. Add the ripe avocados, Greek yogurt, fresh lime juice, lime zest, minced garlic, ground cumin, and a pinch of sea salt. Blend it all together until smooth and creamy. If it seems too thick, add a bit more lime juice. Taste it and adjust the salt or lime juice to your liking. A little extra zing can really elevate the flavor! Use a non-stick skillet for this step. Heat it over medium heat. Toast each corn tortilla for about 30 seconds on one side. Flip it and toast for another 30 seconds. The tortillas should feel warm and soft. Once done, stack them and wrap them in a clean kitchen towel to keep them warm. This keeps them from getting dry. Now, take a warm tortilla and spread a generous dollop of your avocado lime crema right in the center. Next, add a handful of shredded red cabbage for crunch. Layer on some halved cherry tomatoes for a fresh bite. Finally, sprinkle chopped fresh cilantro on top for a burst of flavor. For a fun twist, try adding some sliced jalapeños for heat, radish slices for crunch, or crumbled feta cheese for a savory touch. Serve your tacos right away. Enjoy them while they are fresh and bursting with flavor! Remember, you can find the full recipe [here]. You can switch up the base in your crema. Try sour cream or Greek yogurt for a tangy twist. If you want a dairy-free option, use silken tofu or cashew cream. For extra flavor, add herbs like cilantro or dill. You can also mix in spices such as smoked paprika or chipotle for a smoky kick. To balance flavors, add a mix of textures. Use crunchy cabbage, juicy tomatoes, and creamy crema. These layers make each bite exciting. To avoid tearing the tortillas, warm them first. Heat them in a skillet for about 30 seconds on each side. This softens them, making them easier to fold without breaking. Pair your tacos with simple sides. A fresh salad or rice works well. You might also enjoy them with a light drink like agua fresca or sparkling water. For garnishes, lime wedges and extra cilantro make your tacos look vibrant and fresh. These touches enhance both taste and presentation. For the Full Recipe, refer to the earlier section. {{image_4}} For a tasty vegetarian or vegan taco, swap Greek yogurt for cashew cream or coconut yogurt. Both options keep the creamy texture and flavor. You can also add black beans or roasted chickpeas for protein. These legumes add a nice texture and a mild flavor. Toss in some grilled zucchini or bell peppers for extra color and taste. Fresh herbs like mint or basil can bring a surprise twist. If you want to add protein, consider grilled chicken or shrimp. Marinate chicken in lime juice, garlic, and cumin for at least 30 minutes before grilling. For shrimp, a quick toss with olive oil and lime juice works well. Both options cook fast, making them easy to prepare. You could also try seared steak or fish for a heartier bite. Just remember to let the meat rest before slicing to keep it juicy. Tacos can take on many flavors based on where you are. In Mexico, you might find tacos with carne asada, topped with fresh cilantro and onions. In California, fish tacos with mango salsa are popular. Seasonal ingredients can also add a fresh touch. In summer, add sweet corn or peaches. In fall, roasted butternut squash or cranberries can provide a warm, cozy vibe. Each variation opens a new door to flavor! For full recipe details, check out the [Full Recipe]. You can store leftover tacos in different ways. If you have assembled tacos, wrap them in foil or plastic wrap. This keeps them fresh for a short time. Unassembled tacos store better. Keep the tortillas, crema, and toppings separate. Use airtight containers for each. This helps keep everything fresh. - Assembled Tacos: Wrap well in foil or plastic wrap. - Unassembled Tacos: Store tortillas, crema, and toppings in airtight containers. Store everything in the fridge. Consume within two days for best taste. To reheat tortillas, use a skillet. Heat it on medium for a few minutes. Place the tortilla for about 15 seconds on each side. This warms them without losing their texture. For the crema, avoid reheating. Instead, store it in the fridge. Use it cold or at room temperature. This keeps the fresh flavor. - Tortilla Method: Heat on medium in a skillet for 15 seconds per side. - Crema Storage: Keep it cold or at room temperature. These simple steps ensure your Avocado Lime Crema Tacos stay delicious! You can add heat with sliced jalapeños. Place them on top of the crema. For more heat, use hot sauce. A few drops can spice things up without being too much. Try different hot sauces to find your favorite flavor. This small change can make your tacos zing! Yes, you can make the crema ahead of time. Store it in an airtight container in the fridge. It stays fresh for about two days. To keep the color bright, add a little extra lime juice. Stir before using to bring back its smooth texture. If you can't find corn tortillas, use flour tortillas instead. They are soft and easy to fold. You can also use lettuce leaves for a low-carb option. For gluten-free diets, look for rice or almond flour tortillas. Each option gives a unique taste to your tacos. Yes, this recipe is great for meal prep. You can prepare the crema and store it in the fridge. Warm the tortillas before serving. Assemble the tacos just before eating to keep everything fresh. This way, you have tasty meals ready for the week with little effort. For the full recipe, check out the details above! In this article, we explored how to make tasty Avocado Lime Crema Tacos. We covered the essential ingredients, step-by-step instructions, and helpful tips for perfecting your taco assembly. You can easily customize your crema and taco fillings to suit your taste. Remember, you can prepare these tacos in advance and store leftovers for later enjoyment. Embrace these ideas to make your taco nights fun and delicious! With a little practice, you’ll impress family and friends with your new skills. Enjoy every bite!](https://goldendishy.com/wp-content/uploads/2025/07/f06e457d-602e-41ec-b362-5499d4ba2f55-768x768.webp)