Mango Chicken Stir Fry Simple and Flavorful Meal
![- 2 chicken breasts, sliced into thin strips - 1 ripe, juicy mango, diced into small cubes - 1 red bell pepper, sliced into thin strips - 1 yellow bell pepper, sliced into thin strips - 1 cup snap peas, trimmed - 2 cloves garlic, finely minced - 1 tablespoon fresh ginger, grated - 3 tablespoons soy sauce (low sodium recommended) - 1 tablespoon honey (or maple syrup for a vegan option) - 1 tablespoon olive oil or sesame oil - Fresh cilantro leaves for garnish - Cooked jasmine rice or your choice of rice (for serving) The magic of Mango Chicken Stir Fry comes from simple, fresh ingredients. Chicken breasts form the base, bringing protein to your meal. The ripe mango adds sweetness. Bell peppers bring color and crunch. Snap peas give that crisp bite. Aromatics like garlic and ginger add depth. Soy sauce gives a savory touch, while honey balances it out with sweetness. For extra richness, use olive or sesame oil. Fresh cilantro adds a burst of flavor. Jasmine rice makes the perfect bed for this dish. Check out the Full Recipe to gather everything you need! To start, take your chicken breasts and slice them into thin strips. Aim for even cuts so they cook uniformly. Once sliced, season the chicken with salt and pepper. This simple step adds great flavor to the dish. Now, let’s heat the oil. In a large skillet or wok, pour in your olive oil. Set the heat to medium-high and wait until the oil shimmers. This means it’s ready for cooking. Next, add the sliced chicken to the hot pan. Cook the chicken for about 5-7 minutes. Stir frequently to ensure it browns nicely and cooks all the way through. After cooking, remove the chicken from the pan and set it aside on a plate. In the same pan, it’s time for aromatics. Add minced garlic and grated ginger. Sauté these for about 30 seconds. The smell will be amazing, but be careful not to burn them! Now, let’s add the vibrant vegetables. Toss in your sliced red and yellow bell peppers along with the snap peas. Stir-fry them for about 3-4 minutes. You want them tender but still crisp. Return the cooked chicken to the pan. Gently fold in the diced mango to mix everything together. The sweet mango will balance the savory chicken perfectly. Next, let’s make the sauce. In a small bowl, whisk together soy sauce and honey. Pour this mixture over your chicken and veggies. Stir well to coat everything evenly. Let it cook together for an additional 2 minutes. This allows all the flavors to meld. Once done, remove the stir-fry from the heat. It’s now ready to serve. Enjoy your Mango Chicken Stir Fry over cooked jasmine rice. Don’t forget to garnish with fresh cilantro for that extra pop of flavor! For the full recipe, check out the details above. To get the best results, pay close attention to your heat. Use high heat to sear the chicken and veggies. This helps keep the food juicy and full of flavor. If your pan isn't hot enough, the chicken will steam instead of sear. Avoid overcooking your vegetables. Cook them just until they are bright and crisp. This usually takes about 3-4 minutes. If you let them cook too long, they will lose their crunch and color. To add more depth, try spices like cumin or paprika. These can give your dish a unique twist. You can also add a pinch of red pepper flakes for heat. If you want a different sauce, consider teriyaki or sweet chili sauce. These can add a different layer of flavor that pairs well with mango. When serving, place your stir-fry over a bed of fluffy jasmine rice. This adds a nice base and absorbs the sauce. For garnishing, sprinkle fresh cilantro on top. You can also add lime wedges on the side. This adds color and a zesty kick. For the complete experience, check out the Full Recipe. Enjoy your cooking! {{image_4}} You can easily make this dish vegetarian. Use tofu instead of chicken. Firm tofu works best. Press it to remove excess water. Cut it into cubes and sauté until golden. For sauce, you can swap honey with maple syrup. This keeps it vegan-friendly. You might also try tamari instead of soy sauce. It’s gluten-free and tastes great. If you want more protein, shrimp or beef are great choices. For shrimp, cook them for about 3-4 minutes. The shrimp turn pink when done. If you use beef, slice it thinly. Cook it for about 5-7 minutes. Always check it’s fully cooked. You can use flank steak or sirloin for the best flavor. You can switch out fruits and veggies based on the season. In summer, try peaches or pineapple for a juicy twist. Winter calls for hearty vegetables like carrots or broccoli. Adding seasonal greens like kale or spinach boosts nutrition too. Get creative with what you have. This keeps your Mango Chicken Stir Fry fresh and exciting. For the full recipe, check above! To keep your Mango Chicken Stir Fry fresh, store leftovers in an airtight container. Let the stir-fry cool before sealing. It stays good for up to three days in the fridge. Always label your container with the date. This helps you keep track of freshness. When you want to enjoy your stir-fry again, reheat it carefully. You can use a microwave or a skillet. If using a microwave, heat in short bursts. Stir between heating to ensure even warmth. If using a skillet, add a splash of water to keep it moist. Always make sure it reaches a safe temperature of 165°F (74°C) before eating. You can freeze Mango Chicken Stir Fry if you want to store it longer. Place it in a freezer-safe container and leave some space for expansion. It can last up to three months in the freezer. To thaw, move it to the fridge overnight. For reheating, use a skillet or microwave, just like before. This method helps maintain the flavors and textures well. Check the [Full Recipe] for more details on making this dish. Mango Chicken Stir Fry lasts about 3 to 4 days in the fridge. Store it in an airtight container to keep it fresh. Make sure to cool it down before putting it in the fridge. This helps keep the texture and flavor. Yes, you can use frozen mango in this recipe. Frozen mango works well when fresh mango is not available. Just thaw the mango before adding it to the stir-fry. This will help it blend well with the other ingredients. Fresh mango offers a firmer texture and brighter flavor, but frozen is a great alternative. You can serve this dish with jasmine rice, quinoa, or even noodles. These sides soak up all the tasty sauce. You can also add a simple salad on the side. A cucumber salad or a green bean salad pairs nicely with the stir-fry. Yes, the recipe can be made gluten-free. Use tamari or coconut aminos instead of soy sauce. These options give a similar taste without gluten. Always check the labels to ensure there are no hidden gluten ingredients. This blog post covered everything you need to make a tasty Mango Chicken Stir Fry. We explored key ingredients like chicken, mango, and veggies. I provided step-by-step instructions to help you cook with confidence. You learned tips for perfecting the dish, plus variations to keep things fresh. In short, this recipe is fun and easy to customize. Get creative in the kitchen and enjoy your stir-fry!](https://goldendishy.com/wp-content/uploads/2025/06/67704695-6c72-4914-a503-47315e3cdcd3.webp)
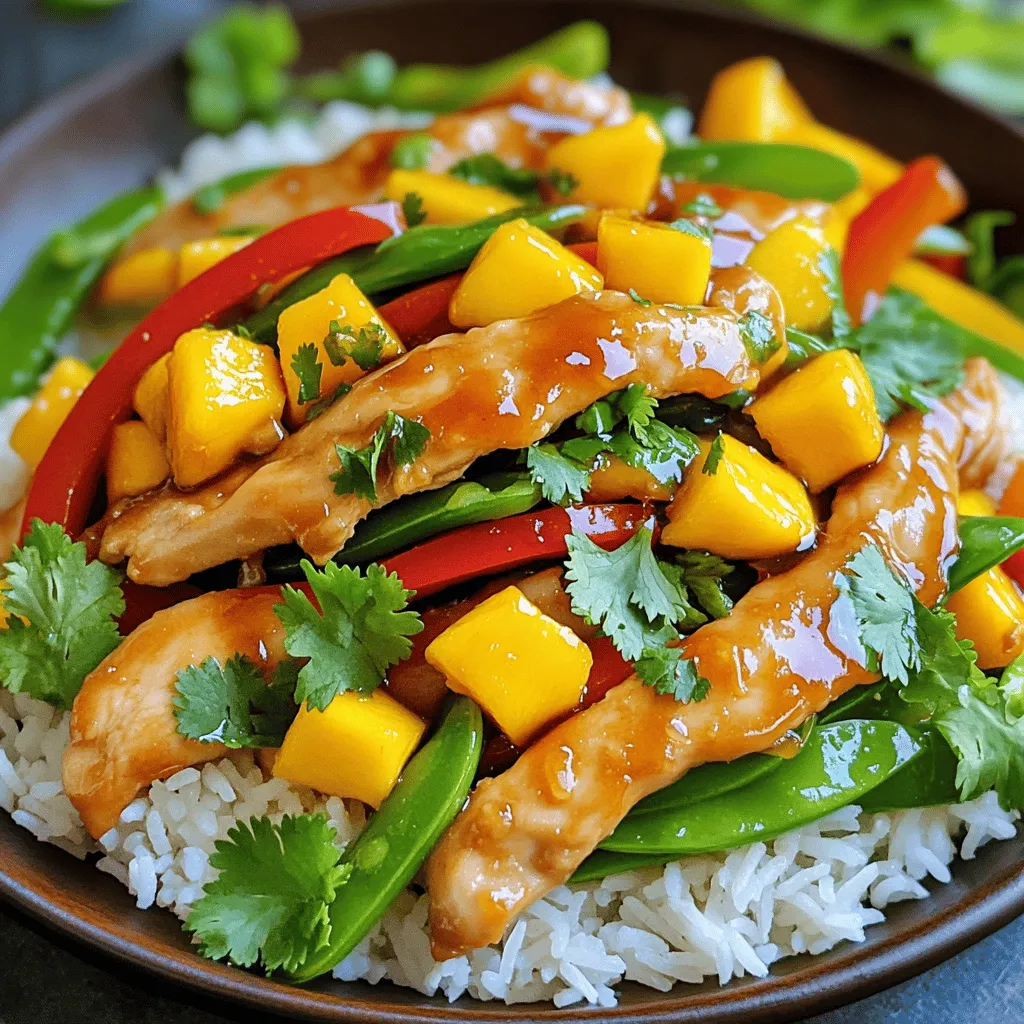
Are you craving a meal that’s both simple and bursting with flavor? My Mango Chicken Stir Fry is the answer! This dish combines juicy chicken, ripe mango, and vibrant veggies for a quick, satisfying dinner. Follow my easy steps to whip up a delicious and colorful meal that will impress your family and friends. Get ready to dive into the world of fresh ingredients and bold tastes!
Ingredients
Main Ingredients
– 2 chicken breasts, sliced into thin strips
– 1 ripe, juicy mango, diced into small cubes
– 1 red bell pepper, sliced into thin strips
– 1 yellow bell pepper, sliced into thin strips
– 1 cup snap peas, trimmed
Aromatics and Sauces
– 2 cloves garlic, finely minced
– 1 tablespoon fresh ginger, grated
– 3 tablespoons soy sauce (low sodium recommended)
– 1 tablespoon honey (or maple syrup for a vegan option)
Optional Add-ons
– 1 tablespoon olive oil or sesame oil
– Fresh cilantro leaves for garnish
– Cooked jasmine rice or your choice of rice (for serving)
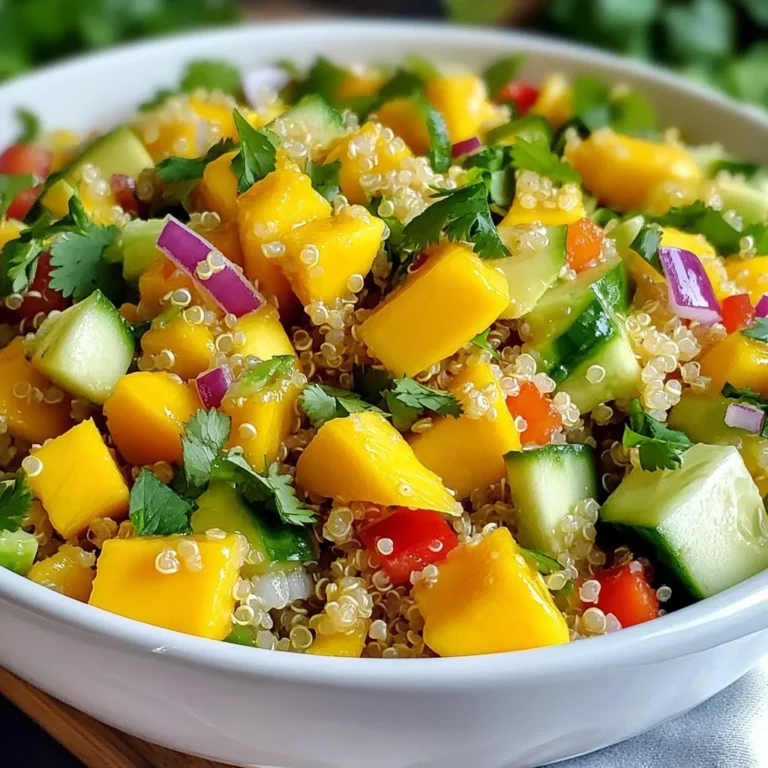
The magic of Mango Chicken Stir Fry comes from simple, fresh ingredients. Chicken breasts form the base, bringing protein to your meal. The ripe mango adds sweetness. Bell peppers bring color and crunch. Snap peas give that crisp bite.
Aromatics like garlic and ginger add depth. Soy sauce gives a savory touch, while honey balances it out with sweetness.
For extra richness, use olive or sesame oil. Fresh cilantro adds a burst of flavor. Jasmine rice makes the perfect bed for this dish.
Step-by-Step Instructions
Preparing the Chicken
To start, take your chicken breasts and slice them into thin strips. Aim for even cuts so they cook uniformly. Once sliced, season the chicken with salt and pepper. This simple step adds great flavor to the dish.
Cooking Procedure
Now, let’s heat the oil. In a large skillet or wok, pour in your olive oil. Set the heat to medium-high and wait until the oil shimmers. This means it’s ready for cooking.
Next, add the sliced chicken to the hot pan. Cook the chicken for about 5-7 minutes. Stir frequently to ensure it browns nicely and cooks all the way through. After cooking, remove the chicken from the pan and set it aside on a plate.
In the same pan, it’s time for aromatics. Add minced garlic and grated ginger. Sauté these for about 30 seconds. The smell will be amazing, but be careful not to burn them!
Combining and Finalizing
Now, let’s add the vibrant vegetables. Toss in your sliced red and yellow bell peppers along with the snap peas. Stir-fry them for about 3-4 minutes. You want them tender but still crisp.
Return the cooked chicken to the pan. Gently fold in the diced mango to mix everything together. The sweet mango will balance the savory chicken perfectly.
Next, let’s make the sauce. In a small bowl, whisk together soy sauce and honey. Pour this mixture over your chicken and veggies. Stir well to coat everything evenly. Let it cook together for an additional 2 minutes. This allows all the flavors to meld.
Once done, remove the stir-fry from the heat. It’s now ready to serve. Enjoy your Mango Chicken Stir Fry over cooked jasmine rice. Don’t forget to garnish with fresh cilantro for that extra pop of flavor!
Tips & Tricks
Perfecting the Stir-Fry
To get the best results, pay close attention to your heat. Use high heat to sear the chicken and veggies. This helps keep the food juicy and full of flavor. If your pan isn’t hot enough, the chicken will steam instead of sear.
Avoid overcooking your vegetables. Cook them just until they are bright and crisp. This usually takes about 3-4 minutes. If you let them cook too long, they will lose their crunch and color.
Flavor Enhancements
To add more depth, try spices like cumin or paprika. These can give your dish a unique twist. You can also add a pinch of red pepper flakes for heat.
If you want a different sauce, consider teriyaki or sweet chili sauce. These can add a different layer of flavor that pairs well with mango.
Presentation Tips
When serving, place your stir-fry over a bed of fluffy jasmine rice. This adds a nice base and absorbs the sauce.
For garnishing, sprinkle fresh cilantro on top. You can also add lime wedges on the side. This adds color and a zesty kick.Enjoy your cooking!
Variations
Vegetarian Adaptation
You can easily make this dish vegetarian. Use tofu instead of chicken. Firm tofu works best. Press it to remove excess water. Cut it into cubes and sauté until golden.
For sauce, you can swap honey with maple syrup. This keeps it vegan-friendly. You might also try tamari instead of soy sauce. It’s gluten-free and tastes great.
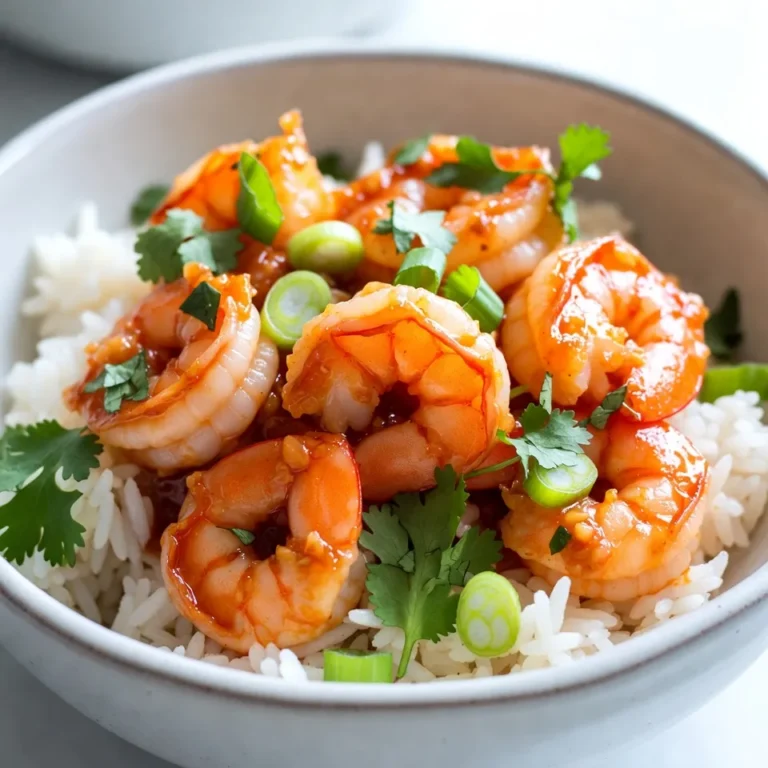
Additional Protein Options
If you want more protein, shrimp or beef are great choices. For shrimp, cook them for about 3-4 minutes. The shrimp turn pink when done.
If you use beef, slice it thinly. Cook it for about 5-7 minutes. Always check it’s fully cooked. You can use flank steak or sirloin for the best flavor.
Seasonal Ingredient Ideas
You can switch out fruits and veggies based on the season. In summer, try peaches or pineapple for a juicy twist. Winter calls for hearty vegetables like carrots or broccoli.
Adding seasonal greens like kale or spinach boosts nutrition too. Get creative with what you have. This keeps your Mango Chicken Stir Fry fresh and exciting.
Storage Info
Refrigeration Guidelines
To keep your Mango Chicken Stir Fry fresh, store leftovers in an airtight container. Let the stir-fry cool before sealing. It stays good for up to three days in the fridge. Always label your container with the date. This helps you keep track of freshness.
Reheating Tips
When you want to enjoy your stir-fry again, reheat it carefully. You can use a microwave or a skillet. If using a microwave, heat in short bursts. Stir between heating to ensure even warmth. If using a skillet, add a splash of water to keep it moist. Always make sure it reaches a safe temperature of 165°F (74°C) before eating.
Freezing Options
You can freeze Mango Chicken Stir Fry if you want to store it longer. Place it in a freezer-safe container and leave some space for expansion. It can last up to three months in the freezer. To thaw, move it to the fridge overnight. For reheating, use a skillet or microwave, just like before. This method helps maintain the flavors and textures well.
FAQs
How long does Mango Chicken Stir Fry last in the fridge?
Mango Chicken Stir Fry lasts about 3 to 4 days in the fridge. Store it in an airtight container to keep it fresh. Make sure to cool it down before putting it in the fridge. This helps keep the texture and flavor.
Can I use frozen mango in this recipe?
Yes, you can use frozen mango in this recipe. Frozen mango works well when fresh mango is not available. Just thaw the mango before adding it to the stir-fry. This will help it blend well with the other ingredients. Fresh mango offers a firmer texture and brighter flavor, but frozen is a great alternative.
What can I serve with Mango Chicken Stir Fry?
You can serve this dish with jasmine rice, quinoa, or even noodles. These sides soak up all the tasty sauce. You can also add a simple salad on the side. A cucumber salad or a green bean salad pairs nicely with the stir-fry.
Is this recipe gluten-free?
Yes, the recipe can be made gluten-free. Use tamari or coconut aminos instead of soy sauce. These options give a similar taste without gluten. Always check the labels to ensure there are no hidden gluten ingredients.
This blog post covered everything you need to make a tasty Mango Chicken Stir Fry. We explored key ingredients like chicken, mango, and veggies. I provided step-by-step instructions to help you cook with confidence. You learned tips for perfecting the dish, plus variations to keep things fresh.
In short, this recipe is fun and easy to customize. Get creative in the kitchen and enjoy your stir-fry!
![- 2 chicken breasts, sliced into thin strips - 1 ripe, juicy mango, diced into small cubes - 1 red bell pepper, sliced into thin strips - 1 yellow bell pepper, sliced into thin strips - 1 cup snap peas, trimmed - 2 cloves garlic, finely minced - 1 tablespoon fresh ginger, grated - 3 tablespoons soy sauce (low sodium recommended) - 1 tablespoon honey (or maple syrup for a vegan option) - 1 tablespoon olive oil or sesame oil - Fresh cilantro leaves for garnish - Cooked jasmine rice or your choice of rice (for serving) The magic of Mango Chicken Stir Fry comes from simple, fresh ingredients. Chicken breasts form the base, bringing protein to your meal. The ripe mango adds sweetness. Bell peppers bring color and crunch. Snap peas give that crisp bite. Aromatics like garlic and ginger add depth. Soy sauce gives a savory touch, while honey balances it out with sweetness. For extra richness, use olive or sesame oil. Fresh cilantro adds a burst of flavor. Jasmine rice makes the perfect bed for this dish. Check out the Full Recipe to gather everything you need! To start, take your chicken breasts and slice them into thin strips. Aim for even cuts so they cook uniformly. Once sliced, season the chicken with salt and pepper. This simple step adds great flavor to the dish. Now, let’s heat the oil. In a large skillet or wok, pour in your olive oil. Set the heat to medium-high and wait until the oil shimmers. This means it’s ready for cooking. Next, add the sliced chicken to the hot pan. Cook the chicken for about 5-7 minutes. Stir frequently to ensure it browns nicely and cooks all the way through. After cooking, remove the chicken from the pan and set it aside on a plate. In the same pan, it’s time for aromatics. Add minced garlic and grated ginger. Sauté these for about 30 seconds. The smell will be amazing, but be careful not to burn them! Now, let’s add the vibrant vegetables. Toss in your sliced red and yellow bell peppers along with the snap peas. Stir-fry them for about 3-4 minutes. You want them tender but still crisp. Return the cooked chicken to the pan. Gently fold in the diced mango to mix everything together. The sweet mango will balance the savory chicken perfectly. Next, let’s make the sauce. In a small bowl, whisk together soy sauce and honey. Pour this mixture over your chicken and veggies. Stir well to coat everything evenly. Let it cook together for an additional 2 minutes. This allows all the flavors to meld. Once done, remove the stir-fry from the heat. It’s now ready to serve. Enjoy your Mango Chicken Stir Fry over cooked jasmine rice. Don’t forget to garnish with fresh cilantro for that extra pop of flavor! For the full recipe, check out the details above. To get the best results, pay close attention to your heat. Use high heat to sear the chicken and veggies. This helps keep the food juicy and full of flavor. If your pan isn't hot enough, the chicken will steam instead of sear. Avoid overcooking your vegetables. Cook them just until they are bright and crisp. This usually takes about 3-4 minutes. If you let them cook too long, they will lose their crunch and color. To add more depth, try spices like cumin or paprika. These can give your dish a unique twist. You can also add a pinch of red pepper flakes for heat. If you want a different sauce, consider teriyaki or sweet chili sauce. These can add a different layer of flavor that pairs well with mango. When serving, place your stir-fry over a bed of fluffy jasmine rice. This adds a nice base and absorbs the sauce. For garnishing, sprinkle fresh cilantro on top. You can also add lime wedges on the side. This adds color and a zesty kick. For the complete experience, check out the Full Recipe. Enjoy your cooking! {{image_4}} You can easily make this dish vegetarian. Use tofu instead of chicken. Firm tofu works best. Press it to remove excess water. Cut it into cubes and sauté until golden. For sauce, you can swap honey with maple syrup. This keeps it vegan-friendly. You might also try tamari instead of soy sauce. It’s gluten-free and tastes great. If you want more protein, shrimp or beef are great choices. For shrimp, cook them for about 3-4 minutes. The shrimp turn pink when done. If you use beef, slice it thinly. Cook it for about 5-7 minutes. Always check it’s fully cooked. You can use flank steak or sirloin for the best flavor. You can switch out fruits and veggies based on the season. In summer, try peaches or pineapple for a juicy twist. Winter calls for hearty vegetables like carrots or broccoli. Adding seasonal greens like kale or spinach boosts nutrition too. Get creative with what you have. This keeps your Mango Chicken Stir Fry fresh and exciting. For the full recipe, check above! To keep your Mango Chicken Stir Fry fresh, store leftovers in an airtight container. Let the stir-fry cool before sealing. It stays good for up to three days in the fridge. Always label your container with the date. This helps you keep track of freshness. When you want to enjoy your stir-fry again, reheat it carefully. You can use a microwave or a skillet. If using a microwave, heat in short bursts. Stir between heating to ensure even warmth. If using a skillet, add a splash of water to keep it moist. Always make sure it reaches a safe temperature of 165°F (74°C) before eating. You can freeze Mango Chicken Stir Fry if you want to store it longer. Place it in a freezer-safe container and leave some space for expansion. It can last up to three months in the freezer. To thaw, move it to the fridge overnight. For reheating, use a skillet or microwave, just like before. This method helps maintain the flavors and textures well. Check the [Full Recipe] for more details on making this dish. Mango Chicken Stir Fry lasts about 3 to 4 days in the fridge. Store it in an airtight container to keep it fresh. Make sure to cool it down before putting it in the fridge. This helps keep the texture and flavor. Yes, you can use frozen mango in this recipe. Frozen mango works well when fresh mango is not available. Just thaw the mango before adding it to the stir-fry. This will help it blend well with the other ingredients. Fresh mango offers a firmer texture and brighter flavor, but frozen is a great alternative. You can serve this dish with jasmine rice, quinoa, or even noodles. These sides soak up all the tasty sauce. You can also add a simple salad on the side. A cucumber salad or a green bean salad pairs nicely with the stir-fry. Yes, the recipe can be made gluten-free. Use tamari or coconut aminos instead of soy sauce. These options give a similar taste without gluten. Always check the labels to ensure there are no hidden gluten ingredients. This blog post covered everything you need to make a tasty Mango Chicken Stir Fry. We explored key ingredients like chicken, mango, and veggies. I provided step-by-step instructions to help you cook with confidence. You learned tips for perfecting the dish, plus variations to keep things fresh. In short, this recipe is fun and easy to customize. Get creative in the kitchen and enjoy your stir-fry!](https://goldendishy.com/wp-content/uploads/2025/06/67704695-6c72-4914-a503-47315e3cdcd3-300x300.webp)