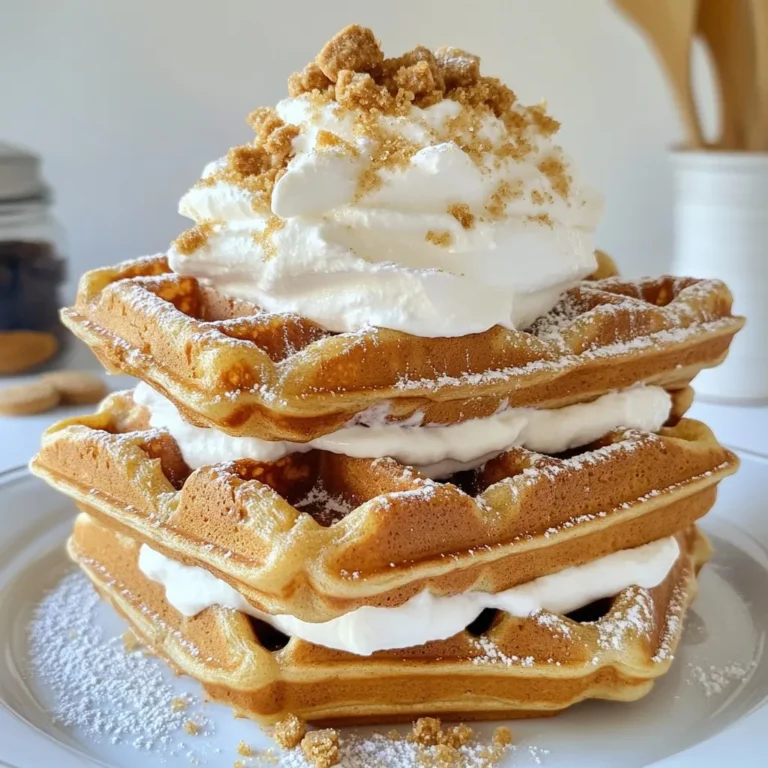
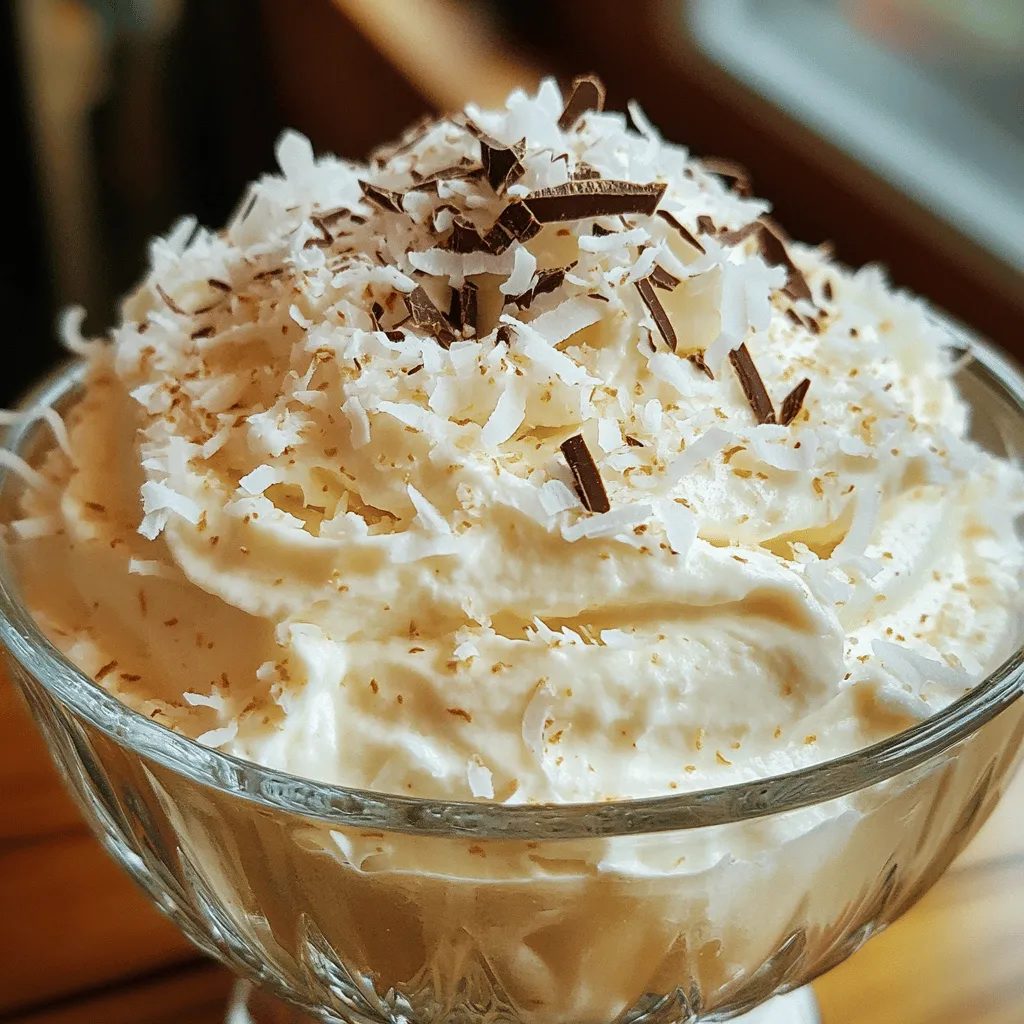
Coconut Whipped Cream Delightful and Simple Recipe

Are you ready to impress your tastebuds with a delightful treat? This Coconut Whipped Cream recipe is simple, quick, and incredibly delicious. In just a few easy steps, you’ll create a creamy topping that elevates any dessert. Whether you dollop it on cakes, pancakes, or fruit, it adds a tropical twist. Let’s dive into the ingredients and tools you need to make this light, fluffy delight!
Ingredients
Main Ingredients
– 1 can (13.5 oz) full-fat coconut milk, chilled overnight
– 2 tablespoons powdered sugar
– 1 teaspoon pure vanilla extract
– Pinch of sea salt
Kitchen Tools
– Mixing bowl
– Electric mixer
– Measuring spoons
– Airtight container
Coconut whipped cream shines in many desserts. You only need a few key items to make it. First, the coconut milk has to be full-fat. This gives the cream a rich and creamy texture. Chilling the can overnight makes a big difference.
The chilled coconut milk separates into a thick cream and a watery layer. Use just the cream for the best results. Add powdered sugar to sweeten it. The vanilla extract brings out the flavor, while a pinch of sea salt balances it.
To prepare your kitchen, grab your mixing bowl and electric mixer. Chill them in the freezer for ten minutes. This helps the cream whip better and makes it fluffy. Don’t forget to measure your ingredients accurately. This ensures the right taste and texture for your coconut whipped cream.
This recipe is both simple and rewarding.
Step-by-Step Instructions
Prepping the Equipment
– Chill mixing bowl and beaters.
– Gather all ingredients.
Start by placing your mixing bowl and beaters in the freezer for about 10 minutes. This helps the coconut cream whip up light and fluffy. While they chill, get all your ingredients ready. You will need full-fat coconut milk, powdered sugar, vanilla extract, and sea salt. Having everything in one place makes the process smooth.
Extracting Coconut Cream
– Open the can of coconut milk.
– Scoop out the solidified cream.
Carefully open the can of coconut milk after chilling. You will see that the cream rises to the top. Scoop out only the solidified cream, leaving the coconut water in the can. Don’t throw the water away! You can use it in smoothies or other recipes.
Whipping the Cream
– Combine ingredients in the mixing bowl.
– Whip until soft peaks form.
In your chilled mixing bowl, mix together the scooped coconut cream, powdered sugar, vanilla extract, and sea salt. Start whipping the mixture with your electric mixer on medium-high speed. Do this for about 2 to 4 minutes. Keep going until soft peaks form. This means your cream is light and fluffy, ready to enjoy.
If you want a sweeter cream, slowly add more powdered sugar. Mix well after each addition until it tastes just right. You can serve it right away or store it in an airtight container in the fridge for up to 5 days. If it thickens, just re-whip it before serving.Enjoy your delicious creation!
Tips & Tricks
Achieving the Right Consistency
Chilling your bowl and beaters is key. This step helps the coconut cream whip better. I chill them for about 10 minutes. If you skip this, the cream won’t whip as well.
Avoid over-whipping. It can turn your cream grainy instead of fluffy. Stop whipping when you see soft peaks. This gives you a light and airy texture.
Flavor Enhancements
To adjust sweetness, use powdered sugar. Start with two tablespoons. Taste the cream and add more if needed. This way, you can make it just right for you.
You can also add spices or extracts. A dash of cinnamon or nutmeg can make it special. Try adding almond or coconut extract for extra flavor.
Troubleshooting Common Issues
If your coconut whipped cream is grainy, don’t worry. Whipping too long can cause this. Just re-whip it gently until it smooths out.
For taste adjustments, feel free to tweak the sweetness. Add more sugar if it’s not sweet enough. Mix well after each addition until you reach the flavor you love.
Enjoy creating your delicious coconut whipped cream!
Variations
Flavored Coconut Whipped Cream
You can make your coconut whipped cream even more fun! Here are two easy ideas:
– Adding cocoa powder for chocolate flavor: Just mix in 1 to 2 tablespoons of cocoa powder. This gives your whipped cream a rich chocolate taste. It’s great on cakes, pies, or even just by itself!
– Incorporating fruit purees: Adding fruit purees like strawberry or mango can brighten your whipped cream. Use about 1 to 2 tablespoons of puree. This adds color and flavor, making it perfect for summer desserts.
Seasonal Variations
You can change the flavors based on the season. Here are some tasty ideas:
– Pumpkin spice for a fall twist: Mix in 1 teaspoon of pumpkin spice. This gives a warm, cozy flavor that is perfect for autumn treats like pies and coffee.
– Peppermint extract for holiday flair: Just add ½ teaspoon of peppermint extract. This makes your whipped cream fresh and minty, great for holiday desserts or hot cocoa!
Alternative Sweeteners
You can swap out powdered sugar for other sweeteners if you want. Here are two options:
– Using maple syrup or honey: These natural sweeteners give a unique taste. Start with 1 to 2 tablespoons and adjust to your liking.
– Sugar-free options for health-conscious recipes: You can use sugar substitutes like stevia or erythritol. This keeps your whipped cream tasty without the sugar!
Feel free to experiment with these ideas! Your coconut whipped cream will always be a delight.
Storage Info
How to Store Leftovers
Store your coconut whipped cream in an airtight container. Glass jars work well for this. Make sure the lid seals tightly to keep out air. This helps the cream stay fresh longer. In the refrigerator, you can keep it for up to five days. Remember to label your container with the date for easy tracking.
Re-whipping After Refrigeration
If your whipped cream thickens in the fridge, you can re-whip it easily. Just take it out and allow it to sit for a few minutes. Then, use your electric mixer on low speed. This will help restore its light and fluffy texture. If it still feels too thick, add a tiny bit of coconut milk or cream to loosen it up. For longer shelf life, always store it in an airtight container and avoid letting it sit out at room temperature.
Freezing Coconut Whipped Cream
You can freeze coconut whipped cream for later use. To do this, scoop the whipped cream into an airtight container or freezer-safe bag. Make sure to leave some space at the top for expansion. It can last up to three months in the freezer. When you’re ready to use it, thaw it in the fridge overnight. After thawing, re-whip it to get back that delightful texture.
FAQs
Can I use light coconut milk?
You can use light coconut milk, but it won’t whip well. Light coconut milk has less fat. The fat is key for a fluffy texture. Full-fat coconut milk gives the best results.
Is this recipe vegan-friendly?
Yes, this recipe is vegan-friendly. It uses only coconut milk and plant-based ingredients. There are no animal products in this recipe. You can enjoy it without worries.
How do I make coconut whipped cream without a mixer?
To make coconut whipped cream without a mixer, use a whisk. Start by chilling your bowl and coconut milk. Scoop out the solid cream into the bowl. Whisk it vigorously until it becomes fluffy. It takes more time, but it works!
What can I use coconut whipped cream for?
Coconut whipped cream is great on many treats. Use it on cakes, pies, or fruit. It adds a creamy touch to coffee or hot chocolate. You can also use it in smoothies or as a dip for snacks.
Where can I buy pre-made coconut whipped cream?
You can find pre-made coconut whipped cream in health food stores. Many grocery stores now carry it too. Look in the dairy-free or plant-based section. Check the label to ensure it’s made with coconut.
You now know how to make delicious coconut whipped cream. We covered the key ingredients, tools, and step-by-step methods to create it perfectly. Remember to chill your bowls and be mindful of over-whipping for the best texture. You can even add fun flavors to match any season or occasion. Store it well in an airtight container, and you can enjoy it later. This treat works great as a topping or a dessert on its own. Enjoy your creamy delight and get creative with your flavors!

![To make Cherry Cheesecake Dip, gather these simple ingredients: - 8 oz cream cheese, softened - 1/2 cup powdered sugar - 1 teaspoon pure vanilla extract - 1/4 cup sour cream - 1 cup cherry pie filling or fresh cherries - 1/2 teaspoon freshly squeezed lemon juice - Graham crackers or vanilla wafers - Fresh cherries for garnish These items come together to create a rich and creamy dip. The cream cheese gives it a smooth texture. The powdered sugar adds sweetness. The vanilla extract brings warmth and flavor. Sour cream adds a nice tang. You can use cherry pie filling for ease or fresh cherries for freshness. Lemon juice brightens the taste. Graham crackers or vanilla wafers make perfect dippers. Fresh cherries on top make it look beautiful. If you want to see how to put this all together, check the Full Recipe. 1. Beat the cream cheese until smooth. Start with 8 oz of softened cream cheese in a large bowl. Use an electric mixer on medium speed. Beat for about 2-3 minutes. You want it creamy and smooth. 2. Mix in powdered sugar gradually. Take 1/2 cup of sifted powdered sugar. Slowly add it to the bowl while mixing on low speed. Keep mixing until there are no lumps. This step adds sweetness. 3. Add vanilla extract and sour cream. Measure 1 teaspoon of vanilla extract and 1/4 cup of sour cream. Mix them in on medium speed. Blend until fluffy, about 1 minute. This gives a nice flavor and creaminess. 1. Fold in cherry pie filling and lemon juice. Use 1 cup of cherry pie filling. You can also use fresh cherries if you prefer. Add 1/2 teaspoon of fresh lemon juice. Gently fold these into the mixture with a spatula. Be careful not to over-stir; you want to keep some cherry chunks. 2. Spoon mixture into serving bowl. Take a decorative bowl and carefully spoon the dip mixture into it. Make it look nice! This is where the magic happens. 1. Chill in the refrigerator. Cover the bowl with plastic wrap. Place it in the fridge for at least 30 minutes. This lets the flavors come together. 2. Prepare accompaniments for dipping. While the dip chills, get your dippers ready. Use graham crackers or vanilla wafers. These pair perfectly with the creamy dip. When you serve, it will look and taste wonderful! For the complete recipe, check [Full Recipe]. Softened cream cheese is key to a smooth dip. It blends easily and avoids lumps. To get it just right, leave the cream cheese out for about an hour. You want it soft, not melted. When adding powdered sugar, do it slowly. Sprinkle it in while mixing. This helps it mix well. If you add it all at once, you may get clumps. A fine sift can help too, ensuring smoothness. You can add extra flavors to make this dip special. Try a splash of almond extract or a bit of cocoa powder. These can give the dip a different twist. If you want it sweeter, taste as you mix. You can add more sugar if you like. Just remember that the cherry pie filling adds some sweetness too. Serve your dip in a fun bowl to catch the eye. You can use a bright plate for contrast. This makes it stand out at parties. For garnish, top the dip with fresh cherries. They look great and taste amazing! You can also add a sprinkle of crushed graham crackers on top for crunch. Serve with a mix of graham crackers and vanilla wafers for a tasty dipper combo. For the full recipe, check out the Cherry Cheesecake Dip Delight. {{image_4}} You can switch up the fruit in this dip. Instead of cherries, try blueberries or strawberries. They add a fresh taste and a fun color. You can also mix in other pie fillings. Peach or apple pie filling works well too. Each fruit gives the dip a unique flavor. Experiment and find your favorite! Want to try something new? Create a chocolate cheesecake dip. Use cream cheese and mix in cocoa powder and chocolate chips. It’s rich and sweet. You can also make a peanut butter cheesecake dip. Just blend in creamy peanut butter for a nutty twist. Both options are sure to please your guests. If you need gluten-free options, use gluten-free graham crackers. They taste great and keep the dip crunchy. For vegan variations, swap the cream cheese for vegan cream cheese. You can also use maple syrup instead of powdered sugar. These changes make the dip suitable for more diets. Enjoy every bite without worry! Cherry cheesecake dip can last up to 3 days in the fridge. To keep it fresh, store it in an airtight container. This will prevent the dip from drying out and help it stay creamy. Make sure the container is sealed tight before placing it in the fridge. Can you freeze cherry cheesecake dip? Yes, you can! Freezing helps you save leftovers for later. To freeze it, place the dip in a freezer-safe container. Leave some space at the top, as the dip may expand when frozen. When you want to enjoy it again, thaw the dip in the fridge overnight. Avoid microwaving it, as this can change the texture. After thawing, stir it gently to bring back the creamy consistency. Enjoy your cherry cheesecake dip anytime! You can make this dip without cream cheese by using Greek yogurt or cottage cheese. Both options give a creamy texture. For a sweeter taste, add a bit more powdered sugar. You can also blend in ricotta cheese for a slight twist. These substitutes keep the dip light and flavorful. Yes, fresh cherries work great! They add a bright, juicy flavor. Chopping them finely keeps the texture nice. You might want to add a bit of sugar to balance the tartness. This change can make your dip taste fresh and vibrant. For the best dipping experience, try graham crackers, vanilla wafers, or fresh fruit slices. You can also use pretzels for a salty twist. Present your dip in a colorful bowl and surround it with your dippers. Add fresh cherries on top for a fun touch. This makes your dish look inviting and tasty. This blog post covered the easy steps to make cherry cheesecake dip. We started with the ingredients, then moved on to making, chilling, and serving the dip. I shared helpful tips for great texture and flavor. You can also explore fun variations like using other fruits or dips. Finally, we discussed storing your delicious creation. This dip is perfect for gatherings or a family treat. Enjoy making it and tasting the joy it brings!](https://goldendishy.com/wp-content/uploads/2025/06/2157293b-a45d-439f-9bc7-da334d1e6e82-768x768.webp)